从零开始学android -- notification通知
目前有三种通知
第一种是普通通知
看看效果

布局什么的太简单了我就不放在上面了给你们看核心的代码就行了 里面的 int notificationID = 1;
//设置点击通知后的意图

        Intent intent = new Intent(this,NotificationView.class);

        intent.putExtra("notificationID",notificationID);

        //塞入pendingIntent  参数解释:1.上下文也就是context 2.请求码(用于意图的请求码) 3.意图(用来启动目标活动的意图) 4.标志(活动启动时使用的标志)

        PendingIntent pendingIntent = PendingIntent.getActivity(this,0,intent,PendingIntent.FLAG_CANCEL_CURRENT);

        //获取系统的notification管理服务

        NotificationManager manager = (NotificationManager) getSystemService(NOTIFICATION_SERVICE);

        //现在官方推荐用builder的方式构建Notification,原来是new的方式已经淘汰了。

        Notification.Builder builder = new Notification.Builder(this);

        //收到通知时最顶部显示的信息

        builder.setSmallIcon(R.mipmap.ic_launcher);

        builder.setTicker("Reminder:Meeting starts in 5 minutes");

        builder.setWhen(System.currentTimeMillis());

        //下拉顶部看到的详细通知信息 图标通用的

        builder.setContentTitle("System Alarm"); //设置标题

        builder.setContentText("Meeting with customer at 3pm.."); //设置内容

        //设置通知被点击后的意图处理也就是打开某个activity

        //至于为什么要用pendingIntent ,因为PendingIntent对象可以代表应用程序帮助您在后面的某个时候执行一个动作,而“不用考虑应用程序是否正在运行”

        builder.setContentIntent(pendingIntent);

        builder.setDefaults(Notification.DEFAULT_SOUND); //设置默认的声音和震动

        //当然你也可以自定义设置震动

//        builder.setVibrate(new long[]{100,250,100,500}); //设置震动

        builder.setAutoCancel(true);//设置点击后自动消失也就是取消显示  true:点击后消失;false:点击后不消失;默认是false

        Notification notif = builder.build(); //构建 这里注意build方法最低支持minSdkVersion 16

        manager.notify(notificationID,notif); //notification管理服务发送你所构建的通知  此时你会收到通知
注意里面的builder.setAutoCancel(true); 如果你不想程序自动帮你点击后关闭,而是自己用代码在另一个位置自己去关闭,那么你可以不写这句代码,也可以设置成false,然后关闭代码可以这么写
        //获取服务

        NotificationManager nm = (NotificationManager) getSystemService(NOTIFICATION_SERVICE);

        nm.cancel(getIntent().getIntExtra("notificationID",1)); //关闭显示notificationID为1的通知
切记关闭id与你通知一致的id。
也可以写个方法
/**

     * 显示普通的通知

     */

    private void showNormalNotify(){

        Notification.Builder builder = new Notification.Builder(this);

        builder.setAutoCancel(true); //设置点击玩自动关闭

        builder.setSmallIcon(R.drawable.ic_launcher_background);

        builder.setLargeIcon(BitmapFactory.decodeResource(getResources(),R.drawable.ic_launcher_foreground));

        builder.setContentTitle("普通通知");

        builder.setContentText("普通通知的我的鬼内容");

        Intent intent = new Intent(Intent.ACTION_VIEW,Uri.parse("http://www.baidu.com"));

        PendingIntent pendingIntent = PendingIntent.getActivity(this,0,intent,0);

        builder.setContentIntent(pendingIntent);

        NotificationManager notifiyManager = (NotificationManager) this.getSystemService(Context.NOTIFICATION_SERVICE);

        notifiyManager.notify(1,builder.build());

    }
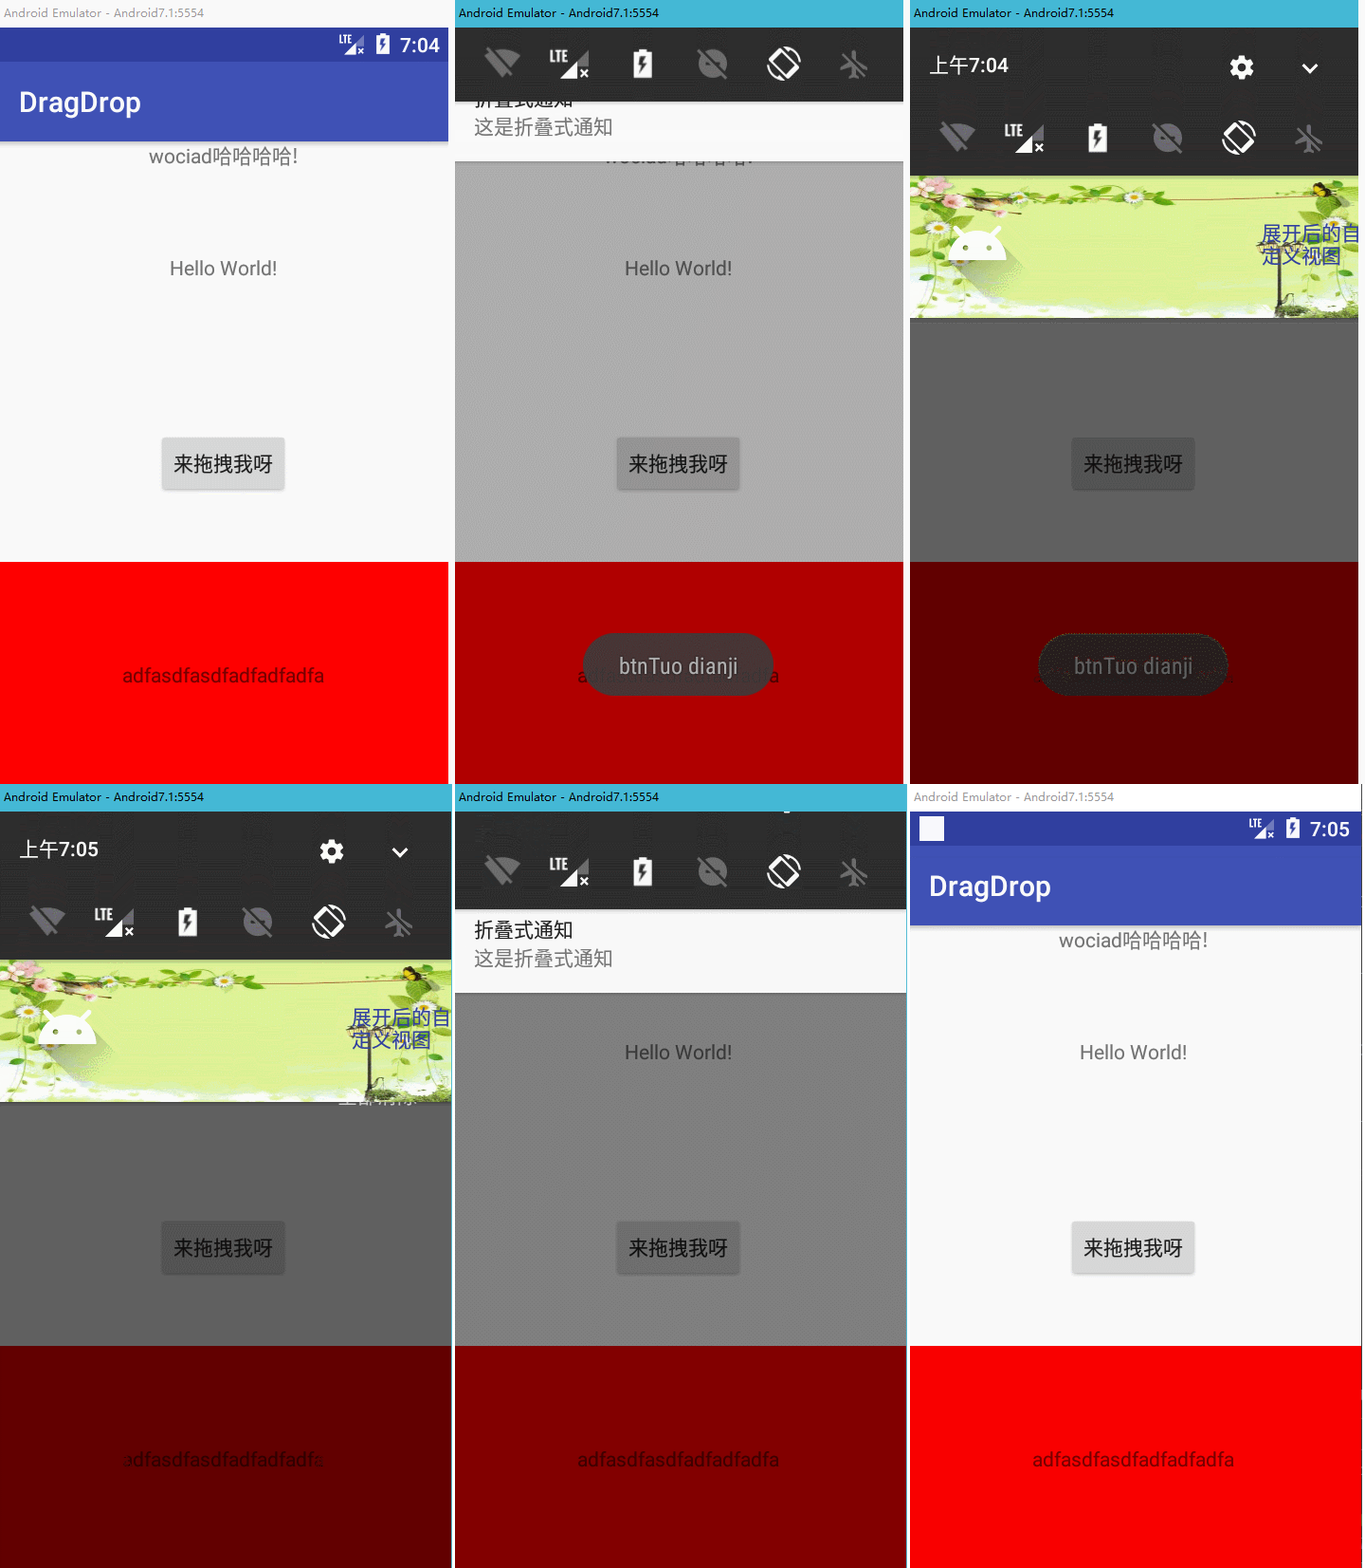
第二种是折叠式的通知
看看效果

写法也是类似只是需要用到红色标注的代码
 /**

     * 显示折叠式的通知

     */

    @RequiresApi(api = Build.VERSION_CODES.JELLY_BEAN)

    private void showZDNotify(){

        Notification.Builder builder = new Notification.Builder(this);

        builder.setAutoCancel(true);

        builder.setSmallIcon(R.drawable.ic_launcher_background);

        builder.setLargeIcon(BitmapFactory.decodeResource(getResources(),R.drawable.ic_launcher_foreground));

        builder.setContentTitle("折叠式通知");

        builder.setContentText("这是折叠式通知");

        Intent intent = new Intent(Intent.ACTION_VIEW,Uri.parse("http://www.baidu.com"));

        PendingIntent pendingIntent = PendingIntent.getActivity(this,0,intent,0);

        builder.setContentIntent(pendingIntent);

        RemoteViews remoteViews = new RemoteViews(getPackageName(),R.layout.view_fold);

        Notification notification = builder.build();

        notification.bigContentView = remoteViews;

        NotificationManager notificationManager = (NotificationManager) getSystemService(Context.NOTIFICATION_SERVICE);;

        notificationManager.notify(1,notification);

    }
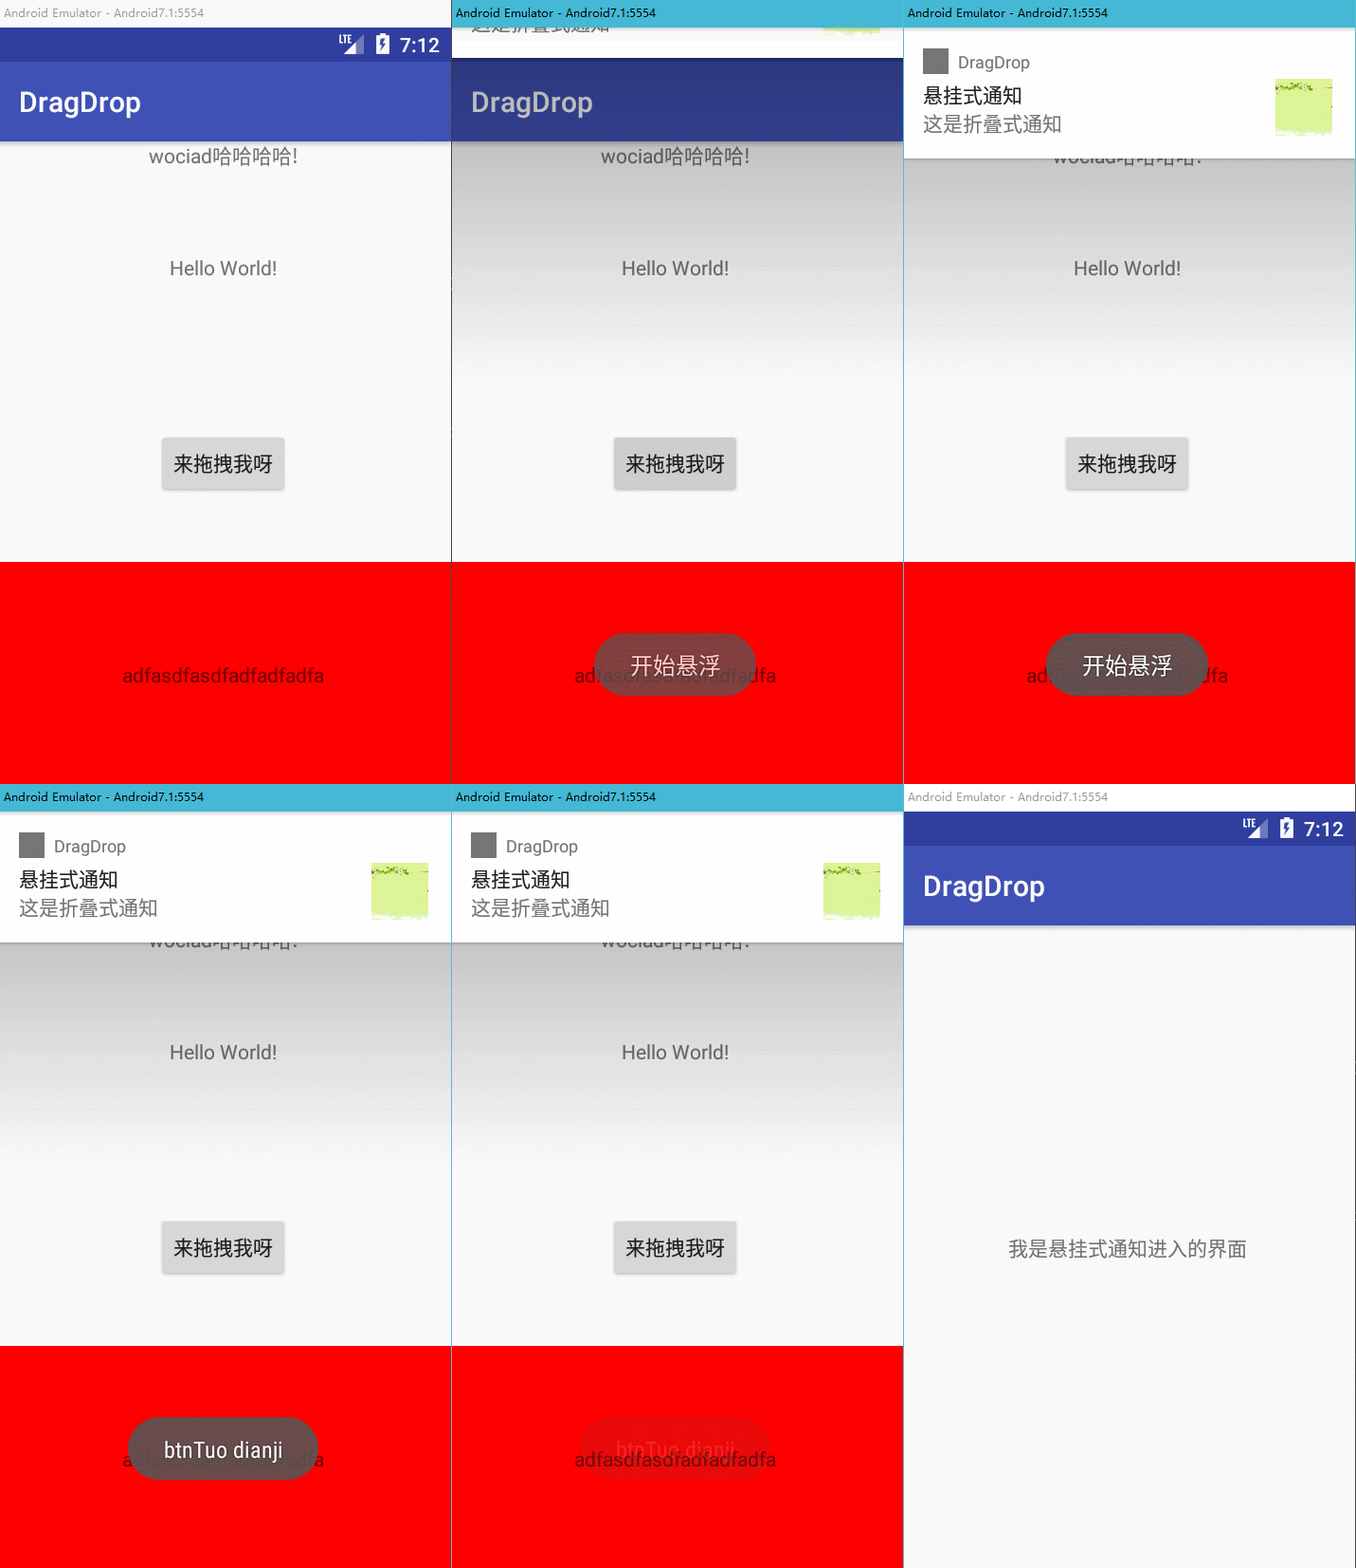
第三种是悬挂式通知
看看效果

来看看使用方法
写法也是类似只是需要用到红色标注的代码
/**

     * 显示悬挂式的通知

     */

    private void showXGNotify(){

        Notification.Builder builder = new Notification.Builder(this);

        builder.setAutoCancel(true);

        builder.setSmallIcon(R.drawable.ic_launcher_background);

        builder.setLargeIcon(BitmapFactory.decodeResource(getResources(),R.drawable.folder));

        builder.setContentTitle("悬挂式通知");

        builder.setContentText("这是折叠式通知");

        Intent intent = new Intent();

        intent.setFlags(Intent.FLAG_ACTIVITY_NEW_TASK);

        intent.setClass(this,TestActivity.class);

        PendingIntent hangPendingIntent = PendingIntent.getActivity(this,0,intent,PendingIntent.FLAG_CANCEL_CURRENT);

        builder.setFullScreenIntent(hangPendingIntent,true);

        NotificationManager notificationManager = (NotificationManager) getSystemService(Context.NOTIFICATION_SERVICE);

        notificationManager.notify(1,builder.build());

    }
Android 5.0后加入了一种新的模式Notification显示等级,共有以下3种
1.VISIBILITY_PUBLIC:任何情况都会显示通知
2.VISIBILITY_PRIVATE:只有在没有锁屏时会显示通知。
3.VISIBILITY_SECRET:在pin、password等安全锁和没有锁屏的情况下才能显示通知
设置非常简单,只要调用setVisibility方法就行了
builder.setVisibility(Notification.VISIBILITY_PUBLIC);
是不是很简单。
好了,好好学习天天向上。
学习记录,如果有错请指出,谢谢!
从零开始学android -- notification通知的更多相关文章
- Android Notification通知详细解释
Android Notification通知具体解释 Notification: (一).简单介绍: 显示在手机状态栏的通知. Notification所代表的是一种具有全局效果的通 ...
- Android Notification通知简介
Android Notification通知简介 根据activity的生命周期,在activity不显示时,会执行onStop函数(比如按下home键),所以你在onStop函数(按退出键除外)里面 ...
- Android Notification通知详解
根据activity的生命周期,在activity不显示时,会执行onStop函数(比如按下home键),所以你在onStop函数(按退出键除外)里面把notification放在通知栏里,再此显示时 ...
- Android Notification通知
/** * 在状态栏显示通知 */ private void showNotification(){ // 创建一个NotificationManager的引用 NotificationManager ...
- 从零开始学android -- Service
废话不多说了,Service是四大组件之一,是一个后台处理长时间运行在主线程不需要依赖ui界面显示的应用组件,切记不能在service中做耗时操作,会阻塞主线程,要做也要在service中开个子线程做 ...
- 从零开始学android开发-项目打包发布
右键项目 选择[android tools]-[export signed application package] 点击[next] 如果没有keystore可以选择[create new keys ...
- 从零开始学android开发-adt-bundle-eclipse下的修改android app名称
eclipse中,打开项目根目录中的AndoirManifest.xml文件,找到如下内容 <application android:allowBackup="true" a ...
- 从零开始学android开发-通过WebService进行网络编程,使用工具类轻松实现
相信大家在平常的开发中,对网络的操作用到HTTP协议比较多,通过我们使用Get或者Post的方法调用一个数据接口,然后服务器给我们返回JSON格式的数据,我们解析JSON数据然后展现给用户,相信很多人 ...
- 从零开始学android开发-通过WebService获取今日天气情况
因为本身是在搞.NET方面的东东,现在在学习Android,所以想实现Android通过WebService接口来获取数据,网上很多例子还有有问题的.参考:Android 通过WebService进行 ...
随机推荐
- SQL表操作
//创建一个名为TEST1的表空间 CREATE SMALLFILE TABLESPACE "TEST1" DATAFILE 'G:\ORACLE_11G\ORADATA\ORCL ...
- ubuntu 下安装nodejs以及pm2
ubuntu 12.04服务器可以使用apt-get方式安装Node JS,但是,安装完后的版本为v0.6.12的版本,如果我们想要使用新一点的版本需要做如下配置: 1 2 3 4 apt-get i ...
- 15 个 Docker 技巧和提示
CLI(Command Line Interface,命令行) 好的 docker ps 输出 将 docker ps 输出通过管道重定向到 less -S,避免折行: docker ps -a | ...
- Window mode
D3D window mode:Upper left (0,0)是左上角 OGL window mode:Lower left(0,0)是左下角 nvn API nvn::Device::SetWin ...
- Attribute 和 Parameter 的区别
Attribute 和 Parameter 的区别 (1)HttpServletRequest类有setAttribute()方法,而没有setParameter()方法 (2)当两个Web组件之间为 ...
- App开发者博客之: 包建强 (专注移动app开发)
http://www.cnblogs.com/Jax/p/4912606.html 著有"App研发录" 一书. Android EventBus源码解析 带你深入理解EventB ...
- [Functional Programming] Compose Simple State ADT Transitions into One Complex Transaction
State is a lazy datatype and as such we can combine many simple transitions into one very complex on ...
- Angular 学习笔记——ng-animate
<!DOCTYPE HTML> <html ng-app="myApp"> <head> <meta http-equiv="C ...
- [PIC32--IDE]使用MPLAB IDE调试
问题描写叙述 安装好MPLAB IDE后,就能够用来调试自己的PIC32板子,用于应用的开发了. 开发板 手边使用的是Microchip的PIC32 Ethernet Starter Kit II的小 ...
- STL学习笔记(第四章 通用工具)
本章讲解C++标准程序库中的通用工具.它们是由短小精干的类和函数构成. Pairs(对组) class pair可以将两个值视为一个单元.STL内多处使用了pair.尤其容器map和multimap, ...
