WPF窗体动态效果
在浏览网页的时候,发现现在很多网页都采用这种效果。看起来很炫。
效果如下:
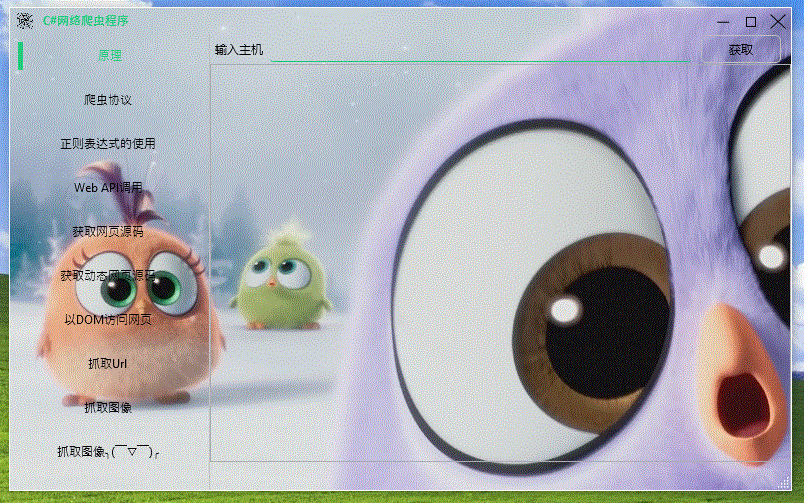
已经实现很久了,一直没写出来。今天突然想到,写出来分享一下
原理比较简单,就是在Window里面放一个MediaElement控件,播放视频就行
1、首先需要定义Window样式
如果使用 WindowStyle="None"属性再手动实现窗体效果,那窗体是没有阴影、标题栏,也没有动画效果,所以需要使用WindowChrome类来自定义窗体
WindowChrome类介绍https://docs.microsoft.com/zh-cn/dotnet/api/system.windows.shell.windowchrome?redirectedfrom=MSDN&view=netframework-4.8
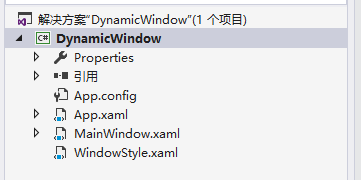
一、新建一个WPF工程,命名为DynamicWindow
二、添加资源字典WindowStyle.xaml,用于自定义窗体样式
输入以下代码
 <ResourceDictionary xmlns="http://schemas.microsoft.com/winfx/2006/xaml/presentation"

                     xmlns:x="http://schemas.microsoft.com/winfx/2006/xaml"

                     xmlns:local="clr-namespace:DynamicWindow">

     <Style x:Key="CaptionNormalButtonStyle" TargetType="{x:Type Button}">

         <Setter Property="Focusable" Value="False" />

         <Setter Property="Background" Value="Transparent" />

         <Setter Property="BorderBrush" Value="Transparent" />

         <Setter Property="BorderThickness"  Value="1" />

         <Setter Property="HorizontalContentAlignment"   Value="Center" />

         <Setter Property="VerticalContentAlignment"  Value="Center" />

         <Setter Property="Template">

             <Setter.Value>

                 <ControlTemplate TargetType="{x:Type Button}">

                     <Grid>

                         <Rectangle x:Name="TitleButtonBackground"  Width="40" Height="40" Fill="Silver" Opacity="0" />

                         <Border x:Name="ButtonBorder" BorderBrush="{TemplateBinding BorderBrush}"  BorderThickness="{TemplateBinding BorderThickness}" Background="{TemplateBinding Background}" SnapsToDevicePixels="true">

                             <ContentPresenter x:Name="TitleButtonContent"  Focusable="False"  RecognizesAccessKey="True" SnapsToDevicePixels="{TemplateBinding SnapsToDevicePixels}" VerticalAlignment="{TemplateBinding VerticalContentAlignment}" />

                         </Border>

                     </Grid>

                     <ControlTemplate.Triggers>

                         <Trigger Property="IsMouseOver" Value="true">

                             <Setter Property="Opacity" Value=".5" TargetName="TitleButtonBackground" />

                         </Trigger>

                         <Trigger Property="IsPressed"  Value="True">

                             <Setter Property="Opacity" Value="0.4"  TargetName="TitleButtonBackground" />

                         </Trigger>

                         <Trigger Property="IsEnabled"   Value="false">

                             <Setter TargetName="TitleButtonContent"  Property="Opacity" Value=".5" />

                         </Trigger>

                     </ControlTemplate.Triggers>

                 </ControlTemplate>

             </Setter.Value>

         </Setter>

     </Style>

     <Style x:Key="CaptionCloseButtonStyle" TargetType="{x:Type Button}">

         <Setter Property="Focusable" Value="False" />

         <Setter Property="Background" Value="Transparent" />

         <Setter Property="BorderBrush" Value="Transparent" />

         <Setter Property="BorderThickness"  Value="1" />

         <Setter Property="HorizontalContentAlignment"   Value="Center" />

         <Setter Property="VerticalContentAlignment"  Value="Center" />

         <Setter Property="Template">

             <Setter.Value>

                 <ControlTemplate TargetType="{x:Type Button}">

                     <Grid x:Name="LayoutRoot">

                         <Rectangle x:Name="TitleButtonBackground"  Width="40" Height="40" Fill="Silver" Opacity="0" />

                         <Border x:Name="TitleButtonBorder" BorderBrush="{TemplateBinding BorderBrush}"  BorderThickness="{TemplateBinding BorderThickness}" Background="{TemplateBinding Background}" SnapsToDevicePixels="true">

                             <ContentPresenter x:Name="TitleButtonContent"  Focusable="False"  RecognizesAccessKey="True" SnapsToDevicePixels="{TemplateBinding SnapsToDevicePixels}" VerticalAlignment="{TemplateBinding VerticalContentAlignment}" />

                         </Border>

                     </Grid>

                     <ControlTemplate.Triggers>

                         <Trigger Property="IsMouseOver" Value="true">

                             <Setter Property="Background" Value="LightSkyBlue" TargetName="TitleButtonBorder" />

                         </Trigger>

                         <Trigger Property="IsPressed"  Value="True">

                             <Setter Property="Opacity" Value="0.4"  TargetName="TitleButtonBackground" />

                         </Trigger>

                         <Trigger Property="IsEnabled"   Value="false">

                             <Setter TargetName="TitleButtonContent"  Property="Opacity" Value=".5" />

                         </Trigger>

                     </ControlTemplate.Triggers>

                 </ControlTemplate>

             </Setter.Value>

         </Setter>

     </Style>

     <DataTemplate x:Key="Minimize">

         <Grid>

             <Path Data="M 7.2 14.2 L19.2 14.2" Width="26.4"  Height="26.4" VerticalAlignment="Center"  HorizontalAlignment="Center"  Stroke="Black" StrokeThickness="1" />

         </Grid>

     </DataTemplate>

     <DataTemplate x:Key="Maximize">

         <Grid>

             <Rectangle Width="10" Height="10" Stroke="Black" StrokeThickness="1" Margin="0,1,0,0"/>

         </Grid>

     </DataTemplate>

     <DataTemplate x:Key="Restore">

         <Grid>

             <Rectangle Width="10" Height="10" Stroke="Black" StrokeThickness="1" Margin="0,3,3,0"/>

             <Rectangle Width="8" Height="8" Stroke="Black" StrokeThickness="1" Margin="5,0,0,5"/>

         </Grid>

     </DataTemplate>

     <DataTemplate x:Key="Close">

         <Grid Width="15.6" Height="15.4">

             <Path Data="M 12,12 L16.4,16.4"  Stretch="Fill" Stroke="Black" StrokeThickness="1"/>

             <Path Data="M 12,16.4 L 16.4,12 "  Stretch="Fill" Stroke="Black" StrokeThickness="1"/>

         </Grid>

     </DataTemplate>

     <Style TargetType="{x:Type Window}" x:Key="WindowStyle">

         <Setter Property="BorderBrush"  Value="White" />

         <Setter Property="BorderThickness"  Value="1" />

         <Setter Property="ResizeMode"  Value="CanResizeWithGrip" />

         <Setter Property="UseLayoutRounding" Value="True" />

         <Setter Property="TextOptions.TextFormattingMode"  Value="Display" />

         <Setter Property="WindowStyle" Value="SingleBorderWindow" />

         <Setter Property="FontFamily" Value="LightSkyBlue" />

         <Setter Property="WindowChrome.WindowChrome">

             <Setter.Value>

                 <WindowChrome CornerRadius="0"  GlassFrameThickness="1" UseAeroCaptionButtons="False" NonClientFrameEdges="None" />

             </Setter.Value>

         </Setter>

         <Setter Property="Template">

             <Setter.Value>

                 <ControlTemplate TargetType="{x:Type Window}">

                     <Border BorderBrush="{TemplateBinding BorderBrush}"  BorderThickness="{TemplateBinding BorderThickness}" x:Name="WindowBorder" Background="{TemplateBinding Background}">

                         <!-- Background="{TemplateBinding Background}"-->

                         <!--<Border.Background>

                             <LinearGradientBrush EndPoint="0.5,1" StartPoint="0.5,0">

                                 <GradientStop Color="#FFFFF9F9" Offset="0"/>

                                 <GradientStop Color="#FFA49B96" Offset="1"/>

                             </LinearGradientBrush>

                         </Border.Background>-->

                         <Grid x:Name="LayoutRoot">

                             <Grid.RowDefinitions>

                                 <RowDefinition Height="26.4" />

                                 <RowDefinition />

                             </Grid.RowDefinitions>

                             <Grid x:Name="PART_WindowTitleGrid"  Grid.Row="0" Background="Transparent" Panel.ZIndex="1">

                                 <Grid.ColumnDefinitions>

                                     <ColumnDefinition Width="*" />

                                     <ColumnDefinition Width="Auto" />

                                 </Grid.ColumnDefinitions>

                                 <StackPanel Orientation="Horizontal">

                                     <Button VerticalAlignment="Center" Margin="7,0,5,0"  Height="{x:Static SystemParameters.SmallIconHeight}" Width="{x:Static SystemParameters.SmallIconWidth}" WindowChrome.IsHitTestVisibleInChrome="True"

                                     IsTabStop="False" Command="{Binding Source={x:Static SystemCommands.ShowSystemMenuCommand}}" >

                                         <Button.Template>

                                             <ControlTemplate>

                                                 <!--title image-->

                                                 <Image Name="btnbg" HorizontalAlignment="Center" VerticalAlignment="Center"  Stretch="UniformToFill" Source="caption.png" Width="26.4" Height="26.4"/>

                                             </ControlTemplate>

                                         </Button.Template>

                                     </Button>

                                     <ContentControl IsTabStop="False"

                                                     Foreground="LightSkyBlue"

                                                     FontWeight="Bold"

                                                     HorizontalAlignment="Center"

                                                     VerticalAlignment="Center"

                                                     FontSize="{DynamicResource {x:Static SystemFonts.CaptionFontSize}}"

                                                     Content="{TemplateBinding Title}"  Margin="5,0,0,0"/>

                                 </StackPanel>

                                 <StackPanel x:Name="WindowCommandButtonsStackPanel"  Grid.Column="1" HorizontalAlignment="Right" VerticalAlignment="Top" Orientation="Horizontal" WindowChrome.IsHitTestVisibleInChrome="True">

                                     <Button x:Name="Minimize" Width="26.4" Height="26.4" ToolTip="最小化"  WindowChrome.IsHitTestVisibleInChrome="True"  Command="{Binding Source={x:Static SystemCommands.MinimizeWindowCommand}}"  ContentTemplate="{StaticResource Minimize}"  Style="{StaticResource CaptionNormalButtonStyle}"  IsTabStop="False" Margin="0,0,2,0"></Button>

                                     <Button x:Name="Restore" Width="26.4" Height="26.4" ToolTip="还原" WindowChrome.IsHitTestVisibleInChrome="True"  Command="{Binding Source={x:Static SystemCommands.RestoreWindowCommand}}"   Visibility="Collapsed" ContentTemplate="{StaticResource Restore}" Style="{StaticResource CaptionNormalButtonStyle}" IsTabStop="False"></Button>

                                     <Button x:Name="Maximize"  Width="26.4" Height="26.4" ToolTip="最大化" WindowChrome.IsHitTestVisibleInChrome="True" Command="{Binding Source={x:Static SystemCommands.MaximizeWindowCommand}}"   ContentTemplate="{StaticResource Maximize}" Style="{StaticResource CaptionNormalButtonStyle}" Margin="0,0,1,0" IsTabStop="False"></Button>

                                     <Button x:Name="Close" Width="26.4" Height="26.4" ToolTip="关闭"  WindowChrome.IsHitTestVisibleInChrome="True"  Command="{Binding Source={x:Static SystemCommands.CloseWindowCommand}}"   IsTabStop="False"  Style="{StaticResource CaptionCloseButtonStyle}"  ContentTemplate="{StaticResource Close}" ></Button>

                                 </StackPanel>

                             </Grid>

                             <AdornerDecorator Grid.Row="0" Grid.RowSpan="2" KeyboardNavigation.IsTabStop="False">

                                 <ContentPresenter/>

                             </AdornerDecorator>

                             <Grid Grid.Row="0" Grid.RowSpan="2" Panel.ZIndex="-1">

                                 <Grid>

                                     <!--window background-->

                                     <!--<Grid.Background>

                                         <ImageBrush ImageSource="../timg.jpg"  Stretch="UniformToFill"/>

                                     </Grid.Background>-->

                                 </Grid>

                             </Grid>

                             <ResizeGrip x:Name="ResizeGrip"  HorizontalAlignment="Right" VerticalAlignment="Bottom" Grid.Row="1" IsTabStop="False" Visibility="Hidden" WindowChrome.ResizeGripDirection="BottomRight" />

                         </Grid>

                     </Border>

                     <ControlTemplate.Triggers>

                         <Trigger Property="WindowState" Value="Maximized">

                             <Setter TargetName="Maximize" Property="Visibility" Value="Collapsed" />

                             <Setter TargetName="Restore" Property="Visibility" Value="Visible" />

                             <Setter TargetName="LayoutRoot" Property="Margin"  Value="7" />

                         </Trigger>

                         <Trigger Property="WindowState" Value="Normal">

                             <Setter TargetName="Maximize" Property="Visibility" Value="Visible" />

                             <Setter TargetName="Restore" Property="Visibility" Value="Collapsed" />

                         </Trigger>

                         <Trigger Property="ResizeMode"  Value="NoResize">

                             <Setter TargetName="Minimize" Property="Visibility" Value="Collapsed" />

                             <Setter TargetName="Maximize" Property="Visibility" Value="Collapsed" />

                             <Setter TargetName="Restore"  Property="Visibility" Value="Collapsed" />

                         </Trigger>

                         <MultiTrigger>

                             <MultiTrigger.Conditions>

                                 <Condition Property="ResizeMode"  Value="CanResizeWithGrip" />

                                 <Condition Property="WindowState" Value="Normal" />

                             </MultiTrigger.Conditions>

                             <Setter TargetName="ResizeGrip" Property="Visibility" Value="Visible" />

                         </MultiTrigger>

                     </ControlTemplate.Triggers>

                 </ControlTemplate>

             </Setter.Value>

         </Setter>

     </Style>

 </ResourceDictionary>
2、引入资源字典
在App.xaml中输入以下代码
 <Application x:Class="DynamicWindow.App"

              xmlns="http://schemas.microsoft.com/winfx/2006/xaml/presentation"

              xmlns:x="http://schemas.microsoft.com/winfx/2006/xaml"

              xmlns:local="clr-namespace:DynamicWindow"

              StartupUri="MainWindow.xaml">

     <Application.Resources>

         <ResourceDictionary Source="WindowStyle.xaml"/>

     </Application.Resources>

 </Application>
3、添加一个MediaElement控件
打开MainWindow.xaml,输入以下代码
 <Window x:Class="DynamicWindow.MainWindow"

         xmlns="http://schemas.microsoft.com/winfx/2006/xaml/presentation"

         xmlns:x="http://schemas.microsoft.com/winfx/2006/xaml"

         xmlns:d="http://schemas.microsoft.com/expression/blend/2008"

         xmlns:mc="http://schemas.openxmlformats.org/markup-compatibility/2006"

         xmlns:local="clr-namespace:DynamicWindow"

         mc:Ignorable="d"

         Title="MainWindow" Height="720" Width="1280" Style="{StaticResource WindowStyle}">

     <Grid>

         <Grid.RowDefinitions>

             <RowDefinition Height="26.4"/>

             <RowDefinition/>

         </Grid.RowDefinitions>

         <Grid  Grid.RowSpan="2" Panel.ZIndex="-1" Grid.Row="0">

             <MediaElement x:Name="mediaelement" Stretch="UniformToFill" Volume="1" LoadedBehavior="Manual"  UnloadedBehavior="Manual"/>

         </Grid>

         <Grid Grid.Row="1">

             <Button Content="播放" HorizontalAlignment="Left" VerticalAlignment="Top" Click="Button_Click"></Button>

             <Button Content="停止" HorizontalAlignment="Left" VerticalAlignment="Top" Margin="50,0,0,0" Click="Button_Click_1"></Button>

         </Grid>

     </Grid>

 </Window>
4、运行,点击播放就可以看到效果

2019.07.12
WPF窗体动态效果的更多相关文章
- WinForm 与WPF 窗体之间的想到调用
先放置一个容器控件,并设计 好WinForm(或WPF)窗口 winform 调用 wpf ElementHost el = new ElementHost(); el.Dock = DockStyl ...
- 关于WinForm引用WPF窗体---在Winform窗体中使用WPF控件
项目中有个界面展示用WPF实现起来比较简单,并且能提供更酷炫的效果,但是在WinForm中使用WPF窗体出现了问题,在网上找了一下有些人说Winform不能引用WPF的窗体,我就很纳闷,Win32都能 ...
- 关于WinForm引用WPF窗体
项目中有个界面展示用WPF实现起来比较简单,并且能提供更酷炫的效果,但是在WinForm中使用WPF窗体出现了问题,在网上找了一下有些人说Winform不能引用WPF的窗体,我就很纳闷,Win32都能 ...
- WPF窗体视图中绑定Resources文件中字符串时,抛出:System.Windows.Markup.StaticExtension
问题描述: 在Resources.resx定义了一个静态字符串字段Title,并在WPF窗体视图中绑定为窗体的标题: Title="{x:Static local:Resources.Tit ...
- WPF窗体禁用最大化按钮
禁用WPF窗体的最大化按钮可以使用Windows API改变按钮状态的方法实现.使用GetWindowLong可以得到当前按钮的状态.使用SetWindowLong可以设置按钮的状态.使用SetWin ...
- WPF自学入门(八)WPF窗体之间的交互
今天我们一起来看一下WPF窗体之间的交互-窗体之间的传值.有两个窗体,一个是父窗体,一个是子窗体.要将父窗体的文本框中的值传递给子窗体中的控件.我们该怎么实现? 接下来我们一起来实现窗体之间的传值,在 ...
- 在Office应用中打开WPF窗体并且让子窗体显示在Office应用上
在.NET主程序中,我们可以通过创建 ExcelApplication 对象来打开一个Excel应用程序,如果我们想在Excle里面再打开WPF窗口,问题就不那么简单了. 我们可以简单的实例化一个WP ...
- WPF窗体の投影效果
有时候我们需要给WPF窗体加上一个毛边(投影效果) 我们可以在窗体下加上如下代码 <Window.Effect> <DropShadowEffect BlurRadius=" ...
- 自定义WPF窗体形状
介绍 你好WPF爱好者. 随着WPF等统一API语言的发明,丰富用户界面变得非常容易. 创建丰富的用户界面只是一个想法. 您需要拥有的是创造性思维和最新技术融合. WPF和Expression Ble ...
随机推荐
- 第12组 Alpha冲刺(4/6)
Header 队名:To Be Done 组长博客 作业博客 团队项目进行情况 燃尽图(组内共享) 由于这两天在修bug,燃尽图没有下降 展示Git当日代码/文档签入记录(组内共享) 注: 由于Git ...
- vue使用axios发送请求,都会发送两次请求
vue 使用axios,每次的请求都会发送两次,第一次的请求头为options CORS是一个W3C标准,全称是"跨域资源共享"(Cross-origin resource sha ...
- manjaro系统的回滚操作
作为linux系统的爱好者,自从使用linux后,就喜欢追求新的软件,连系统都换成了滚动升级的版本.manjaro基于arch linux,同时也是kde的支持系统,升级非常频繁.使用了几年,很少碰到 ...
- win7安装composer Failed to decode zlib stream
今天学习php的时候想安装一下composer,刚开始采用的是exe文件的安装方式,可是安装了好几次都没有安装成功,如下图: 可能还有其他的一些错误,所以这里我就换了一个方式安装,就是自己手动来安装c ...
- 第10组alpha冲刺(2/4)
队名:凹凸曼 组长博客 作业博客 组员实践情况 童景霖 过去两天完成了哪些任务 文字/口头描述 继续学习Android studio和Java 完善项目APP原型 展示GitHub当日代码/文档签入记 ...
- Edusoho之Basic Authentication
通过如下代码,可以正常请求并获取对应的数据: curl -X POST -H "Accept:application/vnd.edusoho.v2+json" -H "A ...
- 在mybatis中写sql语句的一些体会
本文会使用一个案例,就mybatis的一些基础语法进行讲解.案例中使用到的数据库表和对象如下: article表:这个表存放的是文章的基础信息 -- ------------------------- ...
- NoSql数据库Redis系列(5)——Redis主从复制
前面介绍Redis,我们都在一台服务器上进行操作的,也就是说读和写以及备份操作都是在一台Redis服务器上进行的,那么随着项目访问量的增加,对Redis服务器的操作也越加频繁,虽然Redis读写速度都 ...
- tar_ssh 配合下载文件(适合于带宽充足传输大量小文件场景)
局域网网速快,但是当要传输大量小文件时倘若仍然使用scp,由于每个文件传输完毕都需要独立进行传输完毕的确认,这样就无法充分利用带宽.一方面等待确认时tcp窗口无法填满,另一方面文件传完之前确认也不会开 ...
- Jmeter里http接口的执行顺序是顺序执行
1,如果在一个线程组里则是顺序执行 2,如果不在一个线程组里,就勾选独立运行各个线程组,在一个运行结束后启动下一个线程组