ubuntu 14.04 安装mysql server的分支MariaDB Server初级教程
序,MariaDB Server是Mysql的fork版本,与Mysql完美兼容,mysql在10年被sun收购,后sun被oracle收购,后mysql的创建者及项目长期技术带头人之一的Michael ‘Monty’ Widenius。Monty和他的团队创建了Mysql的一个fork版本并命名为MariaDB。
MariaDB是一个开源数据库且100%与MySQL兼容,目标是替代MySQL数据库
默认上MariaDB的包并没有在Ubuntu仓库中。要安装MariaDB,我们首先要设置MariaDB仓库。
设置 MariaDB 仓库
- $ sudo apt-get install software-properties-common
- $ sudo apt-key adv --recv-keys --keyserver hkp://keyserver.ubuntu.com:80 0xcbcb082a1bb943db
- $ sudo add-apt-repository 'deb http://sfo1.mirrors.digitalocean.com/mariadb/repo/10.0/ubuntu trusty main'
安装 MariaDB :
- $ sudo apt-get update
- $ sudo apt-get install mariadb-server
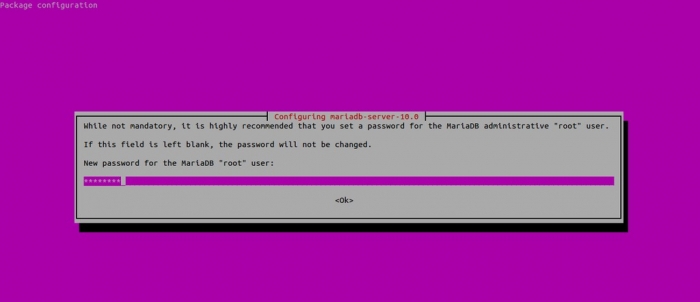
在安装中,你会被要求设置MariaDB的root密码。
从命令行连接到MariaDB :
- linuxtechi@mail:~$ mysql -uroot -p
- Enter password:
- Welcome to the MariaDB monitor. Commands end with ; or \g.
- Your MariaDB connection id is 40
- Server version: 10.0.14-MariaDB-1~trusty-log mariadb.org binary distribution
- Copyright (c) 2000, 2014, Oracle, SkySQL Ab and others.
- Type 'help;' or '\h' for help. Type '\c' to clear the current input statement.
- MariaDB [(none)]>
MariaDB 服务
- $ sudo /etc/init.d/mysql stop
- $ sudo /etc/init.d/mysql start
以上只是在Ubuntu上装完MariaDB,下面要设置MariaDB允许远程访问
1. 如果Ubuntu有设置防火墙或者iptables规则的话,请自行打开
2. 3306端口是不是没有打开?
使用nestat命令查看3306端口状态:
~# netstat -an | grep 3306
tcp 0 0 127.0.0.1:3306 0.0.0.0:* LISTEN
从结果可以看出3306端口只是在IP 127.0.0.1上监听,所以拒绝了其他IP的访问。
解决方法:修改/etc/mysql/my.cnf文件。打开文件,找到下面内容:
# Instead of skip-networking the default is now to listen only on
# localhost which is more compatible and is not less secure.
bind-address = 127.0.0.1
把上面这一行注释掉或者把127.0.0.1换成合适的IP,建议注释掉。
重新启动后,重新使用netstat检测:
~# netstat -an | grep 3306
tcp 0 0 0.0.0.0:3306 0.0.0.0:* LISTEN
3. 现在使用下面命令测试:
~# mysql -h 192.168.0.101 -u root -p
Enter password:
ERROR 1130 (00000): Host 'Ubuntu-Fvlo.Server' is not allowed to connect to this MySQL server
结果出乎意料,还是不行。
解决方法:原来还需要把用户权限分配各远程用户。
登录到mysql服务器,使用grant命令分配权限
mysql> grant all on *.* to 你的用户名如root@'%' identified by '你的密码';
完成后使用mysql命令连接,提示成功,为了确保正确可以再远程登陆测试一下。
ubuntu 14.04 安装mysql server的分支MariaDB Server初级教程的更多相关文章
- Ubuntu 14.04 安装mysql
Ubuntu 14.04 没有mysql5.7的源,需要连接外部资源下载安装. wget http://dev.mysql.com/get/mysql-apt-config_0.8.1-1_all.d ...
- ubuntu 14.04 安装mysql server初级教程
序,mysql数据库是开源的,被大多数企业所使用 目录 一.apt-get install 软件安装原理剖析二.安装mysql server三.配置和管理msyql 一.apt-get install ...
- ubuntu 14.04 安装mysql,并配置远程连接和中文乱码
1. 安装MySQL的jar root@computer-PowerEdge-T30:~# sudo apt-get install mysql-server mysql-client在本次安装中,根 ...
- Ubuntu 14.04安装mysql
在ubuntu kylin上面安装mysq的过程中遇到一些问题,记录如下, wget http://cdn.mysql.com//Downloads/MySQL-5.7/mysql-server_5. ...
- ubuntu 14.04安装mysql server & mysql client
$ sudo apt-get install mysql-server
- 阿里云 Ubuntu 14.04 安装mysql 5.6
1. 升级apt-get apt-get update 如果出现 : 说明没有你不是root用户,则需要用sudo命令 sudo apt-get update 下面出现权限问题都可以参照这个方法. 2 ...
- ubuntu 14.04安装mysql数据库
1. apt-get install mysql-server mysql-client 输入root的密码: 确认root的密码: 2. 连接测试是否成功:mysql –hlocalhost –ur ...
- ubuntu 14.04 安装svn server (subversionedge )
ubuntu 14.04 安装subversionedge 请仔细阅读安装包自带的readme文件! 1.先去官网,找安装包: http://subversion.apache.org/ http:/ ...
- Ubuntu 16.04 安装Mysql 5.7 踩坑小记
title:Ubuntu 16.04 安装Mysql 5.7 踩坑小记 date: 2018.02.03 安装mysql sudo apt-get install mysql-server mysql ...
随机推荐
- SqlServerException:拒绝对表对象的select,insert权限解决(新建账号导致的问题)
继上一篇文章所述的问题,这次又出现了不能插入的问题.经过定位,也是由于我多选择了一个数据库用户角色的权限导致的,下面是详细的操作步骤 SqlServerException:拒绝了对对象 '...'(数 ...
- Nginx 日志分享
Nginx 日志对于大部分人来说是个未被发掘的宝藏,总结之前做某日志分析系统的经验,和大家分享一下 Nginx 日志的纯手工分析方式. Nginx 日志相关配置有 2 个地方:access_log 和 ...
- POJ3154 Graveyard
Graveyard Time Limit: 2000MS Memory Limit: 65536K Total Submissions: 1654 Accepted: 840 Specia ...
- Java命名约定
类名 类名应该是名词, 描述对象.应该按照驼峰式写法,即只有每个单词首字母大写. 接口名称 接口名称应该是形容词,描述功能.应该以“able”.“ible”结尾,否则应该是名词.通常遵循和类名写相同的 ...
- Yocto开发笔记之《错误记录》(QQ交流群:519230208)
QQ群:519230208,为避免广告骚扰,申请时请注明 “开发者” 字样 ============================================== 提问: 1. 怎样修改linu ...
- sql 中的运算符级别 如and or not
写了这么多简单的sql,很多东西忘记得差不多了,差点连最基本sql运算符优先级都忘了.平时最常用到and or的优先级都忘了 and的优先级高于or的优先级 举个例子 select * from us ...
- 会话控制:session与cookie
我们在浏览网站时,访问的每一个web页面都需要使用"http协议"实现.而HTTP协议是无状态协议,就是说HTTP协议没有一个内建机制来维护两个事务之间的状态.当一个用户请求一个页 ...
- 转: CvMat,Mat和IplImage之间的转化和拷贝
1.CvMat之间的复制 //注意:深拷贝 - 单独分配空间,两者相互独立 CvMat* a; CvMat* b = cvCloneMat(a); //copy a to b 2.Mat之间的复制 / ...
- 模拟退火解决TSP问题
// monituihuo.cpp : 定义控制台应用程序的入口点. // #include "stdafx.h" #include <stdio.h> #includ ...
- electron打包
1.全局安装electron-packager npm install -g electron-packager 2.在项目目录下执行命令 electron-packager ./ --platfor ...