EF使用CodeFirst方式生成数据库&技巧经验
前言
EF已经发布很久了,也有越来越多的人在使用EF。如果你已经能够非常熟练的使用EF的功能,那么就不需要看了。本文意在将自己使用EF的方式记录下来备忘,也是为了给刚刚入门的同学一些指导。看完此文,你应该就学会以CodeFirst的方式操作数据库了。
本文主要内容
- CodeFirst生成数据库的流程
- 初始化配置
- 数据库实体构造技巧
- 主外键设置
- decimal精度修改
项目框架搭建
本文所使用的开发工具是vs2015(EF6.1.3)
第一步:新建一个空白项目

第二步:引用EntityFramework

DbContext的初始化配置
DbContext作为操作数据库的网关,十分重要。我们需要对它进行一些类的初始化操作,例如:解决团队开发中,多人迁移数据库造成的修改覆盖问题。
代码如下:
using System;

using System.Collections.Generic;

using System.Data.Entity;

using System.Linq;

using System.Text;

using System.Threading.Tasks;

using System.Data.Entity.ModelConfiguration.Conventions;

namespace EFDemo.Core.EF

{

    /// <summary>

    /// EF访问数据库的接口

    /// </summary>

    public class MyDbContext : System.Data.Entity.DbContext

    {

        public MyDbContext()

            : base("EFDemo")

        {

            //解决团队开发中,多人迁移数据库造成的修改覆盖问题。

            Database.SetInitializer<MyDbContext>(null);

            //base.Configuration.AutoDetectChangesEnabled = false;

            ////关闭EF6.x 默认自动生成null判断语句

            //base.Configuration.UseDatabaseNullSemantics = true;

        }

        public MyDbContext(System.Data.Common.DbConnection oConnection)

            : base(oConnection, true)

        {

            this.Configuration.LazyLoadingEnabled = true;

        }

        protected override void OnModelCreating(DbModelBuilder modelBuilder)

        {

            //表名不用复数形式

            modelBuilder.Conventions.Remove<PluralizingTableNameConvention>();

            //移除一对多的级联删除约定,想要级联删除可以在 EntityTypeConfiguration<TEntity>的实现类中进行控制

            modelBuilder.Conventions.Remove<OneToManyCascadeDeleteConvention>();

            //多对多启用级联删除约定,不想级联删除可以在删除前判断关联的数据进行拦截

            modelBuilder.Conventions.Remove<ManyToManyCascadeDeleteConvention>();

            base.OnModelCreating(modelBuilder);

        }

        //将实体对象写在这里,就可以生成对应的数据。 如下:

        //public DbSet<Demo> Demo { get; set; }

    }

}
项目位置:

Migrations下Configuration类的初始化配置
Configuration类的初始化配置十分重要,我们需要通过配置解决一系列迁移问题。例如:允许自动迁移,自动迁移默认情况下不扔掉列在我们的数据库中的表。如果我们不希望这样的行为,我们可以告诉迁移明确允许数据丢失的配置类的AutomaticMigrationDataLossAllowed属性设置为true。
代码如下:
namespace EFDemo.Core.Migrations

{

    using System;

    using System.Data.Entity;

    using System.Data.Entity.Migrations;

    using System.Linq;

    internal sealed class Configuration : DbMigrationsConfiguration<EFDemo.Core.EF.MyDbContext>

    {

        public Configuration()

        {

            //允许自动迁移

            //不然会报错Unable to update database to match the current model because there are pending changes and automatic migration is disabled. Either write the pending model changes to a code-based migration or enable automatic migration. Set DbMigrationsConfiguration.AutomaticMigrationsEnabled to true to enable automatic migration.You can use the Add-Migration command to write the pending model changes to a code-based migration.

            //允许自动迁移

            AutomaticMigrationsEnabled = true;

            //自动迁移默认情况下不扔掉列在我们的数据库中的表。如果我们不希望这样的行为,我们可以告诉迁移明确允许数据丢失的配置类的AutomaticMigrationDataLossAllowed属性设置为true。

            AutomaticMigrationDataLossAllowed = true;

        }

        protected override void Seed(EF.MyDbContext context)

        {

            //  This method will be called after migrating to the latest version.

            //  You can use the DbSet<T>.AddOrUpdate() helper extension method

            //  to avoid creating duplicate seed data. E.g.

            //

            //    context.People.AddOrUpdate(

            //      p => p.FullName,

            //      new Person { FullName = "Andrew Peters" },

            //      new Person { FullName = "Brice Lambson" },

            //      new Person { FullName = "Rowan Miller" }

            //    );

            //

        }

    }

}
项目位置:

数据库对应实体对象的定义
CodeFirst模式需要我们先定义实体,然后通过实体生成数据。
通常我们设计数据库表时,每个表都有(ID,是否删除,备注,添加人,添加时间,修改人,修改时间)等字段。我们可以用基类处理
基类实体:
using System;

using System.Collections.Generic;

using System.ComponentModel;

using System.ComponentModel.DataAnnotations;

using System.ComponentModel.DataAnnotations.Schema;

using System.Linq;

using System.Text;

using System.Threading.Tasks;

namespace EFDemo.Core.Entity

{

    public class BaseEntity

    {

    }

    [Serializable]

    public class BaseEntity<TKey> : BaseEntity

    {

        public BaseEntity()

        {

            this.AddTime = DateTime.Now;

        }

        [Key]

        [Display(Name = "编号")]

        public TKey ID { get; set; }

        [Display(Name = "排序")]

        [Required(ErrorMessage = "{0}是必填项"), Range(, int.MaxValue, ErrorMessage = "{0}的范围是{1}到{2}")]

        [DefaultValue()]

        public int Sort { get; set; }

        [Display(Name = "备注")]

        [MaxLength(, ErrorMessage = "{0}最大长度{1}")]

        public string Remark { get; set; }

        [Display(Name = "是否删除")]

        [Required]

        public bool Deleted { get; set; }

        public int AddUser { get; set; }

        [Display(Name = "添加时间")]

        [DisplayFormat(ApplyFormatInEditMode = true, ConvertEmptyStringToNull = true, DataFormatString = "{0:yyyy-MM-dd HH mm}", HtmlEncode = false, NullDisplayText = "数据无效")]

        public DateTime AddTime { get; set; }

        public int ModUser { get; set; }

        [DisplayFormat(ApplyFormatInEditMode = true, ConvertEmptyStringToNull = true, DataFormatString = "{0:yyyy-MM-dd  HH mm}", HtmlEncode = false, NullDisplayText = "数据无效")]

        public DateTime? ModTime { get; set; }

    }

}
省市区表:
using System;

using System.Collections.Generic;

using System.ComponentModel.DataAnnotations;

using System.ComponentModel.DataAnnotations.Schema;

using System.Linq;

using System.Text;

using System.Threading.Tasks;

namespace EFDemo.Core.Entity

{

    /// <summary>

    /// 省市区

    /// </summary>

    public class Public_Area

    {

        [Key]

        public Guid ID { get; set; }

        [Display(Name = "父亲ID")]

        public Guid ParentID { get; set; }

        [Display(Name = "名称")]

        [MaxLength(, ErrorMessage = "{0}最大长度{1}")]

        public String Name { get; set; }

    }

}
班级表:
using System;

using System.Collections.Generic;

using System.ComponentModel.DataAnnotations;

using System.ComponentModel.DataAnnotations.Schema;

using System.Linq;

using System.Text;

using System.Threading.Tasks;

namespace EFDemo.Core.Entity

{

    /// <summary>

    /// 班级

    /// </summary>

   public class T_Classes : BaseEntity<int>

    {

        public T_Classes() {

            this.T_Student = new List<Entity.T_Student>();

        }

        [InverseProperty("T_Classes")]

        public virtual List<T_Student> T_Student { get; set; }

        [Display(Name = "班级名称")]

        [Required(ErrorMessage = "{0}是必填项")]

        [MaxLength(, ErrorMessage = "{0}最大长度{1}")]

        public string Name { get; set; }

        [Display(Name = "人数")]

        public int Count { get; set; }

        [Display(Name = "班级经费")]

        public decimal Money { get; set; }

    }

}
学生表:
using System;

using System.Collections.Generic;

using System.ComponentModel.DataAnnotations;

using System.ComponentModel.DataAnnotations.Schema;

using System.Linq;

using System.Text;

using System.Threading.Tasks;

namespace EFDemo.Core.Entity

{

    /// <summary>

    /// 学生

    /// </summary>

    public class T_Student : BaseEntity<int>

    {

        /// <summary>

        /// 外键

        /// </summary>

        [ForeignKey("ClassesID")]

        public virtual T_Classes T_Classes { get; set; }

        [Display(Name = "班级ID")]

        public int ClassesID { get; set; }

        [Display(Name = "姓名")]

        [Required(ErrorMessage = "{0}是必填项")]

        [MaxLength(, ErrorMessage = "{0}最大长度{1}")]

        public string Name { get; set; }

        [Display(Name = "性别")]

        public bool Sex { get; set; }

        [Display(Name = "年龄")]

        public int Age { get; set; }

        [Display(Name = "电话")]

        [Required(ErrorMessage = "{0}是必填项")]

        [RegularExpression(@"^(13[0-9]|15[0-9]|18[0-9])\d{8}$", ErrorMessage = "不是手机号格式")]

        [MaxLength(, ErrorMessage = "{0}最大长度{1}")]

        public string Phone { get; set; }

        /// <summary>

        /// 省市县外键

        /// </summary>

        [ForeignKey("ProvinceID")]

        public virtual Public_Area Public_Area_Province { get; set; }

        [Display(Name = "省ID")]

        public Guid ProvinceID { get; set; }

        [ForeignKey("CityID")]

        public virtual Public_Area Public_Area_City { get; set; }

        [Display(Name = "市ID")]

        public Guid CityID { get; set; }

        [ForeignKey("CountyID")]

        public virtual Public_Area Public_Area_County { get; set; }

        [Display(Name = "县ID")]

        public Guid CountyID { get; set; }

    }

}
班级表和学生表是一对多的关系,省市区表和学生表是一对多的关系,同时学生表中有多个省市区表的外键。
项目位置:

使用命令生成数据库
第一步:将实体对象加入到DbContext中,
如下:
//将实体对象写在这里,就可以生成对应的数据。 如下:

        //public DbSet<Demo> Demo { get; set; }

        public DbSet<Public_Area> Public_Area { get; set; }

        public DbSet<T_Classes> T_Classes { get; set; }

        public DbSet<T_Student> T_Student { get; set; }
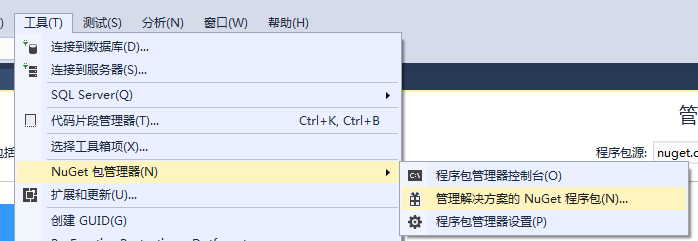
第二步:在EFDemo.Core项目下的App.config文件夹中添加生成数据库的配置项

配置文件代码如下:
name="EFDemo"中的EFDemo要和DbContex中的一致。
<?xml version="1.0" encoding="utf-8"?>

<configuration>

  <configSections>

    <!-- For more information on Entity Framework configuration, visit http://go.microsoft.com/fwlink/?LinkID=237468 -->

    <section name="entityFramework" type="System.Data.Entity.Internal.ConfigFile.EntityFrameworkSection, EntityFramework, Version=6.0.0.0, Culture=neutral, PublicKeyToken=b77a5c561934e089" requirePermission="false" />

  </configSections>

  <connectionStrings>

    <!--生成数据库的连接字符串-->

    <add name="EFDemo" connectionString="Data Source=.;Initial Catalog=EFDemoDB;User ID=sa;Password=123456;MultipleActiveResultSets=True;Application Name=EntityFramework" providerName="System.Data.SqlClient" />

  </connectionStrings>

  <entityFramework>

    <defaultConnectionFactory type="System.Data.Entity.Infrastructure.LocalDbConnectionFactory, EntityFramework">

      <parameters>

        <parameter value="mssqllocaldb" />

      </parameters>

    </defaultConnectionFactory>

    <providers>

      <provider invariantName="System.Data.SqlClient" type="System.Data.Entity.SqlServer.SqlProviderServices, EntityFramework.SqlServer" />

    </providers>

  </entityFramework>

</configuration>
第三步:执行更新命令
启动项目一定要选择EFDemo.Core

生成数据库如下:


主外键关系设置
班级和学生一对多关系的设置:

一个表中的多个外键是另一个表中的主键的情况:学生表和省市县表

生成的数据库如下:

需要注意的是:这种情况,在Public_Area表中不能反向设置 public virtual List<T_Student> T_Student ,不然会报错。
decimal怎么保存四位小数
decimal默认保留两位小数,我们需要通过如下设置让其保留四位小数。
在DbContext中配置班级表中的Money字段让其保留四位小数:

执行Update-Database命令:
结果如下:

使用EF操作数据库数据
第一步:
让EFDemo.Web应用EFDemo.Core程序集。
第二步:
配置EFDemo.Web中的webconfig中的数据库连接字符串:
 <connectionStrings>

    <!--操作数据库的连接字符串-->

    <add name="EFDemo" connectionString="Data Source=.;Initial Catalog=EFDemoDB;User ID=sa;Password=123456;MultipleActiveResultSets=True;Application Name=EntityFramework" providerName="System.Data.SqlClient" />

  </connectionStrings>
第三步:
使用EF向数据库添加数据
    public ActionResult Index()

        {

            using (var db = new Core.EF.MyDbContext())

            {

                Public_Area area1 = new Public_Area()

                {

                    ID = Guid.NewGuid(),

                    Name = "河南",

                    ParentID = Guid.NewGuid()

                };

                db.Public_Area.Add(area1);

                Public_Area area2 = new Public_Area()

                {

                    ID = Guid.NewGuid(),

                    Name = "郑州",

                    ParentID = area1.ID

                };

                db.Public_Area.Add(area2);

                Public_Area area3 = new Public_Area()

                {

                    ID = Guid.NewGuid(),

                    Name = "新郑",

                    ParentID = area2.ID

                };

                db.Public_Area.Add(area3);

                //添加测试数据

                T_Classes classes = new T_Classes()

                {

                    Name = "高中三班",

                    Money =

                };

                db.T_Classes.Add(classes);

                T_Student student = new T_Student()

                {

                    ClassesID = classes.ID,

                    Name = "张三",

                    Phone = "",

                    Sex = true,

                    ProvinceID = area1.ID,

                    CityID = area2.ID,

                    CountyID = area3.ID,

                };

                db.T_Student.Add(student);

                db.SaveChanges();

            }

            return View();

        }
第四步:
查看数据库数据
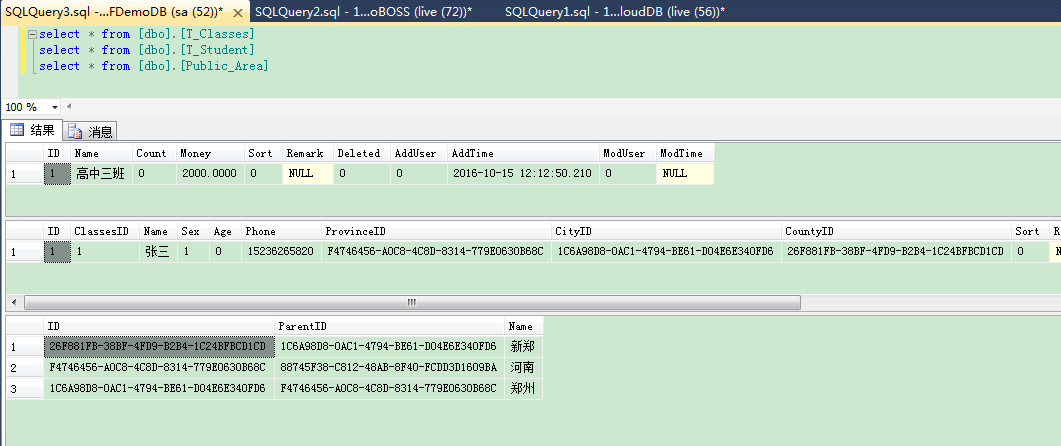
Demo完整代码下载
EF使用CodeFirst方式生成数据库&技巧经验的更多相关文章
- 2.EF中 Code-First 方式的数据库迁移
原文链接:http://www.c-sharpcorner.com/UploadFile/3d39b4/code-first-migrations-with-entity-framework/ 系列目 ...
- EF中 Code-First 方式的数据库迁移
原文链接:http://www.c-sharpcorner.com/UploadFile/3d39b4/code-first-migrations-with-entity-framework/ 系列目 ...
- 学习EF之CodeFirst二(数据库对应映射)
在上一篇文章我们简单通过一个实例完成对CodeFirst的理解,我们通过实体生成数据库里的表和字段,虽然有一些默认的配置生成规定,但其实我们可以能过对实体进一步控制从而对生成的表字段进行更加符合我们要 ...
- EntityFramework系列:SQLite.CodeFirst自动生成数据库
http://www.cnblogs.com/easygame/p/4447457.html 在Code First模式下使用SQLite一直存在不能自动生成数据库的问题,使用SQL Server C ...
- ASP.NET MVC5利用EF,反向自动生成数据库
1.在Model类里面,写好相应的属性. using System; using System.Collections.Generic; using System.Linq; using System ...
- 【EF6学习笔记】(一)Code First 方式生成数据库及初始化数据库实际操作
本篇参考原文地址: Creating an Entity Framework Data Model 说明:学习笔记参考原文中的流程,为了增加实际操作性,并能够深入理解,部分地方根据实际情况做了一些调整 ...
- EF6 学习笔记(一):Code First 方式生成数据库及初始化数据库实际操作
EF6 学习笔记总目录:ASP.NET MVC5 及 EF6 学习笔记 - (目录整理) 本篇参考原文地址: Creating an Entity Framework Data Model 说明:学习 ...
- .Net Core建站(2):EF Core+CodeFirst数据库迁移
上一篇的话,说了下怎么使用EF7 实现 CodeFirst去生成数据库, 其实还有好多问题的,这次一点一点的解决吧,都挺简单,不过零零散散的,, 1.读取配置文件,获得链接字符串 2.使用数据库进行增 ...
- 第十七节: EF的CodeFirst模式的四种初始化策略和通过Migration进行数据的迁移
一. 四种初始化策略 EF的CodeFirst模式下数据库的初始化有四种策略: 1. CreateDatabaseIfNotExists:EF的默认策略,数据库不存在,生成数据库:一旦model发生变 ...
随机推荐
- Java进击C#——应用开发之WinForm环境
本章简言 上一章笔者讲到关于IO文件操作类,了解如何处理文件流.从这一章开始笔者将讲解相对比较高级的知识点.而本章笔者就对WinForm开发的知识点进行讲解和引导.现在很多业务都是面向于B/S模式的开 ...
- const 与 readonly知多少
原文地址: http://www.cnblogs.com/royenhome/archive/2010/05/22/1741592.html 尽管你写了很多年的C#的代码,但是可能当别人问到你cons ...
- Delphi_09_Delphi_Object_Pascal_面向对象编程
今天这里讨论一下Delphi中的面向对象编程,这里不做过多过细的讨论,主要做提纲挈领的描述,帮助自己抓做重点. 本随笔分为两部分: 一.面向对象编程 二.面向对象编程详细描述 ------------ ...
- java web学习总结(三十) -------------------JSTL表达式
一.JSTL标签库介绍 JSTL标签库的使用是为弥补html标签的不足,规范自定义标签的使用而诞生的.使用JSLT标签的目的就是不希望在jsp页面中出现java逻辑代码 二.JSTL标签库的分类 核心 ...
- HttpSession与Hibernate中Session的区别
一.javax.servlet.http.HttpSession是一个抽象接口 它的产生:J2EE的Web程序在运行的时候,会给每一个新的访问者建立一个HttpSession,这个Session是用户 ...
- 新手入门指导:Vue 2.0 的建议学习顺序
起步 1. 扎实的 JavaScript / HTML / CSS 基本功.这是前置条件. 2. 通读官方教程 (guide) 的基础篇.不要用任何构建工具,就只用最简单的 <script> ...
- 节日来了发个HTML5红包
效果图: 请关注微信公众号 何问起 , 账号ihewenqi ,或者微信扫描下图二维码: 关注后发送 愚人节 ,或 微信节日红包 ,可以体验效果. 代码如下: <!DOCTYPE html> ...
- BPM实例分享——日期自动计算
日期自动计算 在请假流程中通常我们需要获得请假开始到请假结束时间的天数,那么请假天数(可结合工作日历)是怎么实现系统计算呢?下面我们来看下配置的方法. 1. 首选建立业务服务BPMService, ...
- 关于 Xcode8打印JSON的时候,NSLog控制台显示不完整
看到打印结果之后 为什么只打印了一部分???为什么呢??? 我也不知道为什么,可能是xcode8的原因. 借鉴了下国外人说了,printf可以打印全,自己写了个输出宏 #ifdef DEBUG #d ...
- (十一)Maven远程仓库的各种配置
1.远程仓库的配置 在平时的开发中,我们往往不会使用默认的中央仓库,默认的中央仓库访问的速度比较慢,访问的人或许很多,有时候也无法满足我们项目的需求,可能项目需要的某些构件中央仓库中是没有的,而在其他 ...