
详解CATransformLayer
详解CATransformLayer

CATransformLayer与CALayer有着细微的差别,但这些差别会影响到3D变换的动画效果.
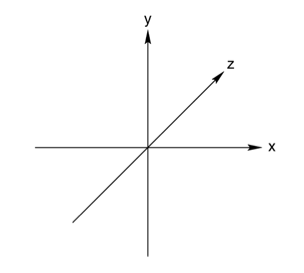
动画都有坐标系,如下所示(注意,这个不是iOS中的坐标系,请勿对号入座):
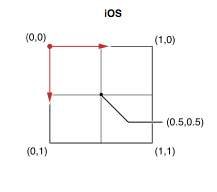
iOS中layer的锚点就在坐标系的正中间.
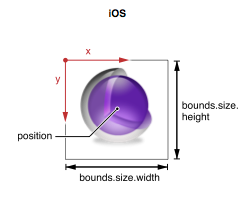
layer的position可以理解为View的center.
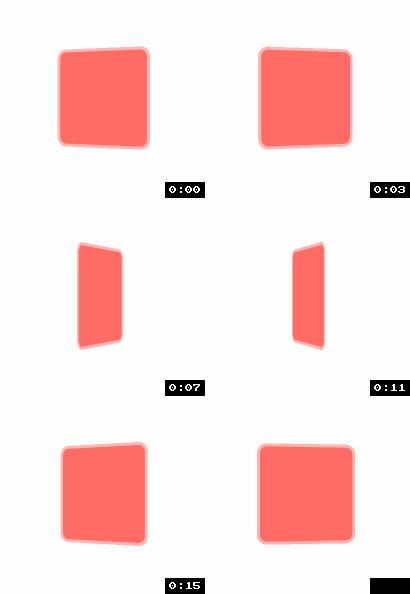
实现带有3d景深效果动画:
//

//  RootViewController.m

//  CATransformLayer

//

//  Copyright (c) 2014年 Y.X. All rights reserved.

//

#import "RootViewController.h"

#import "YXGCD.h"

@interface RootViewController ()

@property (nonatomic, strong) GCDTimer  *timer;

@end

@implementation RootViewController

#define V_CENTER_X           self.view.center.x

#define V_CENTER_Y           self.view.center.y

#define CG_COLOR(R, G, B, A) [UIColor colorWithRed:(R) green:(G) blue:(B) alpha:(A)].CGColor

#define DEGREE(d)            ((d) * M_PI / 180.0f)

- (void)viewDidLoad

{

    [super viewDidLoad];

    // 普通的一个layer

    CALayer *plane        = [CALayer layer];

    plane.anchorPoint = CGPointMake(0.5, 0.5);                         // 锚点

    plane.frame       = (CGRect){CGPointZero, CGSizeMake(, )};   // 尺寸

    plane.position    = CGPointMake(V_CENTER_X, V_CENTER_Y);           // 位置

    plane.opacity         = 0.6;                                       // 背景透明度

    plane.backgroundColor = CG_COLOR(, , , );                      // 背景色

    plane.borderWidth     = ;                                         // 边框宽度

    plane.borderColor     = CG_COLOR(, , , 0.5);                    // 边框颜色(设置了透明度)

    plane.cornerRadius    = ;                                        // 圆角值

    // 创建容器layer

    CALayer *container = [CALayer layer];

    container.frame    = self.view.bounds;

    [self.view.layer addSublayer:container];

    [container addSublayer:plane];

    // 启动定时器

    _timer = [[GCDTimer alloc] initInQueue:[GCDQueue mainQueue]];

    [_timer event:^{

        static float degree = .f;

        // 起始值

        CATransform3D fromValue = CATransform3DIdentity;

        fromValue.m34           = 1.0/ -;

        fromValue               = CATransform3DRotate(fromValue, degree, , , );

        // 结束值

        CATransform3D toValue   = CATransform3DIdentity;

        toValue.m34             = 1.0/ -;

        toValue                 = CATransform3DRotate(toValue, degree += .f, , , );

        // 添加3d动画

        CABasicAnimation *transform3D = [CABasicAnimation animationWithKeyPath:@"transform"];

        transform3D.duration  = .f;

        transform3D.fromValue = [NSValue valueWithCATransform3D:fromValue];

        transform3D.toValue   = [NSValue valueWithCATransform3D:toValue];

        plane.transform = toValue;

        [plane addAnimation:transform3D forKey:@"transform3D"];

    } timeInterval:NSEC_PER_SEC];

    [_timer start];

}

@end
下图中的m34值代表着景深效果,非常关键,其值越接近0,景深效果就越发强烈
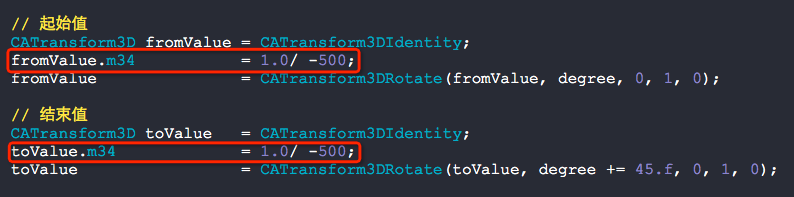
如果写成这样子:

那么显示就会变成:
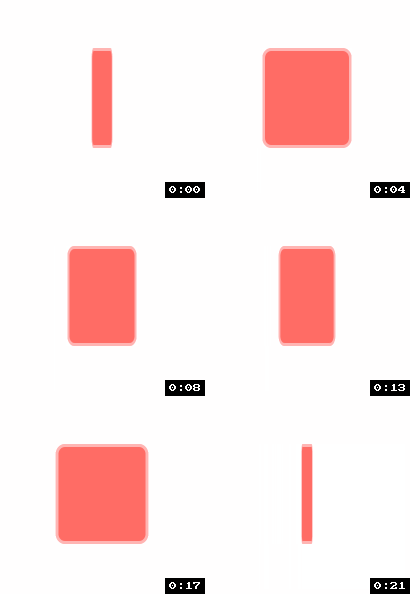
毫无3d感可言.
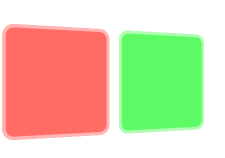
将景深效果添加到容器上面去我们就能得到如下的效果:
- (void)viewDidLoad

{

    [super viewDidLoad];

    // 普通的一个layer

    CALayer *plane1        = [CALayer layer];

    plane1.anchorPoint = CGPointMake(0.5, 0.5);                         // 锚点

    plane1.frame       = (CGRect){CGPointZero, CGSizeMake(, )};   // 尺寸

    plane1.position    = CGPointMake(, V_CENTER_Y);                   // 位置

    plane1.opacity         = 0.6;                                       // 背景透明度

    plane1.backgroundColor = CG_COLOR(, , , );                      // 背景色

    plane1.borderWidth     = ;                                         // 边框宽度

    plane1.borderColor     = CG_COLOR(, , , 0.5);                    // 边框颜色(设置了透明度)

    plane1.cornerRadius    = ;                                        // 圆角值

    // 普通的一个layer

    CALayer *plane2        = [CALayer layer];

    plane2.anchorPoint = CGPointMake(0.5, 0.5);                         // 锚点

    plane2.frame       = (CGRect){CGPointZero, CGSizeMake(, )};   // 尺寸

    plane2.position    = CGPointMake( + , V_CENTER_Y);             // 位置

    plane2.opacity         = 0.6;                                       // 背景透明度

    plane2.backgroundColor = CG_COLOR(, , , );                      // 背景色

    plane2.borderWidth     = ;                                         // 边框宽度

    plane2.borderColor     = CG_COLOR(, , , 0.5);                    // 边框颜色(设置了透明度)

    plane2.cornerRadius    = ;                                        // 圆角值

    // 创建容器layer

    CALayer *container = [CALayer layer];

    container.frame    = self.view.bounds;

    [self.view.layer addSublayer:container];

    CATransform3D plane_3D = CATransform3DIdentity;

    plane_3D.m34           = 1.0/ -;

    plane_3D               = CATransform3DRotate(plane_3D, DEGREE(), , , );

    container.transform    = plane_3D;

    [container addSublayer:plane1];

    [container addSublayer:plane2];

}
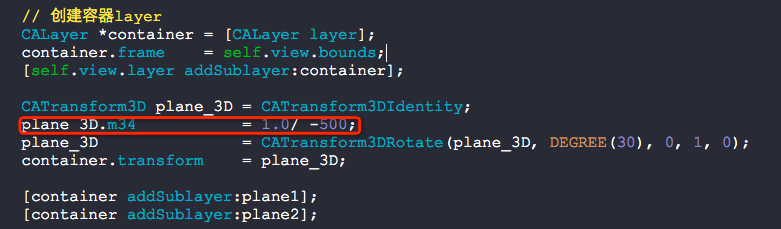
注意,下图红框中的值是非常关键的哦:
到这里还没讲CATransformLayer呢,先看个例子:
效果如下:

- (void)viewDidLoad

{

    [super viewDidLoad];

    // 普通的一个layer

    CALayer *plane1        = [CALayer layer];

    plane1.anchorPoint = CGPointMake(0.5, 0.5);                         // 锚点

    plane1.frame       = (CGRect){CGPointZero, CGSizeMake(, )};   // 尺寸

    plane1.position    = CGPointMake(, V_CENTER_Y);                  // 位置

    plane1.opacity         = 0.6;                                       // 背景透明度

    plane1.backgroundColor = CG_COLOR(, , , );                      // 背景色

    plane1.borderWidth     = ;                                         // 边框宽度

    plane1.borderColor     = CG_COLOR(, , , 0.5);                    // 边框颜色(设置了透明度)

    plane1.cornerRadius    = ;                                        // 圆角值

    // Z轴平移

    CATransform3D plane1_3D = CATransform3DIdentity;

    plane1_3D               = CATransform3DTranslate(plane1_3D, , , -);

    plane1.transform        = plane1_3D;

    // 普通的一个layer

    CALayer *plane2        = [CALayer layer];

    plane2.anchorPoint = CGPointMake(0.5, 0.5);                         // 锚点

    plane2.frame       = (CGRect){CGPointZero, CGSizeMake(, )};   // 尺寸

    plane2.position    = CGPointMake(, V_CENTER_Y);                  // 位置

    plane2.opacity         = 0.6;                                       // 背景透明度

    plane2.backgroundColor = CG_COLOR(, , , );                      // 背景色

    plane2.borderWidth     = ;                                         // 边框宽度

    plane2.borderColor     = CG_COLOR(, , , 0.5);                    // 边框颜色(设置了透明度)

    plane2.cornerRadius    = ;                                        // 圆角值

    // Z轴平移

    CATransform3D plane2_3D = CATransform3DIdentity;

    plane2_3D               = CATransform3DTranslate(plane2_3D, , , -);

    plane2.transform        = plane2_3D;

    // 创建容器layer

    CALayer *container = [CALayer layer];

    container.frame    = self.view.bounds;

    [self.view.layer addSublayer:container];

    // 以Y轴为坐标系,旋转45度

    CATransform3D t = CATransform3DIdentity;

    t.m34 = 1.0/-;

    t = CATransform3DRotate(t, DEGREE(), , , );

    container.transform = t;

    [container addSublayer:plane1];

    [container addSublayer:plane2];

}
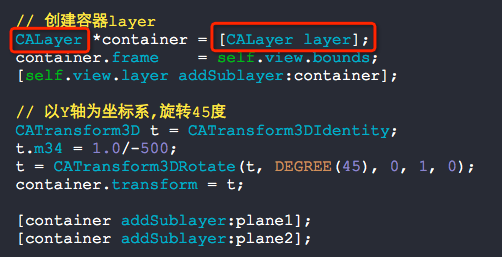
如果把上图的CALayer替换成下图的CATransformLayer
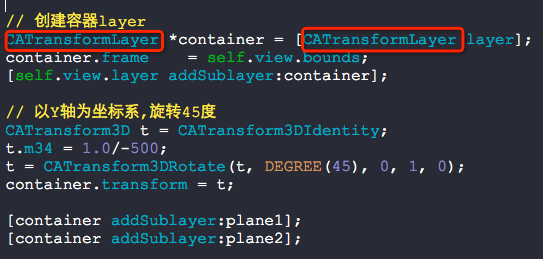
则会产生如下的效果:
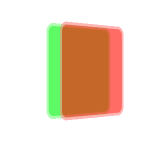
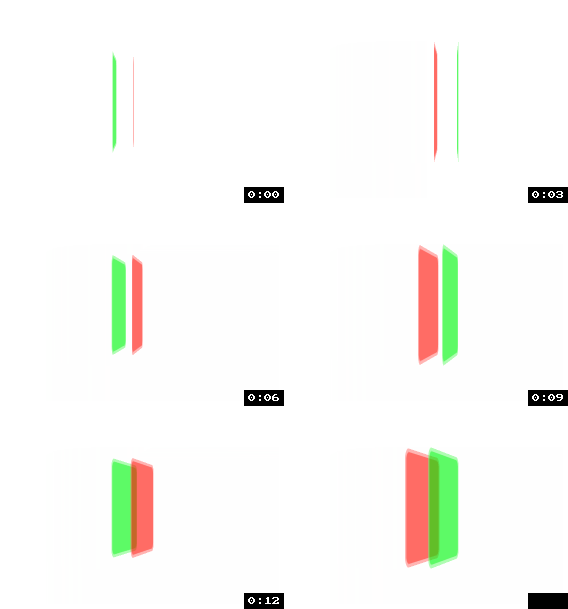
看到上面的图,你应该就明白了CATransformLayer当做容器是为了给里面的Layer提供景深效果用的.
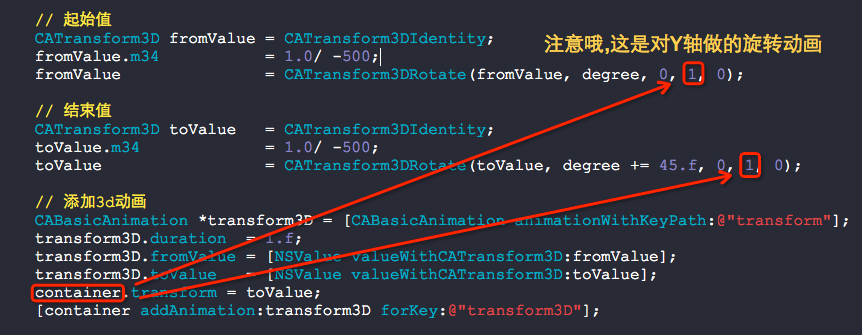
再来做成动画看看效果吧:
- (void)viewDidLoad

{

    [super viewDidLoad];

    // 普通的一个layer

    CALayer *plane1        = [CALayer layer];

    plane1.anchorPoint = CGPointMake(0.5, 0.5);                         // 锚点

    plane1.frame       = (CGRect){CGPointZero, CGSizeMake(, )};   // 尺寸

    plane1.position    = CGPointMake(, V_CENTER_Y);                  // 位置

    plane1.opacity         = 0.6;                                       // 背景透明度

    plane1.backgroundColor = CG_COLOR(, , , );                      // 背景色

    plane1.borderWidth     = ;                                         // 边框宽度

    plane1.borderColor     = CG_COLOR(, , , 0.5);                    // 边框颜色(设置了透明度)

    plane1.cornerRadius    = ;                                        // 圆角值

    // Z轴平移

    CATransform3D plane1_3D = CATransform3DIdentity;

    plane1_3D               = CATransform3DTranslate(plane1_3D, , , -);

    plane1.transform        = plane1_3D;

    // 普通的一个layer

    CALayer *plane2        = [CALayer layer];

    plane2.anchorPoint = CGPointMake(0.5, 0.5);                         // 锚点

    plane2.frame       = (CGRect){CGPointZero, CGSizeMake(, )};   // 尺寸

    plane2.position    = CGPointMake(, V_CENTER_Y);                  // 位置

    plane2.opacity         = 0.6;                                       // 背景透明度

    plane2.backgroundColor = CG_COLOR(, , , );                      // 背景色

    plane2.borderWidth     = ;                                         // 边框宽度

    plane2.borderColor     = CG_COLOR(, , , 0.5);                    // 边框颜色(设置了透明度)

    plane2.cornerRadius    = ;                                        // 圆角值

    // Z轴平移

    CATransform3D plane2_3D = CATransform3DIdentity;

    plane2_3D               = CATransform3DTranslate(plane2_3D, , , -);

    plane2.transform        = plane2_3D;

    // 创建容器layer

    CATransformLayer *container = [CATransformLayer layer];

    container.frame    = self.view.bounds;

    [self.view.layer addSublayer:container];

    [container addSublayer:plane1];

    [container addSublayer:plane2];

    // 启动定时器

    _timer = [[GCDTimer alloc] initInQueue:[GCDQueue mainQueue]];

    [_timer event:^{

        static float degree = .f;

        // 起始值

        CATransform3D fromValue = CATransform3DIdentity;

        fromValue.m34           = 1.0/ -;

        fromValue               = CATransform3DRotate(fromValue, degree, , , );

        // 结束值

        CATransform3D toValue   = CATransform3DIdentity;

        toValue.m34             = 1.0/ -;

        toValue                 = CATransform3DRotate(toValue, degree += .f, , , );

        // 添加3d动画

        CABasicAnimation *transform3D = [CABasicAnimation animationWithKeyPath:@"transform"];

        transform3D.duration  = .f;

        transform3D.fromValue = [NSValue valueWithCATransform3D:fromValue];

        transform3D.toValue   = [NSValue valueWithCATransform3D:toValue];

        container.transform = toValue;

        [container addAnimation:transform3D forKey:@"transform3D"];

    } timeInterval:NSEC_PER_SEC];

    [_timer start];

}
详解CATransformLayer的更多相关文章
- Linq之旅:Linq入门详解(Linq to Objects)
示例代码下载:Linq之旅:Linq入门详解(Linq to Objects) 本博文详细介绍 .NET 3.5 中引入的重要功能:Language Integrated Query(LINQ,语言集 ...
- 架构设计:远程调用服务架构设计及zookeeper技术详解(下篇)
一.下篇开头的废话 终于开写下篇了,这也是我写远程调用框架的第三篇文章,前两篇都被博客园作为[编辑推荐]的文章,很兴奋哦,嘿嘿~~~~,本人是个很臭美的人,一定得要截图为证: 今天是2014年的第一天 ...
- EntityFramework Core 1.1 Add、Attach、Update、Remove方法如何高效使用详解
前言 我比较喜欢安静,大概和我喜欢研究和琢磨技术原因相关吧,刚好到了元旦节,这几天可以好好学习下EF Core,同时在项目当中用到EF Core,借此机会给予比较深入的理解,这里我们只讲解和EF 6. ...
- Java 字符串格式化详解
Java 字符串格式化详解 版权声明:本文为博主原创文章,未经博主允许不得转载. 微博:厉圣杰 文中如有纰漏,欢迎大家留言指出. 在 Java 的 String 类中,可以使用 format() 方法 ...
- Android Notification 详解(一)——基本操作
Android Notification 详解(一)--基本操作 版权声明:本文为博主原创文章,未经博主允许不得转载. 微博:厉圣杰 源码:AndroidDemo/Notification 文中如有纰 ...
- Android Notification 详解——基本操作
Android Notification 详解 版权声明:本文为博主原创文章,未经博主允许不得转载. 前几天项目中有用到 Android 通知相关的内容,索性把 Android Notificatio ...
- Git初探--笔记整理和Git命令详解
几个重要的概念 首先先明确几个概念: WorkPlace : 工作区 Index: 暂存区 Repository: 本地仓库/版本库 Remote: 远程仓库 当在Remote(如Github)上面c ...
- Drawable实战解析:Android XML shape 标签使用详解(apk瘦身,减少内存好帮手)
Android XML shape 标签使用详解 一个android开发者肯定懂得使用 xml 定义一个 Drawable,比如定义一个 rect 或者 circle 作为一个 View 的背景. ...
- Node.js npm 详解
一.npm简介 安装npm请阅读我之前的文章Hello Node中npm安装那一部分,不过只介绍了linux平台,如果是其它平台,有前辈写了更加详细的介绍. npm的全称:Node Package M ...
随机推荐
- windows 老掉牙CMD的命令
再老,也得温习下: net use \\' /user:'administrator' //ipc连接 net use \\127.0.0.1\ipc$ /delete //退出ipc net use ...
- 微服务Kong(七)——CLI参考
KONG提供了一套CLI(命令行界面)命令,您可以通过它来启动.停止和管理您的Kong实例.CLI管理您的本地节点(如在当前机器上). 全局配置 所有命令都采用一组指定的可选标志作为参数: --hel ...
- Java Servlet 缺点
1.web.xml配置比较多 2.servlet具有容器依赖性(tomcat没有启动,就没有用)
- java的finally简单理解
1. 大家都知道, 普通的try, catch, finally格式: try{ //有可能会抛出异常的代码 }catch{ //抛出异常时处理的代码 }finally{ //无条件执行的代码,就不管 ...
- Linux shell ${}简单用法
转自:Linux shell ${}简单用法 为了完整起见,我这里再用一些例子加以说明 ${ } 的一些特异功能:假设我们定义了一个变量为:file=/dir1/dir2/dir3/my.file.t ...
- [Mysql]——备份、还原、表的导入导出
备份 1. mysqldump mysqldump备份生成的是个文本文件,可以打开了解查看. Methods-1 备份单个数据库或其中的几个表# mysqldump -u username -p'pa ...
- Django 用模板来节省公共代码,
如果我们有一个后台网站,或者显示个人信息的网站 标题logo,边框等信息的代码都是固定的,只有部分区域是改变, 我们如果用Django来写html的话就会重复代码.这时候我们只要用模板的方 ...
- ORCLE报错解决(ora-01747:无效的用户.表.列,表.列)
原因: 这个问题出现是因为表中存在关键字造成.
- 解析Excel----ExcelHelper
public static class ExcelHelper { /// <summary> /// 获取单元格的值 /// </summary> /// <param ...
- CPU缓存一致性协议与java中的volatile关键字
有关缓存一致性协议MESI自行百度. 提出问题:volatile在缓存一致性协议上又做了哪些事情?为啥它不保证原子性? 在缓存一致性协议下,CPU为了执行效率使用了写(存储)缓存和失效队列从而导致对用 ...