python框架之Django(1)-第一个Django项目
准备
自己写一个简单的webServer
 import socket

 # 生成socket实例对象

 sk = socket.socket()

 # 绑定IP和端口

 sk.bind(("127.0.0.1", 8001))

 # 监听

 sk.listen()

 # 写一个死循环,一直等待客户端来连我

 while 1:

     conn, _ = sk.accept()

     data = conn.recv(8096)

     data_str = str(data, encoding="utf-8")

     # 给客户端回复消息

     conn.send(b'http/1.1 200 OK\r\ncontent-type:text/html; charset=utf-8\r\n\r\n')

     # 拿到函数的执行结果

     response = b'from socket server'

     # 将函数返回的结果发送给浏览器

     conn.send(response)

     # 关闭连接

     conn.close()
wsgiref实现的webServer
 import time

 from wsgiref.simple_server import make_server

 def func1():

     return 'from func1'

 def run_server(environ, start_response):

     start_response('200 OK', [('Content-Type', 'text/html;charset=utf8'), ])  # 设置HTTP响应的状态码和头信息

     url = environ['PATH_INFO']  # 取到用户输入的url

     print(url)  # /func1

     response = ''

     if url == '/func1':

         response = eval(url[1:] + '()')

     response = bytes(response, encoding='utf8')

     return [response, ]

 if __name__ == '__main__':

     httpd = make_server('127.0.0.1', 8090, run_server)

     print("我在8090等你哦...")

     httpd.serve_forever()
jinja2模板引擎
安装: pip3 install jinja2
from wsgiref.simple_server import make_server
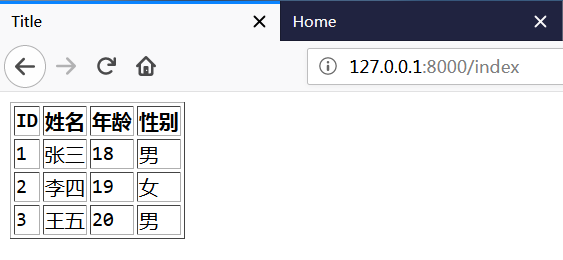
from jinja2 import Template def index():
with open("user_template.html", "r", encoding="utf-8") as f:
data = f.read()
template = Template(data) # 生成模板文件
# 从数据库中取数据
import pymysql conn = pymysql.connect(
host="127.0.0.1",
port=3306,
user="root",
password="root",
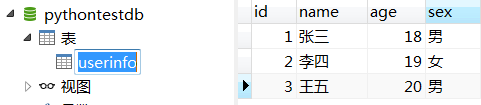
database="pythontestdb",
charset="utf8",
)
cursor = conn.cursor(cursor=pymysql.cursors.DictCursor)
cursor.execute("select * from userinfo;")
user_list = cursor.fetchall()
# 实现字符串的替换
ret = template.render({"user_list": user_list}) # 把数据填充到模板里面
return [bytes(ret, encoding="utf8"), ] def home():
with open("home.html", "rb") as f:
data = f.read()
return [data, ] # 定义一个url和函数的对应关系
URL_LIST = [
("/index", index),
("/home", home),
] def run_server(environ, start_response):
start_response('200 OK', [('Content-Type', 'text/html;charset=utf8'), ]) # 设置HTTP响应的状态码和头信息
url = environ['PATH_INFO'] # 取到用户输入的url
func = None # 将要执行的函数
for i in URL_LIST:
if i[0] == url:
func = i[1] # 去之前定义好的url列表里找url应该执行的函数
break
if func: # 如果能找到要执行的函数
return func() # 返回函数的执行结果
else:
return [bytes("404没有该页面", encoding="utf8"), ] if __name__ == '__main__':
httpd = make_server('', 8000, run_server)
print("Serving HTTP on port 8000...")
httpd.serve_forever()
Code
 <!DOCTYPE html>

 <html lang="zh-CN">

 <head>

     <meta charset="UTF-8">

     <meta http-equiv="x-ua-compatible" content="IE=edge">

     <meta name="viewport" content="width=device-width, initial-scale=1">

     <title>Title</title>

 </head>

 <body>

 <table border="1">

     <thead>

     <tr>

         <th>ID</th>

         <th>姓名</th>

         <th>年龄</th>

         <th>性别</th>

     </tr>

     </thead>

     <tbody>

     {% for user in user_list %}

     <tr>

         <td>{{user.id}}</td>

         <td>{{user.name}}</td>

         <td>{{user.age}}</td>

         <td>{{user.sex}}</td>

     </tr>

     {% endfor %}

     </tbody>

 </table>

 </body>

 </html>
user_template.html
 <!DOCTYPE html>

 <html lang="en">

 <head>

     <meta charset="UTF-8">

     <title>Home</title>

 </head>

 <body>

 <h1>Home</h1>

 </body>

 </html>
home.html
db
django的安装与使用
介绍
支持时间图

python版本支持对照表
django版本 python版本 1.5.x 2.6.5|2.7|3.2|3.3 1.6.x 2.6|2.7|3.2|3.3 1.7.x 2.7|3.2|3.3|3.4 1.8.x 2.7|3.2|3.3|3.4|3.5 1.9.x 2.7|3.4|3.5 1.10.x 2.7|3.4|3.5 1.11.x(开发推荐) 2.7|3.4|3.5|3.6 2.0.x 3.4|3.5|3.6
安装
使用cmd安装
pip3 install django # 默认安装当前最高版本

pip3 install django==1.11.15 # 用==安装指定版本
使用pycharm安装


使用
配置相关
settings.py
 TEMPLATES = [

     {

         'BACKEND': 'django.template.backends.django.DjangoTemplates',

         'DIRS': [

             os.path.join(BASE_DIR, 'templates1'),  # 根目录->templates1

             os.path.join(BASE_DIR, 'templates2'),  # 根目录->templates2

         ],  # 配置render()函数在上述路径下寻找模板

         'APP_DIRS': True,

         'OPTIONS': {

             'context_processors': [

                 'django.template.context_processors.debug',

                 'django.template.context_processors.request',

                 'django.contrib.auth.context_processors.auth',

                 'django.contrib.messages.context_processors.messages',

             ],

         },

     },

 ]
Templates节:配置模板存放位置
 # 静态文件保存目录的别名

 STATIC_URL = '/static/'

 # 静态文件存放文件夹

 STATICFILES_DIRS = [

     os.path.join(BASE_DIR, "static1"),

     os.path.join(BASE_DIR, "static2"),

 ]

 # 上述配置的效果就是 请求指定别名会在指定目录下寻找指定文件

 # 例:127.0.0.1:8000/static/test.css 会在STATICFILES_DIRS节中配置的每个目录寻找名为test.css的文件
STATIC_URL&STATICFILES_DIRS节:配置静态文件存放目录
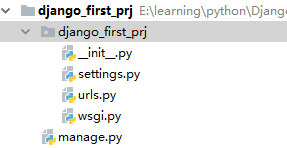
创建Django项目
命令行创建
django-admin startproject 项目名
pycharm创建
File --> New project --> 左侧选Django --> 右侧填项目路径-->Create
目录结构如下
Django项目的运行
命令行运行
在项目的根目录下(也就是有manage.py的那个目录),运行:

            python3 manage.py runserver IP:端口--> 在指定的IP和端口启动

            python3 manage.py runserver 端口   --> 在指定的端口启动

            python3 manage.py runserver        --> 默认在本机的8000端口启动
pycharm运行

点绿色的小三角,直接可以启动Django项目(前提是小三角左边是你的Django项目名)
Hello Django
编辑urls.py
 from django.conf.urls import url

 from django.contrib import admin

 def hello(request):

     from django.shortcuts import HttpResponse

     return HttpResponse('Hello Django')

 urlpatterns = [

     url(r'^admin/', admin.site.urls),

     url(r'^hello/',hello)

 ]
urls.py
运行
Performing system checks...

System check identified no issues (0 silenced).

You have 13 unapplied migration(s). Your project may not work properly until you apply the migrations for app(s): admin, auth, contenttypes, sessions.

Run 'python manage.py migrate' to apply them.

September 18, 2018 - 14:27:53

Django version 1.11.15, using settings 'django_first_prj.settings'

Starting development server at http://127.0.0.1:8000/

Quit the server with CTRL-BREAK.
console
python框架之Django(1)-第一个Django项目的更多相关文章
- Python开发入门与实战2-第一个Django项目
2.第一个Django项目 上一章节我们完成了python,django和数据库等运行环境的安装,现在我们来创建第一个django project吧,迈出使用django开发应用的第一步. 2.1.创 ...
- django创建第一个django项目-2
安装django 虚拟环境下执行命令: pip install django==1.11.11 查看是否安装成功 pip list 列表中有django说明安装成功 创建工程 命令行移动到想要创建项目 ...
- Django安装+创建一个Django项目
安装 选用pycharm 在终端输入命令:pip install django 安装完成后创建项目 1.在你想创建项目的目录下输入下面的代码 2.django-admin startprojec ...
- SSM框架搭建——我的第一个SSM项目
转载自:http://blog.csdn.net/tmaskboy/article/details/51464791 作者使用MyEclipse 2014版本 本博客所编写程序源码为: http:// ...
- dya49:django:wsgrief&模板渲染Jinjia2&django的MTV/MVC框架&创建/启动一个django项目
目录 1.自定义web框架wsgiref版 2.自定义web框架wsgiref版-优化版 3.模板渲染JinJa2 4.MTV和MVC框架 5.django:下载安装&创建启动 自定义web框 ...
- 编写你的第一个Django应用
安装 Python 作为一个 Python Web 框架,Django 需要 Python.更多细节请参见 我应该使用哪个版本的 Python 来配合 Django?. Python 包含了一个名为 ...
- 第一个Django应用
Django教程:http://www.liujiangblog.com/course/django/2 第一个Django应用 该应用包括以下两个部分: 一个可以让公众用户进行投票和查看投票结果的站 ...
- python框架之django
python框架之django 本节内容 web框架 mvc和mtv模式 django流程和命令 django URL django views django temple django models ...
- 第六篇:web之python框架之django
python框架之django python框架之django 本节内容 web框架 mvc和mtv模式 django流程和命令 django URL django views django te ...
随机推荐
- 在.txt文件的首行写上.LOG后,后面每次对改文本文件进行编辑后,系统会自动在编辑内容后记录操作时间
在.txt文件的首行写上.LOG后,后面每次对改文本文件进行编辑后,系统会自动在编辑内容后记录操作时间
- asp.net mvc 微信支付代码分析(根据沐雪微信平台3.1商城业务来分析)
开发微信应用,微信支付是永远要面对的.现在的微信支付相对以往已经很稳定,很少出现诡异情况.再加上无数人开发的经验分享,现在开发微信支付已经没什么难度了. 我这次主要是想基于沐雪微信平台的微商城业务来分 ...
- cx_Oracle读写clob
cx_Oracle读写clob 读 读到相应字段后,使用read()方法即可:例如读取到clob对象a,想要查看其内容,使用下列代码即可: a.read() 写 参考下列代码: id='123' cl ...
- 【OCR技术系列之七】端到端不定长文字识别CRNN算法详解
在以前的OCR任务中,识别过程分为两步:单字切割和分类任务.我们一般都会讲一连串文字的文本文件先利用投影法切割出单个字体,在送入CNN里进行文字分类.但是此法已经有点过时了,现在更流行的是基于深度学习 ...
- 在BootStrap的modal中使用Select2
bootstrap 3 $.fn.modal.Constructor.prototype.enforceFocus = function() {}; bootstrap4 $.fn.modal.C ...
- nginx转发成功报400 bad request,服务端未收到请求
nginx转发成功报400 bad request,服务端未收到请求 解决办法: upstream后面不要跟下划线 例如: upstream auth_service{ server 30.4.164 ...
- @Scope用法
http://www.cnblogs.com/lonecloud/p/5937513.htmlhttp://www.cnblogs.com/lonecloud/p/5937513.htmlhttp:/ ...
- r里面如何实现两列数据合并为一列
library(dplyr) unite(mtcars, "vs_am", vs, am) Merging Data Adding Columns To merge two dat ...
- 深入浅出 1 - AI量化策略快速理解
我们在用AI来编写量化策略过程中,主要用到了机器学习,先来从一张图直观理解什么是机器学习:人类对新问题做出有效决策依靠的是过去积累的许多经验,并对经验进行利用,而对机器来说,“经验”以“数据”方式 ...
- JS对象与Dom对象与jQuery对象之间的区别
前言 通过问题看本质: 举例: js的写法:document.getElementById('save').disabled=true; 在jquery中我是这样写的 $("#save&qu ...