11-scrapy(递归解析,post请求,日志等级,请求传参)
一、递归解析:
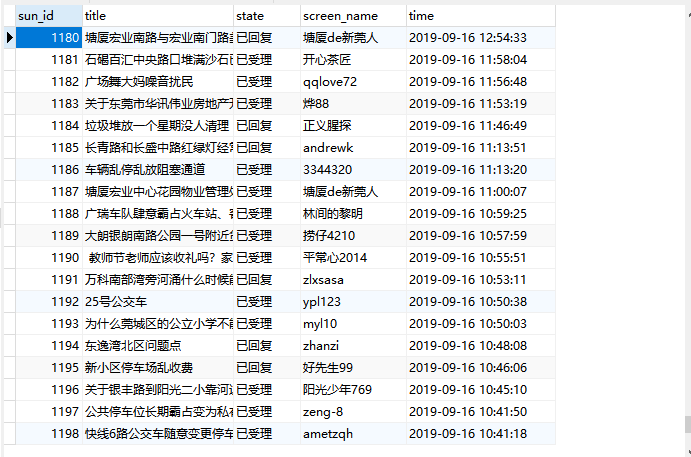
需求:将投诉_阳光热线问政平台中的投诉标题和状态网友以及时间爬取下来永久储存在数据库中
url:http://wz.sun0769.com/index.php/question/questionType?type=4&page=
需求分析:每一个页面对应的是一个url,scrapy框架发起请求对一个url进行解析,解析完后又对另一个url发起请求进行解析。
实现方案:
1.可以将每一个页面的url放在爬虫程序中的start_urls中请求。(不推荐,累死人)
2.另一种请求使用Request方法手动发起请求。(推荐)
代码展示:(经过测试网站做了反爬措施,因此我将后面所学到selenium导入进来进行反爬)(只需要看爬虫文件,储存文件,items.py文件,以及settings.py文件)
spider/sun.py
# -*- coding: utf-8 -*-

import scrapy

from Sunline.items import SunlineItem

from selenium import webdriver

class SunSpider(scrapy.Spider):

    name = 'sun'

    # allowed_domains = ['www.xxx.com']

    start_urls = ['http://wz.sun0769.com/index.php/question/questionType?type=4&page=']

    std_url = "http://wz.sun0769.com/index.php/question/questionType?type=4&page=%d"#第二页30 第三页60 90 120

    pages = 1

    #在这里实例化浏览器,不懂的可以暂时跳过,就理解下面的代码是递归爬取多页数据

    bro = webdriver.Chrome("./chromedriver.exe")

    print("爬虫开始啦!!!")

    def parse(self, response):

        page_list = response.xpath('//*[@id="morelist"]/div/table[2]/tbody/tr/td/table/tbody/tr')

        for page in page_list:

            title = page.xpath('./td[2]/a[2]/text()').extract_first()

            state = page.xpath('./td[3]/span/text()').extract_first()

            screen_name = page.xpath('./td[4]/text()').extract_first()

            time = page.xpath('./td[5]/text()').extract_first()

            item = SunlineItem()

            item["title"] = title

            item["state"] = state

            item["screen_name"] = screen_name

            item["time"] = time

            # print(title,state,screen_name,time)

            #提交数据item给管道 将设置的robots 与UA设置好

            yield item

       # 抓取前100页数据储存在数据库

        if self.pages <= 100:

            #经观察,发现每一页乘30就是本页

            pg = self.pages*30

            self.pages += 1

            new_url = format(self.std_url%pg)

            #递归的解析数据调用parse方法  满足递归的两个条件1、终止条件:前100页,第二个条件:调用函数本身

            yield scrapy.Request(url=new_url,callback=self.parse)

    def close(self,spider):

        self.bro.quit()

        print("爬虫结束")
items.py
# -*- coding: utf-8 -*-

# Define here the models for your scraped items

#

# See documentation in:

# https://docs.scrapy.org/en/latest/topics/items.html

import scrapy

class SunlineItem(scrapy.Item):

    # define the fields for your item here like:

    title = scrapy.Field()

    state = scrapy.Field()

    screen_name = scrapy.Field()

    time = scrapy.Field()
pipelines.py
# -*- coding: utf-8 -*-

# Define your item pipelines here

#

# Don't forget to add your pipeline to the ITEM_PIPELINES setting

# See: https://docs.scrapy.org/en/latest/topics/item-pipeline.html

import pymysql

class SunlinePipeline(object):

    #管道里面有两个默认执行的方法

    def __init__(self):

        self.conn = None

        self.cursor = None

    def open_spider(self,spider):

        #建立连接

        self.conn = pymysql.Connect(host="127.0.0.1",port=3306,user='root',password='',db='test')

    def process_item(self, item, spider):

        # print(item)

        #先尝试打印结果看一下 将设置里的管道打开

        title = item["title"]

        state = item["state"]

        screen_name = item["screen_name"]

        time = item["time"]

        #执行sql语句

        sql = "insert into sun(title,state,screen_name,time) values('%s','%s','%s','%s');"%(title,state,screen_name,time)

        self.cursor = self.conn.cursor()

        try:

            #创建游标

            self.cursor.execute(sql)

            self.conn.commit()

        except Exception as e:

            print(e)

            #不提交事务

            self.conn.rollback()

        return item

    def close_spider(self,spider):

        self.cursor.close()

        self.conn.close()
middlewares.py
# -*- coding: utf-8 -*-

# Define here the models for your spider middleware

#

# See documentation in:

# https://docs.scrapy.org/en/latest/topics/spider-middleware.html

from scrapy import signals

from time import sleep

from scrapy.http import HtmlResponse

class SunlineDownloaderMiddleware(object):

    # Not all methods need to be defined. If a method is not defined,

    # scrapy acts as if the downloader middleware does not modify the

    # passed objects.

    def process_request(self, request, spider):

        # Called for each request that goes through the downloader

        # middleware.

        # Must either:

        # - return None: continue processing this request

        # - or return a Response object

        # - or return a Request object

        # - or raise IgnoreRequest: process_exception() methods of

        #   installed downloader middleware will be called

        return None

    def process_response(self, request, response, spider):

        # Called with the response returned from the downloader.

        # Must either;

        # - return a Response object

        # - return a Request object

        # - or raise IgnoreRequest

        #从浏览器中发起请求

        spider.bro.get(url=request.url)

        sleep(1)

        spider.bro.execute_script("window.scrollTo(0,document.body.scrollHeight)")

        page_text = spider.bro.page_source

        # 改动返回响应对象 参数url=spider.bro.current_url, body=page_text, encoding='utf-8', request=request

        new_response = HtmlResponse(url=request.url,body=page_text,encoding="utf-8",request=request)

        return new_response

    def process_exception(self, request, exception, spider):

        # Called when a download handler or a process_request()

        # (from other downloader middleware) raises an exception.

        # Must either:

        # - return None: continue processing this exception

        # - return a Response object: stops process_exception() chain

        # - return a Request object: stops process_exception() chain

        pass
settings.py
# -*- coding: utf-8 -*-

# Scrapy settings for Sunline project

#

# For simplicity, this file contains only settings considered important or

# commonly used. You can find more settings consulting the documentation:

#

#     https://docs.scrapy.org/en/latest/topics/settings.html

#     https://docs.scrapy.org/en/latest/topics/downloader-middleware.html

#     https://docs.scrapy.org/en/latest/topics/spider-middleware.html

BOT_NAME = 'Sunline'

SPIDER_MODULES = ['Sunline.spiders']

NEWSPIDER_MODULE = 'Sunline.spiders'

# Crawl responsibly by identifying yourself (and your website) on the user-agent

USER_AGENT = 'Mozilla/5.0 (Windows NT 10.0; WOW64) AppleWebKit/537.36 (KHTML, like Gecko) Chrome/75.0.3770.100 Safari/537.36'

#设置UA

# Obey robots.txt rules

ROBOTSTXT_OBEY = False

#关闭robots

LOG_LEVEL = "ERROR" #只打印错误信息

# Configure maximum concurrent requests performed by Scrapy (default: 16)

#CONCURRENT_REQUESTS = 32

# Configure a delay for requests for the same website (default: 0)

# See https://docs.scrapy.org/en/latest/topics/settings.html#download-delay

# See also autothrottle settings and docs

#DOWNLOAD_DELAY = 3

# The download delay setting will honor only one of:

#CONCURRENT_REQUESTS_PER_DOMAIN = 16

#CONCURRENT_REQUESTS_PER_IP = 16

# Disable cookies (enabled by default)

#COOKIES_ENABLED = False

# Disable Telnet Console (enabled by default)

#TELNETCONSOLE_ENABLED = False

# Override the default request headers:

#DEFAULT_REQUEST_HEADERS = {

#   'Accept': 'text/html,application/xhtml+xml,application/xml;q=0.9,*/*;q=0.8',

#   'Accept-Language': 'en',

#}

# Enable or disable spider middlewares

# See https://docs.scrapy.org/en/latest/topics/spider-middleware.html

#SPIDER_MIDDLEWARES = {

#    'Sunline.middlewares.SunlineSpiderMiddleware': 543,

#}

# Enable or disable downloader middlewares

# See https://docs.scrapy.org/en/latest/topics/downloader-middleware.html

DOWNLOADER_MIDDLEWARES = {

   'Sunline.middlewares.SunlineDownloaderMiddleware': 543,

}

#打开中间件 下载的

# Enable or disable extensions

# See https://docs.scrapy.org/en/latest/topics/extensions.html

#EXTENSIONS = {

#    'scrapy.extensions.telnet.TelnetConsole': None,

#}

# Configure item pipelines

# See https://docs.scrapy.org/en/latest/topics/item-pipeline.html

ITEM_PIPELINES = {

   'Sunline.pipelines.SunlinePipeline': 300,

}

#打开管道

# Enable and configure the AutoThrottle extension (disabled by default)

# See https://docs.scrapy.org/en/latest/topics/autothrottle.html

#AUTOTHROTTLE_ENABLED = True

# The initial download delay

#AUTOTHROTTLE_START_DELAY = 5

# The maximum download delay to be set in case of high latencies

#AUTOTHROTTLE_MAX_DELAY = 60

# The average number of requests Scrapy should be sending in parallel to

# each remote server

#AUTOTHROTTLE_TARGET_CONCURRENCY = 1.0

# Enable showing throttling stats for every response received:

#AUTOTHROTTLE_DEBUG = False

# Enable and configure HTTP caching (disabled by default)

# See https://docs.scrapy.org/en/latest/topics/downloader-middleware.html#httpcache-middleware-settings

#HTTPCACHE_ENABLED = True

#HTTPCACHE_EXPIRATION_SECS = 0

#HTTPCACHE_DIR = 'httpcache'

#HTTPCACHE_IGNORE_HTTP_CODES = []

#HTTPCACHE_STORAGE = 'scrapy.extensions.httpcache.FilesystemCacheStorage'
settings.py
结果用navicat所示:
二、scrapy核心组件工作流程
- 引擎(Scrapy)
用来处理整个系统的数据流处理, 触发事务(框架核心) - 调度器(Scheduler)
用来接受引擎发过来的请求, 压入队列中, 并在引擎再次请求的时候返回. 可以想像成一个URL(抓取网页的网址或者说是链接)的优先队列, 由它来决定下一个要抓取的网址是什么, 同时去除重复的网址(队列和过滤器的作用) - 下载器(Downloader)
用于下载网页内容, 并将网页内容返回给爬虫(Scrapy下载器是建立在twisted这个高效的异步模型上的) - 爬虫(Spiders)
爬虫是主要干活的, 用于从特定的网页中提取自己需要的信息, 即所谓的实体(Item)。用户也可以从中提取出链接,让Scrapy继续抓取下一个页面 - 项目管道(Pipeline)
负责处理爬虫从网页中抽取的实体,主要的功能是持久化实体、验证实体的有效性、清除不需要的信息。当页面被爬虫解析后,将被发送到项目管道,并经过几个特定的次序处理数据。
三、scrapy的post请求发送(一般不会用scrapy采取参数请求发送了解就可以啦)
在之前代码中,我们从来没有手动的对start_urls列表中存储的起始url进行过请求的发送,但是起始url的确是进行了请求的发送,那这是如何实现的呢?
其实是因为爬虫文件中的爬虫类继承到了Spider父类中的start_requests(self)这个方法,该方法就可以对start_urls列表中的url发起请求:
  def start_requests(self):

        for u in self.start_urls:

           yield scrapy.Request(url=u,callback=self.parse)
【注意】该方法默认的实现,是对起始的url发起get请求,如果想发起post请求,则需要子类重写该方法。
方法: 重写start_requests方法,让其发起post请求:
def start_requests(self):

        #请求的url

        post_url = 'http://fanyi.baidu.com/sug'

        # post请求参数

        formdata = {

            'kw': 'wolf',

        }

        # 发送post请求

        yield scrapy.FormRequest(url=post_url, formdata=formdata, callback=self.parse)
四、日志等级:
在使用scrapy crawl spiderFileName运行程序时,在终端里打印输出的就是scrapy的日志信息。
日志信息的种类:
        ERROR : 一般错误

        WARNING : 警告

        INFO : 一般的信息

        DEBUG : 调试信息
设置日志信息指定输出:
在settings.py配置文件中,加入
                 LOG_LEVEL = ‘指定日志信息种类’即可。

                    LOG_FILE = 'log.txt'则表示将日志信息写入到指定文件中进行存储。
五、请求传参(meta={“item”:item})
在某些情况下,我们爬取的数据不在同一个页面中,例如,我们爬取一个网易新闻网站,新闻的标题在第一页,新闻的详情页面在第二页。这时我们就需要用到请求传参。
案例展示:爬取https://news.163.com/新闻网,将一级页面中的新闻标题,第二页的新闻详情页进行爬取。
爬虫文件(spiders/wangyi.py):
# -*- coding: utf-8 -*-

import scrapy

from Wangyixinwen.items import WangyixinwenItem

from selenium import webdriver

class WangyiSpider(scrapy.Spider):

    name = 'wangyi'

    # allowed_domains = ['www.xxx.com']

    #自动发送请求的 去设置里将user-agent以及robots协议设置好

    start_urls = ['https://news.163.com/']

    """"

    我们的第一次请求对象就是start_urls开始,我们还需要对UA伪装同时还有IP代理等,可以在下载中间件的process_request中设置UA伪装

    process_exception中设置代理ip(等到自己ip出问题了就用代理ip)。等到响应对象缺失就可以在process_response中拦截。

    """

    bro = webdriver.Chrome("./chromedriver.exe")

    urls = []

    def parse(self, response):

        #从响应对象中获取到全部目标

        target_list = response.xpath('//*[@id="js_festival_wrap"]/div[3]/div[2]/div[2]/div[2]/div/ul/li')

        #遍历目标得到具体的url

        for index in [3,6,7,8]:

            target = target_list[index]

            #得到目标的url 并且取出url

            target_url = target.xpath('./a/@href').extract_first()

            self.urls.append(target_url)

            #对目标url发起请求

            yield scrapy.Request(url=target_url,callback=self.parse_target)

    def parse_target(self,response):

        #将第二次请求的响应对象开始解析,分析由于还未编写代码就知道这次是含有动态加载数据,因此这次

        #分析可以用到selenium一起解析数据,下面解析出新闻标题以及具体的详情页的url(响应的数据缺失,因此我们需要去下载中间件设置)

        detail_list = response.xpath('/html/body/div[1]/div[3]/div[4]/div[1]/div/div/ul/li/div/div')

        for detail in detail_list:

            title = detail.xpath('./div/div[1]/h3/a/text()').extract_first()

            detail_url = detail.xpath('./div/div[1]/h3/a/@href').extract_first()

            #实例化item对象,封装数据

            item = WangyixinwenItem()

            item["title"] = title

            yield scrapy.Request(url=detail_url,callback=self.parse_detail,meta={"item":item})

    def parse_detail(self,response):

        item = response.meta['item']

        content = response.xpath('//*[@id="endText"]/p/text()').extract()

        #将内容转换为字符串对象

        content = "".join(content)

        item["content"] = content

        #提交数据

        yield item

    def close(self,spider):

        # 爬虫结束,浏览器也关闭

        print("爬虫结束!!!")

        self.bro.quit()
spiders/wangyi.py
# -*- coding: utf-8 -*-

# Define here the models for your scraped items

#

# See documentation in:

# https://docs.scrapy.org/en/latest/topics/items.html

import scrapy

class WangyixinwenItem(scrapy.Item):

    # define the fields for your item here like:

    title = scrapy.Field()

    content = scrapy.Field()
items.py
# -*- coding: utf-8 -*-

# Define here the models for your spider middleware

#

# See documentation in:

# https://docs.scrapy.org/en/latest/topics/spider-middleware.html

from scrapy import signals

from scrapy.http import HtmlResponse

import random

from time import sleep

class WangyixinwenDownloaderMiddleware(object):

    # Not all methods need to be defined. If a method is not defined,

    # scrapy acts as if the downloader middleware does not modify the

    # passed objects.

    user_agent_list = [

        "Mozilla/5.0 (Windows NT 6.1; WOW64) AppleWebKit/537.1 "

        "(KHTML, like Gecko) Chrome/22.0.1207.1 Safari/537.1",

        "Mozilla/5.0 (X11; CrOS i686 2268.111.0) AppleWebKit/536.11 "

        "(KHTML, like Gecko) Chrome/20.0.1132.57 Safari/536.11",

        "Mozilla/5.0 (Windows NT 6.1; WOW64) AppleWebKit/536.6 "

        "(KHTML, like Gecko) Chrome/20.0.1092.0 Safari/536.6",

        "Mozilla/5.0 (Windows NT 6.2) AppleWebKit/536.6 "

        "(KHTML, like Gecko) Chrome/20.0.1090.0 Safari/536.6",

        "Mozilla/5.0 (Windows NT 6.2; WOW64) AppleWebKit/537.1 "

        "(KHTML, like Gecko) Chrome/19.77.34.5 Safari/537.1",

        "Mozilla/5.0 (X11; Linux x86_64) AppleWebKit/536.5 "

        "(KHTML, like Gecko) Chrome/19.0.1084.9 Safari/536.5",

        "Mozilla/5.0 (Windows NT 6.0) AppleWebKit/536.5 "

        "(KHTML, like Gecko) Chrome/19.0.1084.36 Safari/536.5",

        "Mozilla/5.0 (Windows NT 6.1; WOW64) AppleWebKit/536.3 "

        "(KHTML, like Gecko) Chrome/19.0.1063.0 Safari/536.3",

        "Mozilla/5.0 (Windows NT 5.1) AppleWebKit/536.3 "

        "(KHTML, like Gecko) Chrome/19.0.1063.0 Safari/536.3",

        "Mozilla/5.0 (Macintosh; Intel Mac OS X 10_8_0) AppleWebKit/536.3 "

        "(KHTML, like Gecko) Chrome/19.0.1063.0 Safari/536.3",

        "Mozilla/5.0 (Windows NT 6.2) AppleWebKit/536.3 "

        "(KHTML, like Gecko) Chrome/19.0.1062.0 Safari/536.3",

        "Mozilla/5.0 (Windows NT 6.1; WOW64) AppleWebKit/536.3 "

        "(KHTML, like Gecko) Chrome/19.0.1062.0 Safari/536.3",

        "Mozilla/5.0 (Windows NT 6.2) AppleWebKit/536.3 "

        "(KHTML, like Gecko) Chrome/19.0.1061.1 Safari/536.3",

        "Mozilla/5.0 (Windows NT 6.1; WOW64) AppleWebKit/536.3 "

        "(KHTML, like Gecko) Chrome/19.0.1061.1 Safari/536.3",

        "Mozilla/5.0 (Windows NT 6.1) AppleWebKit/536.3 "

        "(KHTML, like Gecko) Chrome/19.0.1061.1 Safari/536.3",

        "Mozilla/5.0 (Windows NT 6.2) AppleWebKit/536.3 "

        "(KHTML, like Gecko) Chrome/19.0.1061.0 Safari/536.3",

        "Mozilla/5.0 (X11; Linux x86_64) AppleWebKit/535.24 "

        "(KHTML, like Gecko) Chrome/19.0.1055.1 Safari/535.24",

        "Mozilla/5.0 (Windows NT 6.2; WOW64) AppleWebKit/535.24 "

        "(KHTML, like Gecko) Chrome/19.0.1055.1 Safari/535.24"

    ]

    # 代理池

    PROXY_http = [

        '153.180.102.104:80',

        '195.208.131.189:56055',

    ]

    PROXY_https = [

        '120.83.49.90:9000',

        '95.189.112.214:35508',

    ]

    def process_request(self, request, spider):

        """

        在这里可以设置UA,如果要设置IP就需要等自己IP出现问题再前去process_exception中设置代理IP

        但最后一定要返回request对象

        :param request:

        :param spider:

        :return:

        """

        # ua = random.choice(self.user_agent_list)#随机选择一个元素(反爬策略(即不同浏览器和机型))出来

        # request.headers["User-Agent"] = ua

        #return request#将修正的request对象重新进行发送

        return None

    def process_response(self, request, response, spider):

        #刚才响应体缺失,因此从这里我们应该重新返回新的响应体

        #这里要用到爬虫程序中的urls,判断url是否在里面,在urls里面的就会出现响应缺失,

        # 、因此需要返回新的响应体

        if request.url in spider.urls:

            #响应缺失是因为是动态加载数据,因此我们配合selenium使用

            #在这里实例化selenium的话会被实例化多次,然而selenium只需要实例化一次,

            #这个时候我们可以将selenium放在实例化一次的爬虫程序开始的时候,实例化完成引入

            sleep(2)

            bro = spider.bro.get(url=request.url)#浏览器中发送请求

            sleep(1)

            spider.bro.execute_script("window.scrollTo(0,document.body.scrollHeight)")

            sleep(1.5)

            spider.bro.execute_script("window.scrollTo(0,document.body.scrollHeight)")

            sleep(0.7)

            spider.bro.execute_script("window.scrollTo(0,document.body.scrollHeight)")

            sleep(1)

            spider.bro.execute_script("window.scrollTo(0,document.body.scrollHeight)")

            #发送到请求我们需要获取浏览器当前页面的源码数据 获取数据之前需要翻滚页面

            page_text = spider.bro.page_source

            #改动返回响应对象  scrapy提供了一个库url=spider.bro.current_url, body=page_text, encoding='utf-8', request=request

            new_response = HtmlResponse(url=request.url,body=page_text,encoding="utf-8",request=request)

            return new_response

        else:

            return response

        #提交完新的响应体之后,去设置将下载中间件打开

    def process_exception(self, request, exception, spider):

        # Called when a download handler or a process_request()

        # (from other downloader middleware) raises an exception.

        # Must either:

        # - return None: continue processing this exception

        # - return a Response object: stops process_exception() chain

        # - return a Request object: stops process_exception() chain

        #如果抛出异常,那么就换代理IP

        # 代理ip的设定

        # if request.url.split(':')[0] == 'http':

        #     request.meta['proxy'] = random.choice(self.PROXY_http)

        # else:

        #     request.meta['proxy'] = random.choice(self.PROXY_https)

        # # 将修正后的请求对象重新进行请求发送

        # return request

        pass
middlewares.py
# -*- coding: utf-8 -*-

# Scrapy settings for Wangyixinwen project

#

# For simplicity, this file contains only settings considered important or

# commonly used. You can find more settings consulting the documentation:

#

#     https://docs.scrapy.org/en/latest/topics/settings.html

#     https://docs.scrapy.org/en/latest/topics/downloader-middleware.html

#     https://docs.scrapy.org/en/latest/topics/spider-middleware.html

BOT_NAME = 'Wangyixinwen'

SPIDER_MODULES = ['Wangyixinwen.spiders']

NEWSPIDER_MODULE = 'Wangyixinwen.spiders'

# Crawl responsibly by identifying yourself (and your website) on the user-agent

USER_AGENT = 'Mozilla/5.0 (Windows NT 10.0; WOW64) AppleWebKit/537.36 (KHTML, like Gecko) Chrome/75.0.3770.100 Safari/537.36'

# Obey robots.txt rules

ROBOTSTXT_OBEY = False

LOG_LEVEL = "ERROR"#只打印错误日志

# Configure maximum concurrent requests performed by Scrapy (default: 16)

#CONCURRENT_REQUESTS = 32

# Configure a delay for requests for the same website (default: 0)

# See https://docs.scrapy.org/en/latest/topics/settings.html#download-delay

# See also autothrottle settings and docs

#DOWNLOAD_DELAY = 3

# The download delay setting will honor only one of:

#CONCURRENT_REQUESTS_PER_DOMAIN = 16

#CONCURRENT_REQUESTS_PER_IP = 16

# Disable cookies (enabled by default)

#COOKIES_ENABLED = False

# Disable Telnet Console (enabled by default)

#TELNETCONSOLE_ENABLED = False

# Override the default request headers:

#DEFAULT_REQUEST_HEADERS = {

#   'Accept': 'text/html,application/xhtml+xml,application/xml;q=0.9,*/*;q=0.8',

#   'Accept-Language': 'en',

#}

# Enable or disable spider middlewares

# See https://docs.scrapy.org/en/latest/topics/spider-middleware.html

#SPIDER_MIDDLEWARES = {

#    'Wangyixinwen.middlewares.WangyixinwenSpiderMiddleware': 543,

#}

# Enable or disable downloader middlewares

# See https://docs.scrapy.org/en/latest/topics/downloader-middleware.html

DOWNLOADER_MIDDLEWARES = {

   'Wangyixinwen.middlewares.WangyixinwenDownloaderMiddleware': 543,

}

# Enable or disable extensions

# See https://docs.scrapy.org/en/latest/topics/extensions.html

#EXTENSIONS = {

#    'scrapy.extensions.telnet.TelnetConsole': None,

#}

# Configure item pipelines

# See https://docs.scrapy.org/en/latest/topics/item-pipeline.html

ITEM_PIPELINES = {

   'Wangyixinwen.pipelines.WangyixinwenPipeline': 300,

}

# Enable and configure the AutoThrottle extension (disabled by default)

# See https://docs.scrapy.org/en/latest/topics/autothrottle.html

#AUTOTHROTTLE_ENABLED = True

# The initial download delay

#AUTOTHROTTLE_START_DELAY = 5

# The maximum download delay to be set in case of high latencies

#AUTOTHROTTLE_MAX_DELAY = 60

# The average number of requests Scrapy should be sending in parallel to

# each remote server

#AUTOTHROTTLE_TARGET_CONCURRENCY = 1.0

# Enable showing throttling stats for every response received:

#AUTOTHROTTLE_DEBUG = False

# Enable and configure HTTP caching (disabled by default)

# See https://docs.scrapy.org/en/latest/topics/downloader-middleware.html#httpcache-middleware-settings

#HTTPCACHE_ENABLED = True

#HTTPCACHE_EXPIRATION_SECS = 0

#HTTPCACHE_DIR = 'httpcache'

#HTTPCACHE_IGNORE_HTTP_CODES = []

#HTTPCACHE_STORAGE = 'scrapy.extensions.httpcache.FilesystemCacheStorage'
settings.py
管道储存文件没有设置,根据具体需求设置不同储存方式。
六、如何提高scrapy的爬取效率
增加并发:

    默认scrapy开启的并发线程为32个,可以适当进行增加。在settings配置文件中修改CONCURRENT_REQUESTS = 100值为100,并发设置成了为100。

降低日志级别:

    在运行scrapy时,会有大量日志信息的输出,为了减少CPU的使用率。可以设置log输出信息为INFO或者ERROR即可。在配置文件中编写:LOG_LEVEL = ‘INFO’


禁止cookie:

    如果不是真的需要cookie,则在scrapy爬取数据时可以进制cookie从而减少CPU的使用率,提升爬取效率。在配置文件中编写:COOKIES_ENABLED = False

禁止重试:

    对失败的HTTP进行重新请求(重试)会减慢爬取速度,因此可以禁止重试。在配置文件中编写:RETRY_ENABLED = False


减少下载超时:

    如果对一个非常慢的链接进行爬取,减少下载超时可以能让卡住的链接快速被放弃,从而提升效率。在配置文件中进行编写:DOWNLOAD_TIMEOUT = 10 超时时间为10s
备注:了解五大组件流程
11-scrapy(递归解析,post请求,日志等级,请求传参)的更多相关文章
- vue.js学习之 跨域请求代理与axios传参
vue.js学习之 跨域请求代理与axios传参 一:跨域请求代理 1:打开config/index.js module.exports{ dev: { } } 在这里面找到proxyTable{}, ...
- 使用Fiddler工具发送post请求(带有json数据)以及get请求(Header方式传参)
Fiddler工具是一个http协议调试代理工具,它可以帮助程序员测试或调试程序,辅助web开发. Fiddler工具可以发送向服务端发送特定的HTTP请求以及接受服务器回应的请求和数据,是web调试 ...
- scrapy递归解析和post请求
递归解析 递归爬取解析多页页面数据 每一个页面对应一个url,则scrapy工程需要对每一个页码对应的url依次发起请求,然后通过对应的解析方法进行作者和段子内容的解析. 实现方案: 1.将每一个页码 ...
- JS——变量和函数的预解析、匿名函数、函数传参、return
JS解析过程分为两个阶段:编译阶段.执行阶段.在编译阶段会将函数function的声明和定义都提前,而将变量var的声明提前,并将var定义的变量赋值为undefined. 匿名函数: window. ...
- jmeter处理http请求Content-Type类型和传参方式
引言 我们在做接口测试的时候经常会忽略数据类型content-type的格式,以及参数Parameters和Body Data的区别和用途. 对于初次接触接口的同学来说,自己在发送一个http请求时, ...
- SpringMVC——接收请求参数和页面传参
Spring接收请求参数: 1.使用HttpServletRequest获取 @RequestMapping("/login.do") public String login(Ht ...
- SpringMVC之接收请求参数和页面传参
1.Spring接收请求参数 1>.使用HttpServletRequest获取 @RequestMapping("/login.do") public String log ...
- .NET CORE API 使用Postman中Post请求获取不到传参问题
开发中遇到个坑 记录下. 使用Postman请求core api 接口时,按之前的使用方法(form-data , x-www-form-urlencoded)怎么设置都无法访问. 最后采用raw写入 ...
- SpringMVC接收请求参数和页面传参
接收请求参数: 1,使用HttpServletRequest获取 @RequestMapping("/login.do") public String login(HttpServ ...
随机推荐
- python 基础学习笔记(6)--函数(1)
## **函数(1)** **函数的定义:** 1. [ ] 小时候大家应该都玩过乐高积木,只要通过想象和创意,可以用它怕拼凑出很多神奇的东西.随着学习的深入,编写的代码日益增加并且越来越复杂,所以需 ...
- Python的map方法的应用
Map方法,第一个参数要写一个匿名函数表达式,或者是一个函数引用,第二个第三个往后都是表达式用到的参数,参数一般是可迭代的 1.比如下面这个map方法,两个参数,第一个 lambda x: x*x是匿 ...
- HTTP 请求夹带(smuggling)攻击
什么是HTTP请求夹带(smuggling)攻击 HTTP请求走私是一种干扰网站处理从一个或多个用户接收的HTTP请求序列的方式的技术. 请求夹带漏洞危害,允许攻击者绕过安全控制,获取对敏感数据的未授 ...
- 菜鸟刷面试题(三、Redis篇)
目录: redis是什么?都有哪些使用场景? redis有哪些功能? redis和memecache有什么区别? redis为什么是单线程的? 什么是缓存穿透?怎么解决? redis支持的数据类型有哪 ...
- <挑战程序设计竞赛> poj 3320 Jessica's Reading Problem 双指针
地址 http://poj.org/problem?id=3320 解答 使用双指针 在指针范围内是否达到要求 若不足要求则从右进行拓展 若满足要求则从左缩减区域 代码如下 正确性调整了几次 然后 ...
- Python三级菜单作业实现
数据结构: menu = { '北京':{ '海淀':{ '五道口':{ 'soho':{}, '网易':{}, 'google':{} }, '中关村':{ '爱奇艺':{}, '汽车之家':{}, ...
- 死磕 java线程系列之线程的生命周期
(手机横屏看源码更方便) 注:java源码分析部分如无特殊说明均基于 java8 版本. 简介 大家都知道线程是有生命周期,但是彤哥可以认真负责地告诉你网上几乎没有一篇文章讲得是完全正确的. 常见的错 ...
- 在Asp.Net Core中配置使用MarkDown富文本编辑器实现图片上传和截图上传(开源代码.net core3.0)
我们的富文本编辑器不能没有图片上传尤其是截图上传,下面我来教大家怎么实现MarkDown富文本编辑器截图上传和图片上传. 1.配置编辑器到html页 <div id="test-edi ...
- scrapy在pycharm配置启动(无需命令行启动)
一.新建文件 run.py这个名字随意哈 方法一. from scrapy.cmdline import execute execute(['scrapy','crawl','爬虫程序名字','-a' ...
- Scss换肤
项目中虽然没有一键换肤的要求,但是产品要求后期能换主题.在开发组件中涉及到主题的地方,要提取一些公用的变量,不要直接写死样式值.但是如果只是定义一些变量的话,只是完成控制颜色等值的提取.后期切换的话需 ...