
点云3D 目标检测
点云
点云是雷达采集到的信息.
关于点云基本介绍参考https://zhuanlan.zhihu.com/p/22581673
ros中的点云消息结构:http://docs.ros.org/jade/api/sensor_msgs/html/msg/PointCloud2.html
# This message holds a collection of N-dimensional points, which may

# contain additional information such as normals, intensity, etc. The

# point data is stored as a binary blob, its layout described by the

# contents of the "fields" array.

# The point cloud data may be organized 2d (image-like) or 1d

# (unordered). Point clouds organized as 2d images may be produced by

# camera depth sensors such as stereo or time-of-flight.

# Time of sensor data acquisition, and the coordinate frame ID (for 3d

# points).

Header header

# 2D structure of the point cloud. If the cloud is unordered, height is

# 1 and width is the length of the point cloud.

uint32 height

uint32 width

# Describes the channels and their layout in the binary data blob.

PointField[] fields

bool    is_bigendian # Is this data bigendian?

uint32  point_step   # Length of a point in bytes

uint32  row_step     # Length of a row in bytes

uint8[] data         # Actual point data, size is (row_step*height)

bool is_dense        # True if there are no invalid points
PointField结构:http://docs.ros.org/melodic/api/sensor_msgs/html/msg/PointField.html
# This message holds the description of one point entry in the

# PointCloud2 message format.

uint8 INT8    = 1

uint8 UINT8   = 2

uint8 INT16   = 3

uint8 UINT16  = 4

uint8 INT32   = 5

uint8 UINT32  = 6

uint8 FLOAT32 = 7

uint8 FLOAT64 = 8

string name      # Name of field

uint32 offset    # Offset from start of point struct

uint8  datatype  # Datatype enumeration, see above

uint32 count     # How many elements in the field
点云消息数据存储在PointCloud2.data中.
示例:
header:  // 点云的头信息

  seq: 963 //

  stamp:  // 时间戳

    secs: 1541143772

    nsecs: 912011000

  frame_id: "/camera_init"

height: 1   // If the cloud is unordered, height is 1  如果cloud 是无序的 height 是 1

width: 852578  //点云的长度

fields:  //  sensor_msgs/PointField[] fields

  -

    name: "x"

    offset: 0

    datatype: 7 	// 	uint8 INT8    = 1

			//	uint8 UINT8   = 2

			//	uint8 INT16   = 3

			//	uint8 UINT16  = 4

			//	uint8 INT32   = 5

			//	uint8 UINT32  = 6

			//	uint8 FLOAT32 = 7

			//	uint8 FLOAT64 = 8

    count: 1

  -

    name: "y"

    offset: 4

    datatype: 7

    count: 1

  -

    name: "z"

    offset: 8

    datatype: 7

    count: 1

  -

    name: "intensity"

    offset: 16

    datatype: 7

    count: 1

is_bigendian: False

point_step: 32 // Length of a point in bytes 一个点占的字节数

row_step: 27282496 // Length of a row in bytes 一行的长度占用的字节数

data: [ .......................................................... ] //  Actual point data, size is (row_step*height)

is_dense: True // 没有非法数据点
datatype=7对应的类型为PointField.FLOAT32,size为4.x/y/z的偏移都是正常的.为什么intensity的offset变成了16而不是12呢?ros在包装PointCloud2的时候可能在PointField之间添加了一些额外信息,这点我们在处理的时候要注意一下.同理还有Point与Point之间也可能有额外的信息.
点云rosbag转numpy
参考https://gist.github.com/bigsnarfdude/eeb156dc7b4caca69f5b31037da54708
我们想将PointCloud2格式的msg转换为numpy的矩阵格式.即转换成m行n列,每一列即为x,y,z,intensity...
首先我们希望对msg.data做反序列化处理,即
def msg_to_arr(msg):

    arr = np.fromstring(msg.data, dtype_list)
现在问题变成了如何从点云的datatype转到numpy的datatype
DUMMY_FIELD_PREFIX = '__'

# mappings between PointField types and numpy types

type_mappings = [(PointField.INT8, np.dtype('int8')), (PointField.UINT8, np.dtype('uint8')), (PointField.INT16, np.dtype('int16')),

                 (PointField.UINT16, np.dtype('uint16')), (PointField.INT32, np.dtype('int32')), (PointField.UINT32, np.dtype('uint32')),

                 (PointField.FLOAT32, np.dtype('float32')), (PointField.FLOAT64, np.dtype('float64'))]

pftype_to_nptype = dict(type_mappings)

nptype_to_pftype = dict((nptype, pftype) for pftype, nptype in type_mappings)

# sizes (in bytes) of PointField types

pftype_sizes = {PointField.INT8: 1, PointField.UINT8: 1, PointField.INT16: 2, PointField.UINT16: 2,

                PointField.INT32: 4, PointField.UINT32: 4, PointField.FLOAT32: 4, PointField.FLOAT64: 8}

def fields_to_dtype(fields, point_step):

    '''

    Convert a list of PointFields to a numpy record datatype.

    '''

    offset = 0

    np_dtype_list = []

    for f in fields:

        while offset < f.offset:

            # might be extra padding between fields

            np_dtype_list.append(('%s%d' % (DUMMY_FIELD_PREFIX, offset), np.uint8))

            offset += 1

        dtype = pftype_to_nptype[f.datatype]

        if f.count != 1:

            dtype = np.dtype((dtype, f.count))

        np_dtype_list.append((f.name, dtype))

        offset += pftype_sizes[f.datatype] * f.count

    # might be extra padding between points

    while offset < point_step:

        np_dtype_list.append(('%s%d' % (DUMMY_FIELD_PREFIX, offset), np.uint8))

        offset += 1

    return np_dtype_list
代码逻辑很清楚,pftype_to_nptype和nptype_to_pftype定义了点云消息中数据结构和numpy中数据结构的映射关系.
唯一需要注意的就是前面提到过的ros在包装PointCloud2的时候可能在PointField之间添加了一些额外信息,这点我们在处理的时候要注意一下.同理还有Point与Point之间也可能有额外的信息. 代码里的
        while offset < f.offset:

            # might be extra padding between fields

            np_dtype_list.append(('%s%d' % (DUMMY_FIELD_PREFIX, offset), np.uint8))

            offset += 1

    # might be extra padding between points

    while offset < point_step:

        np_dtype_list.append(('%s%d' % (DUMMY_FIELD_PREFIX, offset), np.uint8))

        offset += 1
就是为了处理上述问题.
复现点云检测模型SqueezeSeg检测点云数据
https://blog.csdn.net/AdamShan/article/details/83544089
原文用的py2.7,复现的时候遇到了很多问题
- conda activate env2.7
- pip install tensorflow
- pip install easydict
- pip install joblib
直接运行squeezeseg_ros_node.py的时候会报如下错误.

错误代码的意思是出错于读launch文件.
npy_path = rospy.get_param('npy_path')
这一句会读launch文件中的配置.
在执行了roslaunch squeezeseg_ros squeeze_seg_ros.launch之后,会报错
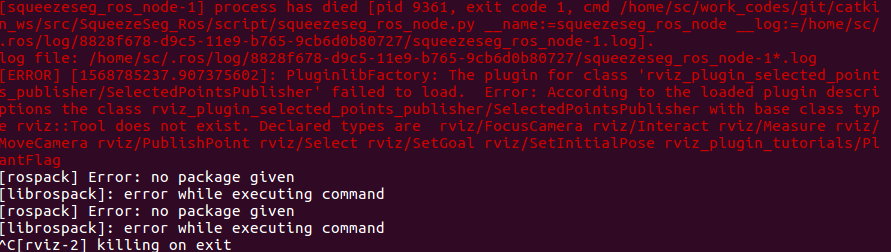
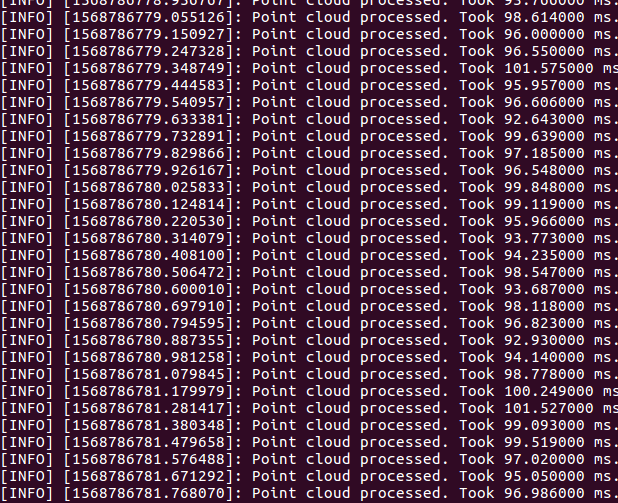
这之后再执行python squeezeseg_ros_node.py就可以正常运行了.
点云3D 目标检测的更多相关文章
- ICCV2019论文点评:3D Object Detect疏密度点云三维目标检测
ICCV2019论文点评:3D Object Detect疏密度点云三维目标检测 STD: Sparse-to-Dense 3D Object Detector for Point Cloud 论文链 ...
- CVPR2020|3D-VID:基于LiDar Video信息的3D目标检测框架
作者:蒋天园 Date:2020-04-18 来源:3D-VID:基于LiDar Video信息的3D目标检测框架|CVPR2020 Brief paper地址:https://arxiv.org/p ...
- CVPR2019:无人驾驶3D目标检测论文点评
CVPR2019:无人驾驶3D目标检测论文点评 重读CVPR2019的文章,现在对以下文章进行点评. Stereo R-CNN based 3D Object Detection for Autono ...
- CVPR2020论文介绍: 3D 目标检测高效算法
CVPR2020论文介绍: 3D 目标检测高效算法 CVPR 2020: Structure Aware Single-Stage 3D Object Detection from Point Clo ...
- 3D目标检测(CVPR2020:Lidar)
3D目标检测(CVPR2020:Lidar) LiDAR-Based Online 3D Video Object Detection With Graph-Based Message Passing ...
- 点云3d检测模型pointpillar
PointPillars 一个来自工业界的模型.https://arxiv.org/abs/1812.05784 3D目标检测通常做法 3d卷积 投影到前平面 在bird-view上操作 处理思路依然 ...
- 三维目标检测论文阅读:Deep Continuous Fusion for Multi-Sensor 3D Object Detection
题目:Deep Continuous Fusion for Multi-Sensor 3D Object Detection 来自:Uber: Ming Liang Note: 没有代码,主要看思想吧 ...
- CVPR2020:利用图像投票增强点云中的三维目标检测(ImVoteNet)
CVPR2020:利用图像投票增强点云中的三维目标检测(ImVoteNet) ImVoteNet: Boosting 3D Object Detection in Point Clouds With ...
- Faster R-CNN:详解目标检测的实现过程
本文详细解释了 Faster R-CNN 的网络架构和工作流,一步步带领读者理解目标检测的工作原理,作者本人也提供了 Luminoth 实现,供大家参考. Luminoth 实现:https:// ...
随机推荐
- nginx基础(1)
目录 一.概念 基础概念 响应码 请求和响应报文的格式 http无连接 我叫张贺,贪财好色.一名合格的LINUX运维工程师,专注于LINUX的学习和研究,曾负责某中型企业的网站运维工作,爱好佛学和跑步 ...
- 关于eclipse创建的[传统web项目][传统maven项目][maven-web项目][springboot项目]目录结构
总体比较 [传统web项目] [传统maven项目] [maven-web项目] [springboot项目] 本文摘至https://blog.csdn.net/qq_42747738/articl ...
- selenium-server-standalone下载网站
http://selenium-release.storage.googleapis.com/index.html
- 【洛谷5794】[THUSC2015] 解密运算(模拟)
点此看题面 大致题意: 对于一个字符串,我们在其末尾添加一个'.',将字符串视作一个环,则可以从\(n+1\)个位置断开得到\(n+1\)个新串.现将这\(n+1\)个新串按字典序排序('.'的字典序 ...
- PyCharm 2019 2.3 软件安装教程(1.补丁破解2.破解码)
一:补丁破解 PyCharm 2019 2.3 下载地址 https://pan.baidu.com/s/1HaWFcbO-x4vZuT6mVC0AGA 提取码:elu7 更多破解教程微信公众号关注“ ...
- 从壹开始[做贡献]之二 || 推荐VSCode多语言开发,支持一键JAVA
缘起 哈喽大家周一好!好久不见鸭,最近在看一本书,很好,<人类简史>,适合夏日星空,仰观宇宙之大
- 2019年全国高校计算机能力挑战赛初赛C语言解答
http://www.ncccu.org.cn 2019年全国高校计算机能力挑战赛分设大数据算法赛,人工智能算法赛,Office高级应用赛,程序设计赛4大赛项 C语言初赛解答 1:编程1 16.现有一 ...
- 软件文档写作-plantuml画用例图和时序图
背景 当下的软件开发人员,不可避免的需要输出一些软件设计文档,作为一个软件工程专业毕业的工程师,最常用的设计工具就是UML,使用UML工具绘制一些软件相关的图,是必备技能,也是输出的技术文档中的重要组 ...
- 传统jdbc存在的问题总结
1.数据库连接创建.释放频繁造成系统资源浪费,影响系统性能,可使用数据库连接池解决此问题. 2.sql语句中在代码中硬编码,代码不易维护,sql变动需要改变java代码. 3.使用preparedSt ...
- 用IIS进行部署,发布网页,运行DEMO
因项目需要,正在学习如何部署IIS服务,并发布网站,发布以后,运行网页,具体步骤如下: 一.IIS的部署 在进行部署前,需要将一些必要的配置选好,如图: 打开选项,进行设置,将箭头部分进行勾选 在wi ...