PaddleOCR-EAST
EAST
写在前面:基于PaddleOCR代码库对其中所涉及到的算法进行代码简读,如果有必要可能会先研读一下原论文。
Abstract
- 论文链接:arxiv
- 应用场景:文本检测
- 代码配置文件:configs/det/det_r50_vd_east.yml
Train
PreProcess
class EASTProcessTrain(object):

    def __init__(self,

                 image_shape=[512, 512],

                 background_ratio=0.125,

                 min_crop_side_ratio=0.1,

                 min_text_size=10,

                 **kwargs):

        self.input_size = image_shape[1]

        self.random_scale = np.array([0.5, 1, 2.0, 3.0])

        self.background_ratio = background_ratio

        self.min_crop_side_ratio = min_crop_side_ratio

        self.min_text_size = min_text_size

   	...

    def __call__(self, data):

        im = data['image']

        text_polys = data['polys']

        text_tags = data['ignore_tags']

        if im is None:

            return None

        if text_polys.shape[0] == 0:

            return None

        #add rotate cases

        if np.random.rand() < 0.5:

            # 旋转图片和文本框(90,180,270)

            im, text_polys = self.rotate_im_poly(im, text_polys)

        h, w, _ = im.shape

        # 限制文本框坐标到有效范围内、检查文本框的有效性(基于文本框的面积)、以及点的顺序是否是顺时针

        text_polys, text_tags = self.check_and_validate_polys(text_polys,

                                                              text_tags, h, w)

        if text_polys.shape[0] == 0:

            return None

        # 随机缩放图片以及文本框

        rd_scale = np.random.choice(self.random_scale)

        im = cv2.resize(im, dsize=None, fx=rd_scale, fy=rd_scale)

        text_polys *= rd_scale

        if np.random.rand() < self.background_ratio:

            # 只切纯背景图,如果有文本框会返回None

            outs = self.crop_background_infor(im, text_polys, text_tags)

        else:

            """

            随机切图并以及crop图所包含的文本框,并基于缩小的文本框生成了label map:

                - label_map: shape=[h,w],得分图,有文本的地方是1,其余地方为0

                - geo_map: shape=[h,w,9]。前8个通道为缩小文本框内的像素到真实文本框的水平以及垂直距离,

                           最后一个通道用来做loss归一化,其值为每个框最短边长的倒数

                - training_mask: shape=[h,w],使无效文本框不参与训练,有效的地方为1,无效的地方为0

            """

            outs = self.crop_foreground_infor(im, text_polys, text_tags)

        if outs is None:

            return None

        im, score_map, geo_map, training_mask = outs

        # 产生最终降采样的score map,shape=[1,h//4,w//4]

        score_map = score_map[np.newaxis, ::4, ::4].astype(np.float32)

        # 产生最终降采样的gep map, shape=[9,h//4,w//4]

        geo_map = np.swapaxes(geo_map, 1, 2)

        geo_map = np.swapaxes(geo_map, 1, 0)

        geo_map = geo_map[:, ::4, ::4].astype(np.float32)

        # 产生最终降采样的training mask,shape=[1,h//4,w//4]

        training_mask = training_mask[np.newaxis, ::4, ::4]

        training_mask = training_mask.astype(np.float32)

        data['image'] = im[0]

        data['score_map'] = score_map

        data['geo_map'] = geo_map

        data['training_mask'] = training_mask

        return data
Architecture
Backbone
采用resnet50_vd,得到1/4、1/8、1/16以及1/32倍共计4张降采样特征图。
Neck
基于Unect decoder架构,完成自底向上的特征融合过程,从1/32特征图逐步融合到1/4的特征图,最终得到一张带有多尺度信息的1/4特征图。
def forward(self, x):

    # x是存储4张从backbone获取的特征图

    f = x[::-1]  # 此时特征图从小到大排列

    h = f[0]  # [b,512,h/32,w/32]

    g = self.g0_deconv(h)  # [b,128,h/16,w/16]

    h = paddle.concat([g, f[1]], axis=1)  # [b,128+256,h/16,w/16]

    h = self.h1_conv(h)  # [b,128,h/16,w/16]

    g = self.g1_deconv(h)  # [b,128,h/8,w/8]

    h = paddle.concat([g, f[2]], axis=1)  # [b,128+128,h/8,w/8]

    h = self.h2_conv(h)  # [b,128,h/8,w/8]

    g = self.g2_deconv(h)  # [b,128,h/4,w/4]

    h = paddle.concat([g, f[3]], axis=1)  # [b,128+64,h/4,w/4]

    h = self.h3_conv(h)  # [b,128,h/4,w/4]

    g = self.g3_conv(h)  # [b,128,h/4,w/4]

    return g
Head
输出分类头和回归头(quad),部分参数共享。
def forward(self, x, targets=None):

    # x是融合后的1/4特征图,det_conv1和det_conv2用于进一步加强特征抽取

    f_det = self.det_conv1(x)  # [b,128,h/4,w/4]

    f_det = self.det_conv2(f_det)  # [b,64,h/4,w/4]

    # # [b,1,h/4,w/4] 用于前、背景分类,注意kernel_size=1

    f_score = self.score_conv(f_det)

    f_score = F.sigmoid(f_score)  # 获取相应得分

    # # [b,8,h/4,w/4],8的意义:dx1,dy1,dx2,dy2,dx3,dy3,dx4,dy4

    f_geo = self.geo_conv(f_det)

    # 回归的range变为:[-800,800],那么最终获取的文本框的最大边长不会超过1600

    f_geo = (F.sigmoid(f_geo) - 0.5) * 2 * 800

    pred = {'f_score': f_score, 'f_geo': f_geo}

    return pred
Loss
分类采用dice_loss,回归采用smooth_l1_loss。
class EASTLoss(nn.Layer):

    def __init__(self,

                 eps=1e-6,

                 **kwargs):

        super(EASTLoss, self).__init__()

        self.dice_loss = DiceLoss(eps=eps)

    def forward(self, predicts, labels):

        """

        Params:

            predicts: {'f_score': 前景得分图,'f_geo': 回归图}

            labels: [imgs, l_score, l_geo, l_mask]

        """

        l_score, l_geo, l_mask = labels[1:]

        f_score = predicts['f_score']

        f_geo = predicts['f_geo']

        # 分类loss

        dice_loss = self.dice_loss(f_score, l_score, l_mask)

        channels = 8

        # channels+1的原因是最后一个图对应了短边的归一化系数(后面会讲),前8个代表相对偏移的label

        # [[b,1,h/4,w/4], ...]共9个

        l_geo_split = paddle.split(

            l_geo, num_or_sections=channels + 1, axis=1)

        # [[b,1,h/4,w/4], ...]共8个

        f_geo_split = paddle.split(f_geo, num_or_sections=channels, axis=1)

        smooth_l1 = 0

        for i in range(0, channels):

            geo_diff = l_geo_split[i] - f_geo_split[i]  # diff=label-pred

            abs_geo_diff = paddle.abs(geo_diff)  # abs_diff

            # 计算abs_diff中小于1的且有文本的部分

            smooth_l1_sign = paddle.less_than(abs_geo_diff, l_score)

            smooth_l1_sign = paddle.cast(smooth_l1_sign, dtype='float32')

            # smoothl1 loss,大于1和小于1的两个部分对应loss相加,只不过这里<1的部分没乘0.5,问题不大

            in_loss = abs_geo_diff * abs_geo_diff * smooth_l1_sign + \

                (abs_geo_diff - 0.5) * (1.0 - smooth_l1_sign)

            # 用短边*8做归一化

            out_loss = l_geo_split[-1] / channels * in_loss * l_score

            smooth_l1 += out_loss

        # paddle.mean(smooth_l1)就可以了,前面都乘过了l_score,这里再乘没卵用

        smooth_l1_loss = paddle.mean(smooth_l1 * l_score)

        # dice_loss权重为0.01,smooth_l1_loss权重为1

        dice_loss = dice_loss * 0.01

        total_loss = dice_loss + smooth_l1_loss

        losses = {"loss":total_loss, \

                  "dice_loss":dice_loss,\

                  "smooth_l1_loss":smooth_l1_loss}

        return losses
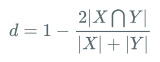
Dice Loss
公式:
代码:
class DiceLoss(nn.Layer):

    def __init__(self, eps=1e-6):

        super(DiceLoss, self).__init__()

        self.eps = eps

    def forward(self, pred, gt, mask, weights=None):

        # mask代表了有效文本的mask,有文本的地方是1,否则为0

        assert pred.shape == gt.shape

        assert pred.shape == mask.shape

        if weights is not None:

            assert weights.shape == mask.shape

            mask = weights * mask

        intersection = paddle.sum(pred * gt * mask)  # 交集

        union = paddle.sum(pred * mask) + paddle.sum(gt * mask) + self.eps  # 并集

        loss = 1 - 2.0 * intersection / union

        assert loss <= 1

        return loss
SmoothL1 Loss
公式:

Infer
PostProcess
class EASTPostProcess(object):

    def __init__(self,

                 score_thresh=0.8,

                 cover_thresh=0.1,

                 nms_thresh=0.2,

                 **kwargs):

        self.score_thresh = score_thresh

        self.cover_thresh = cover_thresh

        self.nms_thresh = nms_thresh

    ...

    def __call__(self, outs_dict, shape_list):

        score_list = outs_dict['f_score']  # shape=[b,1,h//4,w//4]

        geo_list = outs_dict['f_geo']  # shape=[b,8,h//4,w//4]

        if isinstance(score_list, paddle.Tensor):

            score_list = score_list.numpy()

            geo_list = geo_list.numpy()

        img_num = len(shape_list)

        dt_boxes_list = []

        for ino in range(img_num):

            score = score_list[ino]

            geo = geo_list[ino]

            # 根据score、geo以及一些预设阈值和locality_nms操作拿到检测框

            boxes = self.detect(

                score_map=score,

                geo_map=geo,

                score_thresh=self.score_thresh,

                cover_thresh=self.cover_thresh,

                nms_thresh=self.nms_thresh)

            boxes_norm = []

            if len(boxes) > 0:

                h, w = score.shape[1:]

                src_h, src_w, ratio_h, ratio_w = shape_list[ino]

                boxes = boxes[:, :8].reshape((-1, 4, 2))

                # 文本框坐标根于缩放系数映射回输入图像上

                boxes[:, :, 0] /= ratio_w

                boxes[:, :, 1] /= ratio_h

                for i_box, box in enumerate(boxes):

                    # 根据宽度比高度大这一先验,将坐标调整为以“左上角”点为起始点的顺时针4点框

                    box = self.sort_poly(box.astype(np.int32))

                    # 边长小于5的再进行一次过滤,拿到最终的检测结果

                    if np.linalg.norm(box[0] - box[1]) < 5 \

                        or np.linalg.norm(box[3] - box[0]) < 5:

                        continue

                    boxes_norm.append(box)

            dt_boxes_list.append({'points': np.array(boxes_norm)})

        return dt_boxes_list

    def detect(self,

               score_map,

               geo_map,

               score_thresh=0.8,

               cover_thresh=0.1,

               nms_thresh=0.2):

        score_map = score_map[0] # shape=[h//4,w//4]

        geo_map = np.swapaxes(geo_map, 1, 0)

        geo_map = np.swapaxes(geo_map, 1, 2)  # shape=[h//4,w//4,8]

        # 获取score_map上得分大于阈值的点的坐标,shape=[n,2]

        xy_text = np.argwhere(score_map > score_thresh)

        if len(xy_text) == 0:

            return []

        # 按y轴从小到大的顺序对这些点进行排序

        xy_text = xy_text[np.argsort(xy_text[:, 0])]

        # 恢复成基于原图的文本框坐标

        text_box_restored = self.restore_rectangle_quad(

            xy_text[:, ::-1] * 4, geo_map[xy_text[:, 0], xy_text[:, 1], :])

        # shape=[n,9] 前8个通道代表x1,y1,x2,y2的坐标,最后一个通道代表每个框的得分

        boxes = np.zeros((text_box_restored.shape[0], 9), dtype=np.float32)

        boxes[:, :8] = text_box_restored.reshape((-1, 8))

        boxes[:, 8] = score_map[xy_text[:, 0], xy_text[:, 1]]

        try:

            import lanms

            boxes = lanms.merge_quadrangle_n9(boxes, nms_thresh)

        except:

            print(

                'you should install lanms by pip3 install lanms-nova to speed up nms_locality'

            )

            # locality nms,比传统nms要快,因为进入nms中的文本框的数量要比之前少很多。前面按y轴排序其实是在为该步骤做铺垫

            boxes = nms_locality(boxes.astype(np.float64), nms_thresh)

        if boxes.shape[0] == 0:

            return []

        # 最终还会根据框预测出的文本框内的像素在score_map上的得分再做一次过滤,感觉有一些不合理,因为score_map

        # 上预测的是shrink_mask,会导致框内有很多背景像素,拉低平均得分,可能会让一些原本有效的文本框变得无效

        # 当然这里的cover_thresh取的比较低,可能影响就比较小

        for i, box in enumerate(boxes):

            mask = np.zeros_like(score_map, dtype=np.uint8)

            cv2.fillPoly(mask, box[:8].reshape(

                (-1, 4, 2)).astype(np.int32) // 4, 1)

            boxes[i, 8] = cv2.mean(score_map, mask)[0]

        boxes = boxes[boxes[:, 8] > cover_thresh]

        return boxes

def nms_locality(polys, thres=0.3):

    def weighted_merge(g, p):

        """

        框间merge的逻辑:坐标变为coor1*score1+coor2*score2,得分变为score1+score2

        """

        g[:8] = (g[8] * g[:8] + p[8] * p[:8]) / (g[8] + p[8])

        g[8] = (g[8] + p[8])

        return g

    S = []

    p = None

    for g in polys:

        # 由于是按y轴排了序,所以循环遍历就可以了

        if p is not None and intersection(g, p) > thres:

            # 交集大于阈值那么就merge

            p = weighted_merge(g, p)

        else:

            # 不能再merge的时候该框临近区域已无其他框,那么其加入进S

            if p is not None:

                S.append(p)

            p = g

    if p is not None:

        S.append(p)

    if len(S) == 0:

        return np.array([])

    # 将S保留下的文本框进行标准nms,略

    return standard_nms(np.array(S), thres)
PaddleOCR-EAST的更多相关文章
- PaddleOCR详解
@ 目录 PaddleOCR简介 环境配置 PaddleOCR2.0的配置环境 Docker 数据集 文本检测 使用自己的数据集 文本识别 使用自己的数据集 字典 自定义字典 添加空格类别 文本角度分 ...
- 男装电子零售商East Dane即将面世_衣装_YOKA时尚网
男装电子零售商East Dane即将面世_衣装_YOKA时尚网 男装电子零售商East Dane即将面世
- 【OCR技术系列之五】自然场景文本检测技术综述(CTPN, SegLink, EAST)
文字识别分为两个具体步骤:文字的检测和文字的识别,两者缺一不可,尤其是文字检测,是识别的前提条件,若文字都找不到,那何谈文字识别.今天我们首先来谈一下当今流行的文字检测技术有哪些. 文本检测不是一件简 ...
- MPI Maelstrom(East Central North America 1996)(poj1502)
MPI Maelstrom 总时间限制: 1000ms 内存限制: 65536kB 描述 BIT has recently taken delivery of their new supercom ...
- 东方超环(EAST)世界纪录
2017年7月3日夜晚,国家大科学装置——世界上第一个全超导托卡马克(EAST)东方超环再传捷报:实现了稳定的101.2秒稳态长脉冲高约束等离子体运行,创造了新的世界纪录.这标志着EAST成为了世界上 ...
- EAST 自然场景文本检测
自然场景文本检测是图像处理的核心模块,也是一直想要接触的一个方面. 刚好看到国内的旷视今年在CVPR2017的一篇文章:EAST: An Efficient and Accurate S ...
- EAST结构分析+pytorch源码实现
目录 EAST结构分析+pytorch源码实现 @ 一. U-Net的前车之鉴 1.1 FCN网络结构 1.2 U-NET网络 1.3 CTPN网络 二. EAST结构分析 2.1 结构简述 2.2 ...
- 训练20191009 2018-2019 ACM-ICPC, Asia East Continent Finals
2018-2019 ACM-ICPC, Asia East Continent Finals 总体情况 本次训练共3小时20分钟,通过题数4. 解题报告 D. Deja vu of - Go Play ...
- 文字检测模型EAST应用详解 ckpt pb的tf加载,opencv加载
参考链接:https://github.com/argman/EAST (项目来源) https://github.com/opencv/opencv/issues/12491 (遇到的问题) ...
- 手把手0基础Centos下安装与部署paddleOcr 教程
!!!以下内容为作者原创,首发于个人博客园&掘金平台.未经原作者同意与许可,任何人.任何组织不得以任何形式转载.原创不易,如果对您的问题提供了些许帮助,希望得到您的点赞支持. 0.paddle ...
随机推荐
- Apache 首次亚洲在线峰会: Workflow & 数据治理专场
背景 大数据发展到今天已有 10 年时间,早已渗透到各个行业,数据需 求越来越多,这使得大数据 业务间的依赖关系也越来越复杂,另外也相信做数据的伙伴肯定对如何治理数据也是痛苦之至,再加上现今云原生时代 ...
- Apache DolphinScheduler 架构演进介绍及开源经验分享 - eBay 阮文俊
引言 来自 eBay 的文俊同学在近期的上海开源大数据 Meetup 上做了十分精彩的 "Apache DolphinScheduler 的架构演进" 分享.本次分享有近 200 ...
- Excelize 2.5.0 正式发布,这些新增功能值得关注
Excelize 是 Go 语言编写的用于操作 Office Excel 文档基础库,基于 ECMA-376,ISO/IEC 29500 国际标准.可以使用它来读取.写入由 Microsoft Exc ...
- linux 的文件权限案列
需求: 技术部门人员可以相互查看,但不能删除和修改别人的文件,其他部门人员不能查看,但领导组可以且只能查看. 设计: 技术部: 组 jishu ; 人员 js1, js2 领导:组 lingd ; 人 ...
- linux --stdin 管道 标准输入重定向
linux --stdin 标准输入重定向 --stdin This option is used to indicate that passwd should read the new passwo ...
- 【manim】含有add_updater更新函数become的物体移动方法
在manim社区版本中, 一.对于一般的物体,移动的方法分为 (瞬移) 和 (带动画移动) 1.瞬移 #直接对物体操作即可 obj.shift(LEFT) #瞬间移 ...
- Linux软件包常见的几种下载、安装方法
在线源下载和安装 如果服务器是处于在线状态,在使用默认下载源是外国的情况下,安装更新软件包往往会比较痛苦的存在,下载了许久来一个超时就gg了.国内有许多镜像源,完美的解决了这个问题. 对于rpm系列的 ...
- IDEA整合Docker
创建项目 1.使用 IDEA 构建一个 SpringBoot 项目 2.编写一个helloController @RestController public class HelloController ...
- django 通过MQTT连接阿里云
Django MQTT 连接阿里云 目录 Django MQTT 连接阿里云 目录 一.安装库 1.安装Python对接mqtt协议库,paho-mqtt 二. 设备认证,一机一密型接入 三.问题 1 ...
- 【设计模式】Java设计模式 - 原型模式
[设计模式]Java设计模式 - 原型模式 不断学习才是王道 继续踏上学习之路,学之分享笔记 总有一天我也能像各位大佬一样 原创作品,更多关注我CSDN: 一个有梦有戏的人 准备将博客园.CSDN一起 ...