vue 实现分页
1 新建 pager.js 文件
/**

 * [pagination 分页组件]

 * @param  {Number} total         [数据总条数]

 * @param  {Number} display     [每页显示条数 default:10]

 * @param  {Number} current     [当前页码 default:1]

 * @param  {Number} pagegroup     [分页条数(奇数) default:5]

 * @param  {Event} pagechange     [页码改动时 dispatch ]

 * @return {[type]}   [description]

 */

Vue.component('pagination', {

    template: '#template_pagination',

    props: {

        total: {            // 数据总条数

            type: Number,

            default: 0

        },

        display: {            // 每页显示条数

            type: Number,

            default: 10

        },

        current: {            // 当前页码

            type: Number,

            default: 1

        },

        pagegroup: {        // 分页条数 -- 奇数

            type: Number,

            default: 5,

            coerce: function (v) {

                v = v > 0 ? v : 5;

                return v % 2 === 1 ? v : v + 1;

            }

        }

    },

    computed: {

        page: function () { // 总页数

            return Math.ceil(this.total / this.display);

        },

        grouplist: function () { // 获取分页页码

            var len = this.page, temp = [], list = [], count = Math.floor(this.pagegroup / 2), center = this.current;

            if (len <= this.pagegroup) {

                while (len--) { temp.push({ text: this.page - len, val: this.page - len }); };

                return temp;

            }

            while (len--) { temp.push(this.page - len); };

            var idx = temp.indexOf(center);

            (idx < count) && (center = center + count - idx);

            (this.current > this.page - count) && (center = this.page - count);

            temp = temp.splice(center - count - 1, this.pagegroup);

            do {

                var t = temp.shift();

                list.push({

                    text: t,

                    val: t

                });

            } while (temp.length);

            if (this.page > this.pagegroup) {

                (this.current > count + 1) && list.unshift({ text: '...', val: list[0].val - 1 });

                (this.current < this.page - count) && list.push({ text: '...', val: list[list.length - 1].val + 1 });

            }

            return list;

        }

    },

    methods: {

        setCurrent: function (idx) {

            if (this.current != idx && idx > 0 && idx < this.page + 1) {

                this.current = idx;

                this.$emit('pagechange', this.current);

            }

        }

    }

});
2 前端:
@{
ViewBag.Title = "About";
}
<script src="~/Scripts/vue.min.js"></script>
<script src="~/Scripts/pager/Pager.js"></script>
<!-- 模板 -->
<script type="text/template" id="template_pagination">
<nav>
<ul class="pagination">
<li :class="{'disabled': current == 1}"><a href="javascript:;" v-on:click="setCurrent(1)"> 首页 </a></li>
<li :class="{'disabled': current == 1}"><a href="javascript:;" v-on:click="setCurrent(current - 1)"> 上一页 </a></li>
<li v-for="p in grouplist" :class="{'active': current == p.val}"><a href="javascript:;" v-on:click="setCurrent(p.val)"> {{ p.text }} </a></li>
<li :class="{'disabled': current == page}"><a href="javascript:;" v-on:click="setCurrent(current + 1)"> 下一页</a></li>
<li :class="{'disabled': current == page}"><a href="javascript:;" v-on:click="setCurrent(page)"> 尾页 </a></li>
</ul>
<ul class="pagination pull-right">
<li><span> 共 {{ total }} 条数据 </span></li>
<li><span> 每页显示 {{ display }} 条数据 </span></li>
<li><span> 共 {{ page }} 页 </span></li>
<li><span> 当前第 {{ current }} 页 </span></li>
</ul>
</nav>
</script>
<div>
<div id="app">
<div class="container">
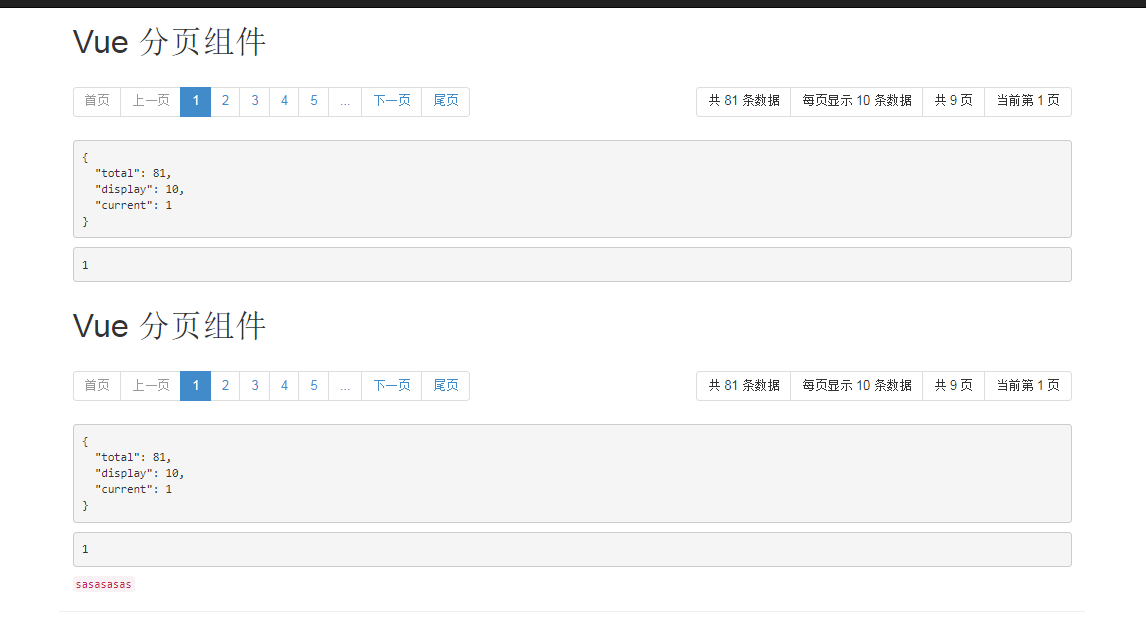
<h1> Vue 分页组件 </h1>
<pagination :total="total" :current.sync="current" v-on:pagechange="pagechange"></pagination>
<pre>{{ $data|json }}</pre>
<pre>{{ current }}</pre>
</div>
</div>
<div id="app01">
<div class="container">
<h1> Vue 分页组件 </h1>
<pagination :total="total" :current.sync="current" v-on:pagechange="pagechange"></pagination>
<pre>{{ $data|json }}</pre>
<pre>{{ current }}</pre>
<code>sasasasas</code>
</div>
</div>
</div>
<script>
new Vue({
el: '#app',
data: {
total: 81, // 记录总条数
display: 10, // 每页显示条数
current: 1 // 当前第n页 , 也可以 watch current 的变化
},
methods: {
pagechange: function (p) {
this.current = p;// 页码改变event , p 为新的 current
console.log('pagechange', p);
}
}
});
new Vue({
el: '#app01',
data: {
total: 81, // 记录总条数
display: 10, // 每页显示条数
current: 1 // 当前第n页 , 也可以 watch current 的变化
},
methods: {
pagechange: function (p) {
this.current = p;// 页码改变event , p 为新的 current
console.log('pagechange', p);
}
}
});
</script>
展示:
vue 实现分页的更多相关文章
- 基于Vue封装分页组件
使用Vue做双向绑定的时候,可能经常会用到分页功能 接下来我们来封装一个分页组件 先定义样式文件 pagination.css ul, li { margin: 0px; padding: 0px;} ...
- JS(vue iview)分页解决方案
JS(vue iview)分页解决方案 一.解决思路 使用分页组件 使用组件API使组件自动生成页面数量 调用组件on-change事件的返回值page 将交互获得的数组存在一个数组list中 通过p ...
- 基于vue的分页插件
相信大家用过很多jquery的分页插件,那这次就用一用基于vue的分页插件. 这里的环境用的是springboot 首先要引入pagehelper的jar文件,版本是1.2.3,配置文件也需要配置一下 ...
- 基于iview 封装一个vue 表格分页组件
iview 是一个支持中大型项目的后台管理系统ui组件库,相对于一个后台管理系统的表格来说分页十分常见的 iview是一个基于vue的ui组件库,其中的iview-admin是一个已经为我们搭好的后天 ...
- vue day5 分页控件 更新 PagedList.mvc 仿
<!DOCTYPE html> <html> <head> <meta http-equiv="Content-Type" content ...
- vue day6 分页显示
@{ ViewBag.Title = "Home Page"; Layout = null; } <!DOCTYPE html> <html> <he ...
- vue day5 分页控件
<!DOCTYPE html> <html> <head> <meta http-equiv="Content-Type" content ...
- Vue element 分页
Vue单页面,有一个带分页的表格,表格内数据关联页码,套路如下: 代码如下: <div class="c-table-list auth-list m-bottom-20"& ...
- 使用Layui和Vue实现分页
原理就是利用Layui的分页组件和Vue组件的模板渲染功能. 我下面直接贴代码,比较直观. index.html <!DOCTYPE html> <html> <head ...
- vue 封装分页组件
分页 一般都是调接口, 接口为这种格式 {code: 0, msg: "success",…} code:0 data:{ content:[{content: "11& ...
随机推荐
- HttpClient类详解
文章链接:https://blog.csdn.net/justry_deng/article/details/81042379 HTTP 协议可能是现在 Internet 上使用得最多.最重要的协议了 ...
- demo_service
<dependencies> <dependency> <groupId>junit</groupId> <artifactId>junit ...
- 【架构】Linux的架构(architecture)
最内层是硬件,最外层是用户常用的应用,比如说firefox浏览器,evolution查看邮件,一个计算流体模型等等.硬件是物质基础,而应用提供服务.但在两者之间,还要经过一番周折. 还记得Linux启 ...
- PHP filter_id() 函数
定义和用法 filter_id() 函数返回指定过滤器的 ID 号. 如果成功则返回过滤器的 ID 号,如果过滤器不存在则返回 NULL. 语法 filter_id(filter_name) 参数 描 ...
- 自己动手写ORB特征
通过一些简单的算法修改,使ORB的提取效率加速了5.8倍.编译该程序需要CPU支持SSE指令集. 如果我们能够对特征提取部分进一步并行化处理,则算法还可以有加速的空间. // // Created b ...
- 使用vue完成一个分页效果
基于 element-ui 分页组件实现分页效果 效果如下: 使用说明: 0.首先在头部引入需要的外部文件 1.从element官方网页中复制想要的组件代码直接放入body中 2.编写逻辑代码 3.完 ...
- 向上转型---父类引用指向子类对象 A a = New B()的使用
一.向上转型 向上转型是JAVA中的一种调用方式,是多态的一种表现.向上转型并非是将B自动向上转型为A的对象,相反它是从另一种角度去理解向上两字的:它是对A的对象的方法的扩充,即A的对象可访问B从A中 ...
- 浏览器地址栏运行HTML代码(谷歌)
在地址栏输入 data:text/html,<h1 style='color:red' >Hello, world!</h1> 浏览器会执行你的html代码,效果如下: 如果觉 ...
- VMware 安装CenterOS
虚拟机安装CenterOS 简介:在VMware里安装Linux虚拟机,这里使用的是(Center OS 6.9). 一.准备工作: 安装 VMware Workstation Pro,很简单不哔哔了 ...
- 运维 03 Linux之文档与目录结构
Linux之文档与目录结构 Linux文件系统结构 Linux目录结构的组织形式和Windows有很大的不同.首先Linux没有“盘(C盘.D盘.E盘)”的概念.已经建立文件系统的硬盘分区被挂载到 ...