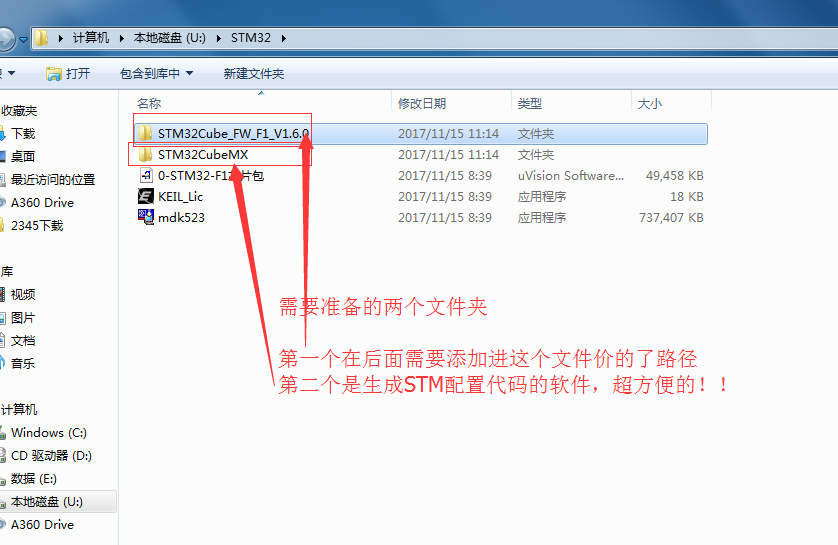
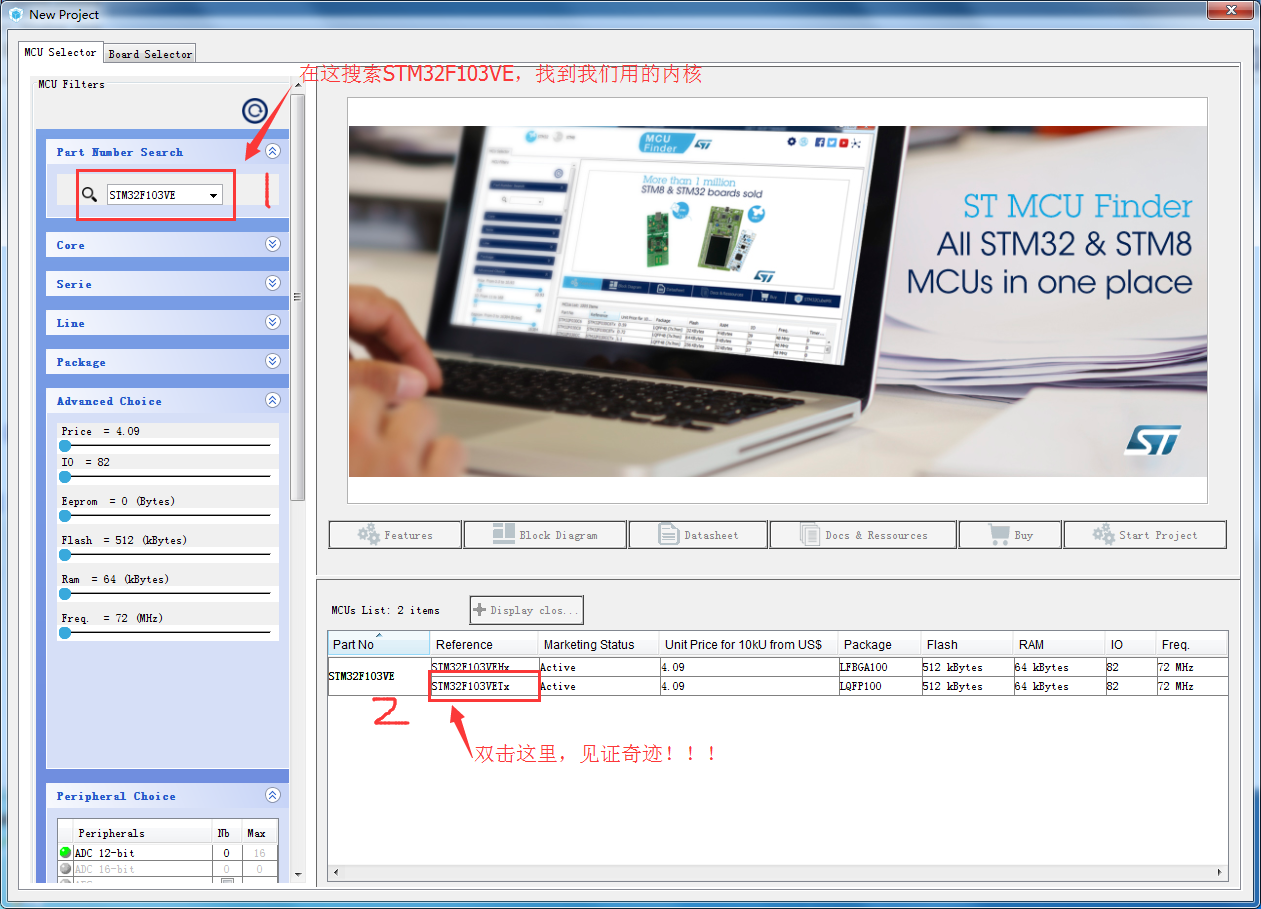
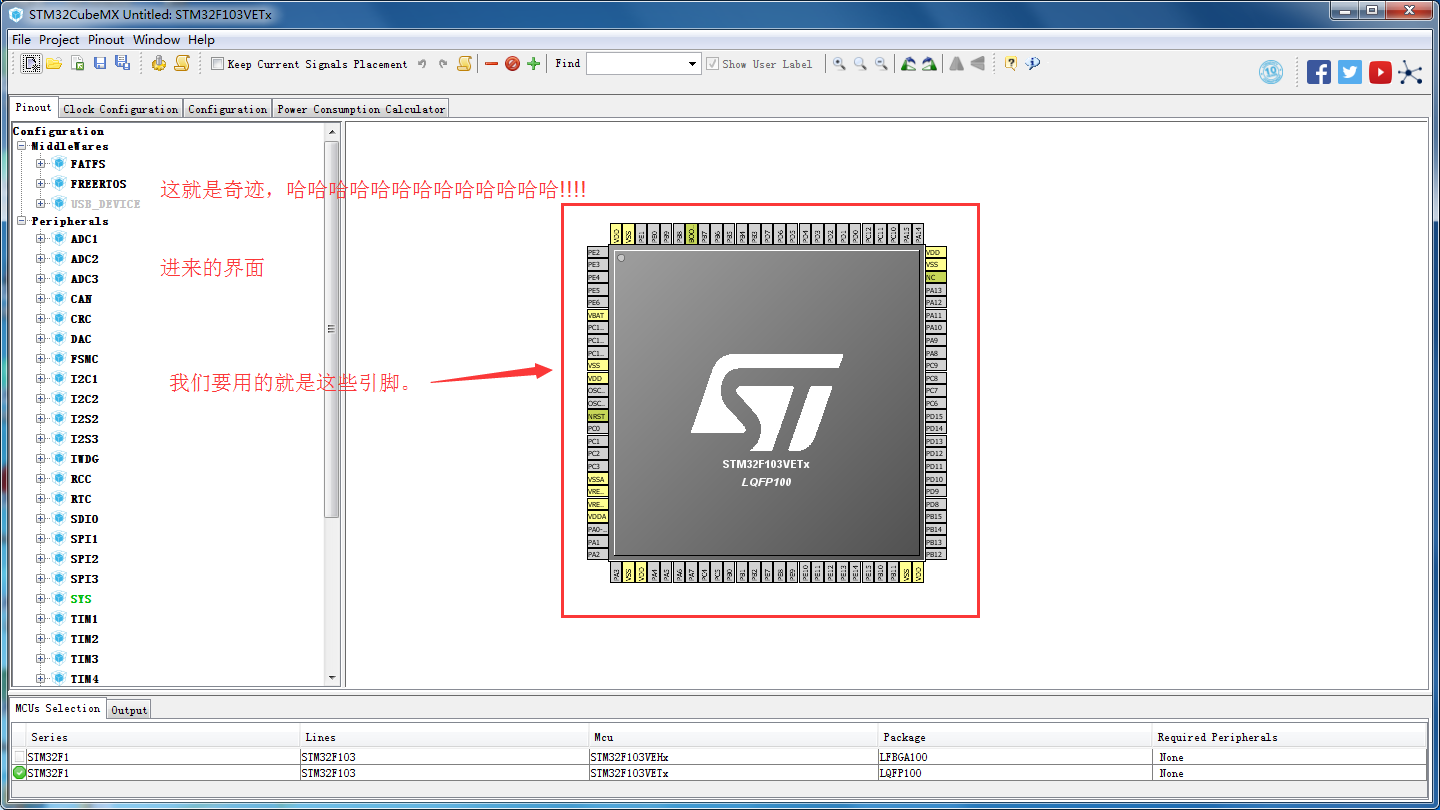
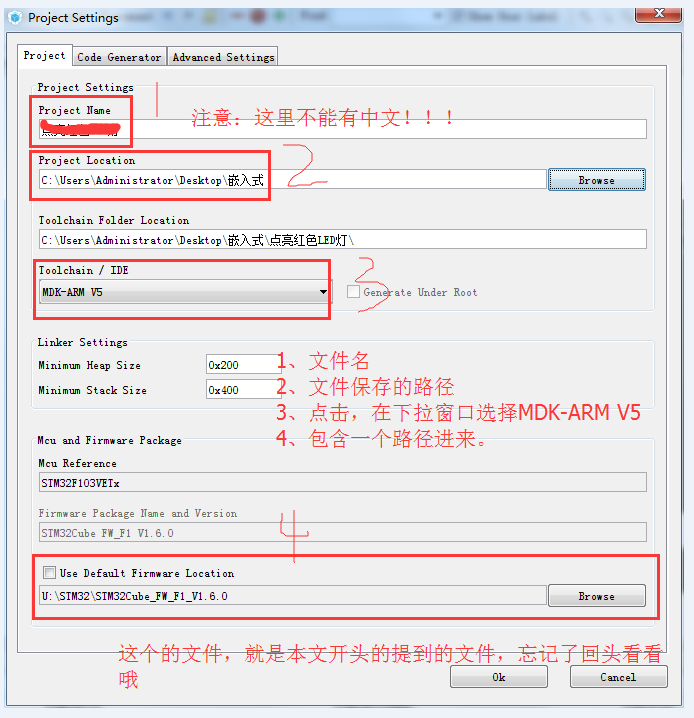
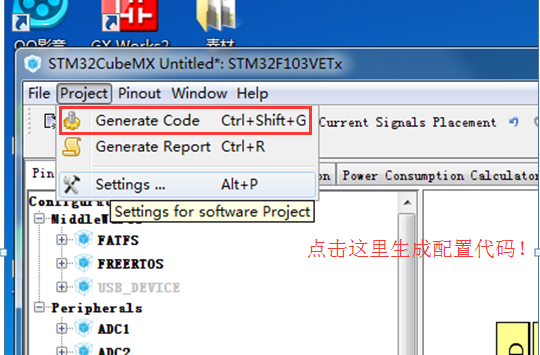
用STM32CudeMX 点亮红色LED灯(软件操作步骤为主)
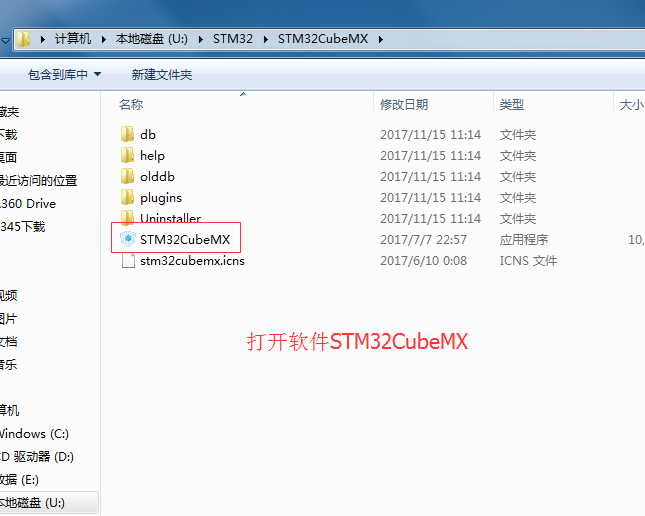
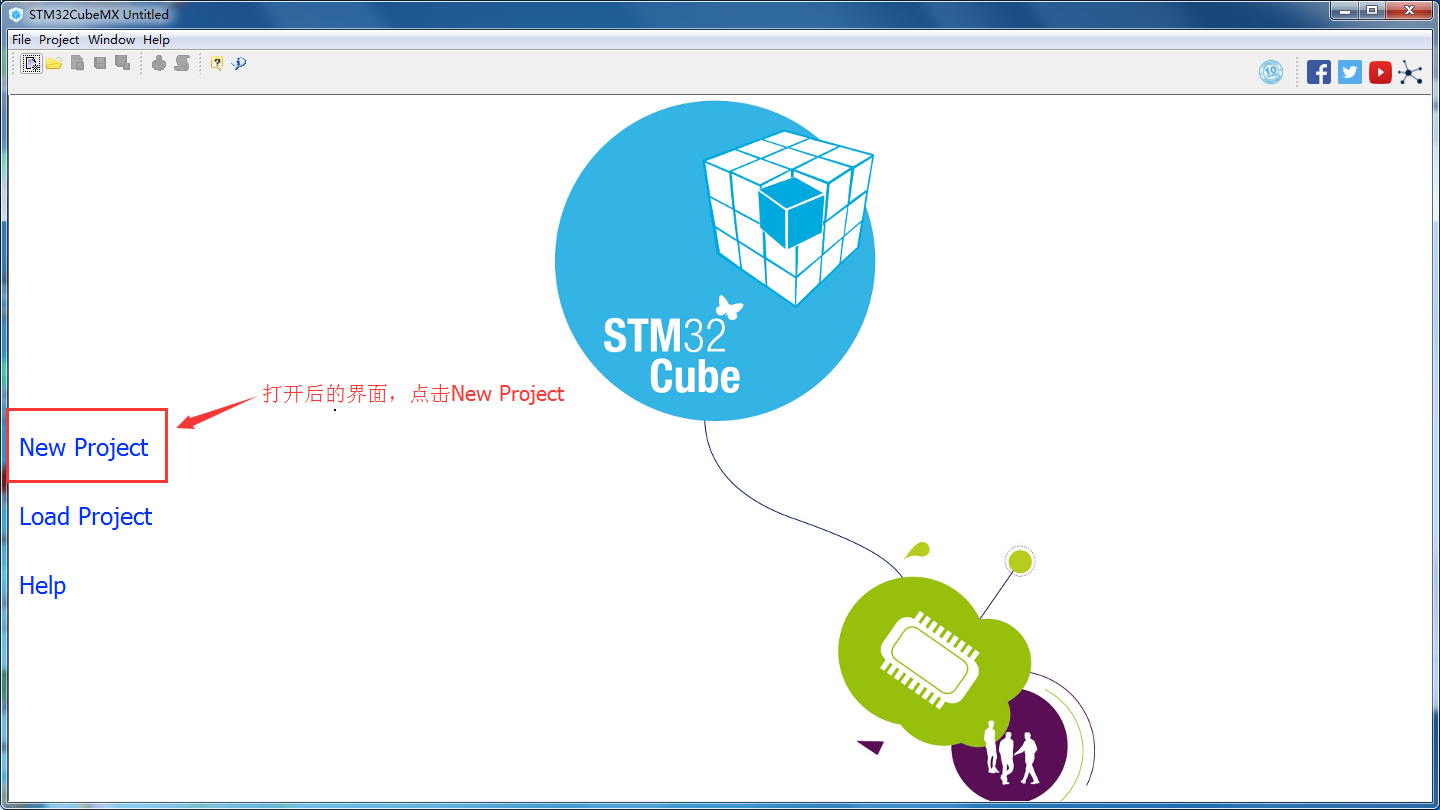
1、收获如何使用软件STM32CudeMX配置代码


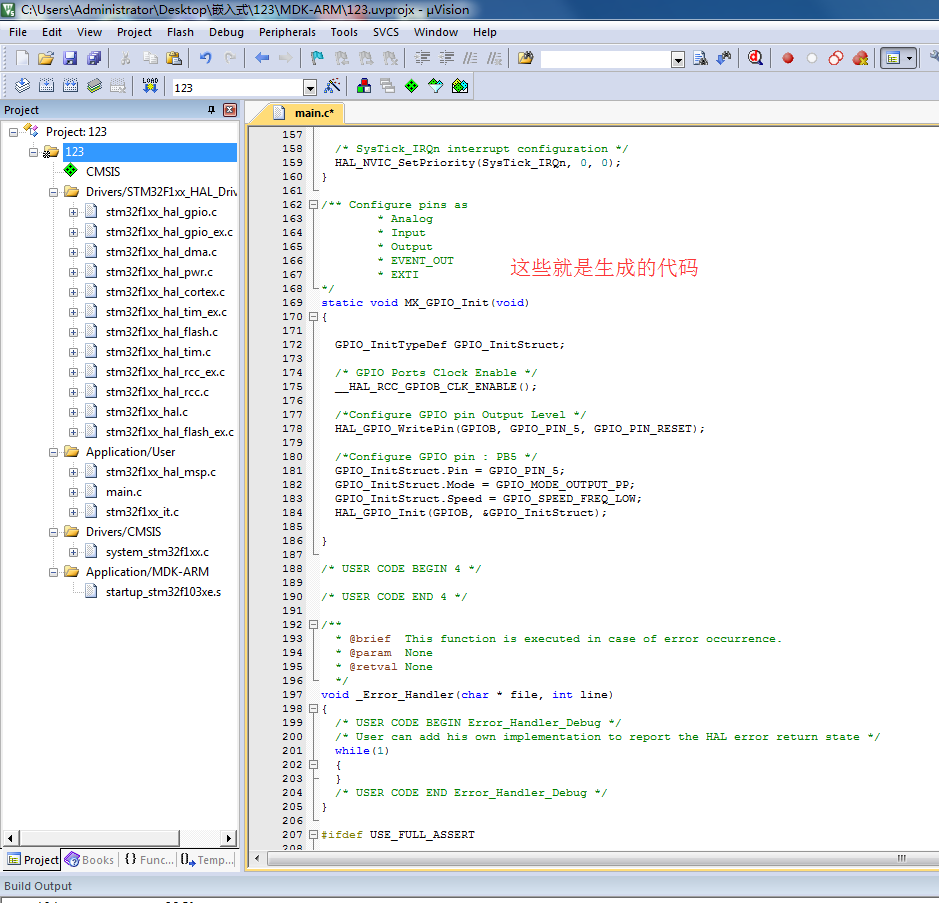
注意:自己要敲的代码,直接看102行,其他是软件配置的。!!!
/**
******************************************************************************
* File Name : main.c
* Description : Main program body
******************************************************************************
** This notice applies to any and all portions of this file
* that are not between comment pairs USER CODE BEGIN and
* USER CODE END. Other portions of this file, whether
* inserted by the user or by software development tools
* are owned by their respective copyright owners.
*
* COPYRIGHT(c) 2017 STMicroelectronics
*
* Redistribution and use in source and binary forms, with or without modification,
* are permitted provided that the following conditions are met:
* 1. Redistributions of source code must retain the above copyright notice,
* this list of conditions and the following disclaimer.
* 2. Redistributions in binary form must reproduce the above copyright notice,
* this list of conditions and the following disclaimer in the documentation
* and/or other materials provided with the distribution.
* 3. Neither the name of STMicroelectronics nor the names of its contributors
* may be used to endorse or promote products derived from this software
* without specific prior written permission.
*
* THIS SOFTWARE IS PROVIDED BY THE COPYRIGHT HOLDERS AND CONTRIBUTORS "AS IS"
* AND ANY EXPRESS OR IMPLIED WARRANTIES, INCLUDING, BUT NOT LIMITED TO, THE
* IMPLIED WARRANTIES OF MERCHANTABILITY AND FITNESS FOR A PARTICULAR PURPOSE ARE
* DISCLAIMED. IN NO EVENT SHALL THE COPYRIGHT HOLDER OR CONTRIBUTORS BE LIABLE
* FOR ANY DIRECT, INDIRECT, INCIDENTAL, SPECIAL, EXEMPLARY, OR CONSEQUENTIAL
* DAMAGES (INCLUDING, BUT NOT LIMITED TO, PROCUREMENT OF SUBSTITUTE GOODS OR
* SERVICES; LOSS OF USE, DATA, OR PROFITS; OR BUSINESS INTERRUPTION) HOWEVER
* CAUSED AND ON ANY THEORY OF LIABILITY, WHETHER IN CONTRACT, STRICT LIABILITY,
* OR TORT (INCLUDING NEGLIGENCE OR OTHERWISE) ARISING IN ANY WAY OUT OF THE USE
* OF THIS SOFTWARE, EVEN IF ADVISED OF THE POSSIBILITY OF SUCH DAMAGE.
*
******************************************************************************
*/
/* Includes ------------------------------------------------------------------*/
#include "main.h"
#include "stm32f1xx_hal.h" /* USER CODE BEGIN Includes */ /* USER CODE END Includes */ /* Private variables ---------------------------------------------------------*/ /* USER CODE BEGIN PV */
/* Private variables ---------------------------------------------------------*/ /* USER CODE END PV */ /* Private function prototypes -----------------------------------------------*/
void SystemClock_Config(void);
static void MX_GPIO_Init(void); /* USER CODE BEGIN PFP */
/* Private function prototypes -----------------------------------------------*/ /* USER CODE END PFP */ /* USER CODE BEGIN 0 */ /* USER CODE END 0 */ int main(void)
{ /* USER CODE BEGIN 1 */ /* USER CODE END 1 */ /* MCU Configuration----------------------------------------------------------*/ /* Reset of all peripherals, Initializes the Flash interface and the Systick. */
HAL_Init(); /* USER CODE BEGIN Init */ /* USER CODE END Init */ /* Configure the system clock */
SystemClock_Config(); /* USER CODE BEGIN SysInit */ /* USER CODE END SysInit */ /* Initialize all configured peripherals */
MX_GPIO_Init(); /* USER CODE BEGIN 2 */ /* USER CODE END 2 */ /* Infinite loop */
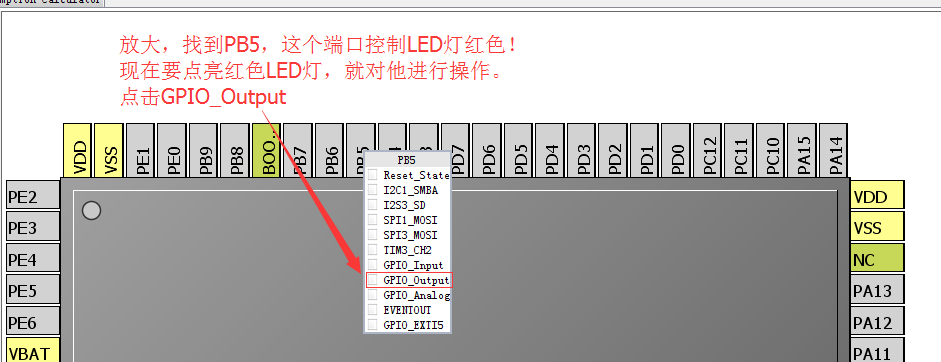
/* USER CODE BEGIN WHILE */ /*下面一行代码需要自己敲的*/ //意思是给PB5端口低电平,记住这个函数哦
HAL_GPIO_WritePin(GPIOB,GPIO_PIN_5,GPIO_PIN_RESET); while ()
{
/* USER CODE END WHILE */ /* USER CODE BEGIN 3 */ }
/* USER CODE END 3 */ } /** System Clock Configuration
*/
void SystemClock_Config(void)
{ RCC_OscInitTypeDef RCC_OscInitStruct;
RCC_ClkInitTypeDef RCC_ClkInitStruct; /**Initializes the CPU, AHB and APB busses clocks
*/
RCC_OscInitStruct.OscillatorType = RCC_OSCILLATORTYPE_HSI;
RCC_OscInitStruct.HSIState = RCC_HSI_ON;
RCC_OscInitStruct.HSICalibrationValue = ;
RCC_OscInitStruct.PLL.PLLState = RCC_PLL_NONE;
if (HAL_RCC_OscConfig(&RCC_OscInitStruct) != HAL_OK)
{
_Error_Handler(__FILE__, __LINE__);
} /**Initializes the CPU, AHB and APB busses clocks
*/
RCC_ClkInitStruct.ClockType = RCC_CLOCKTYPE_HCLK|RCC_CLOCKTYPE_SYSCLK
|RCC_CLOCKTYPE_PCLK1|RCC_CLOCKTYPE_PCLK2;
RCC_ClkInitStruct.SYSCLKSource = RCC_SYSCLKSOURCE_HSI;
RCC_ClkInitStruct.AHBCLKDivider = RCC_SYSCLK_DIV1;
RCC_ClkInitStruct.APB1CLKDivider = RCC_HCLK_DIV1;
RCC_ClkInitStruct.APB2CLKDivider = RCC_HCLK_DIV1; if (HAL_RCC_ClockConfig(&RCC_ClkInitStruct, FLASH_LATENCY_0) != HAL_OK)
{
_Error_Handler(__FILE__, __LINE__);
} /**Configure the Systick interrupt time
*/
HAL_SYSTICK_Config(HAL_RCC_GetHCLKFreq()/); /**Configure the Systick
*/
HAL_SYSTICK_CLKSourceConfig(SYSTICK_CLKSOURCE_HCLK); /* SysTick_IRQn interrupt configuration */
HAL_NVIC_SetPriority(SysTick_IRQn, , );
} /** Configure pins as
* Analog
* Input
* Output
* EVENT_OUT
* EXTI
*/
static void MX_GPIO_Init(void)
{ GPIO_InitTypeDef GPIO_InitStruct; /* GPIO Ports Clock Enable */
__HAL_RCC_GPIOB_CLK_ENABLE(); /*Configure GPIO pin Output Level */
HAL_GPIO_WritePin(GPIOB, GPIO_PIN_5, GPIO_PIN_RESET); /*Configure GPIO pin : PB5 */
GPIO_InitStruct.Pin = GPIO_PIN_5;
GPIO_InitStruct.Mode = GPIO_MODE_OUTPUT_PP;
GPIO_InitStruct.Speed = GPIO_SPEED_FREQ_LOW;
HAL_GPIO_Init(GPIOB, &GPIO_InitStruct); } /* USER CODE BEGIN 4 */ /* USER CODE END 4 */ /**
* @brief This function is executed in case of error occurrence.
* @param None
* @retval None
*/
void _Error_Handler(char * file, int line)
{
/* USER CODE BEGIN Error_Handler_Debug */
/* User can add his own implementation to report the HAL error return state */
while()
{
}
/* USER CODE END Error_Handler_Debug */
} #ifdef USE_FULL_ASSERT /**
* @brief Reports the name of the source file and the source line number
* where the assert_param error has occurred.
* @param file: pointer to the source file name
* @param line: assert_param error line source number
* @retval None
*/
void assert_failed(uint8_t* file, uint32_t line)
{
/* USER CODE BEGIN 6 */
/* User can add his own implementation to report the file name and line number,
ex: printf("Wrong parameters value: file %s on line %d\r\n", file, line) */
/* USER CODE END 6 */ } #endif /**
* @}
*/ /**
* @}
*/ /************************ (C) COPYRIGHT STMicroelectronics *****END OF FILE****/
感谢您的浏览!!!如有问题请留言。后期继续出其他的,请尽请关注。
用STM32CudeMX 点亮红色LED灯(软件操作步骤为主)的更多相关文章
- K1 K2作为中断源控制红色LED灯,实现任意键按一下LED灯亮或者灭
#include "stm32f10x.h" // 相当于51单片机中的 #include <reg51.h> #include "stm32f10x_gpi ...
- 嵌入式学习笔记(综合提高篇 第一章) -- 利用串口点亮/关闭LED灯
1 前言 从踏入嵌入式行业到现在已经过去了4年多,参与开发过的产品不少,有交换机.光端机以及光纤收发器,停车场出入缴费系统,二维码扫码枪,智能指纹锁以及数字IC芯片开发等; 涉及产品中中既有 ...
- 点亮一个led灯
/********************************* 代码功能:点亮一个led灯 使用函数: pinMode(引脚号,模式); digitalWrite(引脚号,电平状态); //默认 ...
- 进阶之路(基础篇) - 001 亮一个led灯
/********************************* 代码功能:点亮一个led灯 使用函数: pinMode(引脚号,模式); digitalWrite(引脚号,电平状态); //默认 ...
- STM32点亮闪烁LED灯
详解请看其他博客: http://www.cnblogs.com/whik/p/6672730.html http://www.51hei.com/bbs/dpj-38605-1.html /*本程序 ...
- 《STM32CubeMX配置STM32H743XI工程》第一讲《初始化UART,重定义printf函数,点亮一个LED灯》
1.打开STM32CubeMX软件->新建一个工程(软件自行到ST官网下载安装) 2.输入对应的芯片型号(本次基于野火STM32H743XI Pro 开发板)点击Start Project生成项 ...
- 在 S5PV210 的 开发板上 点亮 一个 LED 灯
参考学习教程:周立功嵌入式Linux开发教程-(上册) 材料:首先 准备一个 安装好 Linux 的 开发板 使用 xshell 工具 连接 开发板 ,winscp 工具 连接 开发板 , 准 ...
- linux IMX6 汇编点亮一个LED灯
驱动Linux引脚与驱动STM32其实是一样的,都是在操作寄存器,在相应的寄存器上附上相应的值即可驱动. IMX6U手册上有各个管脚的命名,跟STM32不同,IOMUXC_SW_MUC_CTL_PAD ...
- 单片机基础——使用GPIO输出点亮一个LED灯
1. 准备工作 硬件准备 开发板首先需要准备一个小熊派IoT开发板,并通过USB线与电脑连接. 软件准备 需要安装好Keil - MDK及芯片对应的包,以便编译和下载生成的代码,可参考MDK安装教程 ...
随机推荐
- 启动tomcat出现内存溢出错误 java.lang.OutOfMemoryError: PermGen space
三种因素引起: 1.jvm(jdk)的内存引起. 2. eclipse的内存引起. 3.tomcat的内存引起. 1.解决方法: 2.解决方法: 解决问题的方式就是:修改了安装目录eclipse.in ...
- spring cloud Eureka常见问题总结
Spring Cloud中,Eureka常见问题总结. 指定Eureka的Environment 1 eureka.environment: 指定环境 参考文档:https://github.com/ ...
- 饮冰三年-人工智能-Python-15Python基础之文件处理
# 写文件--开始 f=open('test','w',encoding="utf-8") #如果有则写,没有就创建 print(f.writable()) #True f.wri ...
- Java接口自动化测试之集成MyBatis和MySQL (五)
pom.xml新增dependency <dependency> <groupId>org.mybatis</groupId> <artifactId> ...
- python 装饰器--对有无参数的函数进行装饰
# 使用装饰器无参数的函数进行装饰# def func(funcionName): # print('-----1------') # def func_in(): # print('--func_i ...
- PAT Basic 1071. 小赌怡情(15)
题目内容 常言道"小赌怡情".这是一个很简单的小游戏:首先由计算机给出第一个整数:然后玩家下注赌第二个整数将会比第一个数大还是小:玩家下注t个筹码后,计算机给出第二个数.若玩家猜对 ...
- Gradle Build速度加快方法汇总
Android Studio用起来越来越顺手,但是却发现Build的速度实在不敢恭维,在google和度娘了几把(....)之后,大体就是分配更高的内存,步骤:Setting-->搜索gradl ...
- 【ASP.NET】UCenter实现多站点同步登录退出
利用UCenter实现discuz论坛和应用网站同步登录和退出功能 测试环境:Discuz! X3.2.UCenter 1.6..Net Framework 4.0 进入Discuz 后台的UCent ...
- 一起学Hadoop——使用自定义Partition实现hadoop部分排序
排序在很多业务场景都要用到,今天本文介绍如何借助于自定义Partition类实现hadoop部分排序.本文还是使用java和python实现排序代码. 1.部分排序. 部分排序就是在每个文件中都是有序 ...
- Python学习(二十一) —— 前端之JavaScript
转载自http://www.cnblogs.com/liwenzhou/p/8004649.html 一.JavaScript概述 1.JavaScript的历史 1992年Nombas开发出C-mi ...