springboot整合mybatis-plus逆向工程
MyBatis-Plus(简称 MP)是一个 MyBatis 的增强工具,在 MyBatis 的基础上只做增强不做改变,为简化开发、提高效率而生。官方文档
代码生成器
AutoGenerator 是 MyBatis-Plus 的代码生成器,通过 AutoGenerator 可以快速生成 Entity、Mapper、Mapper XML、Service、Controller 等各个模块的代码,极大的提升了开发效率。
mybatis-plus是根据数据库表来生成对应的实体类,首先我们创建数据库表User
| id | name | age | |
|---|---|---|---|
| 1 | Jone | 18 | test1@baomidou.com |
| 2 | Jack | 20 | test2@baomidou.com |
| 3 | Tom | 28 | test3@baomidou.com |
| 4 | Sandy | 21 | test4@baomidou.com |
| 5 | Billie | 24 | test5@baomidou.com |
其对应的数据库 Schema 脚本如下:
DROP TABLE IF EXISTS user;

CREATE TABLE user

(

	id BIGINT(20) NOT NULL COMMENT '主键ID',

	name VARCHAR(30) NULL DEFAULT NULL COMMENT '姓名',

	age INT(11) NULL DEFAULT NULL COMMENT '年龄',

	email VARCHAR(50) NULL DEFAULT NULL COMMENT '邮箱',

	PRIMARY KEY (id)

);
其对应的数据库 Data 脚本如下:
DELETE FROM user;

INSERT INTO user (id, name, age, email) VALUES

(1, 'Jone', 18, 'test1@baomidou.com'),

(2, 'Jack', 20, 'test2@baomidou.com'),

(3, 'Tom', 28, 'test3@baomidou.com'),

(4, 'Sandy', 21, 'test4@baomidou.com'),

(5, 'Billie', 24, 'test5@baomidou.com');
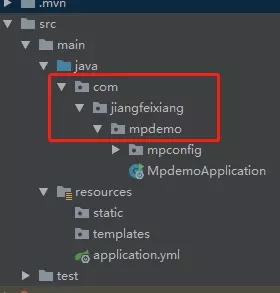
初始化springboot工程

其中mpconfig就是我们逆向工程配置文件
基本依赖如下:
<dependencies>

        <dependency>

            <groupId>org.springframework.boot</groupId>

            <artifactId>spring-boot-starter-web</artifactId>

        </dependency>

        <dependency>

            <groupId>org.springframework.boot</groupId>

            <artifactId>spring-boot-starter-test</artifactId>

            <scope>test</scope>

        </dependency>

        <dependency>

            <groupId>mysql</groupId>

            <artifactId>mysql-connector-java</artifactId>

            <scope>runtime</scope>

        </dependency>

      <dependency>

            <groupId>org.projectlombok</groupId>

            <artifactId>lombok</artifactId>

            <optional>true</optional>

        </dependency>

    </dependencies>
下面开始引入逆向工程依赖
MyBatis-Plus 从 3.0.3 之后移除了代码生成器与模板引擎的默认依赖,需要手动添加相关依赖:
        <dependency>

            <groupId>com.baomidou</groupId>

            <artifactId>mybatis-plus-boot-starter</artifactId>

            <version>3.1.1</version>

        </dependency>

        <!--添加 代码生成器 依赖-->

        <dependency>

            <groupId>com.baomidou</groupId>

            <artifactId>mybatis-plus-generator</artifactId>

            <version>3.1.1</version>

        </dependency>
添加 模板引擎 依赖,MyBatis-Plus 支持 Velocity(默认)、Freemarker、Beetl,用户可以选择自己熟悉的模板引擎,如果都不满足您的要求,可以采用自定义模板引擎。
Velocity(默认):
<dependency>

    <groupId>org.apache.velocity</groupId>

    <artifactId>velocity-engine-core</artifactId>

    <version>2.1</version>

</dependency>
Freemarker:
<dependency>

    <groupId>org.freemarker</groupId>

    <artifactId>freemarker</artifactId>

    <version>2.3.28</version>

</dependency>
这里我选择Freemarker
注意!如果您选择了非默认引擎,需要在 AutoGenerator 中 设置模板引擎
全部依赖如下:
<dependencies>

        <dependency>

            <groupId>org.springframework.boot</groupId>

            <artifactId>spring-boot-starter-web</artifactId>

        </dependency>

        <dependency>

            <groupId>org.springframework.boot</groupId>

            <artifactId>spring-boot-starter-test</artifactId>

            <scope>test</scope>

        </dependency>

        <!-- freemarker 模板引擎 -->

        <dependency>

            <groupId>org.freemarker</groupId>

            <artifactId>freemarker</artifactId>

            <version>2.3.23</version>

        </dependency>

        <dependency>

            <groupId>com.baomidou</groupId>

            <artifactId>mybatis-plus-boot-starter</artifactId>

            <version>3.1.1</version>

        </dependency>

        <!--添加 代码生成器 依赖-->

        <dependency>

            <groupId>com.baomidou</groupId>

            <artifactId>mybatis-plus-generator</artifactId>

            <version>3.1.1</version>

        </dependency>

        <dependency>

            <groupId>org.projectlombok</groupId>

            <artifactId>lombok</artifactId>

            <optional>true</optional>

        </dependency>

        <dependency>

            <groupId>mysql</groupId>

            <artifactId>mysql-connector-java</artifactId>

            <scope>runtime</scope>

        </dependency>

    </dependencies>
下面开始:创建逆向工程配置类mpconfig
package com.jiangfeixiang.mpdemo.mpconfig;

import com.baomidou.mybatisplus.annotation.DbType;

import com.baomidou.mybatisplus.core.exceptions.MybatisPlusException;

import com.baomidou.mybatisplus.core.toolkit.StringPool;

import com.baomidou.mybatisplus.core.toolkit.StringUtils;

import com.baomidou.mybatisplus.generator.AutoGenerator;

import com.baomidou.mybatisplus.generator.InjectionConfig;

import com.baomidou.mybatisplus.generator.config.*;

import com.baomidou.mybatisplus.generator.config.converts.MySqlTypeConvert;

import com.baomidou.mybatisplus.generator.config.po.TableInfo;

import com.baomidou.mybatisplus.generator.config.rules.NamingStrategy;

import com.baomidou.mybatisplus.generator.engine.FreemarkerTemplateEngine;

import java.util.*;

/**

 * @ProjectName: mybatis-plus

 * @Package: com.jiangfeixiang.mybatisplus.mpconfig

 * @ClassName: CodeGenerator

 * @Author: jiangfeixiang

 * @email: 1016767658@qq.com

 * @Description: 代码生成器

 * @Date: 2019/5/10/0010 21:41

 */

public class CodeGenerator {

    /**

     * 读取控制台内容

     */

    public static String scanner(String tip) {

        Scanner scanner = new Scanner(System.in);

        StringBuilder help = new StringBuilder();

        help.append("请输入" + tip + ":");

        System.out.println(help.toString());

        if (scanner.hasNext()) {

            String ipt = scanner.next();

            if (StringUtils.isNotEmpty(ipt)) {

                return ipt;

            }

        }

        throw new MybatisPlusException("请输入正确的" + tip + "!");

    }

    public static void main(String[] args) {

        /**

         * 代码生成器

         */

        AutoGenerator mpg = new AutoGenerator();

        /**

         * 全局配置

         */

        GlobalConfig globalConfig = new GlobalConfig();

        //生成文件的输出目录

        String projectPath = System.getProperty("user.dir");

        globalConfig.setOutputDir(projectPath + "/src/main/java");

        //Author设置作者

        globalConfig.setAuthor("姜飞祥");

        //是否覆盖文件

        globalConfig.setFileOverride(true);

        //生成后打开文件

        globalConfig.setOpen(false);

        mpg.setGlobalConfig(globalConfig);

        /**

         * 数据源配置

          */

        DataSourceConfig dataSourceConfig = new DataSourceConfig();

        // 数据库类型,默认MYSQL

        dataSourceConfig.setDbType(DbType.MYSQL);

        //自定义数据类型转换

        dataSourceConfig.setTypeConvert(new MySqlTypeConvert());

        dataSourceConfig.setUrl("jdbc:mysql://localhost:3306/mp?characterEncoding=utf-8&serverTimezone=GMT%2B8&useSSL=false");

        dataSourceConfig.setDriverName("com.mysql.jdbc.Driver");

        dataSourceConfig.setUsername("root");

        dataSourceConfig.setPassword("1234");

        mpg.setDataSource(dataSourceConfig);

        /**

         * 包配置

         */

        PackageConfig pc = new PackageConfig();

        pc.setModuleName(scanner("模块名"));

        //父包名。如果为空,将下面子包名必须写全部, 否则就只需写子包名

        pc.setParent("com.jiangfeixiang.mpdemo");

        mpg.setPackageInfo(pc);

        /**

         * 自定义配置

         */

        InjectionConfig cfg = new InjectionConfig() {

            @Override

            public void initMap() {

                // to do nothing

            }

        };

        /**

         * 模板

         */

        //如果模板引擎是 freemarker

        String templatePath = "/templates/mapper.xml.ftl";

        // 如果模板引擎是 velocity

        // String templatePath = "/templates/mapper.xml.vm";

        /**

         * 自定义输出配置

         */

        List<FileOutConfig> focList = new ArrayList<>();

        // 自定义配置会被优先输出

        focList.add(new FileOutConfig(templatePath) {

            @Override

            public String outputFile(TableInfo tableInfo) {

                // 自定义输出文件名 , 如果你 Entity 设置了前后缀、此处注意 xml 的名称会跟着发生变化!!

                return projectPath + "/src/main/resources/mapper/"+ pc.getModuleName()

                        + "/" + tableInfo.getEntityName() + "Mapper" + StringPool.DOT_XML;

            }

        });

        cfg.setFileOutConfigList(focList);

        mpg.setCfg(cfg);

        /**

         * 配置模板

         */

        TemplateConfig templateConfig = new TemplateConfig();

        // 配置自定义输出模板

        //指定自定义模板路径,注意不要带上.ftl/.vm, 会根据使用的模板引擎自动识别

        // templateConfig.setEntity("templates/entity2.java");

        // templateConfig.setService();

        // templateConfig.setController();

        templateConfig.setXml(null);

        mpg.setTemplate(templateConfig);

        /**

         * 策略配置

         */

        StrategyConfig strategy = new StrategyConfig();

        //设置命名格式

        strategy.setNaming(NamingStrategy.underline_to_camel);

        strategy.setColumnNaming(NamingStrategy.underline_to_camel);

        strategy.setInclude(scanner("表名,多个英文逗号分割").split(","));

        //实体是否为lombok模型(默认 false)

        strategy.setEntityLombokModel(true);

        //生成 @RestController 控制器

        strategy.setRestControllerStyle(true);

        //设置自定义继承的Entity类全称,带包名

        //strategy.setSuperEntityClass("com.jiangfeixiang.mpdemo.BaseEntity");

        //设置自定义继承的Controller类全称,带包名

        //strategy.setSuperControllerClass("com.jiangfeixiang.mpdemo.BaseController");

        //设置自定义基础的Entity类,公共字段

        strategy.setSuperEntityColumns("id");

        //驼峰转连字符

        strategy.setControllerMappingHyphenStyle(true);

        //表名前缀

        strategy.setTablePrefix(pc.getModuleName() + "_");

        mpg.setStrategy(strategy);

        mpg.setTemplateEngine(new FreemarkerTemplateEngine());

        mpg.execute();

    }

}
拆分详解如下:
/**

     * 读取控制台内容

     */

    public static String scanner(String tip) {

        Scanner scanner = new Scanner(System.in);

        StringBuilder help = new StringBuilder();

        help.append("请输入" + tip + ":");

        System.out.println(help.toString());

        if (scanner.hasNext()) {

            String ipt = scanner.next();

            if (StringUtils.isNotEmpty(ipt)) {

                return ipt;

            }

        }

        throw new MybatisPlusException("请输入正确的" + tip + "!");

    }
读取控制台内容无需更改,因为稍后启动main方法只会需要在控制台输入模块名以及数据库表名。官网参考
接下来是main方法,这个也是主程序,逆向工程启动方法。下面看一下配置
AutoGenerator mpg = new AutoGenerator();
代码生成器,所有的配置都需要set进去
全局配置:
GlobalConfig globalConfig = new GlobalConfig();

       //生成文件的输出目录(下面两行无需改动)

       String projectPath = System.getProperty("user.dir");

       globalConfig.setOutputDir(projectPath + "/src/main/java");

       //Author设置作者

       globalConfig.setAuthor("姜飞祥");

       //是否覆盖文件

       globalConfig.setFileOverride(true);

       //生成后打开文件

       globalConfig.setOpen(false);

       //set进去代码生成器对象中

       mpg.setGlobalConfig(globalConfig);
数据源配置
 DataSourceConfig dataSourceConfig = new DataSourceConfig();

        // 数据库类型,默认MYSQL

        dataSourceConfig.setDbType(DbType.MYSQL);

        //自定义数据类型转换

        dataSourceConfig.setTypeConvert(new MySqlTypeConvert());

       //驱动,URL,用户名以及密码配置,这里使用的是mysql5.6版本

        dataSourceConfig.setUrl("jdbc:mysql://localhost:3306/mp?characterEncoding=utf-8&serverTimezone=GMT%2B8&useSSL=false");

        dataSourceConfig.setDriverName("com.mysql.jdbc.Driver");

        dataSourceConfig.setUsername("root");

        dataSourceConfig.setPassword("1234");

        //set进去代码生成器对象中

        mpg.setDataSource(dataSourceConfig);
包配置
 PackageConfig pc = new PackageConfig();

        //这里的模块名需要在控制台输入的,即生成的代码在哪个包下

        pc.setModuleName(scanner("模块名"));

        //父包名。如果为空子包名必须写全部, 否则就只需写子包名

        pc.setParent("com.jiangfeixiang.mpdemo");

        //set进去代码生成器对象中

        mpg.setPackageInfo(pc);
上面父包名是根据工程路径来的,如下参考:
自定义配置
InjectionConfig cfg = new InjectionConfig() {

            @Override

            public void initMap() {

                // to do nothing

            }

        };
自定义输出配置
String templatePath = "/templates/mapper.xml.ftl";

List<FileOutConfig> focList = new ArrayList<>();

        // 自定义配置会被优先输出

        focList.add(new FileOutConfig(templatePath) {

            @Override

            public String outputFile(TableInfo tableInfo) {

                // 自定义输出文件名 , 如果你 Entity 设置了前后缀、此处注意 xml 的名称会跟着发生变化!!

                return projectPath + "/src/main/resources/mapper/"+ pc.getModuleName()

                        + "/" + tableInfo.getEntityName() + "Mapper" + StringPool.DOT_XML;

            }

        });

        //这块是set到上面自定义配置中

        cfg.setFileOutConfigList(focList);

        //set进去代码生成器对象中

        mpg.setCfg(cfg);
最后是策略配置
StrategyConfig strategy = new StrategyConfig();

        //设置命名格式

        strategy.setNaming(NamingStrategy.underline_to_camel);

        strategy.setColumnNaming(NamingStrategy.underline_to_camel);

        strategy.setInclude(scanner("表名,多个英文逗号分割").split(","));

        //实体是否为lombok模型(默认 false)

        strategy.setEntityLombokModel(true);

        //生成 @RestController 控制器

        strategy.setRestControllerStyle(true);

        //设置自定义继承的Entity类全称,带包名

        //strategy.setSuperEntityClass("com.jiangfeixiang.mpdemo.BaseEntity");

        //设置自定义继承的Controller类全称,带包名

        //strategy.setSuperControllerClass("com.jiangfeixiang.mpdemo.BaseController");

        //设置自定义基础的Entity类,公共字段

        strategy.setSuperEntityColumns("id");

        //驼峰转连字符

        strategy.setControllerMappingHyphenStyle(true);

        //表名前缀

        strategy.setTablePrefix(pc.getModuleName() + "_");

        mpg.setStrategy(strategy);

        mpg.setTemplateEngine(new FreemarkerTemplateEngine());

        mpg.execute();
以上全部配置好之后直接启动main方法,之后进入控制台
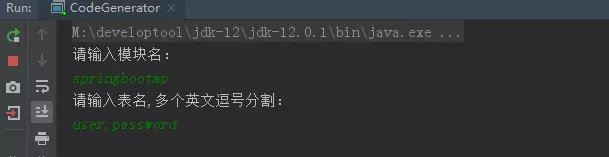
我的模块名是springbootmp,因为我有两张表,输入两个表的名称回车即可生成对应的代码,所生成的代码在模块名springbootmp下
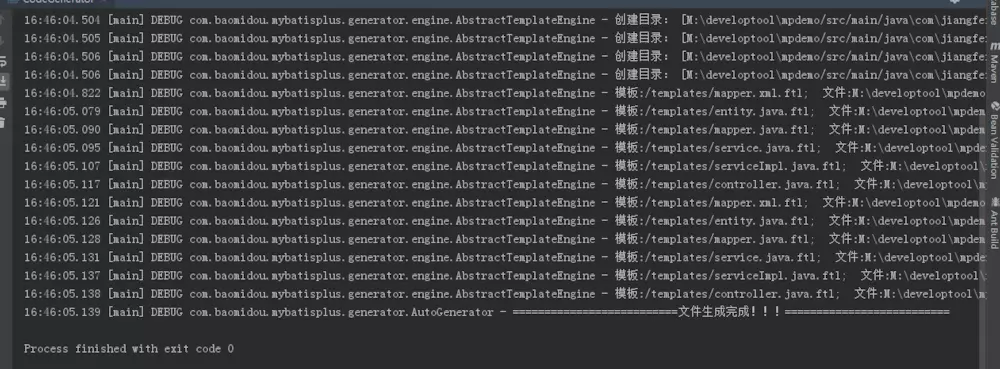
正确执行控制台输出如下
然后看一下模块:
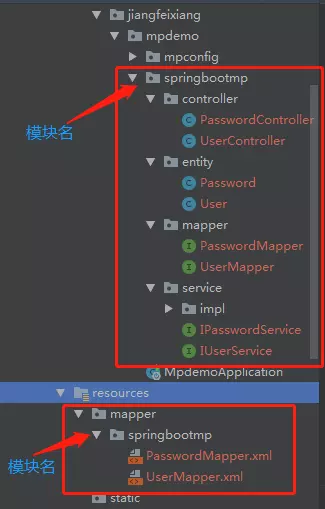
xxxmapper.xml文件是空的:

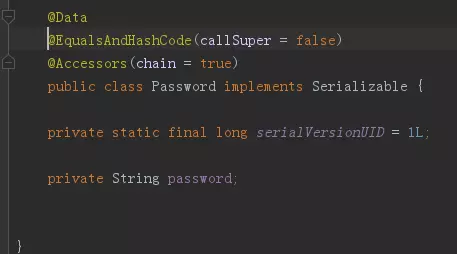
实体类已经加上@Data注解省略了get/set方法并序列化
mapper接口继承了BaseMapper

接口中没有数据的增删改查方法,那么我们直接在UserController类中注入IUserService接口,查询所有user看看有没有输出:
@RestController

@RequestMapping("/springbootmp/user")

public class UserController {

    @Autowired

    private IUserService iUserService;

    /**

     * 获取所有User

     * @return

     */

    @RequestMapping("/getAllUser")

    public List<User> getAllUser(){

        List<User> list = iUserService.list();

        return list;

    }

}
项目运行直接报错如下:
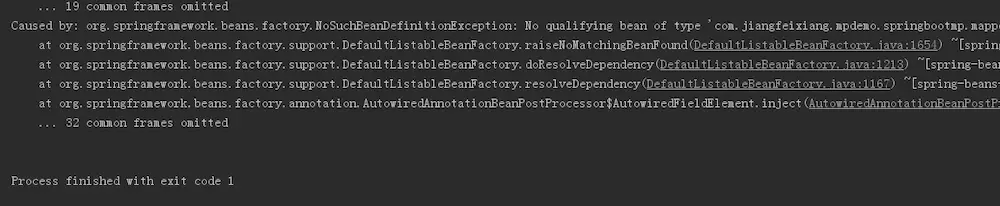
原因是因为主程序中没有加入@MapperScan("com.jiangfeixiang.mpdemo.springbootmp.mapper")

引入即可。之后重新运行启动成功控制台如下图:

还有mybatisplus是不是很漂亮。
调用接口测试如下

springboot整合mybatis-plus逆向工程的更多相关文章
- SpringBoot 2.SpringBoot整合Mybatis
一.创建Springboot的配置文件:application.properties,并添加MyBatis依赖 SpringApplication 会从 application.properties ...
- SpringBoot整合Mybatis之项目结构、数据源
已经有好些日子没有总结了,不是变懒了,而是我一直在奋力学习springboot的路上,现在也算是完成了第一阶段的学习,今天给各位总结总结. 之前在网上找过不少关于springboot的教程,都是一些比 ...
- SpringBoot整合Mybatis【非注解版】
接上文:SpringBoot整合Mybatis[注解版] 一.项目创建 新建一个工程 选择Spring Initializr,配置JDK版本 输入项目名 选择构建web项目所需的state ...
- SpringBoot整合Mybatis注解版---update出现org.apache.ibatis.binding.BindingException: Parameter 'XXX' not found. Available parameters are [arg1, arg0, param1, param2]
SpringBoot整合Mybatis注解版---update时出现的问题 问题描述: 1.sql建表语句 DROP TABLE IF EXISTS `department`; CREATE TABL ...
- springboot学习随笔(四):Springboot整合mybatis(含generator自动生成代码)
这章我们将通过springboot整合mybatis来操作数据库 以下内容分为两部分,一部分主要介绍generator自动生成代码,生成model.dao层接口.dao接口对应的sql配置文件 第一部 ...
- springboot整合mybatis出现的一些问题
springboot整合mybatis非常非常的简单,简直简单到发指.但是也有一些坑,这里我会详细的指出会遇到什么问题,并且这些配置的作用 整合mybatis,无疑需要mapper文件,实体类,dao ...
- springBoot整合mybatis、jsp 或 HTML
springBoot整合mybatis.jsp Spring Boot的主要优点: 1: 为所有Spring开发者更快的入门: 2: 开箱即用,提供各种默认配置来简化项目配置: 3: 内嵌式容器 ...
- SpringBoot系列七:SpringBoot 整合 MyBatis(配置 druid 数据源、配置 MyBatis、事务控制、druid 监控)
1.概念:SpringBoot 整合 MyBatis 2.背景 SpringBoot 得到最终效果是一个简化到极致的 WEB 开发,但是只要牵扯到 WEB 开发,就绝对不可能缺少数据层操作,所有的开发 ...
- SpringBoot整合Mybatis完整详细版二:注册、登录、拦截器配置
接着上个章节来,上章节搭建好框架,并且测试也在页面取到数据.接下来实现web端,实现前后端交互,在前台进行注册登录以及后端拦截器配置.实现简单的未登录拦截跳转到登录页面 上一节传送门:SpringBo ...
- SpringBoot整合Mybatis完整详细版
记得刚接触SpringBoot时,大吃一惊,世界上居然还有这么省事的框架,立马感叹:SpringBoot是世界上最好的框架.哈哈! 当初跟着教程练习搭建了一个框架,传送门:spring boot + ...
随机推荐
- 《C++ Primer》读书笔记之第15章:面向对象编程
一.面向对象概述 1. 面向对象的三个基本特性 封装.继承和多态. 2. 封装 指把隐藏对象的实现细节,仅对外提供接口,从而达到接口与实现分离的效果.封装的好处:一是提高数据的安全性,用户只能使用对象 ...
- [OpenBenchMarking] AMD CPU 的性能简单对比
来源: https://openbenchmarking.org/result/1710193-AL-EPYC7351P64 1. 2. 3. 4.
- appium+python教程1
Python3+Appium安装使用教程 一.安装 我们知道selenium是桌面浏览器自动化操作工具(Web Browser Automation) appium是继承selenium自动化思想旨在 ...
- [转] zookeeper 本地启动多节点
1. zoo.cfg配置文件如下: # The number of milliseconds of each tick tickTime=2000 # The number of ticks that ...
- java中讲讲DataInputStream的用法,举例?
[学习笔记] 2.4 DataInputStream的用法 马 克-to-win:DataInputStream顾名思义:就是专门用来读各种各样的数据的,比如(int,char,long等),一定要注 ...
- LeetCode 第 165 场周赛
LeetCode 第 165 场周赛 5275. 找出井字棋的获胜者 5276. 不浪费原料的汉堡制作方案 5277. 统计全为 1 的正方形子矩阵 5278. 分割回文串 III C 暴力做的,只能 ...
- mysql 连接远程连接服务器 1130错误
今天在用sqlyog连接非本地的Mysql服务器的数据库,居然无法连接很奇怪,报1130错误, ERROR 1130: Host 192.168.3.100 is not allowed to con ...
- (十五)springMvc 拦截器
文章目录 定义拦截器 接口中三个方法 配置拦截器 多个拦截器的规则 定义拦截器 springMvc 中定义拦截器只需要实现一个接口 org.springframework.web.servlet.Ha ...
- PID程序实现
传统PID(位置式PID控制)调节: 这种算法的缺点是,由于全量输出,每次输出均与过去的状态有关,计算时要对 e(k) 进行累加,计算机运算工作量大.而且,因为计算机输出的 u(k) 对应的是执行机构 ...
- python基础(十)--函数进阶
嵌套函数 >>> graphic = '三角形' >>> def chang(): graphic = '正方形' def chang1(): #内部嵌套的函数命名 ...