CentOS 7.x上gitlab搭建教程(https可用,邮件可用)
目录
- 知识要求
- 搭建感想
- 搭建过程
- 参考
知识要求:
nginx基础知识
搭建感想
注:以下是我搭建
gitlab时的思考,需要nginx的基础知识,Docker的基础知识才容易理解,与下面的搭建过程是独立的,不感兴趣可直接略过。
其实gitlab已经搭建并用了一年多了,现在所有的项目管理都通过gitlab完成。但是一直以来都有2个问题:
80端口被系统的nginx占用了,所以只能监听非80端口;443端口也被系统的nginx占用,所以也一直没增加对https的支持;
最近正在尝试对所有已有的服务Docker化,一方面想让gitlab的搭建更简单些,另一方面也把这两个问题都处理掉。
于是就做了两个Docker容器: nginx和gitlab,相当于nginx和gitlab运行在局域网的不同主机,所以端口上没冲突。nginx是对外的服务器,它做一层反向代理到gitlab就能让gitlab提供对外的服务。
然而。。。这个做法却带来了一个新问题:gitlab需要的是22,80,443端口,80与443通过反向代理解决了,22却没办法解决。因为正常来讲,宿主机的SSH肯定也在使用,所以gitlab的SSH监听端口映射到宿主机会有冲突。
当然了,解决办法还是有的,不过非常繁琐。我们做Docker的目的不就是为了降低布署难度吗?如果使用Docker的配置比在宿主机上还繁琐,那使用起来就没太大意义了。
于是gitlab就没有放在Docker中,而是直接搭在宿主机上。
搭建过程
安装
gitlab的安装是很简单的,先下载安装包:
wget https://mirrors.tuna.tsinghua.edu.cn/gitlab-ce/yum/el7/gitlab-ce-10.2.5-ce.0.el7.x86_64.rpm
安装:
rpm -Uvh gitlab-ce-10.2.5-ce.0.el7.x86_64.rpm
配置
gitlab内置了nginx的服务,所以默认会占用80和443端口。一般来说,我们做WEB开发,服务器上早就安装了nginx或者apache,把80和443端口给占了,所以需要做些修改防止冲突。
简单的修改端口是不可行的,比如80改成85,当查看gitlab项目时,下图中的项目地址会变成http://git.papamk.com:85/papamk/groupbill这样,看着就不舒服。启用https则在使用过程中则会出现其他的问题。这里不一一论述,直接说明正确的配置方法。

具体步骤:
1.首先确保你的服务器已经有运行nginx,并且该nginx监听宿主机的80和443端口。(如果你原来使用的apache,请通过nginx反向代理到apache,这样apache原来的服务仍然可用)。
2.编辑/etc/gitlab/gitlab.rb:
# 编辑对外的域名(gitlab.papamk.com请添加A记录指向本服务器的公网IP):

external_url 'http://gitlab.papamk.com/'

# 禁用`gitlab`内置的`nginx`:

nginx['enable'] = false

# 修改成与nginx运行时的用户一致

web_server['external_users'] = ['www']
修改监听方式和监听地址(如果nginx与gitlab都在宿主机上,不用改也行;如果nginx在docker中,则需要修改)
gitlab_workhorse['listen_network'] = "tcp"

# 下面的172.18.147.173为本机IP,根据实际情况修改,不能为localhost或者127.0.0.1,否则docker访问不到

gitlab_workhorse['listen_addr'] = "172.18.147.173:8181"
最后执行下面命令让配置生效:
$gitlab-ctl reconfigure
3.配置nginx
增加gitlab.conf的配置(所有需要注意的地方都加了中文注释):
upstream gitlab-workhorse {

  server 172.18.147.173:8181; #根据实际情况修改

}

## Normal HTTP host

server {

  listen 80;

  listen [::]:80 default_server;

  server_name gitlab.papamk.com; ## 修改成自己的域名;

  server_tokens off; ## Don't show the nginx version number, a security best practice

  root /opt/gitlab/embedded/service/gitlab-rails/public;

  ## See app/controllers/application_controller.rb for headers set

  ## Individual nginx logs for this GitLab vhost

  access_log  /home/wwwlogs/gitlab_access.log; # 根据实际情况修改

  error_log   /home/wwwlogs/gitlab_error.log; # 根据实际情况修改

  location / {

    client_max_body_size 0;

    gzip off;

    ## https://github.com/gitlabhq/gitlabhq/issues/694

    ## Some requests take more than 30 seconds.

    proxy_read_timeout      300;

    proxy_connect_timeout   300;

    proxy_redirect          off;

    proxy_http_version 1.1;

    proxy_set_header    Host                $http_host;

    proxy_set_header    X-Real-IP           $remote_addr;

    proxy_set_header    X-Forwarded-For     $proxy_add_x_forwarded_for;

    proxy_set_header    X-Forwarded-Proto   $scheme;

    proxy_pass http://gitlab-workhorse;

  }

}
该配置根据官网提供的配置修改而来: https://gitlab.com/gitlab-org/gitlab-recipes/blob/master/web-server/nginx/gitlab-omnibus-nginx.conf。
重启nginx:
$sudo service nginx restart
4.登陆浏览器,这时可以看到安装成功了,如下图所示:
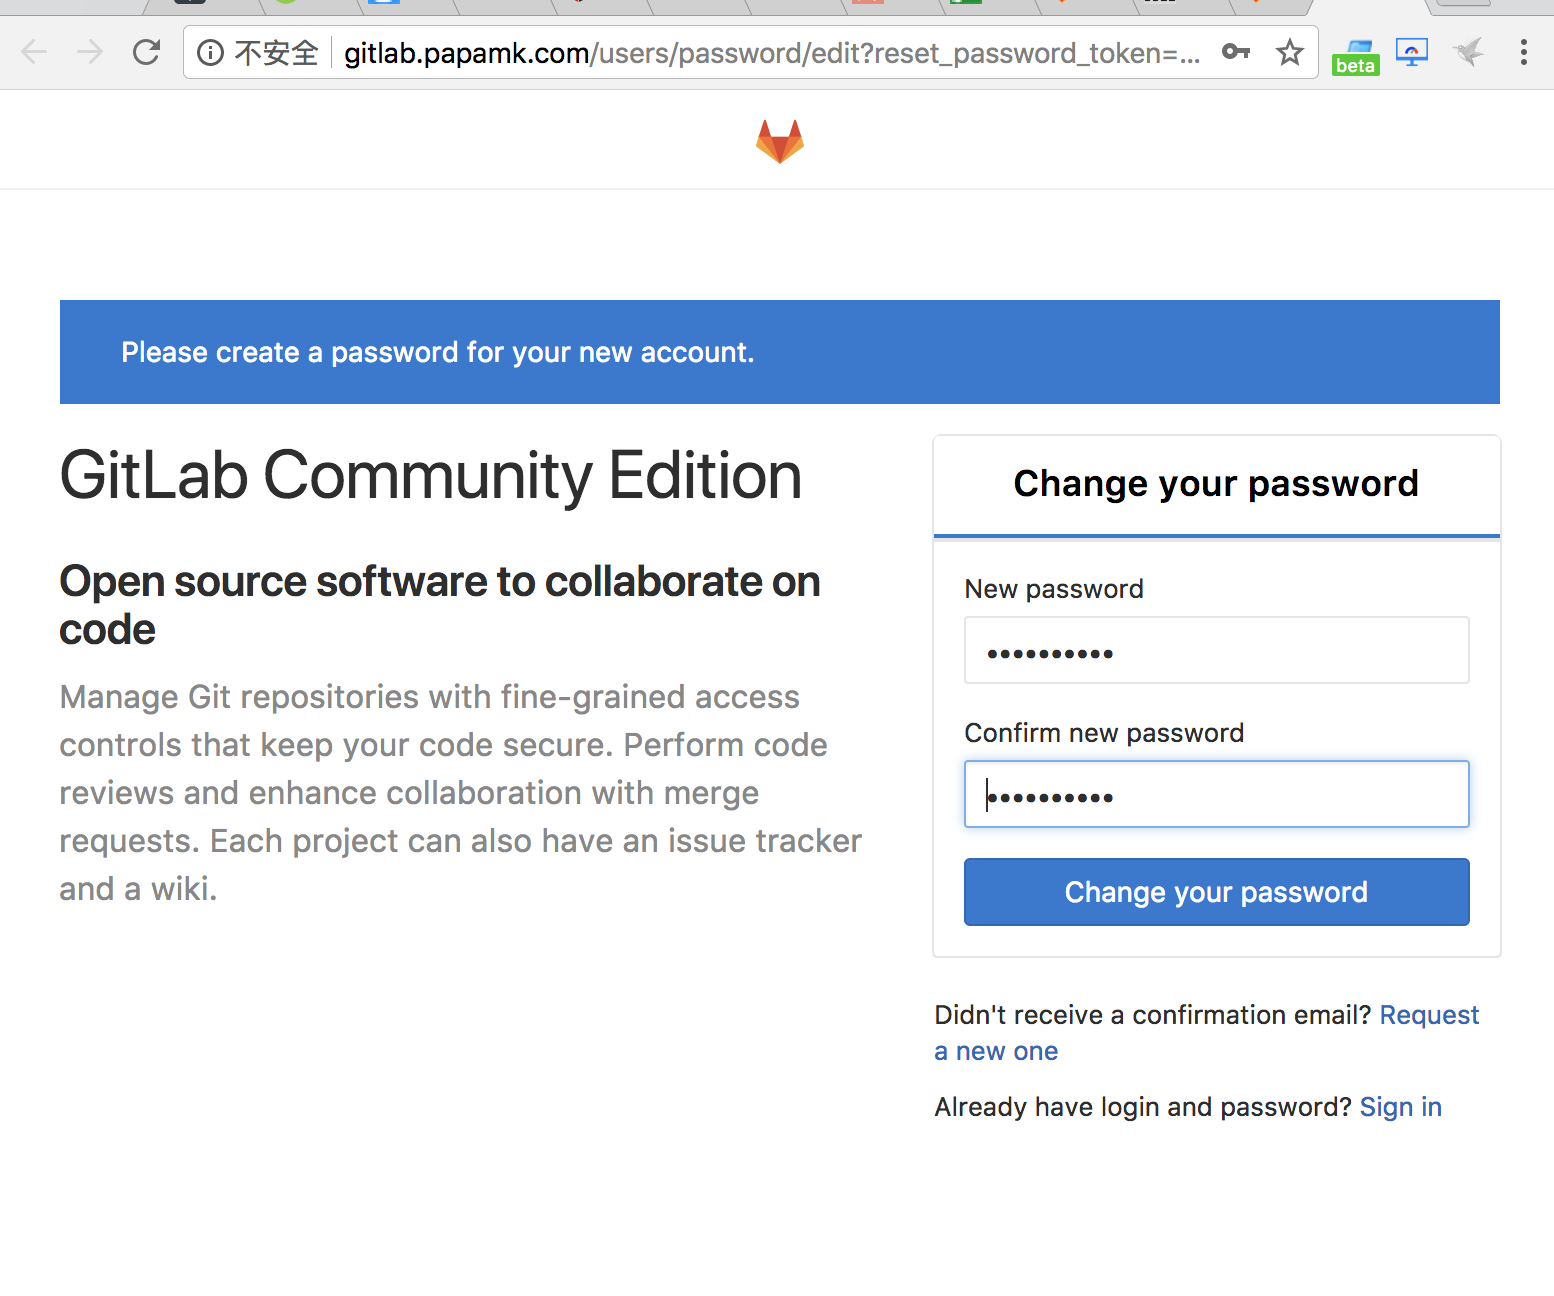
首次登陆会要求重置管理员密码,管理员的默认用户名为root。

https的支持
1.使用Let's encrypt申请免费的SSL证书,该项目提供了一个叫certbot/certbot-auto的工具获取证书,执行下面命令获取工具:
$wget https://dl.eff.org/certbot-auto

$chmod +x certbot-auto
执行下面命令生成生成gitlab.papamk.com的证书,其中--agree-tos表示同意协议,--email 95496875@qq.com为自己的email。
$./certbot-auto --agree-tos --email 95496875@qq.com certonly --webroot -w /opt/gitlab/embedded/service/gitlab-rails/public/ -d gitlab.papamk.com
执行成功后,可通过以下命令查看下证书位置,nginx需要引用这些文件。(一般位于/etc/letsencrypt/live/gitlab.papamk.com/目录)
$./certbot-auto certificates
2.修改/etc/gitlab/gitlab.rb,对外的URL改为https:
external_url 'https://gitlab.papamk.com'
执行重新配置命令以便让新配置生效:
$gitlab-ctl reconfigure
3.修改前面的nginx的gitlab.conf的配置,全部替换成下面的内容(所有需要注意的地方都加了中文注释):
upstream gitlab-workhorse {

  server 172.18.147.173:8181; #根据实际情况修改

}

## Redirects all HTTP traffic to the HTTPS host

server {

  ## Either remove "default_server" from the listen line below,

  ## or delete the /etc/nginx/sites-enabled/default file. This will cause gitlab

  ## to be served if you visit any address that your server responds to, eg.

  ## the ip address of the server (http://x.x.x.x/)

  listen 0.0.0.0:80;

  listen [::]:80 ipv6only=on default_server;

  server_name gitlab.papamk.com; ## 改成自己的域名

  server_tokens off; ## Don't show the nginx version number, a security best practice

  return 301 https://$http_host$request_uri;

  access_log  /home/wwwlogs/gitlab_access.log; # 根据实际情况修改

  error_log   /home/wwwlogs/gitlab_error.log; # 根据实际情况修改

}

## HTTPS host

server {

  listen 0.0.0.0:443 ssl;

  listen [::]:443 ipv6only=on ssl default_server;

  server_name gitlab.papamk.com; ## 改成自己的域名

  server_tokens off; ## Don't show the nginx version number, a security best practice

  root /opt/gitlab/embedded/service/gitlab-rails/public;

  ## Strong SSL Security

  ## https://raymii.org/s/tutorials/Strong_SSL_Security_On_nginx.html & https://cipherli.st/

  ssl on;

  ssl_certificate /etc/letsencrypt/live/gitlab.papamk.com/fullchain.pem;

  ssl_certificate_key /etc/letsencrypt/live/gitlab.papamk.com/privkey.pem;

  # GitLab needs backwards compatible ciphers to retain compatibility with Java IDEs

  ssl_ciphers "ECDHE-RSA-AES256-GCM-SHA384:ECDHE-RSA-AES128-GCM-SHA256:ECDHE-RSA-AES256-SHA384:ECDHE-RSA-AES128-SHA256:ECDHE-RSA-AES256-SHA:ECDHE-RSA-AES128-SHA:ECDHE-RSA-DES-CBC3-SHA:AES256-GCM-SHA384:AES128-GCM-SHA256:AES256-SHA256:AES128-SHA256:AES256-SHA:AES128-SHA:DES-CBC3-SHA:!aNULL:!eNULL:!EXPORT:!DES:!MD5:!PSK:!RC4";

  ssl_protocols TLSv1 TLSv1.1 TLSv1.2;

  ssl_prefer_server_ciphers on;

  ssl_session_cache shared:SSL:10m;

  ssl_session_timeout 5m;

  ##   sudo openssl dhparam -out /etc/ssl/certs/dhparam.pem 4096

  # ssl_dhparam /etc/ssl/certs/dhparam.pem;

  access_log  /home/wwwlogs/gitlab_access.log; # 根据实际情况修改

  error_log   /home/wwwlogs/gitlab_error.log; # 根据实际情况修改

  location / {

    client_max_body_size 0;

    gzip off;

    ## https://github.com/gitlabhq/gitlabhq/issues/694

    ## Some requests take more than 30 seconds.

    proxy_read_timeout      300;

    proxy_connect_timeout   300;

    proxy_redirect          off;

    proxy_http_version 1.1;

    proxy_set_header    Host                $http_host;

    proxy_set_header    X-Real-IP           $remote_addr;

    proxy_set_header    X-Forwarded-Ssl     on;

    proxy_set_header    X-Forwarded-For     $proxy_add_x_forwarded_for;

    proxy_set_header    X-Forwarded-Proto   $scheme;

    proxy_pass http://gitlab-workhorse;

  }

}
重启nginx:
$sudo service nginx restart
4.定期更新ssl证书
Let's encrypt提供的证书,有效期为90天,到期后执行如下命令即可继续使用:
$./certbot-auto renew
将该命令加入到crontab,每小时刷新一次,就不用担心过期了。先将该命令移到系统目录下:
$sudo mv certbot-auto /usr/bin/certbot-auto
然后执行crontab -e,添加一行:
0 */1 * * * /usr/bin/certbot-auto renew
发送邮件的支持
官网已经给出详细的配置说明和各大邮件服务提供商的示例,不再对配置做说明: https://docs.gitlab.com/omnibus/settings/smtp.html。
我自己使用163邮箱做测试,而官网示例没有,这里给出参考配置:
gitlab_rails['gitlab_email_from'] = 'xxxx@163.com' # 替换成实际的email

gitlab_rails['smtp_enable'] = true

gitlab_rails['smtp_address'] = "smtp.163.com"

gitlab_rails['smtp_port'] = 465

gitlab_rails['smtp_user_name'] = "xxxx@163.com" # 替换成实际的email

gitlab_rails['smtp_password'] = "xxx"  # 替换成实际的密码

#gitlab_rails['smtp_domain'] = "163.com"

gitlab_rails['smtp_authentication'] = "login"

gitlab_rails['smtp_enable_starttls_auto'] = true

gitlab_rails['smtp_tls'] = true
一般来说,服务提供商的SMTP邮箱都会限制每日发送次数(250封左右),所以推荐有兴趣的同学用Postfix自建邮箱服务器,或者使用mailgun这种专业的邮件服务提供商。
如果是阿里云上的服务器,作为客户端使用第三方的SMTP配置,会发现被禁止连接
SMTP的25端口,需要使用465或者587。
安全相关
root的密码建议设置得复杂些;- 管理员登陆后,推荐开启注册邮箱验证, 防恶意注册,见:https://docs.gitlab.com/ce/security/user_email_confirmation.html。
参考
CentOS 7.x上gitlab搭建教程(https可用,邮件可用)的更多相关文章
- Openssl的编译安装以及Vs2012上环境搭建教程
Openssl的编译安装以及Vs2012上环境搭建教程 一.Openssl的编译安装 一.准备工作 1.Openssl下载地址:https://www.openssl.org/source/ 2.Ac ...
- centos7安装gitlab 支持带认证https,开启邮件功能 超级简单.
官方安装说明:https://about.gitlab.com/install/#centos-7 自定义yum源 自行搞定 下载gitlab 官方安装: curl -s https://packag ...
- CentOS 7 系统下 GitLab 搭建
参考地址:https://blog.csdn.net/t748588330/article/details/79915003 1. 安装:使用 GitLab 提供仓库在线安装 curl -sS htt ...
- CentOS 6.0下phpvod搭建教程(LAMP+phpvod)
之所以安装CentOS是因为之前试过RedHat,但是发现RedHat在安装时,无法获取安装源,原因是RedHat系统没有在RHN注册. 网上的很多教程都说可以直接换用CentOS的源,可我小搞里一会 ...
- Redis在CentOS for LInux上安装详细教程
1.首先上传安装包,这里我以 redis-5.0.8.tar.gz 为例子. Linux下载redis地址:wget http://download.redis.io/releases/redis-5 ...
- WordPress搭建教程---购买域名+购买VPS主机+域名DNS解析+网站环境+上传网站程序
WordPress搭建教程 购买域名---NameSilo 购买VPS主机---Vultr 域名DNS解析 网站环境 上传网站程序 参考文章: 1. WordPress搭建教程 https://zhu ...
- gitlab 搭建
一.ubuntu搭建gitlab 1. 如果以前有安装过gitlab请根据以下步骤来删除 https://www.cnblogs.com/shansongxian/p/6678110.htm ...
- centos 7.4 安装gitlab
centos 7.4 安装gitlab #curl -s https://packages.gitlab.com/install/repositories/gitlab/gitlab-ce/scrip ...
- gitlab服务器搭建教程
gitlab服务器搭建教程 ----2016年终总结 三 参考https://bbs.gitlab.cc/topic/35/gitlab-ce-8-7-%E6%BA%90%E7%A0%81%E5%AE ...
随机推荐
- 【原创】通过搬瓦工vps搭建SS环境,供学习用
博主前段时间处于某些不可告人的目的,但又限于各类科学工具被禁的窘境,用搬瓦工的vps搭建了次SS环境,现在就来回顾并不知廉耻的传授下经验. 第一步:购买vps 1.登录官网 https://bwh1. ...
- CSS以图换字的9种方法
前面的话 CSS以图换字的技术,很久都没人提起了.它是一种在h1标签内,使用图像替换文本元素的技术,使页面在设计和可访问性之间达到平衡.本文将详细介绍CSS以图换字的9种方法 文字隐藏 在h1标签中, ...
- thinkphp 使用插件异步上传图片或者文件
使用tp做一些上传的功能,的确挺方便.但是在一些特殊情况下无法单独的使用tp的上传功能, 或者需要做一些比较酷炫的上传效果,这里就需要用到框架了. 我在这里使用的是uploadify上传插件. 首先需 ...
- Float精度丢失
BigDecimal _0_1 = new BigDecimal(0.1); BigDecimal x = _0_1; for(int i = 1; i <= 10; i ++) { Syste ...
- vue.js初学,笔记1,安装
最近学习vue.js,下面是笔记: 说明:因为npm安装插件是从国外服务器下载,受网络影响大,可能出现异常,如果npm的服务器在中国就好了,所以我们乐于分享的淘宝团队干了这事.来自官网:"这 ...
- Hashtable 小记
Hashtable 是 JDK 中较早的数据结构了,目前已不再推荐使用了.但抱着学习的目的,还是看了下它的实现. 简介 Hashtable,顾名思义即哈希表,是一种经典的数据结构.其基本结构是一个数组 ...
- Python爬虫(十三)_案例:使用XPath的爬虫
本篇是使用XPath的案例,更多内容请参考:Python学习指南 案例:使用XPath的爬虫 现在我们用XPath来做一个简单的爬虫,我们尝试爬取某个贴吧里的所有帖子且将该帖子里每个楼层发布的图片下载 ...
- 》》jqurey mobile 初
<!DOCTYPE html> <html> <head> <meta charset="utf-8" /> <meta na ...
- javaWeb中URLEncoder.encode空格问题
近期开发一个在线坐席的功能.发现推送的消息中空格变成了+ .查询发现URLEncoder.encode的问题.曾经用的时候也没注意过,解决的方法网上是对URLEncoder.encode的之后的字符串 ...
- hdu 5635 LCP Array(BC第一题)
题目链接:http://acm.hdu.edu.cn/showproblem.php?pid=5635 LCP Array Time Limit: 4000/2000 MS (Java/Others) ...
