pytest文档8-参数化(parametrize)结合allure.title()生成不同标题报告
参数化parametrize
先看一个简单的pytest参数化案例演示test_a.py
# test_a.py

import pytest

import allure

def login(username, password):

    '''登录'''

    print("输入账号:%s" % username)

    print("输入密码:%s" % password)

    # 返回

    return {"code": 0, "msg": "success!"}

# 测试数据

test_datas = [

    ({"username": "yoyo1", "password": "123456"}, "success!"),

    ({"username": "yoyo2", "password": "123456"}, "failed!"),

    ({"username": "yoyo3", "password": "123456"}, "success!"),

]

@allure.story("登录用例")

@pytest.mark.parametrize("test_input,expected",

                         test_datas

                         )

def test_login(test_input, expected):

    '''测试登录用例'''

    # 获取函数返回结果

    result = login(test_input["username"], test_input["password"])

    # 断言

    assert result["msg"] == expected
cmd命令行运行用例
> pytest --alluredir ./report test_a.py

> allure serve ./report
生成报告
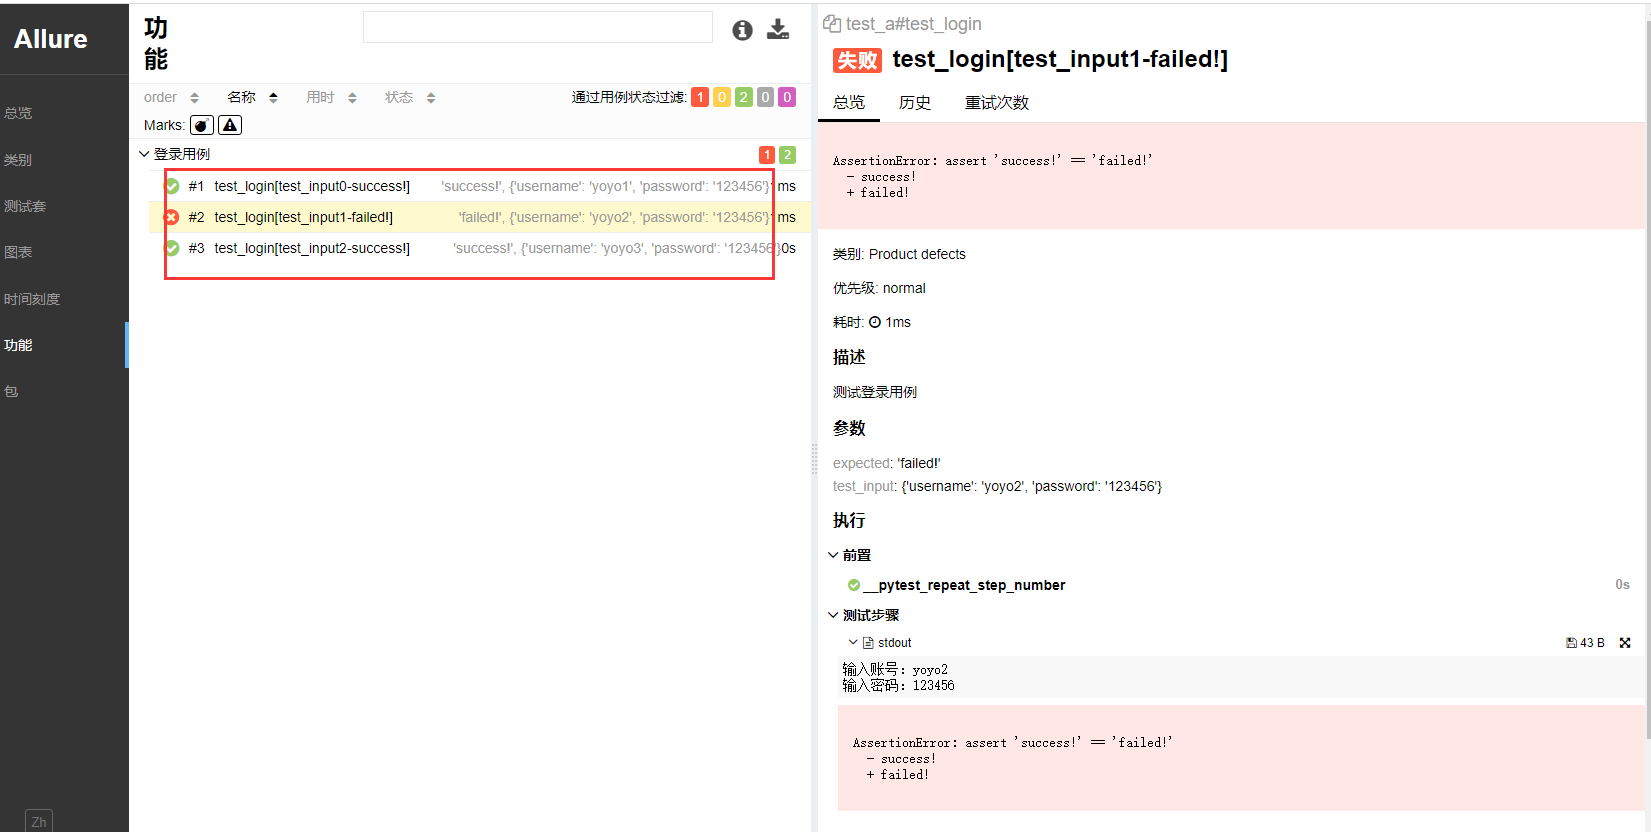
这样生成的报告在用例列表里面并不能很友好的展示出每个用例的执行场景,只知道哪个用例报错了。
于是需要对每个用例加上描述,加一个 ids 参数
ids 参数使用
在上面用例部分代码里面加个 ids 参数,用于描述每个用例的运行场景。
@allure.story("登录用例")

@pytest.mark.parametrize("test_input,expected",

                         test_datas,

                         ids=[

                             "输入正确账号,密码,登录成功",

                             "输入错误账号,密码,登录失败",

                             "输入正确账号,密码,登录成功",

                         ]

                         )

def test_login(test_input, expected):

    '''测试登录用例'''

    # 获取函数返回结果

    result = login(test_input["username"], test_input["password"])

    # 断言

    assert result["msg"] == expected
cmd命令行运行用例
> pytest --alluredir ./report test_a.py

> allure serve ./report
生成报告
allure.title描述用例
上面是通过在 parametrize 里面添加 ids 参数解决,接下来再讲一个用 allure.title("用例描述") 添加用例描述的方式解决。
使用 @allure.title("用例描述") 时,可以加上传入的参数,如传入的参数 "test_input,expected" ,需拼接test_input参数的值,可以这样写
@allure.title("用例描述,测试输入:{test_input}")
在 allure_pytest/utils.py 源码里面可以找到对应的代码
# allure_pytest/utils.py

def allure_name(item, parameters):

    name = escape_name(item.name)

    title = allure_title(item)

    return title.format(**parameters) if title else name
当没有加allure.title()时候,用例的描述就是 item.name 值(也就是上面的 ids 用例的名称),
如果加了allure.title(),那么用例的描述就是添加的title值,这两个地方取其中的一个。
import pytest

import allure

def login(username, password):

    '''登录'''

    print("输入账号:%s" % username)

    print("输入密码:%s" % password)

    # 返回

    return {"code": 0, "msg": "success!"}

# 测试数据

test_datas = [

    ({"username": "yoyo1", "password": "123456"}, "success!"),

    ({"username": "yoyo2", "password": "123456"}, "failed!"),

    ({"username": "yoyo3", "password": "123456"}, "success!"),

]

@allure.story("登录用例")

@allure.title("用例描述,测试输入:{test_input}")

@pytest.mark.parametrize("test_input,expected",

                         test_datas,

                         ids=[

                             "输入正确账号,密码,登录成功",

                             "输入错误账号,密码,登录失败",

                             "输入正确账号,密码,登录成功",

                         ]

                         )

def test_login(test_input, expected):

    '''测试登录用例'''

    # 获取函数返回结果

    result = login(test_input["username"], test_input["password"])

    # 断言

    assert result["msg"] == expected
cmd命令行运行用例
> pytest --alluredir ./report test_a.py

> allure serve ./report
生成报告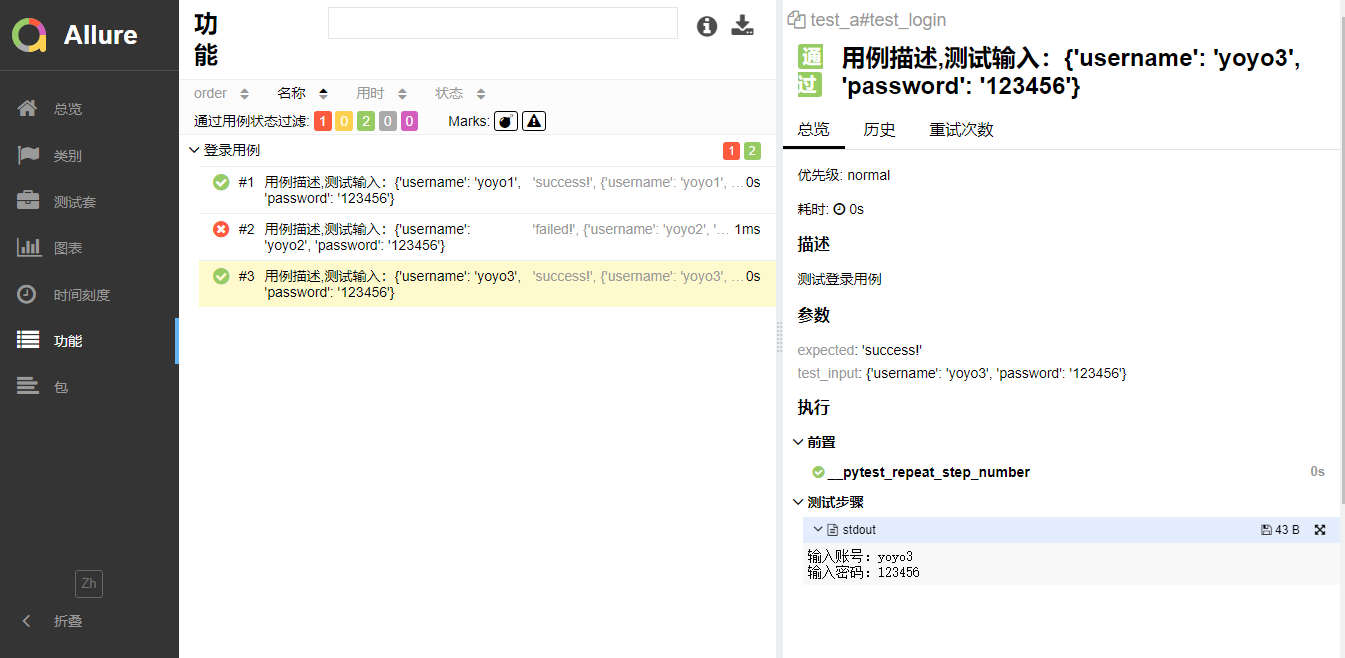
优化用例title
结合上面两种实现方式,把用例描述当成一个测试输入的参数,继续优化后如下
需注意的是 parametrize 里面三个参数 test_input,expected,title 跟 test_login(test_input, expected, title) 里面三个参数保持一致
import pytest

import allure

def login(username, password):

    '''登录'''

    print("输入账号:%s" % username)

    print("输入密码:%s" % password)

    # 返回

    return {"code": 0, "msg": "success!"}

# 测试数据

test_datas = [

    ({"username": "yoyo1", "password": "123456"}, "success!", "输入正确账号,密码,登录成功"),

    ({"username": "yoyo2", "password": "123456"}, "failed!", "输入错误账号,密码,登录失败"),

    ({"username": "yoyo3", "password": "123456"}, "success!", "输入正确账号,密码,登录成功"),

]

@allure.story("登录用例")

@allure.title("{title}")

@pytest.mark.parametrize("test_input,expected,title",

                         test_datas

                         )

def test_login(test_input, expected, title):

    '''测试登录用例'''

    # 获取函数返回结果

    result = login(test_input["username"], test_input["password"])

    # 断言

    assert result["msg"] == expected

pytest文档8-参数化(parametrize)结合allure.title()生成不同标题报告的更多相关文章
- pytest文档42-fixture参数化params
前言 参数化是自动化测试里面必须掌握的一个知识点,用过 unittest 框架的小伙伴都知道使用 ddt 来实现测试用例的参数化. pytest 测试用例里面对应的参数可以用 parametrize ...
- pytest文档7-pytest-html生成html报告
前言 pytest-HTML是一个插件,pytest用于生成测试结果的HTML报告.兼容Python 2.7,3.6 pytest-html 1.github上源码地址[https://github. ...
- pytest文档3-pycharm运行pytest
前言 上一篇pytest文档2-用例运行规则已经介绍了如何在cmd执行pytest用例,平常我们写代码在pycharm比较多 写完用例之后,需要调试看看,是不是能正常运行,如果每次跑去cmd执行,太麻 ...
- pytest文档3-pytest+Allure+jenkins+邮箱发送
前言: 虽然网上有很多邮件配置的文章,但还是想自己写一下配置的过程,因为在中间也碰到了不同坑.按照这个文档配置的话,99%都可以成功. 一.jenkins 配置邮箱 1.打开jenkins后进入点 ...
- pytest文档1-环境准备与入门
前言 首先说下为什么要学pytest,在此之前相信大家已经掌握了python里面的unittest单元测试框架,那再学一个框架肯定是需要学习时间成本的. 刚开始我的内心是拒绝的,我想我用unittes ...
- pytest文档44-allure.dynamic动态生成用例标题
前言 pytest 结合 allure 描述用例的时候我们一般使用 @allure.title 和 @allure.description 描述测试用例的标题和详情. 在用例里面也可以动态更新标题和详 ...
- pytest文档21-pytest-html报告优化(nodeid中文显示[\u6350\u52a9\u6211\u4eec]问题解决)
前言 pytest-html报告中当用到参数化时候,获取用例的nodeid里面有中文时候,会显示[\u6350\u52a9\u6211\u4eec]这种编码(再次声明,这个不叫乱码,这是unicode ...
- pytest文档19-doctest测试框架
前言 doctest从字面意思上看,那就是文档测试.doctest是python里面自带的一个模块,它实际上是单元测试的一种. 官方解释:doctest 模块会搜索那些看起来像交互式会话的 Pytho ...
- pytest文档56-插件打包上传到 pypi 库
前言 pytest 的插件完成之后,可以上传到 github,方便其他小伙伴通过 pip 源码安装.如果我们想通过 pip install packages 这种方式安装的话,需上传到 pypi 仓库 ...
随机推荐
- mysql联合查询更新数据库例子
mysql联合查询更新数据库例子,用户表,部门表,把用户表中的部门属性更新为部门表的主键UPDATE user_table AS utINNER JOIN belongdept AS bd ON bd ...
- html5调用摄像头截图
关于html5调用音视频等多媒体硬件的API已经很成熟,不过一直找不到机会把这些硬件转化为实际的应用场景,不过近年来随着iot和AI的浪潮,我觉得软硬结合的时机已经成熟.那我们就提前熟悉下怎么操作这些 ...
- c++ 之面试题(3)数组递归查找
题目描述 1. 给定严格升序(没有相等元素)的数组a,元素个数为cnt, 查找num在数组中的位置序号(以0位起始). 如果没找到则返回: 比num小且最靠近的元素位置序号. 若所有元素均大于num则 ...
- mac osx 准备 nanogui 记录
!!版权声明:本文为博主原创文章,版权归原文作者和博客园共有,谢绝任何形式的 转载!! 作者:mohist mac osx : 10.14.6 Mojave. 之前没有配置openGL相关开发环境,自 ...
- 【九度OJ】题目1064:反序数 解题报告
[九度OJ]题目1064:反序数 解题报告 标签(空格分隔): 九度OJ 原题地址:http://ac.jobdu.com/problem.php?pid=1064 题目描述: 设N是一个四位数,它的 ...
- 【九度OJ】题目1178:复数集合 解题报告
[九度OJ]题目1178:复数集合 解题报告 标签(空格分隔): 九度OJ http://ac.jobdu.com/problem.php?pid=1178 题目描述: 一个复数(x+iy)集合,两种 ...
- 【LeetCode】919. Complete Binary Tree Inserter 解题报告(Python & C++)
作者: 负雪明烛 id: fuxuemingzhu 个人博客: http://fuxuemingzhu.cn/ 目录 题目描述 题目大意 解题方法 日期 题目地址: https://leetcode. ...
- 【LeetCode】747. Largest Number At Least Twice of Others 解题报告(Python)
作者: 负雪明烛 id: fuxuemingzhu 个人博客: http://fuxuemingzhu.cn/ 目录 题目描述 题目大意 解题方法 寻找两次最大值 排序 大顶堆 日期 题目地址:htt ...
- 【LeetCode】91. Decode Ways 解题报告(Python)
[LeetCode]91. Decode Ways 解题报告(Python) 标签(空格分隔): LeetCode 作者: 负雪明烛 id: fuxuemingzhu 个人博客: http://fux ...
- Java锁与非阻塞算法的性能比较与分析+原子变量类的应用
15.原子变量与非阻塞同步机制 在java.util.concurrent包中的许多类,比如Semaphore和ConcurrentLinkedQueue,都提供了比使用Synchronized更好的 ...