
Android Relative Layout 安卓相对布局详解
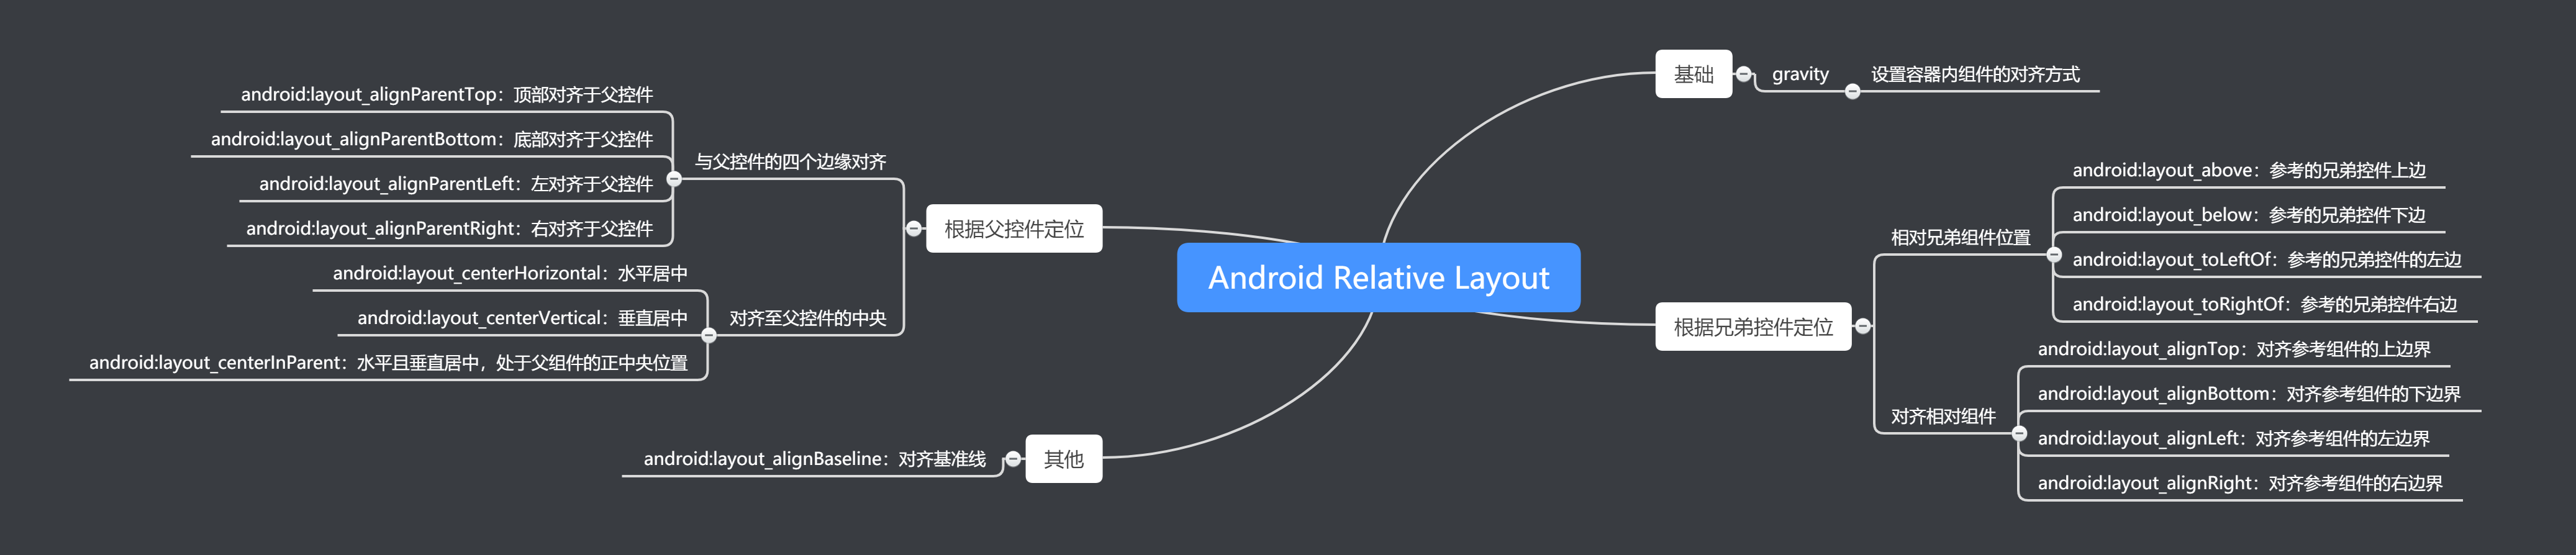
思维导图可在幕布找到
1. 基础
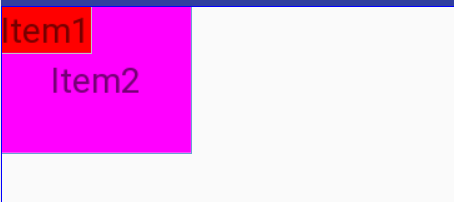
如果在相对布局里,控件没有指明相对位置,则默认都是在相对布局的左上角:
<TextView

    android:layout_width="wrap_content"

    android:layout_height="wrap_content"

    android:background="#FF00FF"

    android:padding="20dp"

    android:text="Item2"/>

<TextView

    android:layout_width="wrap_content"

    android:layout_height="wrap_content"

    android:background="#FF0000"

    android:text="Item1"/>
gravity
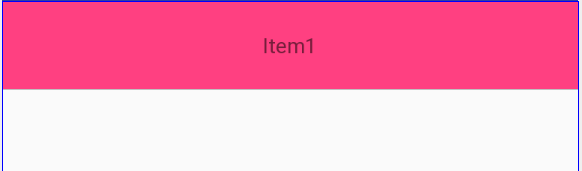
gravity属性用来设置容器内组件的对齐方式
<TextView

    android:layout_width="match_parent"

    android:layout_height="wrap_content"

    android:gravity="center"

    android:background="#FF4081"

    android:text="Item1" />
效果为
2. 根据兄弟控件定位
2.1 相对兄弟组件的位置
android:layout_above:// 参考的兄弟控件上边

android:layout_below:// 参考的兄弟控件下边

android:layout_toLeftOf // 参考的兄弟控件的左边

android:layout_toRightOf // 参考的兄弟控件右边
代码示例
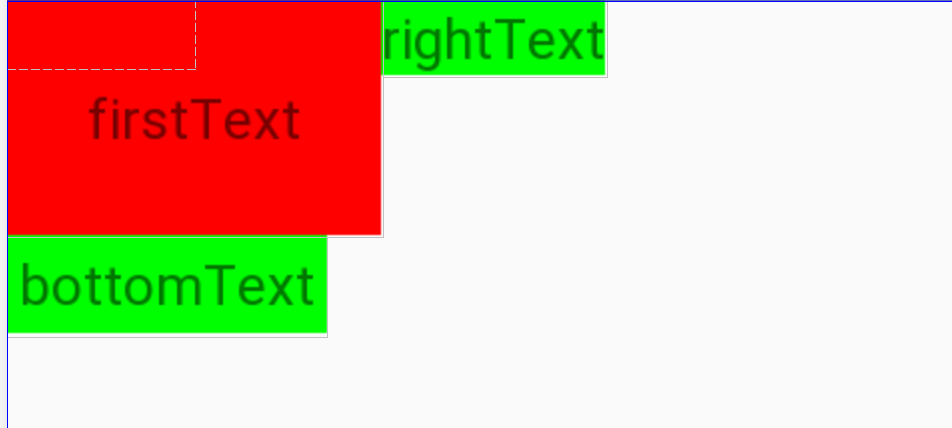
android:layout_below等属性通过制定控件的id来选择需要参考的兄弟组件,即@id/firstText:
<TextView

    android:id="@+id/firstText"

    android:layout_width="wrap_content"

    android:layout_height="wrap_content"

    android:background="#FF0000 "

    android:text="firstText" />

<TextView

    android:id="@+id/rightText"

    android:layout_width="wrap_content"

    android:layout_height="wrap_content"

    android:background="#00FF00"

    android:layout_toRightOf="@id/firstText"

    android:text="rightText" />

<TextView

    android:id="@+id/bottomText"

    android:layout_width="wrap_content"

    android:layout_height="wrap_content"

    android:background="#00FF00"

    android:layout_below="@id/firstText"

    android:text="bottomText" />
显示的效果为
2.2 对齐相对组件
对齐兄弟相对组件的有四个属性,为android:layout_align${方向}
android:layout_alignTop // 对齐参考组件的上边界

android:layout_alignBottom // 对齐参考组件的下边界

android:layout_alignLeft // 对齐参考组件的左边界

android:layout_alignRight  // 对齐参考组件的右边界
android:layout_alignTop等属性同样是通过制定控件的ID来设置参考的组件的边界线:
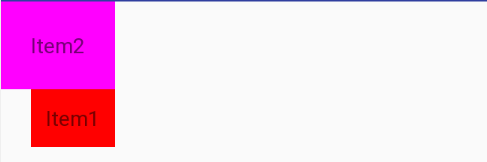
代码示例1
<TextView

    android:id="@+id/item1"

    android:layout_width="wrap_content"

    android:layout_height="wrap_content"

    android:background="#FF00FF"

    android:padding="20dp"

    android:text="Item2"/>

<TextView

    android:id="@+id/item2"

    android:layout_width="wrap_content"

    android:layout_height="wrap_content"

    android:background="#FF0000"

    android:padding="10dp"

    android:layout_below="@id/item1"

    android:layout_alignRight="@id/item1"

    android:text="Item1"/>
效果为
代码实例2
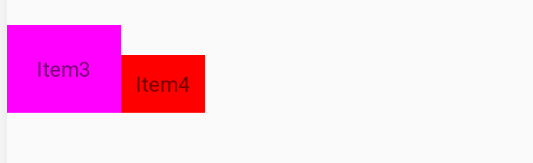
<TextView

    android:id="@+id/item3"

    android:layout_width="wrap_content"

    android:layout_height="wrap_content"

    android:background="#FF00FF"

    android:padding="20dp"

    android:text="Item3"/>

<TextView

    android:id="@+id/item4"

    android:layout_width="wrap_content"

    android:layout_height="wrap_content"

    android:background="#FF0000"

    android:padding="10dp"

    android:layout_toRightOf="@+id/item3"

    android:layout_alignBottom="@id/item3"

    android:text="Item4"/>
效果为
3. 根据父控件定位
3.1 与父控件的四个边缘对齐
与父控件的边缘对齐的属性由android:layout_alignParent${方向}组成
android:layout_alignParentTop  // 顶部对齐于父控件

android:layout_alignParentBottom // 底部对齐于父控件

android:layout_alignParentLeft // 左对齐于父控件

android:layout_alignParentRight // 右对齐于父控件
需要注意的是,这些属性是通过布尔值来设置是否对齐于父控件的某个方向的:
<RelativeLayout

    android:layout_width="match_parent"

    android:layout_height="300dp">

    <TextView

        android:layout_width="wrap_content"

        android:layout_height="wrap_content"

        android:text="first"

        android:textSize="50dp"

        android:background="#FF0000"

        android:layout_alignParentRight="true"

        android:layout_alignParentBottom="true"/>

</RelativeLayout>
效果为:

除此之外还有layout_alignParentLeft、layout_alignParentTop
3.2 对齐至父控件的中央
对齐至父控件中央的属性可以用来设置居中的布局位置:
android:layout_centerHorizontal  // 水平居中

android:layout_centerVertical // 垂直居中

android:layout_centerInParent // 水平且垂直居中,处于父组件的正中央位置
代码示例
同样,这些属性也是通过设置的值也是布尔类型:
<TextView

    android:layout_width="wrap_content"

    android:layout_height="wrap_content"

    android:text="centerHorizontal"

    android:textSize="50dp"

    android:background="#FF0000"

    android:layout_centerHorizontal="true"/>

<TextView

    android:layout_width="wrap_content"

    android:layout_height="wrap_content"

    android:text="centerVertical"

    android:textSize="50dp"

    android:background="#FF0000"

    android:layout_centerVertical="true"/>

<TextView

    android:layout_width="wrap_content"

    android:layout_height="wrap_content"

    android:text="centerInParent"

    android:textSize="15dp"

    android:background="#0000FF"

    android:layout_centerInParent="true"/>
效果为:

4. 其他
对齐至控件的基准线
<TextView

    android:id="@+id/firstText"

    android:layout_width="wrap_content"

    android:layout_height="wrap_content"

    android:textSize="100dp"

    android:text="Hello" />

<TextView

    android:layout_width="wrap_content"

    android:layout_height="wrap_content"

    android:layout_toRightOf="@+id/firstText"

    android:text="World" />
如果没有使用对齐基准线,那么当Hello的字体的大于world时,world则无法和hello在同一基准线上:

通过给world的TextView添加layout_alignBaseline属性来实现对齐firstText控件的基准线:
android:layout_alignBaseline="@+id/firstText"
效果为:

5. 实例
用相对布局来完成经典的梅花布局
    <!--中央-->

    <ImageView

        android:id="@+id/img1"

        android:layout_width="80dp"

        android:layout_height="80dp"

        android:layout_centerInParent="true"

        android:src="@drawable/pic1"/>

    <!--右边-->

    <ImageView

        android:layout_width="80dp"

        android:layout_height="80dp"

        android:layout_centerInParent="true"

        android:layout_toLeftOf="@+id/img1"

        android:layout_centerVertical="true"

        android:src="@drawable/pic2"/>

    <!--左边-->

    <ImageView

        android:layout_width="80dp"

        android:layout_height="80dp"

        android:layout_toRightOf="@+id/img1"

        android:layout_centerVertical="true"

        android:src="@drawable/pic3"/>

    <!--上边-->

    <ImageView

        android:layout_width="80dp"

        android:layout_height="80dp"

        android:layout_above="@+id/img1"

        android:layout_centerHorizontal="true"

        android:src="@drawable/pic4"/>

    <!--下边-->

    <ImageView

        android:layout_width="80dp"

        android:layout_height="80dp"

        android:layout_below="@+id/img1"

        android:layout_centerHorizontal="true"

        android:src="@drawable/pic5"/>
效果图为

参考资料
Android Relative Layout 安卓相对布局详解的更多相关文章
- 【Android开发】交互界面布局详解
原文:http://android.eoe.cn/topic/summary Android 的系统 UI 为构建您自己的应用提供了基础的框架.主要包括主屏幕 (Home Screen).系统 UI ...
- Android 布局学习之——Layout(布局)详解二(常见布局和布局参数)
[Android布局学习系列] 1.Android 布局学习之——Layout(布局)详解一 2.Android 布局学习之——Layout(布局)详解二(常见布局和布局参数) 3.And ...
- Android布局详解之一:FrameLayout
原创文章,如有转载,请注明出处:http://blog.csdn.net/yihui823/article/details/6702273 FrameLayout是最简单的布局了.所有放在布局里的 ...
- Android 布局详解
Android 布局详解 1.重用布局 当一个布局文件被多处使用时,最好<include>标签来重用布局. 例如:workspace_screen.xml的布局文件,在另一个布局文件中被重 ...
- Android View 的绘制流程之 Layout 和 Draw 过程详解 (二)
View 的绘制系列文章: Android View 的绘制流程之 Measure 过程详解 (一) Android View 绘制流程之 DecorView 与 ViewRootImpl 在上一篇 ...
- Android开发重点难点1:RelativeLayout(相对布局)详解
前言 啦啦啦~博主又推出了一个新的系列啦~ 之前的Android开发系列主要以完成实验的过程为主,经常会综合许多知识来写,所以难免会有知识点的交杂,给人一种混乱的感觉. 所以博主推出“重点难点”系列, ...
- Android安卓书籍推荐《Android驱动开发与移植实战详解》下载
百度云下载地址:点我 Android凭借其开源性.优异的用户体验和极为方便的开发方式,赢得了广大用户和开发者的青睐,目前已经发展成为市场占有率很高的智能手机操作系统. <Android驱动开发与 ...
- [置顶]
xamarin android toolbar(踩坑完全入门详解)
网上关于toolbar的教程有很多,很多新手,在使用toolbar的时候踩坑实在太多了,不好好总结一下,实在浪费.如果你想学习toolbar,你肯定会去去搜索androd toolbar,既然你能看到 ...
- 安卓集成发布详解(二)gradle
转自:http://frank-zhu.github.io/android/2015/06/15/android-release_app_build_gradle/ 安卓集成发布详解(二) 15 Ju ...
随机推荐
- 课程一(Neural Networks and Deep Learning),第二周(Basics of Neural Network programming)—— 3、Python Basics with numpy (optional)
Python Basics with numpy (optional)Welcome to your first (Optional) programming exercise of the deep ...
- IE不兼容document.getElementsByClassName
在DOM3里已经加入了getElementsByClassName这个方法,然而IE9.10以外的其它版本均不支持,这是一块伤痛啊! 目前可以这么解决,判断浏览器支不支持这个方法,如果支持就不管:如果 ...
- This Gradle plugin requires Studio 3.0 minimum
从github上下载的项目遇到一个问题:Error:This Gradle plugin requires Studio 3.0 minimum 意思就是说studio版本不高,导入的项目的版本是3. ...
- 杂谈:HTTP1.1 与 HTTP2.0 知多少?
HTTP是应用层协议,是基于TCP底层协议而来. TCP的机制限定,每建立一个连接需要3次握手,断开连接则需要4次挥手. HTTP协议采用"请求-应答"模式,HTTP1.0下,HT ...
- nginx反向代理如何获取真实IP?
由于客户端和web服务器之间增加了中间层,因此web服务器无法直接拿到客户端的ip,通过$remote_addr变量拿到的将是反向代理服务器的ip地址. 1.安装--with-http_realip_ ...
- python中os模块的walk函数
Python的文档中对walk的介绍: walk(top, topdown=True, onerror=None, followlinks=False) 树状目录的生成器. 对于以top参数为根的目录 ...
- Tomcat学习总结(14)—— Tomcat常见面试题
一.Tomcat的缺省是多少,怎么修改 Tomcat的缺省端口号是8080. 修改Tomcat端口号: 1.找到Tomcat目录下的conf文件夹 2.进入conf文件夹里面找到server.xml文 ...
- Docker 入门 之基本命令
3 Docker 入门 首先确保docker 已成功安装在Linux 或windows 系统中 我们可以使用 docker info 查看docker是否成功安装和正常运行 运行我们第一个docker ...
- Angular ngIf相关问题
1.ngIf会把元素销毁,如果在页面加载时给元素注册了事件(如MouseOver),当ngIf的条件不满足时会销毁元素,再次生成元素并不会把事件注册 2.ngIf在IOS上会导致input控件无法正常 ...
- 深入理解读写锁ReentrantReadWriteLock
1.读写锁的介绍 在并发场景中用于解决线程安全的问题,我们几乎会提供高频率的使用到独占式锁,通常使用java提供的关键字synchronized(关于synchronized可以看这篇文章)或者con ...