安装jessie记录
安装jessie记录
1 引言
我是一名linux忠实的用户,从2010年开始,一直在笔记本上用Debiana,Debian是所有 linux发行版里最彻底执行自由软件精神的,从5.0到6.0,从一个初学者为长为中级用户, 越用越发现linux世界的精彩:)。在这三年时间里,学习了emacs这个神器,这是黑客精神 的产物,LaTex是接触的第二个神器,领略了软件中的艺术品。今年5月Debian从6.0升 级到7.0,这次我计划安装testing版,也就是jessie,下面是安装中问题总结,大家看了 有什么问题,观迎讨论。
2 目标
- 开发java程序,eclipse,rabbitvcs
- 写文档,texlive
- 画图,asympote
- 数学,octave
- 翻译,stardict
- 一切的前端,emacs23.4
- windows虚拟,wine
- 游戏,dosbox
3 usb安装
由于笔记本光驱坏了,只能用usb安装了,试了不少方式,用官方 的方法:
CD 或 DVD 映像直接写入 U 盘,覆盖它当前的内容。例如,使用已有的 GNU/Linux 系统,

CD 或 DVD 映像文件可以参照下面方法写入 U 盘,写之前请确认 U 盘已经卸载:

# cp debian.iso /dev/sdX

# sync
写入后,U盘内容的确是映像的内容了,而且U盘被认成了usb-cdrom,但无法启动!又找 了U盘的量产工具,没敢试。
另一种方法制作U盘是手动复制安装文件和 CD 映像。注意U盘最小容量为1GB (也可以使用较

少容量,请参考 第 4.3.3 节 “手动复制文件到 U 盘 — 灵活的方法”)。

有一个文件合集 hd-media/boot.img.gz 包含所有的安装程序文件(包括内核) 以及

syslinux 和对应的配置文件 。

需要注意的是,虽然方便,但该方法有一个主要缺点:即使 U 盘容量更大,该设备的逻辑尺

寸还是限制在 1 GB。如果您要该 U 盘作其他用途,需要为它重新分区,为剩余容量创建一

个新的文件系统。

使用该映象只须将它直接解压到 U 盘:

# zcat boot.img.gz > /dev/sdX

然后,挂载 U 盘 (mount /dev/sdX /mnt), 现在上面有了 一个 FAT 文件系统 ,然后复制

Debian ISO 映像 (netinst 或完整的 CD) 到里面。卸载 U 盘 (umount /mnt) 就完成了。
写入后,16G的U盘的确只有1G容量了,复制CD ISO映像到U盘中,还是无法启动!
无奈在网上找办法,ultraiso 软碟通,将jessie DVD映像写入,可以启动安装了!启动后 加载光盘时有点技巧,要写入/dev/cdrom,多试几次,一路畅通!
4 无线网卡
安装完系统,第一个问题就是无线网卡无法安装。
机器是thinkpad r400,无线网卡是rt8192se,Debian5.0/6.0中使用源码安装成功, 见 无线网卡安装 ,但在jessie中不行,又到 官网 下载了最新驱动,编译出现如下错误:
[root@localhost rtl_92ce_92se_92de_linux_mac80211_0005.1230.2011]# make

make -C /lib/modules/2.6.32-279.11.1.el6.i686/build M=/var/tmp/rtl_92ce_92se_92de_linux_mac80211_0005.1230.2011 modules

make[1]: Entering directory `/usr/src/kernels/2.6.32-279.11.1.el6.i686'

  CC [M]  /var/tmp/rtl_92ce_92se_92de_linux_mac80211_0005.1230.2011/base.o

/var/tmp/rtl_92ce_92se_92de_linux_mac80211_0005.1230.2011/base.c: In function ‘rtl_action_proc’:

/var/tmp/rtl_92ce_92se_92de_linux_mac80211_0005.1230.2011/base.c:861: error: ‘RX_FLAG_TSFT’ undeclared (first use in this function)

/var/tmp/rtl_92ce_92se_92de_linux_mac80211_0005.1230.2011/base.c:861: error: (Each undeclared identifier is reported only once

/var/tmp/rtl_92ce_92se_92de_linux_mac80211_0005.1230.2011/base.c:861: error: for each function it appears in.)

make[2]: *** [/var/tmp/rtl_92ce_92se_92de_linux_mac80211_0005.1230.2011/base.o] Error 1

make[1]: *** [_module_/var/tmp/rtl_92ce_92se_92de_linux_mac80211_0005.1230.2011] Error 2

make[1]: Leaving directory `/usr/src/kernels/2.6.32-279.11.1.el6.i686'

make: *** [all] Error 2
后来仔细看了源码包中的readme,试了一下第三种方式,居然成功了!
========================================================================================

                III. Compile & Installation & uninstall [2.6.24, 2.6.34]

========================================================================================

We don't support kernel 2.6.24-2.6.34 directly, Because there are

lots of issues in mac80211 from kernel 2.6.24-2.6.34,

So we suggest you to use the latest kernel >= 2.6.35.

but if you want to use our driver in an old kernel,

you can use compat-wireless. this methord can support all kernel

versions higher than 2.6.24, and you can use all functions

of our driver like you use it in the latest kernel version.

You can get more informations of compat-wireless from:

http://wireless.kernel.org/en/users/Download/stable

you should use the following commands to Compile, Installation, or uninstall the driver:

        1. Change to Super User

           sudo su

        2. install compat-wireless driver

           ./compat/script/compat-install.sh

        3. reboot

           reboot

        4. uninstall driver

           ./compat/script/compat-uninstall.sh

        5. you can get more information form follwing webset for how to use compat-wireless:

           http://wireless.kernel.org/en/users/Download/stable

NOTICE:

        1. Maybe you can not use other vendors wireless after you install compat wireless,

           in this situation, you can uninstall compat-wireless use step 4 to recover it.

        2. This install methord can support all versions of kernel, not just 2.6.24-2.6.34,

           you can also use it in the kernel higher than 2.6.35.
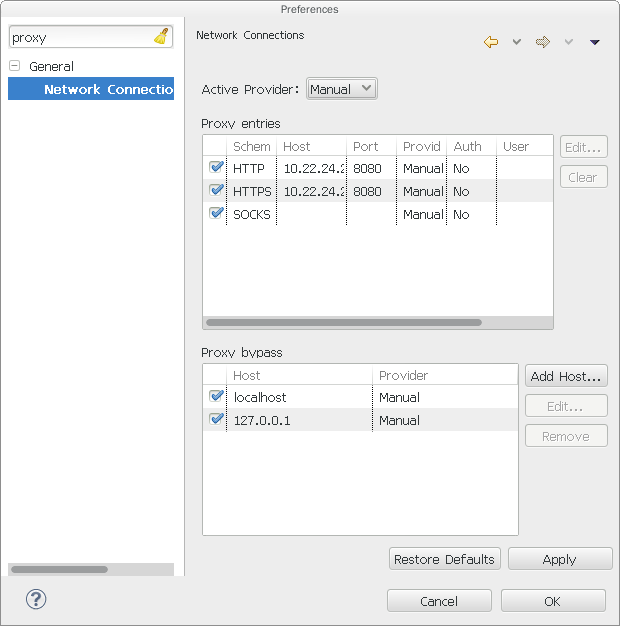
5 代理上网
公司上网用代理,apt-get一定要用代理啊,所以在~/,bashrc中加入以下两句:
http_proxy=http://xxxx.xxxx:8080

export http_proxy
当然firefox中也要设置代理,eclipse中的代理有点奇怪,我开始这样设置了,就是不行, 无意中将SOCKS选项中代理未填,居然好了!
我在emacs中用w3m上网,也要设置代理:
'(w3m-command-arguments (quote ("-o" "http_proxy=http://xxx.xxx:8080"))))
6 rabbitvcs
RabbitVCS给Linux开发者带来了福音,它完全就像Windows下的TortoiseSVN。jessie程序 库中有rabbitvcs,但是安装后鼠标右键并没有版本控制菜单,原因jessie使用的是 gnome3,库里的rabbitvcs只支持gnome2,没办法只能手动安装了。
- 下载源码 RabbitVCS 0.15.3
machine@debian:~$ wget http://rabbitvcs.googlecode.com/files/rabbitvcs-0.15.3.tar.bz2
- 安装依赖:
sudo apt-get install python-nautilus python-configobj python-gtk2 python-glade2

sudo apt-get install python-svn python-dbus python-dulwich subversion meld
- 安装RabbitVCS
machine@debian:~/Downloads$ tar jxvf rabbitvcs-0.15.3.tar.bz2

machine@debian:~/Downloads/rabbitvcs-0.15.3$ cd rabbitvcs-0.15.3/

machine@debian:~/Downloads/rabbitvcs-0.15.3$ sudo python setup.py install –install-layout=deb

machine@debian:~/Downloads/rabbitvcs-0.15.3$ sudo cp clients/nautilus-3.0/RabbitVCS.py /usr/share/nautilus-python/extensions/
- 添加软件链接
## 重启nautilus时,发生错误

machine@debian:nautilus -q

## 添加软件链接

machine@debian:sudo ln -sf /usr/lib/libpython2.7.so.1

/usr/lib/libpython2.7.so.1.0

## 再次重启nautilus

machine@debian:nautilus -q

ok!
7 locale
安装rabbitvcs时,不知怎么,系统的local从zhCN.utf8改为了enGB.utf8,用网上各种 方法都改不过来:
  - 用dpkg-reconfigure locales重新配置locale

  - 手动增加locale,只要把新的locale增加到/etc/locale.gen文件中,再运行

    locale-gen命令即可生成新的locale

# This file lists locales that you wish to have built. You can find a list

# of valid supported locales at /usr/share/i18n/SUPPORTED. Other

# combinations are possible, but may not be well tested. If you change

# this file, you need to rerun locale-gen.

#

zh_CN.GBK GBK

zh_CN.UTF-8 UTF-8

  - 修改/etc/default/locale,结果只是影响root用户的locale
看来locale命令一定是从哪个文件读取了Locale设定的信息,我不知道是不是与开机启动 的一些文件有关,目前先在/etc/X11/Xsession.d/25xchinput-start文件中加入:
export LANG=zh_CN.utf8

export LAN=zh_CN.UTF-8

export LC_ALL=zh_CN.UTF-8

export LC_LANG=zh_CN.UTF-8
重启后locale合适了,但系统菜单还是英文,不过能使用了:),一定是先加载了系统菜单, 才调用/etc/X11/Xsession.d/25xchinput-start文件,以后再研究吧。
machine@debian:~$ locale

LANG=zh_CN.utf8

LANGUAGE=

LC_CTYPE="zh_CN.UTF-8"

LC_NUMERIC="zh_CN.UTF-8"

LC_TIME="zh_CN.UTF-8"

LC_COLLATE="zh_CN.UTF-8"

LC_MONETARY="zh_CN.UTF-8"

LC_MESSAGES="zh_CN.UTF-8"

LC_PAPER="zh_CN.UTF-8"

LC_NAME="zh_CN.UTF-8"

LC_ADDRESS="zh_CN.UTF-8"

LC_TELEPHONE="zh_CN.UTF-8"

LC_MEASUREMENT="zh_CN.UTF-8"

LC_IDENTIFICATION="zh_CN.UTF-8"

LC_ALL=zh_CN.UTF-8
8 tomcat
tomcat是手动安装的,先下载apache-tomcat-6.0.37,解压到/opt/中,然后在 /usr/share/中建立一个链接:
machine@debian:sudo ln -s /opt/apache-tomcat-6.0.37/ /usr/share/tomcat6
开放相关目录权限,用户就可以发布程序了:
machine@debian:sudo chmod 757 /opt/apache-tomcat-6.0.37/
查找logs目录下的信息,只有错误级的信息,没别的辅助内容. 给查错带来了困难,在这种 情况下,是因为Tomcat自身的默认日志没有将一些错误信息输出到控制台或文件,需要配置 Tomcat自身的log,启用详细的调试日志。首先需要准备的文件为:
- log4j.jar , 下载地址 : http://www.apache.org/dist/logging/log4j/1.2.15/apache-log4j-1.2.15.zip
- Tomcat6 所需的 commons-logging.jar,下载地址: http://www.apache.org/dist/commons/logging/binaries/commons-logging-1.1.zip
- log4j配置文件:
log4j.rootLogger=info,console

log4j.appender.console=org.apache.log4j.ConsoleAppender

log4j.appender.console.layout=org.apache.log4j.PatternLayout

log4j.appender.console.layout.ConversionPattern=[cmall] %d{yyyy-MM-dd HH:mm:ss} [%5p] (%F:%L) - %m%n

log4j.logger.freemarker=FATAL
- commons-logging-1.1.jar,log4j-1.2.15.jar,log4j.properties复制到 $CATALINA_HOME/lib下
- 下载 tomcat-juli.jar 和 tomcat-juli-adapters.jar,这两个包是tomcat的扩展内容, 将 tomcat-juli-adapters.jar复制到 $CATALINA_HOME/lib下,将 tomcat-juli.jar覆 盖 $CATALINA_HOME/bin/tomcat-juli.jar
- 删除 $CATALINA_BASE/conf/logging.properties文件,防止 java.util.logging产生0 长度的log文件
现在tomcat可以记录info级别的信息了:)
[cmall] 2013-08-18 17:22:28 [ INFO] (ExecutorConfigurationSupport.java:191) - Shutting down ExecutorService 'taskExecutor'

[cmall] 2013-08-18 17:22:28 [ INFO] (EhCacheManagerFactoryBean.java:164) - Shutting down EhCache CacheManager

[cmall] 2013-08-18 17:22:28 [ INFO] (AbstractEntityManagerFactoryBean.java:441) - Closing JPA EntityManagerFactory for persistence unit 'persistenceUnit'

[cmall] 2013-08-18 17:22:28 [ INFO] (SessionFactoryImpl.java:927) - closing

[cmall] 2013-08-18 17:22:28 [ERROR] (WebappClassLoader.java:1998) - The web application [/CMall] registered the JDBC driver [com.mysql.jdbc.Driver] but failed to unregister it when the web application was stopped. To prevent a memory leak, the JDBC Driver has been forcibly unregistered.

[cmall] 2013-08-18 17:22:28 [ERROR] (WebappClassLoader.java:2192) - The web application [/CMall] appears to have started a thread named [Abandoned connection cleanup thread] but has failed to stop it. This is very likely to create a memory leak.
Date: \today
Author: the machine of awareness
Org version 7.8.06 with Emacs version 23
安装jessie记录的更多相关文章
- Ubuntu14.04 Tomcat 安装过程记录
Ubuntu14.04 Tomcat 安装过程记录 检查java的版本 zhousp@ubuntu:~$ sudo java -version [sudo] password for zhousp: ...
- FastDFS安装全过程记录(V5.05)
FastDFS安装全过程记录 1.安装准备 HA虚拟IP:192.168.1.208 HA软件:Keepalived 操作系统:CentOS 7 用户:root 数据目录:/data/fastdfs ...
- openvswitch 2.7 安装过程记录 总结
envswitch 2.7 安装过程记录 总结 安装思路是参考文档: http://docs.openvswitch.org/en/latest/intro/install/general/#obta ...
- CentOS 7下安装vertica记录
CentOS 7下安装vertica记录 1. 安装好centeros 并更新 Centeros安装就不说了,安装完之后联网环境下 yum update.更新下,使得那些包都是新的.(要想用中文 ...
- ubuntu 1604安装docker-ce 记录
以前在linux 内核为2.x的低版本中安装过docker,但是很多功能特性都无法使用,本次是在ubuntu 16.04上安装,记录安装过程,方便后续查阅. 一.安装前准备: 1. 安装包,允许 ap ...
- Centos 7 安装Docker-ce记录
以前尝试过在centos 6上安装Docker , 需要升级内核,支持aufs,比较麻烦:在使用过程中出现过Docker挂掉的情况,官方建议在64 位 centos 7 上运行,本文将安装步骤记录下来 ...
- k8s1.4.3安装实践记录(2)-k8s安装
前面一篇已经安装好了ETCD.docker与flannel(k8s1.4.3安装实践记录(1)),现在可以开始安装k8s了 1.K8S 目前centos yum上的kubernetes还是1.2.0, ...
- ArcGIS Enterprise 10.5.1 静默安装部署记录(Centos 7.2 minimal)- 6、总结
安装小结 安装完成后,首先我们需要将Datastore托管给Server,再将Server托管给Portal以此来完成整个单机版Enterprise 部署流程.为了测试流程是否正确,我们可以采用上传一 ...
- ArcGIS Enterprise 10.5.1 静默安装部署记录(Centos 7.2 minimal)- 5、安装Datastore
安装Datastore 解压datastore安装包,tar -xzvf ArcGIS_DataStore_Linux_1051_156441.tar.gz 切换到arcgis账户静默安装server ...
随机推荐
- [hadoop] 一些基础概念
一.云的概念 1.云计算的概念 随时 随地 使用任何设备 获得任何服务 2.趋势 )资料开始回归集中处理(存储大量资料) 随时存取 降低遗失风险 减少传输成本 促进团队协作 )网页变为预设开发平台(网 ...
- a标签中的点击事件
我们常用的在a标签中有点击事件:1. a href="javascript:js_method();" 这 是我们平台上常用的方法,但是这种方法在传递this等参数的时候很容易出问 ...
- 【必备】史上最全的浏览器 CSS & JS Hack 手册(转)
浏览器渲染页面的方式各不相同,甚至同一浏览器的不同版本(“杰出代表”是 IE)也有差异.因此,浏览器兼容成为前端开发人员的必备技能.如果有一份浏览器 Hack 手册,那查询起来就方便多了.这篇文章就向 ...
- RHCE 系列(一):如何设置和测试静态网络路由
RHCE(Red Hat Certified Engineer,红帽认证工程师)是红帽公司的一个认证,红帽向企业社区贡献开源操作系统和软件,同时它还给公司提供训练.支持和咨询服务. 这个 RHCE 是 ...
- .NET笔试题集(一)
1.简述 private. protected. public. internal.protected internal 访问修饰符和访问权限 private : 私有成员, 在类的内部才可以访问. ...
- python3 使用pyperclip读写剪贴板(windows)
2016年5月14日 03:41:38 codegay 使用pyperclip库读写剪贴板非常简单~, 1.使用命令安装: pip install pyperclip 2.然后...就可以了: 以下是 ...
- Android Studio实现页面跳转(新页面或者网站)
一,跳转到另一个页面 百度了好久,好像好多种方法,从中挑选了一中比较方便的一中方法 利用Intent类进行实现 1,首先在firstActivity中添加相应的跳转命令代码 例如一下示例代码 if ( ...
- UML学习笔记1
UML概述:是一种为面向对象软件设计提供的建模语言. 构成:事物things关系relationshs图diagrams UML事物:构件事物 行为事物 分组事物 注释事物 UML关系:依赖depen ...
- CSS3特性 盒模型 动画
转发自0101后花园 CSS3中的动画功能分为Transitions和Animations功能,这两种功能都可以通过改变CSS中的属性值来产生动画效果. 一.Transitions 语法:transi ...
- 如何把TOMCAT 添加到服务中自动启动
1.配置系统参数: JAVA_HOME:C:\Program Files\Java\jdk1.8.0_51 //本机Jdk的安装路径,已配置相关Java应用的无需再配置. CATALINA_HOM ...