Tensorflow学习(练习)—使用inception做图像识别
import os
import tensorflow as tf
import numpy as np
import re
from PIL import Image
import matplotlib.pyplot as plt
print("hello")
class NodeLookup(object):
def __init__(self):
label_lookup_path = "F:\Tensorflow Project\inception-2015-12-05\imagenet_2012_challenge_label_map_proto.pbtxt"
uid_lookup_path="F:\Tensorflow Project\inception-2015-12-05\imagenet_synset_to_human_label_map.txt"
self.node_lookup=self.load(label_lookup_path,uid_lookup_path)
def load(self,label_lookup_path,uid_lookup_path):
#加载分类字符串
proto_as_ascii_lines = tf.gfile.GFile(uid_lookup_path).readlines()
uid_to_human = {}
#读取数据
for line in proto_as_ascii_lines:
#去掉换行符
line = line.strip('\n')
#根据'/t'分割
parsed_items = line.split('\t')
#获取分类编号
uid = parsed_items[0]
#获取分类名称
human_string = parsed_items[1]
#保存编号
uid_to_human[uid] = human_string
#加载分类字符串
proto_as_ascii = tf.gfile.GFile(label_lookup_path).readlines()
node_id_to_uid = {}
for line in proto_as_ascii:
if line.startswith(' target_class:'):
#获取分类编号
#target_class = int(line.split(': ')[1])
target_class = int(line.split(': ')[1])
if line.startswith(' target_class_string:'):
#获取编号字符串
target_class_string = line.split(': ')[1]
#保存分类编号
node_id_to_uid[target_class] = target_class_string[1:-2]
#建立分类编号
node_id_to_name = {}
for key,val in node_id_to_uid.items():
#获取分类名称
name = uid_to_human[val]
#建立分类编号
node_id_to_name[key] = name
return node_id_to_name
#传入分类器编号返回分类名称
def id_to_string(self,node_id):
if node_id not in self.node_lookup:
return ''
return self.node_lookup[node_id]
#创建一个图用来存储训练好的模型
with tf.gfile.FastGFile('F:\Tensorflow Project\inception-2015-12-05\classify_image_graph_def.pb','rb') as f:
graph_def = tf.GraphDef()
graph_def.ParseFromString(f.read())
tf.import_graph_def(graph_def,name="")
with tf.Session() as sess:
softmax_tensor = sess.graph.get_tensor_by_name("softmax:0")
#遍历目录
for root,dirs,files in os.walk('F:\Tensorflow Project\images0815'):
for file in files:
#Tensorflow载入图片
image_data = tf.gfile.FastGFile(os.path.join(root,file),'rb').read()
#执行函数,传入jpg格式图片计算并得到结果
predictions = sess.run(softmax_tensor,{'DecodeJpeg/contents:0':image_data})
#把得到的结果转成一维
predictions = np.squeeze(predictions)
#打印图片路径及名称
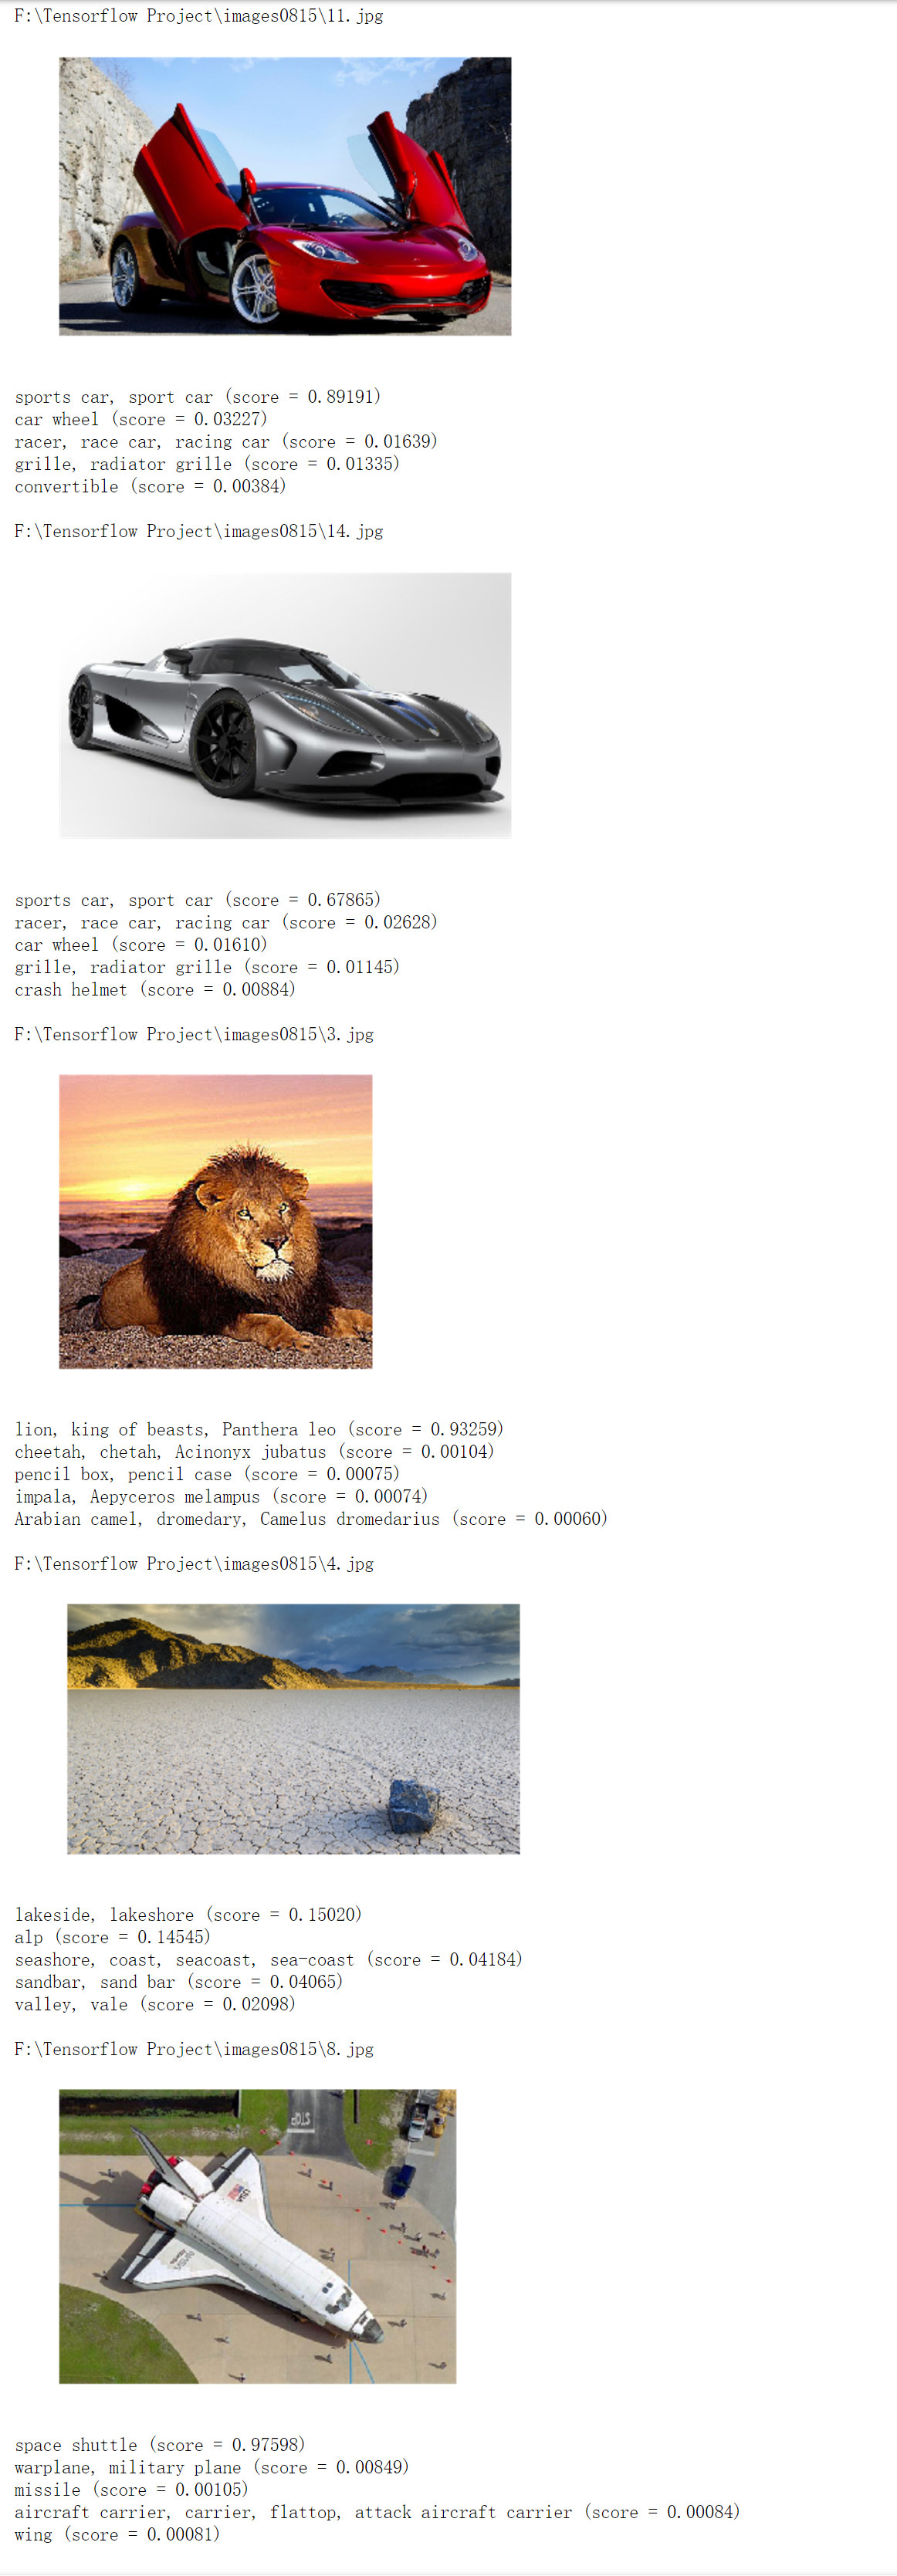
image_path = os.path.join(root,file)
print(image_path)
#显示图片
img = Image.open(image_path)
plt.imshow(img)
plt.axis('off')
plt.show()
#排序
top_k = predictions.argsort()[-5:][::-1]
node_lookup = NodeLookup()
for node_id in top_k:
#获取分类名称
human_string = node_lookup.id_to_string(node_id)
#获取分类的置信度
score = predictions[node_id]
print("%s (score = %.5f)"%(human_string,score))
print()
运行效果
Tensorflow学习(练习)—使用inception做图像识别的更多相关文章
- TensorFlow学习笔记(四)图像识别与卷积神经网络
一.卷积神经网络简介 卷积神经网络(Convolutional Neural Network,CNN)是一种前馈神经网络,它的人工神经元可以响应一部分覆盖范围内的周围单元,对于大型图像处理有出色表现. ...
- TensorFlow学习路径【转】
作者:黄璞链接:https://www.zhihu.com/question/41667903/answer/109611087来源:知乎著作权归作者所有.商业转载请联系作者获得授权,非商业转载请注明 ...
- TensorFlow学习线路
如何高效的学习 TensorFlow 代码? 或者如何掌握TensorFlow,应用到任何领域? 作者:黄璞链接:https://www.zhihu.com/question/41667903/ans ...
- tensorflow学习笔记——自编码器及多层感知器
1,自编码器简介 传统机器学习任务很大程度上依赖于好的特征工程,比如对数值型,日期时间型,种类型等特征的提取.特征工程往往是非常耗时耗力的,在图像,语音和视频中提取到有效的特征就更难了,工程师必须在这 ...
- TensorFlow学习笔记——LeNet-5(训练自己的数据集)
在之前的TensorFlow学习笔记——图像识别与卷积神经网络(链接:请点击我)中了解了一下经典的卷积神经网络模型LeNet模型.那其实之前学习了别人的代码实现了LeNet网络对MNIST数据集的训练 ...
- tensorflow学习笔记——VGGNet
2014年,牛津大学计算机视觉组(Visual Geometry Group)和 Google DeepMind 公司的研究员一起研发了新的深度卷积神经网络:VGGNet ,并取得了ILSVRC201 ...
- 用tensorflow学习贝叶斯个性化排序(BPR)
在贝叶斯个性化排序(BPR)算法小结中,我们对贝叶斯个性化排序(Bayesian Personalized Ranking, 以下简称BPR)的原理做了讨论,本文我们将从实践的角度来使用BPR做一个简 ...
- TensorFlow学习笔记之--[compute_gradients和apply_gradients原理浅析]
I optimizer.minimize(loss, var_list) 我们都知道,TensorFlow为我们提供了丰富的优化函数,例如GradientDescentOptimizer.这个方法会自 ...
- 深度学习-tensorflow学习笔记(1)-MNIST手写字体识别预备知识
深度学习-tensorflow学习笔记(1)-MNIST手写字体识别预备知识 在tf第一个例子的时候需要很多预备知识. tf基本知识 香农熵 交叉熵代价函数cross-entropy 卷积神经网络 s ...
随机推荐
- INIT: vesion 2.88 booting
/***************************************************************************** * INIT: vesion 2.88 b ...
- PHPExcel导出导入
便于记忆 这里写一个PHPexcel导出的demo 我们构造一个数据 $letter = array('A','B','D','E'); //sheet索引 $date = array( ar ...
- [转载] C++中this指针的用法详解
摘自:http://blog.chinaunix.net/uid-21411227-id-1826942.html 1. this指针的用处: 一个对象的this指针并不是对象本身的一部分,不会影响s ...
- POJ1251 Jungle Roads
解题思路:看懂题意是关键,Kruskal算法,最小生成树模板. 上代码: #include<cstdio> #include<cstring> #include<algo ...
- InnoSetup使用笔记
今天用InnoSetup做安装包时,因为要装的驱动区分32位.64位,64位系统中要安装32位+64位驱动. 想在脚本中进行判断.折腾一阵,终于搞定: 参考了:http://379910987.blo ...
- HttpWebRequest传值
From:发送方 class Program { static void Main(string[] args) { string strId = "zhangsan"; &quo ...
- Python学习系列(五)(文件操作及其字典)
Python学习系列(五)(文件操作及其字典) Python学习系列(四)(列表及其函数) 一.文件操作 1,读文件 在以'r'读模式打开文件以后可以调用read函数一次性将文件内容全部读出 ...
- 数据库中通过group by找出表中的重复数据
有时候在做数据割接时会碰到数据插入失败的情况,大部分都是导出的数据中存在重复导致的.我们可以通过查询语句带分组条件来确认是否有重复数据.例如我现在有表 t_wlf_info,其中有个 username ...
- 使用妹子UI开发的体验分享
前阵子看到一个类似bootstrap的前端UI框架,好奇心驱使下,去琢磨了一些,最终决定网站改版用这个UI试试效果: 首页+头部: 投稿页: 现成拷贝过来的评论列表: 总结: 上手难度: (熟悉boo ...
- java排序。。简单的冒泡排序
总结:一种简单的交换顺序,从数左边开始扫描待排序的元素,在扫描过程中依次对相邻元素进行比较,将较大值后移,每经过一轮排序后,值最大的元素将移到末尾, 此时记下该元素的位置,下一轮排序只需比较到此位置即 ...