06mycat使用haproxy进行负载均衡

集群的服务器列表

在10.11.0.210和10.11.0.216中部署mycat和haproxy(因为实验机器性能有限,实际生产环境中需要单独用服务做haproxy反向代理)
两台机器的Mycat配置和haproxy保持一致
即 haproxy à mycat à pxc集群 à mysql分片
Mycat的相关配置
Server.xml
[root@node6 mycat]# cat conf/server.xml

<?xml version="1.0" encoding="UTF-8"?>

<!-- - - Licensed under the Apache License, Version 2.0 (the "License");

    - you may not use this file except in compliance with the License. - You

    may obtain a copy of the License at - - http://www.apache.org/licenses/LICENSE-2.0

    - - Unless required by applicable law or agreed to in writing, software -

    distributed under the License is distributed on an "AS IS" BASIS, - WITHOUT

    WARRANTIES OR CONDITIONS OF ANY KIND, either express or implied. - See the

    License for the specific language governing permissions and - limitations

    under the License. -->

<!DOCTYPE mycat:server SYSTEM "server.dtd">

<mycat:server xmlns:mycat="http://io.mycat/">

    <system>

    <property name="nonePasswordLogin">0</property> <!-- 0为需要密码登陆、1为不需要密码登陆 ,默认为0,设置为1则需要指定默认账户-->

    <property name="useHandshakeV10">1</property>

    <property name="useSqlStat">0</property>  <!-- 1为开启实时统计、0为关闭 -->

    <property name="useGlobleTableCheck">0</property>  <!-- 1为开启全加班一致性检测、0为关闭 -->

        <property name="sequnceHandlerType">2</property>

    <property name="subqueryRelationshipCheck">false</property> <!-- 子查询中存在关联查询的情况下,检查关联字段中是否有分片字段 .默认 false -->

      <!--  <property name="useCompression">1</property>--> <!--1为开启mysql压缩协议-->

        <!--  <property name="fakeMySQLVersion">5.6.20</property>--> <!--设置模拟的MySQL版本号-->

    <!-- <property name="processorBufferChunk">40960</property> -->

    <!--

    <property name="processors">1</property>

    <property name="processorExecutor">32</property>

     -->

        <!--默认为type 0: DirectByteBufferPool | type 1 ByteBufferArena | type 2 NettyBufferPool -->

        <property name="processorBufferPoolType">0</property>

        <!--默认是65535 64K 用于sql解析时最大文本长度 -->

        <!--<property name="maxStringLiteralLength">65535</property>-->

        <!--<property name="sequnceHandlerType">0</property>-->

        <!--<property name="backSocketNoDelay">1</property>-->

        <!--<property name="frontSocketNoDelay">1</property>-->

        <!--<property name="processorExecutor">16</property>-->

        <!--

            <property name="serverPort">8066</property> <property name="managerPort">9066</property>

            <property name="idleTimeout">300000</property> <property name="bindIp">0.0.0.0</property>

            <property name="frontWriteQueueSize">4096</property> <property name="processors">32</property> -->

        <!--分布式事务开关,0为不过滤分布式事务,1为过滤分布式事务(如果分布式事务内只涉及全局表,则不过滤),2为不过滤分布式事务,但是记录分布式事务日志-->

        <property name="handleDistributedTransactions">0</property>

            <!--

            off heap for merge/order/group/limit      1开启   0关闭

        -->

        <property name="useOffHeapForMerge">1</property>

        <!--

            单位为m

        -->

        <property name="memoryPageSize">64k</property>

        <!--

            单位为k

        -->

        <property name="spillsFileBufferSize">1k</property>

        <property name="useStreamOutput">0</property>

        <!--

            单位为m

        -->

        <property name="systemReserveMemorySize">384m</property>

        <!--是否采用zookeeper协调切换  -->

        <property name="useZKSwitch">false</property>

        <!-- XA Recovery Log日志路径 -->

        <!--<property name="XARecoveryLogBaseDir">./</property>-->

        <!-- XA Recovery Log日志名称 -->

        <!--<property name="XARecoveryLogBaseName">tmlog</property>-->

    </system>

    <!-- 全局SQL防火墙设置 -->

    <!--白名单可以使用通配符%或着*-->

    <!--例如<host host="127.0.0.*" user="root"/>-->

    <!--例如<host host="127.0.*" user="root"/>-->

    <!--例如<host host="127.*" user="root"/>-->

    <!--例如<host host="1*7.*" user="root"/>-->

    <!--这些配置情况下对于127.0.0.1都能以root账户登录-->

    <!--

    <firewall>

       <whitehost>

          <host host="1*7.0.0.*" user="root"/>

       </whitehost>

       <blacklist check="false">

       </blacklist>

    </firewall>

    -->

    <user name="admin" defaultAccount="true">

        <property name="password">Abc_123456</property>

        <property name="schemas">chinasoft</property>

        <!-- 表级 DML 权限设置 -->

        <!--

        <privileges check="false">

            <schema name="TESTDB" dml="0110" >

                <table name="tb01" dml="0000"></table>

                <table name="tb02" dml="1111"></table>

            </schema>

        </privileges>

         -->

    </user>

    <user name="user">

        <property name="password">user</property>

        <property name="schemas">chinasoft</property>

        <property name="readOnly">true</property>

    </user>

</mycat:server>
Schame.xml
[root@node6 mycat]# cat conf/schema.xml

<?xml version="1.0"?>

<!DOCTYPE mycat:schema SYSTEM "schema.dtd">

<mycat:schema xmlns:mycat="http://io.mycat/">

    <!-- 配置数据表 -->

    <schema name="chinasoft" checkSQLschema="false" sqlMaxLimit="100">

        <table name="t_user" dataNode="dn1,dn2" rule="mod-long" />

        <table name="t_customer" dataNode="dn1,dn2" rule="sharding-customer">

            <!-- 配置父子表 -->

            <childTable name="t_orders" primaryKey="ID" joinKey="customer_id" parentKey="id">

            </childTable>

        </table>

    </schema>

    <!-- 配置分配关系 -->

    <dataNode name="dn1" dataHost="pxc-cluster" database="chinasoft" />

    <dataNode name="dn2" dataHost="pxc-cluster02" database="chinasoft" />

    <!-- 配置连接关系 pxc-cluster-->

    <dataHost name="pxc-cluster" maxCon="1000" minCon="10" balance="2"

              writeType="1" dbType="mysql" dbDriver="native" switchType="1"  slaveThreshold="100">

        <heartbeat>select user()</heartbeat>

        <writeHost host="W1" url="10.11.0.210:3306" user="admin"

                   password="Abc_123456">

            <readHost host="W1R1" url="10.11.0.212:3306" user="admin" password="Abc_123456" />

            <readHost host="W1R2" url="10.11.0.215:3306" user="admin" password="Abc_123456" />

        </writeHost>

        <writeHost host="W2" url="10.11.0.212:3306" user="admin"

                   password="Abc_123456">

            <readHost host="W2R1" url="10.11.0.210:3306" user="admin" password="Abc_123456" />

            <readHost host="W2R2" url="10.11.0.215:3306" user="admin" password="Abc_123456" />

        </writeHost>

    </dataHost>

    <!-- 配置连接关系 pxc-cluster02-->

    <dataHost name="pxc-cluster02" maxCon="1000" minCon="10" balance="2"

              writeType="1" dbType="mysql" dbDriver="native" switchType="1"  slaveThreshold="100">

        <heartbeat>select user()</heartbeat>

        <writeHost host="W1" url="10.11.0.216:3306" user="admin"

                   password="Abc_123456">

            <readHost host="W1R1" url="10.11.0.217:3306" user="admin" password="Abc_123456" />

            <readHost host="W1R2" url="10.11.0.218:3306" user="admin" password="Abc_123456" />

        </writeHost>

        <writeHost host="W2" url="10.11.0.217:3306" user="admin"

                   password="Abc_123456">

            <readHost host="W2R1" url="10.11.0.216:3306" user="admin" password="Abc_123456" />

            <readHost host="W2R2" url="10.11.0.218:3306" user="admin" password="Abc_123456" />

        </writeHost>

    </dataHost>

</mycat:schema>
Rule.xml
[root@node6 mycat]# cat conf/rule.xml

<?xml version="1.0" encoding="UTF-8"?>

<!-- - - Licensed under the Apache License, Version 2.0 (the "License");

    - you may not use this file except in compliance with the License. - You

    may obtain a copy of the License at - - http://www.apache.org/licenses/LICENSE-2.0

    - - Unless required by applicable law or agreed to in writing, software -

    distributed under the License is distributed on an "AS IS" BASIS, - WITHOUT

    WARRANTIES OR CONDITIONS OF ANY KIND, either express or implied. - See the

    License for the specific language governing permissions and - limitations

    under the License. -->

<!DOCTYPE mycat:rule SYSTEM "rule.dtd">

<mycat:rule xmlns:mycat="http://io.mycat/">

    <tableRule name="rule1">

        <rule>

            <columns>id</columns>

            <algorithm>func1</algorithm>

        </rule>

    </tableRule>

    <tableRule name="rule2">

        <rule>

            <columns>user_id</columns>

            <algorithm>func1</algorithm>

        </rule>

    </tableRule>

    <tableRule name="sharding-by-intfile">

        <rule>

            <columns>sharding_id</columns>

            <algorithm>hash-int</algorithm>

        </rule>

    </tableRule>

    <tableRule name="sharding-customer">

        <rule>

            <columns>sharding_id</columns>

            <algorithm>customer-hash-int</algorithm>

        </rule>

    </tableRule>

    <tableRule name="auto-sharding-long">

        <rule>

            <columns>id</columns>

            <algorithm>rang-long</algorithm>

        </rule>

    </tableRule>

    <tableRule name="mod-long">

        <rule>

            <columns>id</columns>

            <algorithm>mod-long</algorithm>

        </rule>

    </tableRule>

    <tableRule name="sharding-by-murmur">

        <rule>

            <columns>id</columns>

            <algorithm>murmur</algorithm>

        </rule>

    </tableRule>

    <tableRule name="crc32slot">

        <rule>

            <columns>id</columns>

            <algorithm>crc32slot</algorithm>

        </rule>

    </tableRule>

    <tableRule name="sharding-by-month">

        <rule>

            <columns>create_time</columns>

            <algorithm>partbymonth</algorithm>

        </rule>

    </tableRule>

    <tableRule name="latest-month-calldate">

        <rule>

            <columns>calldate</columns>

            <algorithm>latestMonth</algorithm>

        </rule>

    </tableRule>

    <tableRule name="auto-sharding-rang-mod">

        <rule>

            <columns>id</columns>

            <algorithm>rang-mod</algorithm>

        </rule>

    </tableRule>

    <tableRule name="jch">

        <rule>

            <columns>id</columns>

            <algorithm>jump-consistent-hash</algorithm>

        </rule>

    </tableRule>

    <function name="murmur"

        class="io.mycat.route.function.PartitionByMurmurHash">

        <property name="seed">0</property><!-- 默认是0 -->

        <property name="count">2</property><!-- 要分片的数据库节点数量,必须指定,否则没法分片 -->

        <property name="virtualBucketTimes">160</property><!-- 一个实际的数据库节点被映射为这么多虚拟节点,默认是160倍,也就是虚拟节点数是物理节点数的160倍 -->

        <!-- <property name="weightMapFile">weightMapFile</property> 节点的权重,没有指定权重的节点默认是1。以properties文件的格式填写,以从0开始到count-1的整数值也就是节点索引为key,以节点权重值为值。所有权重值必须是正整数,否则以1代替 -->

        <!-- <property name="bucketMapPath">/etc/mycat/bucketMapPath</property>

            用于测试时观察各物理节点与虚拟节点的分布情况,如果指定了这个属性,会把虚拟节点的murmur hash值与物理节点的映射按行输出到这个文件,没有默认值,如果不指定,就不会输出任何东西 -->

    </function>

    <function name="crc32slot"

              class="io.mycat.route.function.PartitionByCRC32PreSlot">

        <property name="count">2</property><!-- 要分片的数据库节点数量,必须指定,否则没法分片 -->

    </function>

    <function name="hash-int"

        class="io.mycat.route.function.PartitionByFileMap">

        <property name="mapFile">partition-hash-int.txt</property>

    </function>

    <function name="customer-hash-int"

        class="io.mycat.route.function.PartitionByFileMap">

        <property name="mapFile">customer-hash-int.txt</property>

    </function>

    <function name="rang-long"

        class="io.mycat.route.function.AutoPartitionByLong">

        <property name="mapFile">autopartition-long.txt</property>

    </function>

    <function name="mod-long" class="io.mycat.route.function.PartitionByMod">

        <!-- how many data nodes -->

        <property name="count">2</property>

    </function>

    <function name="func1" class="io.mycat.route.function.PartitionByLong">

        <property name="partitionCount">8</property>

        <property name="partitionLength">128</property>

    </function>

    <function name="latestMonth"

        class="io.mycat.route.function.LatestMonthPartion">

        <property name="splitOneDay">24</property>

    </function>

    <function name="partbymonth"

        class="io.mycat.route.function.PartitionByMonth">

        <property name="dateFormat">yyyy-MM-dd</property>

        <property name="sBeginDate">2015-01-01</property>

    </function>

    <function name="rang-mod" class="io.mycat.route.function.PartitionByRangeMod">

            <property name="mapFile">partition-range-mod.txt</property>

    </function>

    <function name="jump-consistent-hash" class="io.mycat.route.function.PartitionByJumpConsistentHash">

        <property name="totalBuckets">3</property>

    </function>

</mycat:rule>
Haproxy的配置
[root@node6 mycat]# cat /etc/haproxy/haproxy.cfg

global

    log         127.0.0.1 local2

    chroot      /var/lib/haproxy

    pidfile     /var/run/haproxy.pid

    maxconn

    user        haproxy

    group       haproxy

    daemon

    # turn on stats unix socket

    stats socket /var/lib/haproxy/stats

defaults

    mode                    http

    log                     global

    option                  httplog

    option                  dontlognull

    option http-server-close

    option forwardfor       except 127.0.0.0/

    option                  redispatch

    retries

    timeout http-request    10s

    timeout queue           1m

    timeout connect         10s

    timeout client          1m

    timeout server          1m

    timeout http-keep-alive 10s

    timeout check           10s

    maxconn

listen   admin_stats

    bind    0.0.0.0:

    mode  http

    stats uri       /dbs

    stats realm  Global\ statistics

    stats auth    admin:abc123456

listen   proxy-mysql

    bind    0.0.0.0:

    mode  tcp

    balance  roundrobin

    option  tcplog       #日志格式

    server   mycat_1  10.11.0.210:  check  port    maxconn

    server   mycat_2  10.11.0.216:  check  port    maxconn

option  tcpka        #使用keepalive检测死链
访问 haproxy的监控程序 http://10.11.0.210:4001/dbs

使用工具连接haproxy插入数据


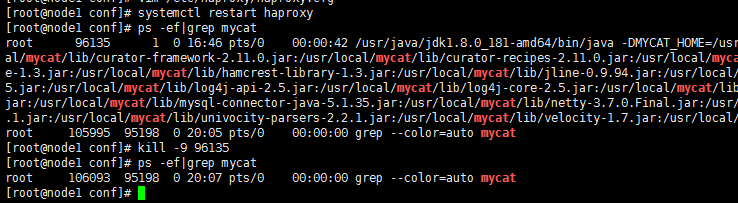
强制关闭其中的一台mycat,然后通过Haproxy还是能插入数据,说明负载均衡没有问题


06mycat使用haproxy进行负载均衡的更多相关文章
- HAProxy 的负载均衡服务器,Redis 的缓存服务器
问答社区网络 StackExchange 由 100 多个网站构成,其中包括了 Alexa 排名第 54 的 StackOverflow.StackExchang 有 400 万用户,每月 5.6 亿 ...
- 基于 Haproxy 构建负载均衡集群
1.HAPROXY简介 HAProxy提供高可用性.负载均衡以及基于TCP和HTTP应用的代理,支持虚拟主机,它是免费.快速并且可靠的一种负载均衡解决方案.HAProxy特别适用于那些负载特大的web ...
- 实现基于Haproxy+Keepalived负载均衡高可用架构
1.项目介绍: 上上期我们实现了keepalived主从高可用集群网站架构,随着公司业务的发展,公司负载均衡服务已经实现四层负载均衡,但业务的复杂程度提升,公司要求把mobile手机站点作为单独的服务 ...
- 05.haproxy+mysql负载均衡 整合 redis集群+ssm
本篇重点讲解haproxy+mysql负载均衡,搭建完成后与之前搭建的redis+ssm进行整合 (注:这里用到了两台mysql数据库,分别安装两台虚拟机上,已经成功实现主主复制,如果有需要,请查看我 ...
- Haproxy+Keepalived负载均衡
Haproxy介绍 HAProxy是一个特别适用于高可用性环境的TCP/HTTP开源的反向代理和负载均衡软件.在7层负载均衡方面的功能很强大(支持cookie track, header rewrit ...
- LNMP+HAProxy+Keepalived负载均衡 - LNMP基础环境准备
环境版本说明: 服务器系统:CentOS 7.5: ``` cat /etc/redhat-release CentOS Linux release 7.5.1804 (Core) # 输出结果 `` ...
- Haproxy 构建负载均衡集群
1.HAPROXY简介 HAProxy提供高可用性.负载均衡以及基于TCP和HTTP应用的代理,支持虚拟主机,它是免费.快速并且可靠的一种负载均衡解决方案.HAProxy特别适用于那些负载特大的web ...
- Nginx,Haproxy/lvs负载均衡的优缺点分析
PS:Nginx/LVS/HAProxy是目前使用最广泛的三种负载均衡软件,本人都在多个项目中实施过,参考了一些资料,结合自己的一些使用经验,总结一下. 一般对负载均衡的使用是随着网站规模的提升根据不 ...
- haproxy实现负载均衡
一.安装tar zxvf haproxy-1.4.22.tar.gzcd haproxy-1.4.22make TARGET=linux26 PREFIX=/usr/local/haproxy ins ...
随机推荐
- MongoDB系列:二、MongoDB常用操作练习
最近在自学MongoDB,在此记录一下,当做学习笔记了(不断更新中)!! 一.背景 MongoDB 是一个基于分布式文件存储的数据库.由 C++ 语言编写.旨在为 WEB 应用提供可扩展的高性能数据存 ...
- 关于 sip
1.html页面 添加拨打按键 拨打按键 下面 添加 音频流/视频流 2 引入 sip.js 和 **.js **.js页面 获取各个元素 创建 simple实例 3. addEventL ...
- ajax参数传递与后台接收
目录 ajax参数传递与后台接收 Servlet中读取http参数的方法 使用默认contentType,参数追加到url后传递 使用默认contentType,参数放到data中传递 使用默认con ...
- FTP文件上传并支持断点续传(一)—— win10 本地环境 ftp站点构建
由于之前项目开发是采用是采用的FTP文件上传,就一直想学习,但由于FTP服务器是公司的,为了方便就像把本地变成ftp站点,其实很简单,但也有很多坑 这里简单介绍一下自己遇到的坑 一:开通本地的ftp权 ...
- win 10 dpi 缩放
win 10 dpi dwm 效果,影响最大的函数有 参考资料:https://blog.csdn.net/chenlycly/article/details/53142098 GetSystemMe ...
- 谈谈JavaScript中继承方式
聊一聊js中的继承 一.简单继承---使用原型赋值的方式继承,将实例化的对象,赋值给子级的原型 父级构造函数 function Parent(param) { this.name = 'parent' ...
- Jira与Confluence集成、授权信息查看和问题汇总
上一篇文章详细阐述了jira和confluence的安装部署和相关配置的操作记录,也介绍了两者之间其中一种集成方式:下面介绍另外的集成方式. 安装部署jira和confluence的顺序是,先安装ji ...
- Docker-CentOS7-安装
yum install -y docker 可以看到,已经安装上docker了,并且没有报什么错误 启动docker,并查看运行状态 停止docker,并查看运行状态 启动完 docker后,可以查看 ...
- Linux命令_sed
1.替换(将"xxx"替换成"yyy") 现有文件pets.txt 要将其中的"my"替换为"your",可以这样替换, ...
- web故障排查常用命令
整理总结了一些常用分析网站的命令方便大家快速定位故障所在排除故障,最小化的减少故障给业务带来的影响. 端口连接类 1.查看TCP连接状态 netstat -nat |awk '{print $6}'| ...