MySQL的安装、改密及远程连接
一、下载MySQL压缩包后的安装步骤
- 将压缩包解压到指定的目录
- 编辑好配置文件
[mysql]

#设置MySQL客户端默认字符集

default-character-set=utf8

[mysqld]

#设置3306端口

port = 3306

#设置MySQL的安装目录

basedir =D:\Program Files\MySQL\mysql-8.0.22-winx64

#设置MySQL数据库的数据的存放目录

datadir = D:\Program Files\MySQL\mysql-8.0.22-winx64\data

#允许最大连接数

max_connections=20

#服务端使用字符集默认为8比特编码的latin1字符集

character-set-server=utf8

#创建新表时将使用的默认存储引擎

default-storage-engine=INNODB
- DOS窗口下输入安装命令
- ①进入到MySQL的bin目录下,或者配置好环境变量即可,任意路径可操作
输入命令:mysqld install
	C:\WINDOWS\system32>mysqld install

	The service already exists!

	The current server installed:
- 注释:提示该服务已存在,先卸载,命令:mysqld remove
	C:\WINDOWS\system32>mysqld remove

	Service successfully removed.
- ②继续安装
	C:\WINDOWS\system32>mysqld install

	Service successfully installed.
- 注释:提示安装成功
- ③根据配置文件进行初始化命令:mysqld --initialize-insecure
C:\WINDOWS\system32>mysqld --initialize-insecure
- ④启动MySQL服务,命令:net start mysql
	C:\WINDOWS\system32>net start mysql

	MySQL 服务正在启动 ..

	MySQL 服务已经启动成功。
- ⑤进入MySQL,root账号免密进入,命令:mysql -u root
C:\WINDOWS\system32>mysql -u root

Welcome to the MySQL monitor.  Commands end with ; or \g.

Your MySQL connection id is 8

Server version: 8.0.22 MySQL Community Server - GPL

Copyright (c) 2000, 2020, Oracle and/or its affiliates. All rights reserved.

Oracle is a registered trademark of Oracle Corporation and/or its

affiliates. Other names may be trademarks of their respective

owners.

Type 'help;' or '\h' for help. Type '\c' to clear the current input statement.

mysql>
- ⑥查看MySQL有几个数据库,起始有4个才正常,查看命令;mysql> show databases;
mysql> show databases;

+--------------------+

| Database           |

+--------------------+

| information_schema |

| mysql              |

| performance_schema |

| sys                |

+--------------------+

4 rows in set (0.00 sec)
二、DOS命令更改MySQL的root用户的密码
- 进入mysql库命令:use mysql; 查看表命令:show tables;
	mysql> use mysql;

	Database changed
mysql> show tables;

+----------------------------------------------+

| Tables_in_mysql                              |

+----------------------------------------------+

| columns_priv                                 |

| component                                    |

| db                                           |

| default_roles                                |

| engine_cost                                  |

| func                                         |

| general_log                                  |

| global_grants                                |

| gtid_executed                                |

| help_category                                |

| help_keyword                                 |

| help_relation                                |

| help_topic                                   |

| innodb_index_stats                           |

| innodb_table_stats                           |

| password_history                             |

| plugin                                       |

| procs_priv                                   |

| proxies_priv                                 |

| replication_asynchronous_connection_failover |

| role_edges                                   |

| server_cost                                  |

| servers                                      |

| slave_master_info                            |

| slave_relay_log_info                         |

| slave_worker_info                            |

| slow_log                                     |

| tables_priv                                  |

| time_zone                                    |

| time_zone_leap_second                        |

| time_zone_name                               |

| time_zone_transition                         |

| time_zone_transition_type                    |

| user                                         |

+----------------------------------------------+

34 rows in set (0.00 sec)
2.user表中管理用户名与密码因此我们在这张表里面去修改,命令:
alter user ‘root’ @‘localhost’ identified by ‘123456’;
mysql> alter user 'root' @'localhost' identified by '123456';

Query OK, 0 rows affected (0.15 sec)
3.改完记得重新加载权限表,命令:flush privileges;
mysql> flush privileges;

Query OK, 0 rows affected (0.08 sec)
4.退出mysql重进,命令:mysql -u root
C:\WINDOWS\system32>mysql -u root

ERROR 1045 (28000): Access denied for user 'root'@'localhost' (using password: NO)
- 注释:此刻没有密码是进不去的,证明我们改密成功了
5.输入命令:mysql -u root -p
C:\WINDOWS\system32>mysql -u root -p

Enter password: ******

Welcome to the MySQL monitor.  Commands end with ; or \g.

Your MySQL connection id is 12

Server version: 8.0.22 MySQL Community Server - GPL

Copyright (c) 2000, 2020, Oracle and/or its affiliates. All rights reserved.

Oracle is a registered trademark of Oracle Corporation and/or its

affiliates. Other names may be trademarks of their respective

owners.

Type 'help;' or '\h' for help. Type '\c' to clear the current input statement.

mysql>
- 注释:输入密码成功进入
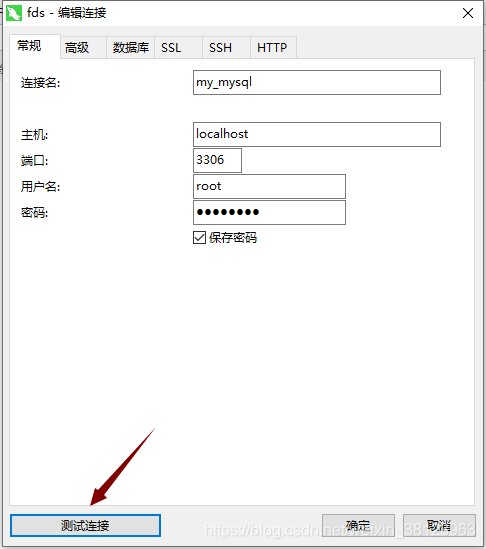
三、如何使用工具端Navicat连接数据库
- 打开客户端工具,输入相关的信息,点击测试连接
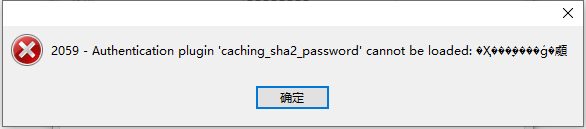
- 注释:提示上述错误,是一个关于加密规则的错误:
很多用户在使用Navicat Premium 12连接MySQL数据库时会出现Authentication plugin ‘caching_sha2_password’ cannot be loaded的错误。出现这个原因是mysql 8 之前的版本中加密规则是mysql_native_password,而在mysql 8之后,加密规则是caching_sha2_password, 解决问题方法有两种,一种是升级navicat驱动,一种是把mysql用户登录密码加密规则还原成mysql_native_password.
- 进入mysql库,在users表里面查看加密规则
mysql> use mysql;

Database changed

mysql> select host,user,plugin from user;

+-----------+------------------+-----------------------+

| host      | user             | plugin                |

+-----------+------------------+-----------------------+

| localhost | mysql.infoschema | caching_sha2_password |

| localhost | mysql.session    | caching_sha2_password |

| localhost | mysql.sys        | caching_sha2_password |

| localhost | root             | caching_sha2_password |

+-----------+------------------+-----------------------+

4 rows in set (0.00 sec)
- host:允许用户登录的 ip,此处如果为 % 表示可以远程;
- user: 当前数据库的用户名;
- plugin: 密码加密方式;
- 在mysql 5.7.9以后废弃了password字段和password()函数
- 修改加密规则
	mysql> ALTER USER 'root'@'localhost' IDENTIFIED WITH mysql_native_password BY '123456';

	Query OK, 0 rows affected (0.10 sec)

	mysql> flush privileges;

	Query OK, 0 rows affected (0.08 sec)
- 修改加密规则后再次查看
mysql> select host,user,plugin from user;

+-----------+------------------+-----------------------+

| host      | user             | plugin                |

+-----------+------------------+-----------------------+

| localhost | mysql.infoschema | caching_sha2_password |

| localhost | mysql.session    | caching_sha2_password |

| localhost | mysql.sys        | caching_sha2_password |

| localhost | root             | mysql_native_password |

+-----------+------------------+-----------------------+

4 rows in set (0.00 sec)
然后重复一步骤,出现如下错误:
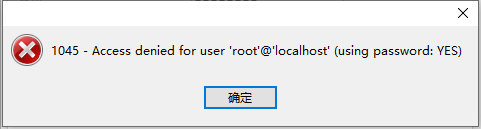
在步骤2中就发现不能远程,设置如下:
mysql> update user set Host='%' where User='root';

Query OK, 1 row affected (0.12 sec)

Rows matched: 1  Changed: 1  Warnings: 0

mysql> flush privileges;

Query OK, 0 rows affected (0.08 sec)
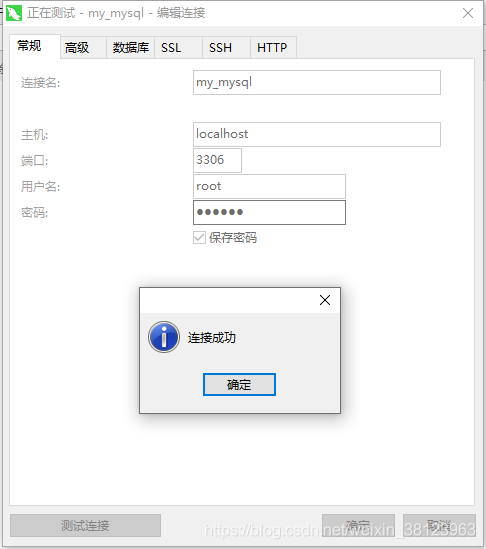
- 再次查看,发现root账号可以远程连接。
mysql> select host,plugin,user from user;

+-----------+-----------------------+------------------+

| host      | plugin                | user             |

+-----------+-----------------------+------------------+

| %         | mysql_native_password | root             |

| localhost | caching_sha2_password | mysql.infoschema |

| localhost | caching_sha2_password | mysql.session    |

| localhost | caching_sha2_password | mysql.sys        |

+-----------+-----------------------+------------------+

4 rows in set (0.01 sec)
MySQL的安装、改密及远程连接的更多相关文章
- MySql数据库安装&修改密码&开启远程连接图解
相关工具下载地址: mysql5.6 链接:http://pan.baidu.com/s/1o8ybn4I密码:aim1 SQLyog-12.0.8 链接:http://pan.baidu.com/s ...
- MysqL的root用户不允许远程连接
原文:MysqL的root用户不允许远程连接 今天程序报了异常:java.sql.SQLException: Access denied for user 'root'@'RJB-Z' (using ...
- 【MySQL解惑笔记】Navicat 无法远程连接MySQL数据库
安装好Navicat之后远程连接MySQL数据库出现以下报错截图: 出现以上截图怀疑是mysql用户权限不够: GRANT ALL PRIVILEGES ON *.* TO 'root'@'192.1 ...
- 本地不安装oracle,PLsql远程连接
Oracle的Instant client工具包可以很好地解决本地不安装oracle,PLsql远程连接. 1.首先到Oracle网站下载Instant Client : http://www.ora ...
- (亲测成功)在centos7.5上安装kvm,通过VNC远程连接并创建多台ubuntu虚拟机(ubuntu server版本)
在centos7.5上安装kvm,通过VNC远程连接并创建多台ubuntu虚拟机 前提:服务器端安装桌面版的centos系统 CentOS Linux release 7.5.1804 (Core) ...
- linux 下修改mysql下root 权限来允许远程连接
MySQL默认只允许root帐户在本地登录,如果要在其它机器上连接mysql,必须修改root允许远程连接. 其操作简单,如下所示: 1. 进入mysql: /usr/local/mysql/bin/ ...
- 虚拟机virtualBox安装linux系统 xshell远程连接linux
虚拟机virtualBox安装linux系统 xshell远程连接linux 虚拟机概念: 通过软件, 使用虚拟化技术虚拟出电脑的硬件环境, 充当真实的电脑使用. 常见的虚拟软件: virtualBo ...
- mysql 如果没有密码 就不能远程连接
mysql 如果没有密码 就不能远程连接
- [运维] 如何在云服务器上安装 MySQL 数据库, 并使用 Navicat 实现远程连接管理
.•●•✿.。.:*.•●•✿.。.:*.•●•✿.。.:*.•●•✿.。.:*.•●•✿.。.:*.•●•✿.。.:*.•.•●•✿.。.:*.•●•✿.。.:*.•●•✿.。.:*.•●•✿.。. ...
随机推荐
- [Skill] 记一次vue项目热更新失败案例
病因 修改文件后无法更新界面,感觉留白,没有更新 解决过程 发现问题,第一步搜索别人是怎么解决的 搜索一阵后,发现大部分都是留言路径问题,基本都是组件文件夹大写导致 修改测试后发现问题依旧 然后仔细观 ...
- Web Service 服务无法连接Oracle数据库
这个问题之前部署就遇到过,但是后来忘了,所以记录一下吧. 我部署Web Service服务的时候,服务没法正常运行,与Oracle数据库无法正常通信. 检查了数据库连接字没有任何问题,写了个测试接口, ...
- maven打包时排除配置文件
上网查了一下,直接在pom里面配置就好了,具体写法如下所示 <build> ... <resources> <resource> <directory> ...
- thinkphp3.2框架运行原理
thinkphp3.2是使用率非常普遍的国产php框架,以简单易于上手闻名,那么它框架结构是怎样的? tp3.2设计简单来说就是CBD,core(框架核心文件),bebavior(行为,tp3.2一大 ...
- jquery表格插件Datatables使用、快速上手
Datatables使用 一.简介 官网:https://datatables.net/ 中文官网:http://datatables.club/ Datatables是一款jquery表格插件.它是 ...
- CTF常见编码及加解密(超全)
@ 目录 前言 常见CTF编码及加解密 补充 ASCII编码 base家族编码 MD5.SHA1.HMAC.NTLM等类似加密型 1.MD5 2.SHA1 3.HMAC 4.NTLM 5.类似加密穷举 ...
- MySQL多版本并发控制——MVCC机制分析
MVCC,即多版本并发控制(Multi-Version Concurrency Control)指的是,通过版本链维护一个数据的多个版本,使得读写操作没有冲突,可保证不同事务读写.写读操作并发执行,提 ...
- Selenium WebDriver 8大定位方式
Selenium WebDriver 8大定位方式: driver.find_element_by_id() driver.find_element_by_name() driver.find_ele ...
- 【Tomcat 源码系列】认识 Tomcat
一,前言 说一句大实话,"平时一直在用 Tomcat,但是我从来没有用过 Tomcat". "平时一直在用 Tomcat",是因为搬砖用的 SpringBoot ...
- Mybatis的CRUD 增删改查
目录 namespace 命名空间 select insert update delete Mybatis 官网: https://mybatis.org/mybatis-3/zh/getting-s ...