pythonanywhere笔记
https://www.pythonanywhere.com
Deploying an existing Django project on PythonAnywhere
Deploying a Django project on PythonAnywhere is a lot like running a Django project on your own PC. You'll use a virtualenv, just like you probably do on your own PC, you'll have a copy of your code on PythonAnywhere which you can edit and browse and commit to version control.
The main thing that's different is that, instead of using the Django dev server with manage.py runserver and viewing your site on localhost, you'll create what we call a Web app via the Web tab in our UI, and then configure it with a WSGI file whose job is simply to import your Django project.
And then your site will be live on the real, public Internet. woo!
Here's an overview of the steps involved.
- Upload your code to PythonAnywhere
- Set up a virtualenv and install Django and any other requirements
- Set up your web app using manual config and your WSGI file.
- Add any other setup (static files, environment variables etc)
Uploading your code to PythonAnywhere
Assuming your code is already on a code sharing site like GitHub or Bitbucket, you can just clone it from a Bash Console:
# for example

$ git clone https://github.com/myusername/myproject.git
That's the solution we recommend, but there are a few different methods documented on the Uploading code page,
Create a virtualenv and install Django and any other requirements
In your Bash console, create a virtualenv, naming it after your project, and choosing the version of Python you want to use:
$ mkvirtualenv --python=/usr/bin/python3.4 mysite-virtualenv

(mysite-virtualenv)$ pip install django

# or, if you have a requirements.txt:

(mysite-virtualenv)$ pip install -r requirements.txt
Warning: Django may take a long time to install. PythonAnywhere has very fast internet, but the filesystem access can be slow, and Django creates a lot of small files during its installation. Thankfully you only have to do it once!
TIP: if you see an error saying mkvirtualenv: command not found, check out InstallingVirtualenvWrapper.
Setting up your Web app and WSGI file
At this point, you need to be armed with 3 pieces of information:
- The path to your Django project's top folder -- the folder that contains "manage.py", eg /home/myusername/mysite
- The name of your project (that's the name of the folder that contains your settings.py), eg mysite
- The name of your virtualenv, eg mysite-virtualenv
Create a Web app with Manual Config
Head over to the Web tab and create a new web app, choosing the "Manual Configuration" option and the right version of Python (the same one you used to create your virtualenv).
Enter your virtualenv name
Once that's done, enter the name of your virtualenv in the Virtualenv section on the web tab and click OK. You can just use its short name "mysite-virtualenv", and it will automatically complete to its full path in /home/username/.virtualenvs.
Edit your WSGI file
One thing that's important here: your Django project (if you're using a recent version of Django) will have a file inside it called wsgi.py. This is not the one you need to change to set things up on PythonAnywhere -- the system here ignores that file.
Instead, the WSGI file to change is the one that has a link inside the "Code" section of the Web tab -- it will have a name something like/var/www/yourusername_pythonanywhere_com_wsgi.py or /var/www/www_yourdomain_com_wsgi.py.
Click on the WSGI file link, and it will take you to an editor where you can change it.
Delete everything except the Django section and then uncomment that section. Your WSGI file should look something like this:
# +++++++++++ DJANGO +++++++++++

# To use your own Django app use code like this:

import os

import sys

# assuming your Django settings file is at '/home/myusername/mysite/mysite/settings.py'

path = '/home/myusername/mysite'

if path not in sys.path:

    sys.path.append(path)

os.environ['DJANGO_SETTINGS_MODULE'] = 'mysite.settings'

## Uncomment the lines below depending on your Django version

###### then, for Django >=1.5:

from django.core.wsgi import get_wsgi_application

application = get_wsgi_application()

###### or, for older Django <=1.4

#import django.core.handlers.wsgi

#application = django.core.handlers.wsgi.WSGIHandler()
- Be sure to substitute the correct path to your project, the folder that contains manage.py, which you noted above.
- Don't forget to substitute in your own username too!
- Also make sure you put the correct value for
DJANGO_SETTINGS_MODULE. - This guide assumes you're using a recent version of Django, so leave the old
wsgi.WSGIHandler()code commented out, or better still, delete it.
Save the file, then go and hit the Reload button for your domain. (You'll find one at the top right of the wsgi file editor, or you can go back to the main web tab)
Database setup
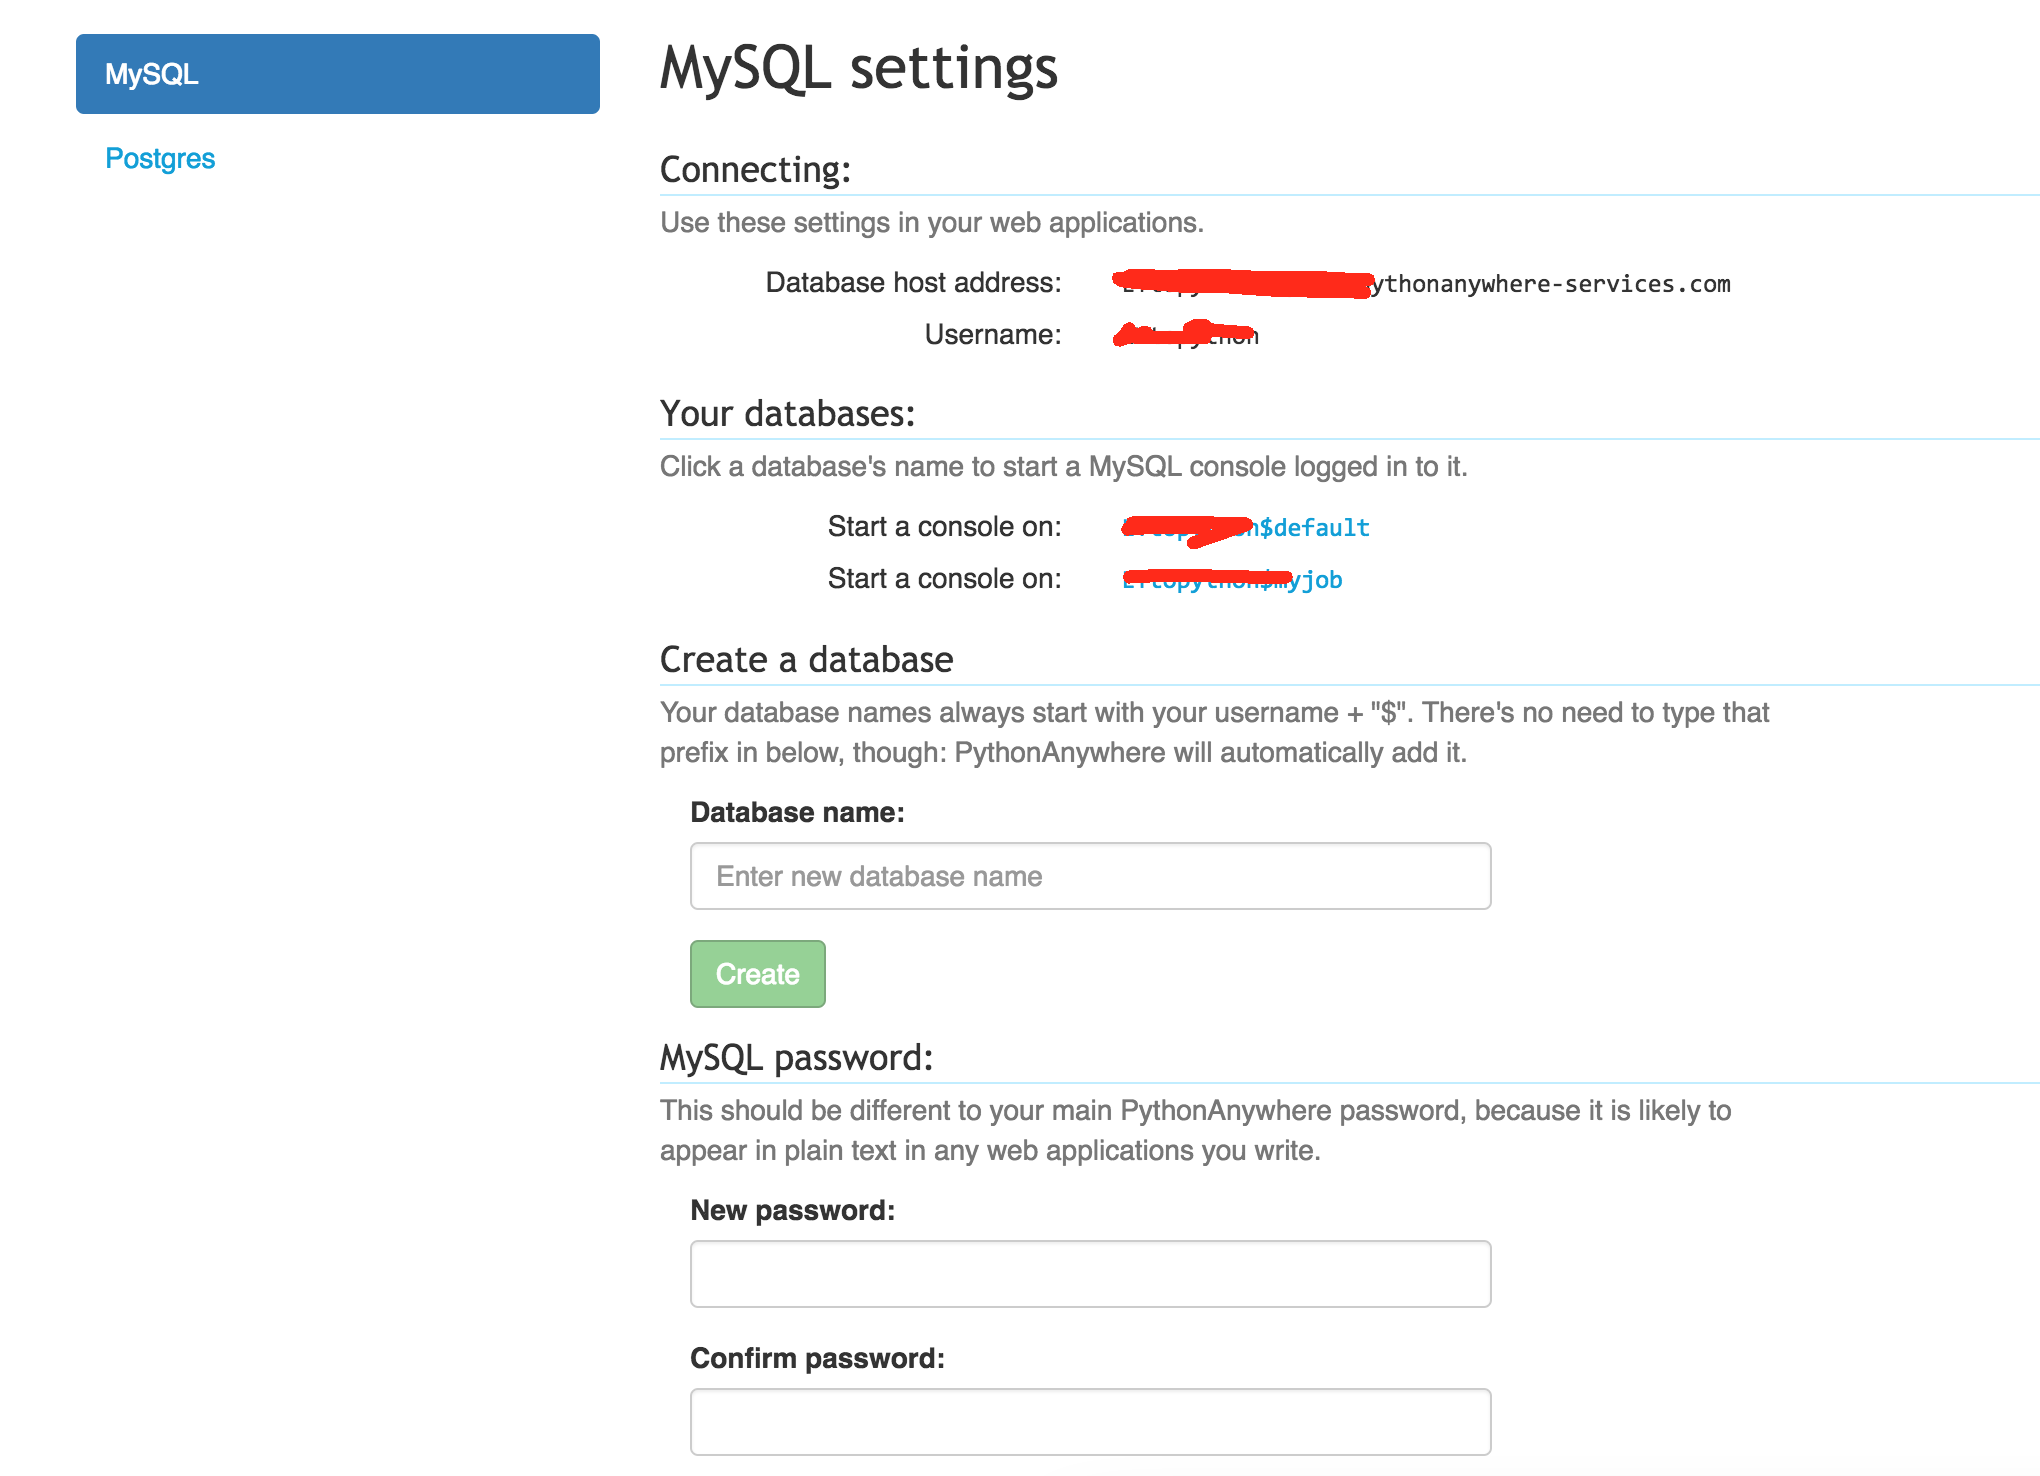
Using MySQL
To start using MySQL, you'll need to go to the MySQL tab on your dashboard, and set up a password. You'll also find the connection settings (host name, username) on that tab, as well as the ability to create new databases.
You can start a new MySQL console to access your databases from this tab too, or alternatively you can open a MySQL shell with the following command from a bash console or ssh session:
mysql -u USERNAME -h HOSTNAME -p
The USERNAME is the username you use to log in to PythonAnywhere and the HOSTNAME is on your Databases tab. It will prompt you for a password -- use the one you entered on the Databases tab.
Accessing MySQL from Python
The appropriate libraries are installed for all versions of Python that we support, so if you're not using a virtualenv, to access a MySQL database just import MySQLdb.
If you are using a virtualenv, you'll need to install the correct package yourself. Start a bash console inside the virtualenv, then:
For Python 2.7
pip install mysql-python
For Python 3.x
pip install mysqlclient
MySQL with Django
To configure Django to access a MySQL database on PythonAnywhere, you need to do this in your settings file:
DATABASES = {

    'default': {

        'ENGINE': 'django.db.backends.mysql',

        'NAME': '<your_username>$<your_database_name>',

        'USER': '<your_username>',

        'PASSWORD': '<your_mysql_password>',

        'HOST': '<your_mysql_hostname>',

    }

}
Again, you can get the username and hostname details from the "Databases" tab.
pythonanywhere笔记的更多相关文章
- python3.4学习笔记(七) 学习网站博客推荐
python3.4学习笔记(七) 学习网站博客推荐 深入 Python 3http://sebug.net/paper/books/dive-into-python3/<深入 Python 3& ...
- git-简单流程(学习笔记)
这是阅读廖雪峰的官方网站的笔记,用于自己以后回看 1.进入项目文件夹 初始化一个Git仓库,使用git init命令. 添加文件到Git仓库,分两步: 第一步,使用命令git add <file ...
- js学习笔记:webpack基础入门(一)
之前听说过webpack,今天想正式的接触一下,先跟着webpack的官方用户指南走: 在这里有: 如何安装webpack 如何使用webpack 如何使用loader 如何使用webpack的开发者 ...
- SQL Server技术内幕笔记合集
SQL Server技术内幕笔记合集 发这一篇文章主要是方便大家找到我的笔记入口,方便大家o(∩_∩)o Microsoft SQL Server 6.5 技术内幕 笔记http://www.cnbl ...
- PHP-自定义模板-学习笔记
1. 开始 这几天,看了李炎恢老师的<PHP第二季度视频>中的“章节7:创建TPL自定义模板”,做一个学习笔记,通过绘制架构图.UML类图和思维导图,来对加深理解. 2. 整体架构图 ...
- PHP-会员登录与注册例子解析-学习笔记
1.开始 最近开始学习李炎恢老师的<PHP第二季度视频>中的“章节5:使用OOP注册会员”,做一个学习笔记,通过绘制基本页面流程和UML类图,来对加深理解. 2.基本页面流程 3.通过UM ...
- NET Core-学习笔记(三)
这里将要和大家分享的是学习总结第三篇:首先感慨一下这周跟随netcore官网学习是遇到的一些问题: a.官网的英文版教程使用的部分nuget包和我当时安装的最新包版本不一致,所以没法按照教材上给出的列 ...
- springMVC学习笔记--知识点总结1
以下是学习springmvc框架时的笔记整理: 结果跳转方式 1.设置ModelAndView,根据view的名称,和视图渲染器跳转到指定的页面. 比如jsp的视图渲染器是如下配置的: <!-- ...
- 读书笔记汇总 - SQL必知必会(第4版)
本系列记录并分享学习SQL的过程,主要内容为SQL的基础概念及练习过程. 书目信息 中文名:<SQL必知必会(第4版)> 英文名:<Sams Teach Yourself SQL i ...
随机推荐
- HTML 事件属性(如:onsubmit)
学习啥都需要一个基础 基础很重要: HTML 4 的新特性之一是可以使 HTML 事件触发浏览器中的行为,比方说当用户点击某个 HTML 元素时启动一段 JavaScript. 在现代浏览器中都内置有 ...
- Zoie中文文档及简单解析
https://linkedin.jira.com/wiki/pages/viewpage.action?pageId=4456480 一.总体架构 Zoie是一个实时的搜索引擎系统,其需要逻辑上独立 ...
- Linux命令-文件处理命令:ln
ln -s /etc/issue /tmp/issue.soft 为这个/etc/issue文件创建一个软连接,名称为/tmp/issue.soft(相当于windows里面给/etc/issue文件 ...
- C#调用windows api控制打印机 状态获取 打印 自定义纸张 完整版
using System; using System.Text; using System.Runtime.InteropServices; using System.Security; using ...
- unity, StartCoroutine and StopCoroutine
startCoroutine("func",1.0f)可以用stopCoroutine("func")来停. startCoroutine(func(1.0f) ...
- CentOS中安装JDK与Intellij idea
卸载CentOS中自带openjdk CentOS自带openjdk,可以先用java –version检测是否存在jdk版本.如果存在,最好在安装oracle的jdk之前最好卸载,可以使用如下指令 ...
- linux CentOs 权限导致的Apache - "DocumentRoot must be a directory"的解决方案
在配置apache服务时经常遇到DocumentRoot must be a directory的错误提示,刚接触到apache时折腾了几个小时才找到错误的原因,出现这样的错误一般都是由于selinu ...
- 关于 initWithNibName 和 loadNibNamed 的区别和联系-iPhone成长之路
转自:http://blog.sina.com.cn/s/blog_7b9d64af01018f2u.html 关于 initWithNibName 和 loadNibNamed 的区别和联系.之所以 ...
- 线程相关函数(4)-pthread_mutex_lock(), pthread_mutex_unlock() 互斥锁
互斥锁实例: #include <pthread.h>pthread_mutex_t mutex = PTHREAD_MUTEX_INITIALIZER;int pthread_mutex ...
- python用time函数计算程序运行时间
内置模块time包含很多与时间相关函数.我们可通过它获得当前的时间和格式化时间输出. time(),以浮点形式返回自Linux新世纪以来经过的秒数.在linux中,00:00:00 UTC, Janu ...