#2020.1.26笔记——springdatajpa
2020.1.26笔记——springdatajpa
使用jpa的步骤:
1. 导入maven坐标

	<?xml version="1.0" encoding="UTF-8"?>

<project xmlns="http://maven.apache.org/POM/4.0.0"

         xmlns:xsi="http://www.w3.org/2001/XMLSchema-instance"

         xsi:schemaLocation="http://maven.apache.org/POM/4.0.0 http://maven.apache.org/xsd/maven-4.0.0.xsd">

    <modelVersion>4.0.0</modelVersion>

    <groupId>org.example</groupId>

    <artifactId>springDataJpa2</artifactId>

    <version>1.0-SNAPSHOT</version>

    <properties>

        <spring.version>4.2.4.RELEASE</spring.version>

        <hibernate.version>5.0.7.Final</hibernate.version>

        <slf4j.version>1.6.6</slf4j.version>

        <log4j.version>1.2.12</log4j.version>

        <c3p0.version>0.9.1.2</c3p0.version>

        <mysql.version>5.1.6</mysql.version>

    </properties>

    <dependencies>

        <!-- junit单元测试 -->

        <dependency>

            <groupId>junit</groupId>

            <artifactId>junit</artifactId>

            <version>4.9</version>

            <scope>test</scope>

        </dependency>

        <!-- spring beg -->

        <dependency>

            <groupId>org.aspectj</groupId>

            <artifactId>aspectjweaver</artifactId>

            <version>1.6.8</version>

        </dependency>

        <dependency>

            <groupId>org.springframework</groupId>

            <artifactId>spring-aop</artifactId>

            <version>${spring.version}</version>

        </dependency>

        <dependency>

            <groupId>org.springframework</groupId>

            <artifactId>spring-context</artifactId>

            <version>${spring.version}</version>

        </dependency>

        <dependency>

            <groupId>org.springframework</groupId>

            <artifactId>spring-context-support</artifactId>

            <version>${spring.version}</version>

        </dependency>

        <dependency>

            <groupId>org.springframework</groupId>

            <artifactId>spring-orm</artifactId>

            <version>${spring.version}</version>

        </dependency>

        <dependency>

            <groupId>org.springframework</groupId>

            <artifactId>spring-beans</artifactId>

            <version>${spring.version}</version>

        </dependency>

        <dependency>

            <groupId>org.springframework</groupId>

            <artifactId>spring-core</artifactId>

            <version>${spring.version}</version>

        </dependency>

        <!-- spring end -->

        <!-- hibernate beg -->

        <dependency>

            <groupId>org.hibernate</groupId>

            <artifactId>hibernate-core</artifactId>

            <version>${hibernate.version}</version>

        </dependency>

        <dependency>

            <groupId>org.hibernate</groupId>

            <artifactId>hibernate-entitymanager</artifactId>

            <version>${hibernate.version}</version>

        </dependency>

        <dependency>

            <groupId>org.hibernate</groupId>

            <artifactId>hibernate-validator</artifactId>

            <version>5.2.1.Final</version>

        </dependency>

        <!-- hibernate end -->

        <!-- c3p0 beg -->

        <dependency>

            <groupId>c3p0</groupId>

            <artifactId>c3p0</artifactId>

            <version>${c3p0.version}</version>

        </dependency>

        <!-- c3p0 end -->

        <!-- log end -->

        <dependency>

            <groupId>log4j</groupId>

            <artifactId>log4j</artifactId>

            <version>${log4j.version}</version>

        </dependency>

        <dependency>

            <groupId>org.slf4j</groupId>

            <artifactId>slf4j-api</artifactId>

            <version>${slf4j.version}</version>

        </dependency>

        <dependency>

            <groupId>org.slf4j</groupId>

            <artifactId>slf4j-log4j12</artifactId>

            <version>${slf4j.version}</version>

        </dependency>

        <!-- log end -->

        <dependency>

            <groupId>mysql</groupId>

            <artifactId>mysql-connector-java</artifactId>

            <version>${mysql.version}</version>

        </dependency>

        <dependency>

            <groupId>org.springframework.data</groupId>

            <artifactId>spring-data-jpa</artifactId>

            <version>1.9.0.RELEASE</version>

        </dependency>

        <dependency>

            <groupId>org.springframework</groupId>

            <artifactId>spring-test</artifactId>

            <version>4.2.4.RELEASE</version>

        </dependency>

        <!-- el beg 使用spring data jpa 必须引入 -->

        <dependency>

            <groupId>javax.el</groupId>

            <artifactId>javax.el-api</artifactId>

            <version>2.2.4</version>

        </dependency>

        <dependency>

            <groupId>org.glassfish.web</groupId>

            <artifactId>javax.el</artifactId>

            <version>2.2.4</version>

        </dependency>

        <!-- el end -->

    </dependencies>

</project>

2. 配置springdatajpa的xml文件,就是配置数据库,当项目运行的时候可以正常使用jpa

		<?xml version="1.0" encoding="UTF-8"?>

<beans xmlns="http://www.springframework.org/schema/beans"

       xmlns:xsi="http://www.w3.org/2001/XMLSchema-instance" xmlns:aop="http://www.springframework.org/schema/aop"

       xmlns:context="http://www.springframework.org/schema/context"

       xmlns:jdbc="http://www.springframework.org/schema/jdbc" xmlns:tx="http://www.springframework.org/schema/tx"

       xmlns:jpa="http://www.springframework.org/schema/data/jpa" xmlns:task="http://www.springframework.org/schema/task"

       xsi:schemaLocation="

		http://www.springframework.org/schema/beans http://www.springframework.org/schema/beans/spring-beans.xsd

		http://www.springframework.org/schema/aop http://www.springframework.org/schema/aop/spring-aop.xsd

		http://www.springframework.org/schema/context http://www.springframework.org/schema/context/spring-context.xsd

		http://www.springframework.org/schema/jdbc http://www.springframework.org/schema/jdbc/spring-jdbc.xsd

		http://www.springframework.org/schema/tx http://www.springframework.org/schema/tx/spring-tx.xsd

		http://www.springframework.org/schema/data/jpa

		http://www.springframework.org/schema/data/jpa/spring-jpa.xsd">

    <!-- 1.dataSource 配置数据库连接池-->

    <bean id="dataSource" class="com.mchange.v2.c3p0.ComboPooledDataSource">

        <property name="driverClass" value="com.mysql.jdbc.Driver" />

        <property name="jdbcUrl" value="jdbc:mysql://localhost:3306/springdatajpa" />

        <property name="user" value="root" />

        <property name="password" value="root" />

    </bean>

    <!-- 2.配置entityManagerFactory -->

    <bean id="entityManagerFactory" class="org.springframework.orm.jpa.LocalContainerEntityManagerFactoryBean">

        <property name="dataSource" ref="dataSource" />

        <property name="packagesToScan" value="cn.itcast.entity" />

        <!--jpa的实现厂家-->

        <property name="persistenceProvider">

            <bean class="org.hibernate.jpa.HibernatePersistenceProvider" />

        </property>

        <!--JPA的供应商适配器-->

        <property name="jpaVendorAdapter">

            <bean class="org.springframework.orm.jpa.vendor.HibernateJpaVendorAdapter">

                <!--配置是否自动创建数据库表-->

                <property name="generateDdl" value="false" />

                <!--指定数据库类型-->

                <property name="database" value="MYSQL" />

                <!--数据库方言,支持的特有语法-->

                <property name="databasePlatform" value="org.hibernate.dialect.MySQLDialect" />

                <!--是否显示sql语句-->

                <property name="showSql" value="true" />

            </bean>

        </property>

        <!--jpa方言,高级的特性-->

        <property name="jpaDialect">

            <bean class="org.springframework.orm.jpa.vendor.HibernateJpaDialect" />

        </property>

    </bean>

    <!-- 3.事务管理器-->

    <!-- JPA事务管理器  -->

    <bean id="transactionManager" class="org.springframework.orm.jpa.JpaTransactionManager">

        <property name="entityManagerFactory" ref="entityManagerFactory" />

    </bean>

    <!-- 整合spring data jpa-->

    <jpa:repositories base-package="cn.itcast.dao"

                      transaction-manager-ref="transactionManager"

                      entity-manager-factory-ref="entityManagerFactory"></jpa:repositories>

    <!-- 4.txAdvice-->

    <tx:advice id="txAdvice" transaction-manager="transactionManager">

        <tx:attributes>

            <tx:method name="save*" propagation="REQUIRED"/>

            <tx:method name="insert*" propagation="REQUIRED"/>

            <tx:method name="update*" propagation="REQUIRED"/>

            <tx:method name="delete*" propagation="REQUIRED"/>

            <tx:method name="get*" read-only="true"/>

            <tx:method name="find*" read-only="true"/>

            <tx:method name="*" propagation="REQUIRED"/>

        </tx:attributes>

    </tx:advice>

    <!-- 5.aop-->

    <aop:config>

        <aop:pointcut id="pointcut" expression="execution(* cn.itcast.service.*.*(..))" />

        <aop:advisor advice-ref="txAdvice" pointcut-ref="pointcut" />

    </aop:config>

    <context:component-scan base-package="cn.itcast"></context:component-scan>

    <!--组装其它 配置文件-->

</beans>
以上的文档内都有具体的内容解释,故不再赘述;
案例:
创建客户实体类:
 		package cn.itcast.entity;

 	import javax.persistence.*;

 	/**

 	 * @Created by Intellij IDEA.

 	 * @author: 陈亚萌

 	 * @Date: 2020/1/24

 	 * 实体类和表的映射关系

 	 * @Entity声明实体列

 	 * @Table

 	 * 类中和表中字段的映射关系

 	 * @Id

 	 * @GeneratedValue

 	 * @Column

 	 */

 	@Entity

 	@Table(name = "cst_customer")

 	public class Customer {

 	    @Id

 	    @GeneratedValue(strategy = GenerationType.IDENTITY)

 	    @Column(name = "cust_id")

 	    private Long custId;

 	    @Column(name = "cust_name")

 	    private String custName;

 	    @Column(name = "cust_source")

 	    private String custSource;

 	    @Column(name = "cust_level")

 	    private String custLevel;

 	    @Column(name = "cust_industry")

 	    private String custIndustry;

 	    @Column(name = "cust_phone")

 	    private String custPhone;

 	    @Column(name = "cust_address")

 	    private String custAddress;

 	    public Long getCustId() {

 	        return custId;

 	    }

 	    public void setCustId(Long custId) {

 	        this.custId = custId;

 	    }

 	    public String getCustAddress() {

 	        return custAddress;

 	    }

 	    public void setCustAddress(String custAddress) {

 	        this.custAddress = custAddress;

 	    }

 	    public String getCustIndustry() {

 	        return custIndustry;

 	    }

 	    public void setCustIndustry(String custIndustry) {

 	        this.custIndustry = custIndustry;

 	    }

 	    public String getCustLevel() {

 	        return custLevel;

 	    }

 	    public void setCustLevel(String custLevel) {

 	        this.custLevel = custLevel;

 	    }

 	    public String getCustName() {

 	        return custName;

 	    }

 	    public void setCustName(String custName) {

 	        this.custName = custName;

 	    }

 	    public String getCustPhone() {

 	        return custPhone;

 	    }

 	    public void setCustPhone(String custPhone) {

 	        this.custPhone = custPhone;

 	    }

 	    public String getCustSource() {

 	        return custSource;

 	    }

 	    public void setCustSource(String custSource) {

 	        this.custSource = custSource;

 	    }

 	    @Override

 	    public String toString() {

 	        return "Customer{" +

 	                "custId=" + custId +

 	                ", custAddress='" + custAddress + '\'' +

 	                ", custIndustry='" + custIndustry + '\'' +

 	                ", custLevel='" + custLevel + '\'' +

 	                ", custName='" + custName + '\'' +

 	                ", custPhone='" + custPhone + '\'' +

 	                ", custSource='" + custSource + '\'' +

 	                '}';

 	    }

 	}
一般来说,注解@Column(name = "cust_id")一般不用加,他会自动根据你的名字来路由表结构的。如果不想写getset方法可以使用lombok中的@Data注解,省去写toString方法和setget方法的时间
2. 创建接口类CustomerDao,必须继承JpaRepository<Customer,Long>, JpaSpecificationExecutor,其中
	*1. JpaRepository<操作的实体类类型,实体类中主键属性的类型>

 	*2. JpaSpecificationExecutor<操作的实体类型>
根据测试类进行测试增删改查:
一、jpa自己封装的方法:
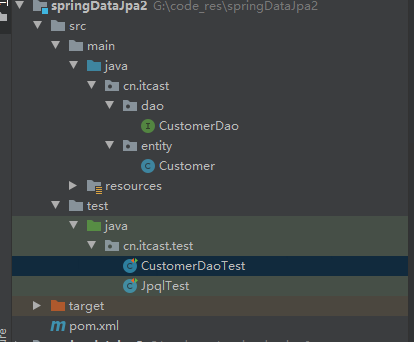
测试类的写法,一般在创建Maven项目后,会有test包,然后根据你需要测试的方法来写包,包结构必须一一对应:
另外,在测试类的上面需要加上注释://声明spring提供的单元测试
@RunWith(SpringJUnit4ClassRunner.class)
//指定spring容器的配置信息
@ContextConfiguration(locations = "classpath:applicationContext.xml")
测试查找,根据id查找:
 @Test

 /**

  * 根据id查询

  */

 public void testFindOne(){

     final Customer one = customerDao.findOne(2L);

     System.out.println(one);

 }
test注解必须加上,如果不加会报错。这种是根据jpa自动封装的方法进行查找出来的结果。
2. 测试保存或者更新
		/**

	     * 保存或者更新

	     *      根据传递的对象是否有存在主键id,如果没有主键id,则保存

	     *      如果传递的对象存在主键的属性id,则更新数据

	     */

	    @Test

	    public void saveOne(){

	        Customer customer=new Customer();

	        customer.setCustName("chenyameng111");

	        customer.setCustLevel("vip");

	        customer.setCustIndustry("jiaoyu");

	        final Customer save = customerDao.save(customer);

	        System.out.println(save);

	    }

		@Test

	    /**

	     * 更新按照id

	     */

	    public void updateOne(){

	       Customer customer=new Customer();

	       customer.setCustId(3L);

	       customer.setCustName("陈亚萌111");

	       customerDao.save(customer);

	    }
保存和更新有区别,因为主键设置为自增,所以保存的时候不需要传递id,但是如果你要更新数据的时候,需要进行传递id
3. 删除略
4. 查找所有:
		 /**

	     * 查询所有

	     */

	    @Test

	    public void findAll(){

	        final List<Customer> all = customerDao.findAll();

	        for (Customer customer : all) {

	            System.out.println(customer);

	        }

	    }
查找所有也是使用封装好的方法
5. 查询总数
		@Test

    public void testCount(){

        //查询客户数量

        final long count = customerDao.count();

        System.out.println(count);

    }
6. 判断该条数据是否存在,一般为主键来判断
	  /**

     * 判断id是否存在

     * 可以查询id为4

     * 的用户,如果值为空则不存在

     *

     *      2. 判断数据库中id为4的数量,为0则不存在 若》0

     */

    @Test

    public void testExists(){

        final boolean exists = customerDao.exists(4l);

        System.out.println(exists);

    }
7. **findOne getOne的区别**
		 /**

     * 根据id从数据库中查询

     *  @Transactional:保证getOne正常运行,事务处理

     *  findOne:   em.find();立即加载

     *  getOne:     em.getReference():延迟加载 返回是客户的动态代理对象,什么时候用什么时候查询

     */

    @Test

    @Transactional

    public void testGetOne(){

        final Customer one = customerDao.getOne(4L);

        System.out.println(one);

    }
二、jpql方法<如果想自定义sql语句>:
jpql的存在主要就是为了是jpa更加灵活,比如可以完成模糊查询,按照指定位置更新数据,查询所有等
根据姓名查找
  @Test

 /**

  * 根据id查询

  */

 public void testFindJpql(){

     final Customer one = customerDao.findJpq("chenyameng");

     System.out.println(one);

 }
在CustomerDao中的定义为:
	/**

	     * 根据客户名称查询客户

	     *      使用jpql的形式

	     *      jpql:from Customer where custName = ?

	     *      配置jpql语句:

	     *          @Query

	     */

	    @Query(value = "from Customer where custName = ?")

	    public Customer findJpq(String custName);
根据id和用户名查找
 @Test

 public void testFindCustNameAndId(){

     final Customer chenyameng = customerDao.findCustNameAndId("chenyameng", 2L);

     System.out.println(chenyameng);

 }
在CustomerDao中的定义:
	    /**

	     * 根据客户名称和客户id查询

	     *      jpql:from Customer where custName=? and custId=?

	     *  对于多个占位符参数:

	     *      赋值的时候,默认的情况下,占位符的位置需要和方法参数中的位置保持一致

	     *  对于指定占位符参数的位置:

	     *      ? 索引的方式指定此占位的取值来源

	     */

	    @Query(value = "from Customer where custName=? and custId=?")

	    public Customer findCustNameAndId(String custName,Long custId);
- 更新
 	/**

      * 测试jpql的更新

      *      springdatajpa使用jpql完成更新或者删除操作

      *          1. 需要手动添加事务的支持

      *          2. 默认执行结束后,回滚事务

      *              @Rollback(value = false)不会滚

      */

     @Test

     @Transactional

     @Rollback(value = false)

     public void testUpdataCustomer(){

         customerDao.updateCustomer(4L,"111222");

     }
CustomerDao:
	 /**

     * 使用jpql完成更新操作

     *      案例: 根据id更新,客户的名称

     *          更新4号客户的名称,将名称改为111222

     *      sql:update cst_customer set cust_name= ? where cust_id =?

     *      jpql: update Customer set custName = ? where custId=?

     * @Query:代表的是进行查询

     *      声明此方法是进行更新操作

     * @Modifying:更新操作

     */

    @Query(value = "update Customer set custName = ?2 where custId=?1")

    @Modifying

    public void updateCustomer(Long custId,String custName);
基本讲解都在代码里。故不再赘述
5. 查找所有 使用mysql或者sql的语法进行查找的时候需要加上nativeQuery=true
	 /**

     * 测试sql查询

     */

    @Test

    public void testListAll(){

        final List<Object[]> sql = customerDao.findSql();

        for (Object[] objects : sql) {

            System.out.println(Arrays.toString(objects));

        }

    }
CustomerDao:
	 /**

	     * 使用sql形式查询

	     *      查询全部的客户

	     *         sql:select * from customer

	     * @Query:配置sql查询

	     *  value:sql语句

	     *  nativeQuery表示是否使用本地查询 true sql false:jpql

	     */

	    @Query(value = "select * from cst_customer",nativeQuery = true)

	    public List<Object [] > findSql();
使用sql语句进行模糊查询:
  /**

  * 测试sql模糊查询

  */

 @Test

 public void testCondition(){

     final List<Object[]> sql = customerDao.findByCondition("chenyam%");

     for (Object[] objects : sql) {

         System.out.println(Arrays.toString(objects));

     }

 }
CustomerDao:
	@Query(value = "select * from cst_customer where cust_name like ?1",nativeQuery = true)

	List<Object [] > findByCondition(String name);
根据jpa封装好的方法进行查询:
 @Test

     public void testFindByname(){

         final Customer chenyameng = customerDao.findByCustName("chenyameng");

         System.out.println(chenyameng);

     }

     @Test

     public void testFindCuastNameLike(){

         final Customer chenyameng = customerDao.findByCustNameLike("chenya%");

         System.out.println(chenyameng);

     }

     @Test

     public void testFindCustNameLikeAndIndustry(){

         final List<Customer> customer = customerDao.findByCustNameLikeAndCustIndustry("陈亚萌%", "教育");

         for (Customer customer1 : customer) {

             System.out.println(customer1);

         }

     }
CustomerDao:
	 /**

     * 方法名约定:

     *      findBy:查询

     *          对象中的属性名称,需要首字母大写:查询的条件

     *              CustName:

     *                  * 默认情况下使用的方式查询

     *                      模糊匹配查询:

     *                          1. findBy+属性名称(根据属性名称完成匹配的查询)

     *                          2. findBy+属性名称+“查询方式”(Like|isnull)

     *                                      findByCustNameLike 可以进行模糊查询

     *                          3. 多条件查询

     *                              findBy+属性名+“查询方式” + “多条件的连接符And | Or(select * from c where sss)”+属性名+ “查询方式”

     *          findByCustName:根据客户名称查询

     *      在springdatajpa的运行阶段:会根据方法名称进行解析,findBy from xxx

     *                                                         属性名称    where 。。。

     */

    Customer findByCustName(String custName);

    Customer findByCustNameLike(String name);

    /**

     * 使用客户名模糊匹配和客户所属行业精准匹配的查询

     *

     */

    List<Customer> findByCustNameLikeAndCustIndustry(String name,String industry);
待总结:
- 项目内容的全部整理。
- jpa最后一部分,分页等内容的总结。
#2020.1.26笔记——springdatajpa的更多相关文章
- Ubuntu 14 编译安装 PHP 5.4.45 + Nginx 1.4.7 + MySQL 5.6.26 笔记
Ubuntu 14 编译安装 PHP 5.4.45 + Nginx 1.8.0/1.4.7 + MySQL 5.6.26 笔记,主要是给自己的PC机安装,非生产环境! 一.下载必要的源码 1.1.下 ...
- Goland 2020.2.x 激活码永久破解教程 (最新Goland激活码!2020.11.26亲测可用!)
在2020.11.26 Goland的用户们又迎来了一次更新,这就导致很多软件打开时候就提示Goland激活码已经失效,码小辫第一时间给各位分享了关于最新Goland激活破解教程! goland已经更 ...
- 2020.11.26 IntellJ idea激活码失效解决方法(最新idea激活码及安装参数!)
今天是2020年11月26号,小伙伴们是不是有发现自己的idea激活码失效了,不瞒大家,小编也是一个JAVA开发者,到了公司打开idea,然后就发现事情不妙,经过1个多小时的摸索,终于把最近的安装参数 ...
- 2020/4/26 大数据的zookeeper分布式安装
大数据的zookeeper分布式安装 **** 前面的文章已经提到Hadoop的伪分布式安装.现在就在原有的基础上安装zookeeper. 首先启动Hadoop平台 [root@master ~]# ...
- Solution -「2020.12.26」 模拟赛
0x00 前言 一些吐槽. 考得很变态诶,看每道题平均两秒的时限就知道了... T1 降智了想到后缀懒得打. T2 口胡了假优化,结果和暴力分一样?? T3 黑题还绑点?? \(50 + 80 + 0 ...
- python随机函数.2020.2.26
随机生成函数: import random //首先要引用random模板 print(random.randint(0,9)) //random的语法 random.randint(0,9 ...
- 关于2020.04.26【MySQL导出数据到文件中的方法】的补充
之前导出的数据文件中没有表的列名,感觉不够完整,摸索一下发现带表列名导出也是可以的,只试了导出txt和csv两种文件类型的方法. 1.导出数据到txt文件中(包含数据表列名)的方法:先选择 ...
- 2020.5.26 第六篇 Scrum冲刺博客
Team:银河超级无敌舰队 Project:招新通 项目冲刺集合贴:链接 目录 一.每日站立会议 1.1 会议照片 1.2 项目完成情况 二.项目燃尽图 三.签入记录 3.1 代码/文档签入记录 3. ...
- ent orm笔记2---schema使用(上)
在上一篇关于快速使用ent orm的笔记中,我们再最开始使用entc init User 创建schema,在ent orm 中的schema 其实就是数据库模型,在schema中我们可以通过Fiel ...
随机推荐
- index|substr
#!/usr/bin/perl use strict; use warnings; $_ = 'duwanxkm,c.,df;oq123@#!@%$#^'; my $d ='d';my $o = 'o ...
- zabbix数据库占用磁盘空间较大的处理方法
du -h /* |sort -nr 使用此命令一步步排查发现/var/lib/mysql/zabbix/这个目录占用磁盘空间较大 发现history_log.ibd这个文件最大,达到了38G,此文 ...
- 三十五、lamp经典组合搭建
一.安装mysql数据库 1.1 创建组和用户: 1)groupadd mysql 2)useradd mysql -g mysql -M -s /sbin/nologin 3)config ...
- 基础篇六:Nginx编译配置参数
- 吴裕雄--天生自然python机器学习:使用朴素贝叶斯过滤垃圾邮件
使用朴素贝叶斯解决一些现实生活中 的问题时,需要先从文本内容得到字符串列表,然后生成词向量. 准备数据:切分文本 测试算法:使用朴素贝叶斯进行交叉验证 文件解析及完整的垃圾邮件测试函数 def cre ...
- O - Snacks(DFS序)
百度科技园内有nn个零食机,零食机之间通过n−1n−1条路相互连通.每个零食机都有一个值vv,表示为小度熊提供零食的价值. 由于零食被频繁的消耗和补充,零食机的价值vv会时常发生变化.小度熊只能从编号 ...
- day24-练习
#17.有四个数字:1 2 3 4 ,能组成多少个各不相同且数字不重复的三位数?各是多少? count = 0 for i in range(1,5): for j in range(1,5): fo ...
- Nginx的下载与安装
.创建文件输入网页中需要复制的 cat >/etc/yum.repos.d/nginx.repo<<EOF [nginx-stable] name=nginx stable repo ...
- volatile、synchronized、ReentrantLock与CAS
目录 一.JVM内存模型: 二.volatile关键字 1.volatile保证内存可见性. 2.能禁止指令重排序 3.不能保证原子性 三.synchronized关键字 1.内存可见性: 2.操作的 ...
- python学习笔记(2)数据类型-字符串
字符串是 Python 中最常用的数据类型.我们可以使用引号( ' 或 " )来创建字符串. 创建字符串很简单,只要为变量分配一个值即可.例如: var1 = 'Hello World!' ...