CentOS 7.0 安装配置LAMP服务器方法(Apache+PHP+MariaDB)(转)
准备篇:
CentOS 7.0系统安装配置图解教程 http://www.jb51.net/os/188487.html
一、配置防火墙,开启80端口、3306端口
CentOS 7.0默认使用的是firewall作为防火墙,这里改为iptables防火墙。
1、关闭firewall:
systemctl stop firewalld.service #停止firewall
systemctl disable firewalld.service #禁止firewall开机启动
2、安装iptables防火墙
yum install iptables-services #安装
vi /etc/sysconfig/iptables #编辑防火墙配置文件
# Firewall configuration written by system-config-firewall
# Manual customization of this file is not recommended.
*filter
:INPUT ACCEPT [0:0]
:FORWARD ACCEPT [0:0]
:OUTPUT ACCEPT [0:0]
-A INPUT -m state --state ESTABLISHED,RELATED -j ACCEPT
-A INPUT -p icmp -j ACCEPT
-A INPUT -i lo -j ACCEPT
-A INPUT -m state --state NEW -m tcp -p tcp --dport 22 -j ACCEPT
-A INPUT -m state --state NEW -m tcp -p tcp --dport 80 -j ACCEPT
-A INPUT -m state --state NEW -m tcp -p tcp --dport 3306 -j ACCEPT
-A INPUT -j REJECT --reject-with icmp-host-prohibited
-A FORWARD -j REJECT --reject-with icmp-host-prohibited
COMMIT
:wq! #保存退出
systemctl restart iptables.service #最后重启防火墙使配置生效
systemctl enable iptables.service #设置防火墙开机启动
二、关闭SELINUX
vi /etc/selinux/config
#SELINUX=enforcing #注释掉
#SELINUXTYPE=targeted #注释掉
SELINUX=disabled #增加
:wq! #保存退出
setenforce 0 #使配置立即生效
安装篇:
一、安装Apache

系统运维 www.osyunwei.com 温馨提醒:qihang01原创内容?版权所有,转载请注明出处及原文链
yum install httpd #根据提示,输入Y安装即可成功安装
systemctl start httpd.service #启动apache
systemctl stop httpd.service #停止apache
systemctl restart httpd.service #重启apache
systemctl enable httpd.service #设置apache开机启动
在客户端浏览器中打开服务器IP地址,会出现下面的界面,说明apache安装成功
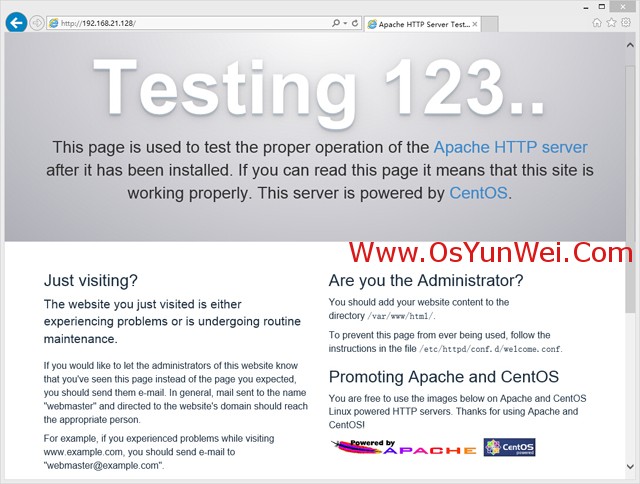
系统运维 www.osyunwei.com 温馨提醒:qihang01原创内容?版权所有,转载请注明出处及原文链
二、安装MariaDB
CentOS 7.0中,已经使用MariaDB替代了MySQL数据库
1、安装MariaDB
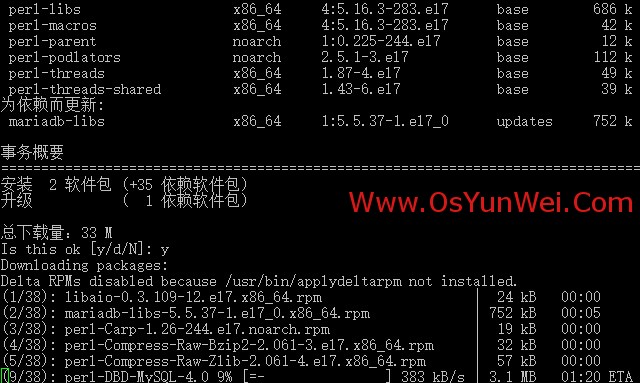
yum install mariadb mariadb-server #询问是否要安装,输入Y即可自动安装,直到安装完成
systemctl start mariadb.service #启动MariaDB
systemctl stop mariadb.service #停止MariaDB
systemctl restart mariadb.service #重启MariaDB
systemctl enable mariadb.service #设置开机启动
cp /usr/share/mysql/my-huge.cnf /etc/my.cnf #拷贝配置文件(注意:如果/etc目录下面默认有一个my.cnf,直接覆盖即可)
2、为root账户设置密码
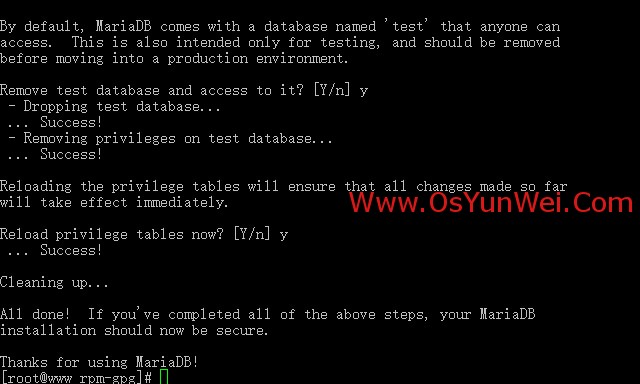
mysql_secure_installation
回车,根据提示输入Y
输入2次密码,回车
根据提示一路输入Y
最后出现:Thanks for using MySQL!
MySql密码设置完成,重新启动 MySQL:
systemctl restart mariadb.service #重启MariaDB
三、安装PHP
1、安装PHP

yum install php #根据提示输入Y直到安装完成
2、安装PHP组件,使PHP支持 MariaDB
yum install php-mysql php-gd libjpeg* php-ldap php-odbc php-pear php-xml php-xmlrpc php-mbstring php-bcmath php-mhash
#这里选择以上安装包进行安装,根据提示输入Y回车
systemctl restart mariadb.service #重启MariaDB
systemctl restart httpd.service #重启apache
配置篇
一、Apache配置
vi /etc/httpd/conf/httpd.conf #编辑文件
ServerSignature On #添加,在错误页中显示Apache的版本,Off为不显示
Options Indexes FollowSymLinks #修改为:Options Includes ExecCGI FollowSymLinks(允许服务器执行CGI及SSI,禁止列出目录)
#AddHandler cgi-script .cgi #修改为:AddHandler cgi-script .cgi .pl (允许扩展名为.pl的CGI脚本运行)
AllowOverride None #修改为:AllowOverride All (允许.htaccess)
AddDefaultCharset UTF-8 #修改为:AddDefaultCharset GB2312 (添加GB2312为默认编码)
#Options Indexes FollowSymLinks #修改为 Options FollowSymLinks(不在浏览器上显示树状目录结构)
DirectoryIndex index.html #修改为:DirectoryIndex index.html index.htm Default.html Default.htm index.php(设置默认首页文件,增加index.php)
MaxKeepAliveRequests 500 #添加MaxKeepAliveRequests 500 (增加同时连接数)
:wq! #保存退出
systemctl restart httpd.service #重启apache
rm -f /etc/httpd/conf.d/welcome.conf /var/www/error/noindex.html #删除默认测试页
二、php配置
vi /etc/php.ini #编辑
date.timezone = PRC #把前面的分号去掉,改为date.timezone = PRC
disable_functions = passthru,exec,system,chroot,scandir,chgrp,chown,shell_exec,proc_open,proc_get_status,ini_alter,ini_alter,ini_restore,dl,openlog,syslog,readlink,symlink,popepassthru,stream_socket_server,escapeshellcmd,dll,popen,disk_free_space,checkdnsrr,checkdnsrr,getservbyname,getservbyport,disk_total_space,posix_ctermid,posix_get_last_error,posix_getcwd,
posix_getegid,posix_geteuid,posix_getgid, posix_getgrgid,posix_getgrnam,posix_getgroups,posix_getlogin,posix_getpgid,posix_getpgrp,posix_getpid, posix_getppid,posix_getpwnam,posix_getpwuid, posix_getrlimit, posix_getsid,posix_getuid,posix_isatty, posix_kill,posix_mkfifo,posix_setegid,posix_seteuid,posix_setgid,
posix_setpgid,posix_setsid,posix_setuid,posix_strerror,posix_times,posix_ttyname,posix_uname
#列出PHP可以禁用的函数,如果某些程序需要用到这个函数,可以删除,取消禁用。
expose_php = Off #禁止显示php版本的信息
short_open_tag = ON #支持php短标签
open_basedir = .:/tmp/ #设置表示允许访问当前目录(即PHP脚本文件所在之目录)和/tmp/目录,可以防止php木马跨站,如果改了之后安装程序有问题(例如:织梦内容管理系统),可以注销此行,或者直接写上程序的目录/data/www.osyunwei.com/:/tmp/
:wq! #保存退出
systemctl restart mariadb.service #重启MariaDB
systemctl restart httpd.service #重启apache
测试篇
cd /var/www/html
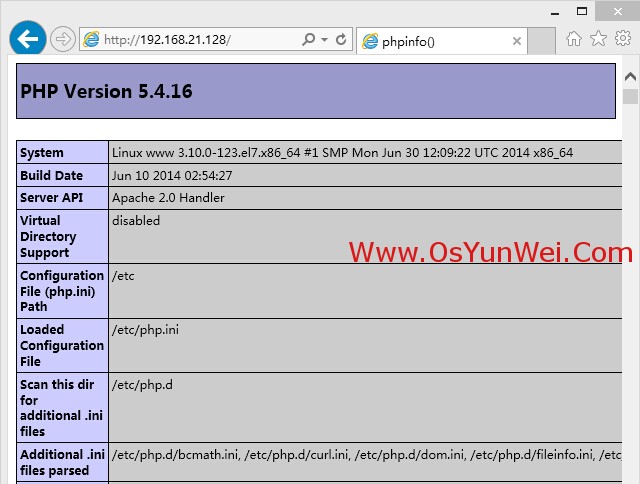
vi index.php #输入下面内容
<?php
phpinfo();
?>
:wq! #保存退出
在客户端浏览器输入服务器IP地址,可以看到如下图所示相关的配置信息!
注意:apache默认的程序目录是/var/www/html
权限设置:chown apache.apache -R /var/www/html
至此,CentOS 7.0安装配置LAMP服务器(Apache+PHP+MariaDB)教程完成!
CentOS 7.0 安装配置LAMP服务器方法(Apache+PHP+MariaDB)(转)的更多相关文章
- CentOS 7.0 安装配置LAMP服务器方法(Apache+PHP+MariaDB)
一.配置防火墙,开启80端口.3306端口 CentOS 7.0默认使用的是firewall作为防火墙,这里改为iptables防火墙. 1.关闭firewall: #停止firewall服务 sys ...
- CentOS 7.0安装配置LAMP服务器(Apache+PHP+MariaDB)
CentOS 7.0默认使用的是firewall作为防火墙,这里改为iptables防火墙. 1.关闭firewall: systemctl stop firewalld.service #停止fir ...
- CentOS 6.3安装配置LAMP服务器(Linux+Apache+MySQL+PHP5)
服务器系统环境:CentOS 6.3 客户端系统环境:Windows 7 ultimate(x86)sp1 简体中文旗舰版 ※ 本文档描述了如何在Linux服务器配置Apache.Mysql.PHP ...
- CentOS 6.5安装配置LAMP服务器(Apache+PHP5+MySQL)的方法
CentOS 6.5安装配置LAMP服务器(Apache+PHP5+MySQL)的方法 准备篇: 1.配置防火墙,开启80端口.3306端口vi /etc/sysconfig/iptables-A I ...
- CentOS 6.4安装配置LAMP服务器(Apache+PHP5+MySQL)
这篇文章主要介绍了CentOS 6.4安装配置LAMP服务器(Apache+PHP5+MySQL)的方法,需要的朋友可以参考下 文章写的不错,很详细:IDO转载自网络: 准备篇: 1.配置防火墙,开启 ...
- CentOS 6.4安装配置LAMP服务器
CentOS 6.4安装配置LAMP服务器(Apache+PHP5+MySQL) 作者: 字体:[增加 减小] 类型:转载 这篇文章主要介绍了CentOS 6.4安装配置LAMP服务器(Apache+ ...
- CentOS 6.3安装配置LAMP服务器(Apache+PHP5+MySQL)
准备篇: 1.配置防火墙,开启80端口.3306端口 vi /etc/sysconfig/iptables -A INPUT -m state --state NEW -m tcp -p tcp -- ...
- CentOS 5.11安装配置LAMP服务器(Apache+PHP5+MySQL)
http://www.osyunwei.com/archives/8880.html 准备篇: CentOS 5.x系统安装配置图解教程 http://www.osyunwei.com/archive ...
- CentOS 6.6安装配置LAMP服务器(Apache+PHP5+MySQL)
准备篇: CentOS 6.6系统安装配置图解教程 http://www.osyunwei.com/archives/8398.html 1.配置防火墙,开启80端口.3306端口 vi /etc/s ...
随机推荐
- Linux部署项目
1 安装jdk 第一步:获取Linux系统中jdk安装包和tomcat安装包(后面要用,所以上传两个) 第二步:使用secureCRT客户端工具连到服务器 第三步:使用命令创建一个目录,作为软件的安装 ...
- vue --轮播图
轮播图,可以使用mint-ui中的swipe HTML: <Swipe :auto="4000"> <SwipeItem v-for="item in ...
- phpexcel如何读取带公式的excel文件得到值呢?
如果某个cell使用到了公式通过getValue()获取的是公式本身而通过getCalculatedValue()会有对象 getFormattedValue()获取到的是公式计算后的值
- mui-当使用addeleventlisener()方法绑定事件时选择器无法绑定事件
在mui中绑定事件不能用jQuery或mui(“#XX”)的形式选取某个元素,而是document.getelementbyid()的形式 mui(“#XX”)可以使用on方法绑定事件
- zabbix 利用python脚本实现钉钉告警
Zabbix 利用python脚本实现钉钉告警 1.安装python3.6环境 2.创建python脚本 cd local/zabbix-4.0.3/share/zabbix/alertscripts ...
- Typechecking With PropTypes
[Typechecking With PropTypes] 1.props类型检查 React has some built-in typechecking abilities. To run typ ...
- Pushlet实现后台信息推送(二)
上一篇日志利用推送源周期性地向订阅了某一事件的所有网页端推送信息,但怎么实现向特定的某一个用户推送信息呢,想象一个网络聊天室,怎么向单独的一个好友私聊呢.问题的关键就是那个SessionID,Push ...
- BOM 表
';--查看BOM创建日期时间 SELECT * FROM SAPSR3.ZSTPO_OUT2011_1@SAP_SEP; SELECT * FROM SAPSR3.ZSTPO_OUT2012_1@S ...
- easymock单元测试跟踪工具
EasyMock can save a lot of legwork and make unit tests a lot faster to write. builder.com Java E-New ...
- 【scrapy】爬虫的时候总在提示 KeyError: 'novelLabel'
调试的时候总是提示 KeyError: 'novelLabel'然后决定断点调试一下, 在def parse_book_list(self, response):方法下,添加print(respons ...