
Netty(1-2)Discard Client
一、DiscardClientHandler
import io.netty.buffer.ByteBuf;

import io.netty.channel.ChannelFuture;

import io.netty.channel.ChannelFutureListener;

import io.netty.channel.ChannelHandlerContext;

import io.netty.channel.SimpleChannelInboundHandler;

import io.netty.util.CharsetUtil;

import lombok.extern.slf4j.Slf4j;

@Slf4j

public class DiscardClientHandler extends SimpleChannelInboundHandler<Object> {

    private ByteBuf content;

    private ChannelHandlerContext ctx;

    @Override

    public void channelActive(ChannelHandlerContext ctx) throws Exception {//(1)

        this.ctx = ctx;

        content = ctx.alloc().directBuffer(DiscardClient.SIZE).writeZero(DiscardClient.SIZE);

        //content = ctx.alloc().directBuffer(DiscardClient.SIZE).writeBytes("1".getBytes(CharsetUtil.UTF_8));

        //发送以上消息

        generatTraffic();

    }

    @Override

    public void channelInactive(ChannelHandlerContext ctx) throws Exception {

        content.release();

    }

    @Override

    protected void channelRead0(ChannelHandlerContext ctx, Object msg) throws Exception {//(2)

        //Server is supposed to send nothing,but if it sends somethings,discard it.

    }

    @Override

    public void exceptionCaught(ChannelHandlerContext ctx, Throwable cause) throws Exception {

        cause.printStackTrace();

        ctx.close();

    }

    //*************************自定义方法

    private void generatTraffic() {

        //flush the outbound buffer to the socket.

        //once flushed,generate the same amount of traffic again.

        ByteBuf buf = content.retainedDuplicate();

        ctx.writeAndFlush(buf).addListener(trafficGenerator);

        //Console.log((char)buf.readByte());

        log.info("{}",(char)buf.getByte(0));

    }

    private final ChannelFutureListener trafficGenerator = new ChannelFutureListener() {//(3)

        @Override

        public void operationComplete(ChannelFuture future) throws Exception {

            if (future.isSuccess()) {

                generatTraffic();

            } else {

                future.cause().printStackTrace();

                future.channel().close();

            }

        }

    };

}
1、发送消息
2、接收服务器返回的消息。由于服务端没有返回消息,所以此处忽略。
3、发送消息后,根据结果的处理。如果成功,继续发送消息;否则,抛出异常,关闭channel。
二、DiscardClient
import io.netty.bootstrap.Bootstrap;

import io.netty.channel.ChannelFuture;

import io.netty.channel.ChannelInitializer;

import io.netty.channel.ChannelOption;

import io.netty.channel.ChannelPipeline;

import io.netty.channel.EventLoopGroup;

import io.netty.channel.nio.NioEventLoopGroup;

import io.netty.channel.socket.SocketChannel;

import io.netty.channel.socket.nio.NioSocketChannel;

import io.netty.handler.ssl.SslContext;

import io.netty.handler.ssl.SslContextBuilder;

import io.netty.handler.ssl.util.InsecureTrustManagerFactory;

import lombok.extern.slf4j.Slf4j;

@Slf4j

public class DiscardClient {

    static final boolean SSL = System.getProperty("ssl") != null;

    static final String HOST = System.getProperty("host","127.0.0.1");

    static final int PORT = Integer.parseInt(System.getProperty("port","8080"));

    static final int SIZE = Integer.parseInt(System.getProperty("size", "256"));

    public static void main(String[] args) throws Exception {

        final SslContext sslCtx;

        if (SSL) {

            sslCtx = SslContextBuilder.forClient().trustManager(InsecureTrustManagerFactory.INSTANCE).build();

        } else {

            sslCtx = null;

        }

        EventLoopGroup group = new NioEventLoopGroup();

        try {

            Bootstrap b = new Bootstrap();

            b.group(group)

            .channel(NioSocketChannel.class)

            .option(ChannelOption.CONNECT_TIMEOUT_MILLIS, 1000)

            .handler(new ChannelInitializer<SocketChannel>() {

                @Override

                protected void initChannel(SocketChannel ch) throws Exception {

                    ChannelPipeline p = ch.pipeline();

                    if (sslCtx != null) {

                        p.addLast(sslCtx.newHandler(ch.alloc(),HOST,PORT));

                    }

                    p.addLast(new DiscardClientHandler());

                }

            });

            //make the connection attempt.

            ChannelFuture f = b.connect(HOST,PORT).sync();

            //wait until the connection is closed.

            f.channel().closeFuture().sync();

            log.info("connection is closed");

        } finally {

            group.shutdownGracefully();

        }

    }

}
运行结果:
服务端:
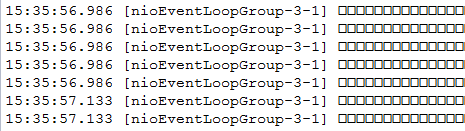
客户端:
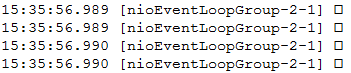
Netty(1-2)Discard Client的更多相关文章
- netty写Echo Server & Client完整步骤教程(图文)
1.创建Maven工程 1.1 父节点的pom.xml代码(root pom文件) 1 <?xml version="1.0" encoding="UTF-8&qu ...
- Netty Client重连实现
from:http://itindex.net/detail/54161-netty-client 当我们用Netty实现一个TCP client时,我们当然希望当连接断掉的时候Netty能够自动重连 ...
- Netty Client 重连实现
当我们用Netty实现一个TCP client时,我们当然希望当连接断掉的时候Netty能够自动重连.Netty Client有两种情况下需要重连: Netty Client启动的时候需要重连 在程序 ...
- netty初探(1)
参考目录: 1. user-guide : http://netty.io/wiki/user-guide-for-4.x.html 2. demo: http://netty.io/wiki/ 3. ...
- Netty 学习 一、初识Netty【原创】
在过去几年的工作和学习中,比较关注高层次的应用开发,对底层探究较少.实现Web应用的开发,主要依赖Tomcat.Apache等应用服务器,程序员无需了解底层协议,但同样限制了应用的性能和效率.现在开始 ...
- Netty Tutorial Part 1: Introduction to Netty [z]
Netty Tutorial, Part 1: Introduction to Netty Update: Part 1.5 Has Been Published: Netty Tutorial P ...
- User guide for Netty 4.x
Table of Contents Preface The Solution Getting Started Before Getting Started Writing a Discard Serv ...
- netty参考
前言 问题 现如今我们使用通用的应用程序或者类库来实现系统之间地互相访问,比如我们经常使用一个HTTP客户端来从web服务器上获取信息,或者通过web service来执行一个远程的调用. 然而,有时 ...
- Netty4.0学习笔记系列之一:Server与Client的通讯
http://blog.csdn.net/u013252773/article/details/21046697 本文是学习Netty的第一篇文章,主要对Netty的Server和Client间的通讯 ...
随机推荐
- 有时候,Visual C++代码中加中文注释会导致错误!
今天做题发现了个奇葩错误,以此警戒自己. 张某,做的一道题. --------------------------------------------------------------------- ...
- js_调试_01_14 个你可能不知道的 JavaScript 调试技巧
更快更高效地调试你的 JavaScript 了解你的工具在完成任务时有很重要的意义. 尽管 JavaScript 是出了名的难以调试,但是如果你掌握了一些小技巧,错误和 bug 解决起来就会快多了. ...
- jquery操作全选、批量删除、加减行
--------------------------------------------------------------------------------------- html静态页面 --- ...
- 在线接口管理工具-eoapi
为了方便和前端沟通,临时在局域网搭建了一个接口管理工具,查了一些资料都说eoapi不错,那就试了一下: 1.安装 要在服务器或者自己的电脑,准备web环境,Linux可以是Apache/nginx , ...
- linux命令学习笔记(54):ping命令
Linux系统的ping命令是常用的网络命令,它通常用来测试与目标主机的连通性,我们经常会说“ping一下某机器, 看是不是开着”.不能打开网页时会说“你先ping网关地址192.168.1.1试试” ...
- 高级Java工程师必备 ----- 深入分析 Java IO (一)BIO
BIO编程 最原始BIO 网络编程的基本模型是C/S模型,即两个进程间的通信. 服务端提供IP和监听端口,客户端通过连接操作想服务端监听的地址发起连接请求,通过三次握手连接,如果连接成功建立,双方就可 ...
- [转]JavaScript的实例化与继承:请停止使用new关键字
JavaScript中的new关键字可以实现实例化和继承的工作,但个人认为使用new关键字并非是最佳的实践,还可以有更友好一些的实现.本文将介绍使用new关键字有什么问题,然后介绍如何对与new相关联 ...
- Asp.Net 无法获取IIS拾取目录的解决办法[译]
Asp.Net 无法获取IIS拾取目录的解决办法 作者:Jason Doucette [MCP] 翻译:彭远志 原文地址:Fixing the cannot get IIS pickup direc ...
- JAVA操作cassandra数据库
如果是maven项目,在pom.xml里加入依赖.不是的话下载相应的jar包放到lib目录下.这里驱动包的版本要和你cassandra的大版本一致.我这里cassandra的版本是最新的3.9,驱动是 ...
- <c和指针>学习笔记1之快速上手和基本概念
1 c语言中的注释 功能:使这段代码在程序中不起作用,当然如果是功能注释,那是方便其他人阅读您的代码. 大部分情况下,多行的注释,我们采用的是这种方式,例如 /*内容*/. 这个符号不能嵌套,也就是 ...