pymysql 模块的使用
一 . pymysql 的下载和使用
在python 中操作数据库需要用到 pymysql 模块.
(1) . pymysql 模块的下载
pip3 install pymysql
(2) . pymysql 的使用
数据库和数据都已经存在
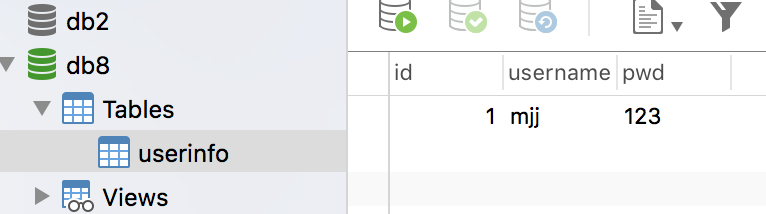
# 实现:使用Python实现用户登录,如果用户存在则登录成功(假设该用户已在数据库中)

import pymysql

user = input('请输入用户名:')

pwd = input('请输入密码:')

# 1.连接

conn = pymysql.connect(host='127.0.0.1', port=3306, user='root', password='', db='db8', charset='utf8')

# 2.创建游标

cursor = conn.cursor()

#注意%s需要加引号

sql = "select * from userinfo where username='%s' and pwd='%s'" %(user, pwd)

print(sql)

# 3.执行sql语句

cursor.execute(sql)

result=cursor.execute(sql) #执行sql语句,返回sql查询成功的记录数目

print(result)

# 关闭连接,游标和连接都要关闭

cursor.close()

conn.close()

if result:

    print('登陆成功')

else:

    print('登录失败')
二 . execute() 之 sql 注入
最后那一个空格,在一条sql语句中如果遇到select * from userinfo where username='mjj' -- asadasdas' and pwd='' 则--之后的条件被注释掉了(注意--后面还有一个空格)

#1、sql注入之:用户存在,绕过密码

mjj' -- 任意字符

#2、sql注入之:用户不存在,绕过用户与密码

xxx' or 1=1 -- 任意字符


# 原来是我们对sql进行字符串拼接

# sql="select * from userinfo where name='%s' and password='%s'" %(username,pwd)

# print(sql)

# result=cursor.execute(sql)

#改写为(execute帮我们做字符串拼接,我们无需且一定不能再为%s加引号了)

sql="select * from userinfo where name=%s and password=%s" #!!!注意%s需要去掉引号,因为pymysql会自动为我们加上

result=cursor.execute(sql,[user,pwd]) #pymysql模块自动帮我们解决sql注入的问题,只要我们按照pymysql的规矩来。
三 . 增 , 删 , 改 : conn.commit()
commit() : 在数据库里增 ,删 , 改 的时候,必须要进行提交,否则插入的数据不生效 .
import pymysql

username = input('请输入用户名:')

pwd = input('请输入密码:')

# 1.连接

conn = pymysql.connect(host='localhost', port=3306, user='root', password='', db='db8', charset='utf8')

# 2.创建游标

cursor = conn.cursor()

# 操作

# 增

# sql = "insert into userinfo(username,pwd) values (%s,%s)"

# effect_row = cursor.execute(sql,(username,pwd))

#同时插入多条数据

#cursor.executemany(sql,[('李四','110'),('王五','119')])

# print(effect_row)#

# 改

# sql = "update userinfo set username = %s  where id = 2"

# effect_row = cursor.execute(sql,username)

# print(effect_row)

# 删

sql = "delete from userinfo  where id = 2"

effect_row = cursor.execute(sql)

print(effect_row)

#一定记得commit

conn.commit()

# 4.关闭游标

cursor.close()

# 5.关闭连接

conn.close()
四 . 查 : fetchone , fetchmany , fetchall
fetchone():   #获取下一行数据,第一次为首行;

fetchall():     #获取所有行数据源

fetchmany(4):  #获取4行数据
查看表内容 :
mysql> select * from userinfo;

+----+----------+-----+

| id | username | pwd |

+----+----------+-----+

|  1 | mjj      | 123 |

|  3 | 张三     | 110 |

|  4 | 李四     | 119 |

+----+----------+-----+

3 rows in set (0.00 sec)
使用 fetchone() :
import pymysql

# 1.连接

conn = pymysql.connect(host='localhost', port=3306, user='root', password='', db='db8', charset='utf8')

# 2.创建游标

cursor = conn.cursor()

sql = 'select * from userinfo'

cursor.execute(sql)

# 查询第一行的数据

row = cursor.fetchone()

print(row) # (1, 'mjj', '123')

# 查询第二行数据

row = cursor.fetchone()

print(row) # (3, '张三', '110')

# 4.关闭游标

cursor.close()

# 5.关闭连接

conn.close()
使用 fetchall():
import pymysql

# 1.连接

conn = pymysql.connect(host='localhost', port=3306, user='root', password='', db='db8', charset='utf8')

# 2.创建游标

cursor = conn.cursor()

sql = 'select * from userinfo'

cursor.execute(sql)

# 获取所有的数据

rows = cursor.fetchall()

print(rows)

# 4.关闭游标

cursor.close()

# 5.关闭连接

conn.close()

#运行结果

((1, 'mjj', ''), (3, '张三', ''), (4, '李四', ''))
默认情况下,获取的返回值是元组,只能看到每行的数据,但是不知道每一列代表的是什么 ? 可以使用以下方式来返回字典,每一行的数据都会生成一个字典 :
cursor = conn.cursor(cursor=pymysql.cursors.DictCursor)

 #在实例化的时候,将属性cursor设置为pymysql.cursors.DictCursor
在fentchone 示例中,在获取行数据的时候,可以理解为开始,有一个行指针指着第一行的上方,获取一行,他就像下移动,所以当行指针到最后一行的时候,就不能再获取到行的内容,所以我们可以使用如下方法来移动指针 :
cursor.scroll(1,mode='relative')  # 相对当前位置移动

cursor.scroll(2,mode='absolute') # 相对绝对位置移动

第一个值为移动的行数,整数为向下移动,负数为向上移动,mode指定了是相对当前位置移动,还是相对于首行移动
# 1.Python实现用户登录

# 2.Mysql保存数据

import pymysql

# 1.连接

conn = pymysql.connect(host='localhost', port=3306, user='root', password='', db='db8', charset='utf8')

# 2.创建游标

cursor = conn.cursor(cursor=pymysql.cursors.DictCursor)

sql = 'select * from userinfo'

cursor.execute(sql)

# 查询第一行的数据

row = cursor.fetchone()

print(row) # (1, 'mjj', '123')

# 查询第二行数据

row = cursor.fetchone() # (3, '张三', '110')

print(row)

cursor.scroll(-1,mode='relative') #设置之后,光标相对于当前位置往前移动了一行,所以打印的结果为第二行的数据

row = cursor.fetchone()

print(row)

cursor.scroll(0,mode='absolute') #设置之后,光标相对于首行没有任何变化,所以打印的结果为第一行数据

row = cursor.fetchone()

print(row)

# 4.关闭游标

cursor.close()

# 5.关闭连接

conn.close()

#结果如下

{'id': 1, 'username': 'mjj', 'pwd': ''}

{'id': 3, 'username': '张三', 'pwd': ''}

{'id': 3, 'username': '张三', 'pwd': ''}

{'id': 1, 'username': 'mjj', 'pwd': ''}
使用 fetchmany():
import pymysql

# 1.连接

conn = pymysql.connect(host='localhost', port=3306, user='root', password='', db='db8', charset='utf8')

# 2.创建游标

cursor = conn.cursor(cursor=pymysql.cursors.DictCursor)

sql = 'select * from userinfo'

cursor.execute(sql)

# 获取2条数据

rows = cursor.fetchmany(2)

print(rows)

# 4.关闭游标

# rows = cursor.fetchall()

# print(rows)

cursor.close()

# 5.关闭连接

conn.close()

#结果如下:

[{'id': 1, 'username': 'mjj', 'pwd': ''}, {'id': 3, 'username': '张三', 'pwd': ''}]
pymysql 模块的使用的更多相关文章
- Python中操作mysql的pymysql模块详解
Python中操作mysql的pymysql模块详解 前言 pymsql是Python中操作MySQL的模块,其使用方法和MySQLdb几乎相同.但目前pymysql支持python3.x而后者不支持 ...
- python实战第一天-pymysql模块并练习
操作系统 Ubuntu 15.10 IDE & editor JetBrains PyCharm 5.0.2 ipython3 Python版本 python-3.4.3 安装pymysql模 ...
- pymysql 模块介绍
pymysql模块是python与mysql进行交互的一个模块. pymysql模块的安装: pymysql模块的用法: import pymysql user=input('user>> ...
- Mysql(六):数据备份、pymysql模块
一 IDE工具介绍 生产环境还是推荐使用mysql命令行,但为了方便我们测试,可以使用IDE工具 下载链接:https://pan.baidu.com/s/1bpo5mqj 掌握: #1. 测试+链接 ...
- python如何使用pymysql模块
Python 3.x 操作MySQL的pymysql模块详解 前言pymysql是Python中操作MySQL的模块,其使用方法和MySQLdb几乎相同.但目前pymysql支持python3.x而M ...
- MySQL之pymysql模块
MySQL之pymysql模块 import pymysql #s链接数据库 conn = pymysql.connect( host = '127.0.0.1', #被连接数据库的ip地址 po ...
- PyMySQL模块的使用
PyMySQL介绍 PyMySQL是在Python3.x版本中用于连接MySQL服务器的一个库,Python2系列中则使用mysqldb.Django中也可以使用PyMySQL连接MySQL数据库. ...
- MySQL学习12 - pymysql模块的使用
一.pymysql的下载和使用 1.pymysql模块的下载 2.pymysql的使用 二.execute()之sql注入 三.增.删.改:conn.commit() 四.查:fetchone.fet ...
- 数据库入门-pymysql模块的使用
一.pymysql模块安装 由于本人的Python版本为python3.7,所以用pymysql来连接数据库(mysqldb不支持python3.x) 方法一: #在cmd输入 pip3 instal ...
- Python连接MySQL数据库之pymysql模块使用
安装PyMySQL pip install pymysql PyMySQL介绍 PyMySQL是在python3.x版本中用于连接MySQL服务器的一个库,2中则使用mysqldb. Django中也 ...
随机推荐
- EV根证书
Extended Validation SSL Certificates翻译为扩展验证型服务器证书(EV 服务器证书 或 EV SSL证书),申请该证书需要经过最彻底的身份验证,确保证书持有组织的真实 ...
- quick-cocos2d 设置横屏
quick cocos2d新建项目,在xcode中 起模拟器,默认的是竖屏,我想做一个横屏的游戏,前面已经说了 选中你的项目,在General这个标签内,Deoployment info的这个分组,有 ...
- cocos2dx 2.x新建项目
举例: cocos2d-x-2.2.6/tools/project-creator 进入 这个文件夹 chmod 777 project-cereator.py ./create_project.py ...
- php报错配置问题
在开发的时候php.ini ,要显示所有的错误 error_reporting=E_ALL | E_STRICT 在发布的时候可以显示除了notice之外的错误,打开错误记录功能 error_repo ...
- 2017.2.13 开涛shiro教程-第十二章-与Spring集成(二)shiro权限注解
原博客地址:http://jinnianshilongnian.iteye.com/blog/2018398 根据下载的pdf学习. 第十二章-与Spring集成(二)shiro权限注解 shiro注 ...
- 【Python】ModuleNotFoundError: No module named 'matplotlib.pyplot'
安装好matplotlib后,很激动的建立了一个文件夹matplotlib,并且在其下面建立了,mpl_squraes.py文件,代码编辑完成以后,点击运行,报错如下: 仔细分析了之后,发现是文件夹名 ...
- 世纪怎么换算成具体的年份?eg:19世纪60年代=19??年?
http://zhidao.baidu.com/question/339742625.html&__bd_tkn__=6ab5183c226b84031b08b849ecac35b396039 ...
- HTML/CSS开发规范指南
参见文档:https://github.com/doyoe/html-css-guide 1.文档目录结构 |-- 项目名 |-- src 开发环境 |-- html 静态页面模板目录 |-- bgi ...
- DevOps 初学者的入门指南
原文地址:http://blog.csdn.net/FIRim/article/details/52681704 当我们谈到 DevOps 时,可能讨论的是:流程和管理,运维和自动化,架构和服务,以及 ...
- vscode Python Pylint(代码检测插件)
暑假刚开始想了解一下Python,使用vscode进行编写,根据vscode 的提示安装了一些不知道干啥的插件,编写过程中提示说 "Linter pylint is not install ...