Nginx的安装与部署
1:安装工具包 wget、vim和gcc
yum install -y wget

yum install -y vim-enhanced

yum install -y make cmake gcc gcc-c++ - 1
- 2
- 3
2:下载nginx安装包
wget http://nginx.org/download/nginx-1.6.2.tar.gz- 1
3:安装依赖包
yum install -y pcre pcre-devel

yum install -y zlib zlib-devel

yum install -y openssl openssl-devel- 1
- 2
- 3
4:解压nginx-1.6.2.tar.gz到/usr/local/目录下
tar -zxvf nginx-1.6.2.tar.gz -C /usr/local/- 1
5:进行configure配置
进入nginx-1.6.2目录然后在执行./configure命令
[root@MiWiFi-R3-srv nginx-1.6.2]# ./configure --prefix=/usr/local/nginx- 1
6:编译安装
[root@MiWiFi-R3-srv nginx-1.6.2]# make && make install- 1
7:启动Nginx,启动完之后检查nginx是否已经正常启动,看到如下信息说明正常启动
[root@MiWiFi-R3-srv nginx-1.6.2]# /usr/local/nginx/sbin/nginx

[root@MiWiFi-R3-srv nginx-1.6.2]# ps -ef | grep nginx

root     24956     1  0 19:41 ?        00:00:00 nginx: master process /usr/local/nginx/sbin/nginx

nobody   24957 24956  0 19:41 ?        00:00:00 nginx: worker process

root     24959 10533  0 19:41 pts/0    00:00:00 grep --color=auto nginx

[root@MiWiFi-R3-srv nginx-1.6.2]# - 1
- 2
- 3
- 4
- 5
- 6
如果要关闭nginx,我们可以使用如下命令:
[root@MiWiFi-R3-srv nginx-1.6.2]# /usr/local/nginx/sbin/nginx -s stop- 1
如果想要重新热启动nginx,则使用如下命令:
[root@MiWiFi-R3-srv nginx-1.6.2]# /usr/local/nginx/sbin/nginx -s reload- 1
8:配置防火墙,nginx默认的端口是80
[root@MiWiFi-R3-srv nginx-1.6.2]# firewall-cmd --zone=public --add-port=80/tcp --permanent

success

[root@MiWiFi-R3-srv nginx-1.6.2]# firewall-cmd --reload

success

[root@MiWiFi-R3-srv nginx-1.6.2]# - 1
- 2
- 3
- 4
- 5
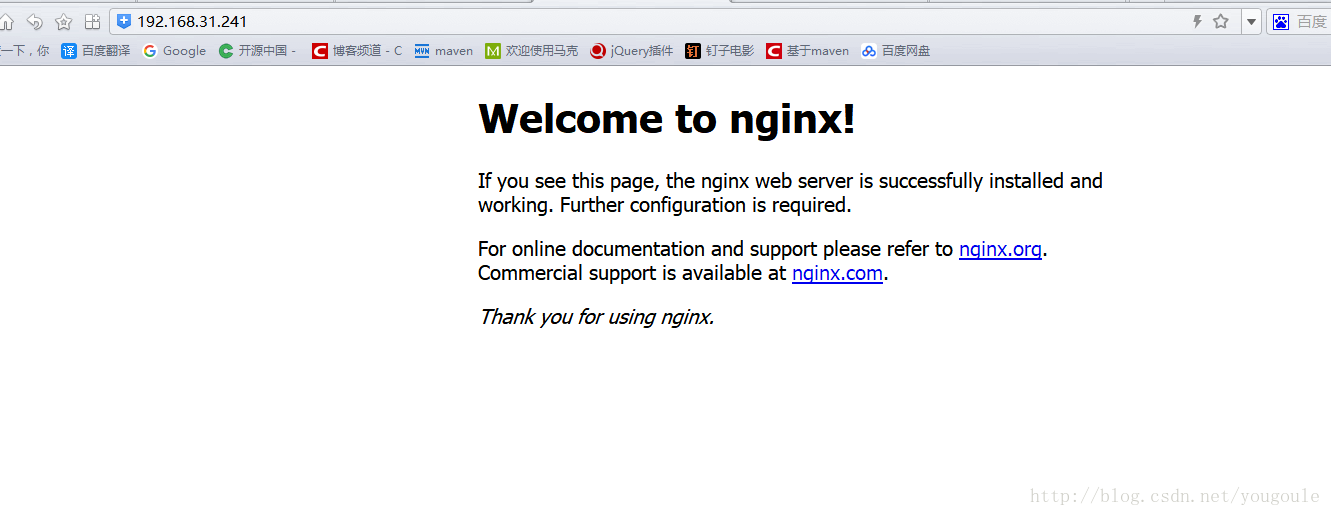
9:测试nginx
通过浏览器访问nginx欢迎页,在地址栏输入:http://192.168.31.241/(80端口可以不用输)或http://192.168.156.11:80/,如下图所示。
10:学习nginx配置
在nginx目录下进入conf目录,该目录下有个nginx.conf文件,这是nginx最重要的配置文件
[root@MiWiFi-R3-srv conf]# vim /usr/local/nginx/conf/nginx.conf- 1
nginx.conf文件的全部内容如下(有注释版):
 #user  nobody;

#开启进程数 <=CPU数

worker_processes  1;

#错误日志保存位置

#error_log  logs/error.log;

#error_log  logs/error.log  notice;

#error_log  logs/error.log  info;

#进程号保存文件

#pid        logs/nginx.pid;

#每个进程最大连接数(最大连接=连接数x进程数)每个worker允许同时产生多少个链接,默认1024

events {

    worker_connections  1024;

}

http {

    #文件扩展名与文件类型映射表

    include       mime.types;

    #默认文件类型

    default_type  application/octet-stream;

    #日志文件输出格式 这个位置相于全局设置

    #log_format  main  '$remote_addr - $remote_user [$time_local] "$request" '

    #                  '$status $body_bytes_sent "$http_referer" '

    #                  '"$http_user_agent" "$http_x_forwarded_for"';

    #请求日志保存位置

    #access_log  logs/access.log  main;

    #打开发送文件

    sendfile        on;

    #tcp_nopush     on;

    #keepalive_timeout  0;

    #连接超时时间

    keepalive_timeout  65;

    #打开gzip压缩

    #gzip  on;

    server {

        #监听端口,默认是80端口

        listen       80;

        #监听域名

        server_name  localhost;

        #charset koi8-r;

        #nginx访问日志放在logs/host.access.log下,并且使用main格式(还可以自定义格式)

        #access_log  logs/host.access.log  main;

        #如果没有location更明确的匹配访问路径的话,访问请求都会被该location处理。

        location / {

            #root指定nginx的根目录为/usr/local/nginx/html

            root   html;

            #默认访问文件,欢迎页先去html目录下找index.html,如果找不到再去找index.htm

            index  index.html index.htm;

        }

        #error_page  404              /404.html;

        # redirect server error pages to the static page /50x.html

        #

        #错误页面及其返回地址,错误码为500、502、503、504都会返回50.html错误页面。

        error_page   500 502 503 504  /50x.html;

        #location后面是"="的话,说明是精确匹配

        location = /50x.html {

            root   html;

        }

        # proxy the PHP scripts to Apache listening on 127.0.0.1:80

        #

        #location ~ \.php$ {

        #    proxy_pass   http://127.0.0.1;

        #}

        # pass the PHP scripts to FastCGI server listening on 127.0.0.1:9000

        #

        #location ~ \.php$ {

        #    root           html;

        #    fastcgi_pass   127.0.0.1:9000;

        #    fastcgi_index  index.php;

        #    fastcgi_param  SCRIPT_FILENAME  /scripts$fastcgi_script_name;

        #    include        fastcgi_params;

        #}

        # deny access to .htaccess files, if Apache's document root

        # concurs with nginx's one

        #

        #location ~ /\.ht {

        #    deny  all;

        #}

    }

    # another virtual host using mix of IP-, name-, and port-based configuration

    #

    #server {

    #    listen       8000;

    #    listen       somename:8080;

    #    server_name  somename  alias  another.alias;

    #    location / {

    #        root   html;

    #        index  index.html index.htm;

    #    }

    #}

    # HTTPS server

    #

    #server {

    #    listen       443 ssl;

    #    server_name  localhost;

    #    ssl_certificate      cert.pem;

    #    ssl_certificate_key  cert.key;

    #    ssl_session_cache    shared:SSL:1m;

    #    ssl_session_timeout  5m;

    #    ssl_ciphers  HIGH:!aNULL:!MD5;

    #    ssl_prefer_server_ciphers  on;

    #    location / {

    #        root   html;

    #        index  index.html index.htm;

    #    }

    #}

} - 1
- 2
- 3
- 4
- 5
- 6
- 7
- 8
- 9
- 10
- 11
- 12
- 13
- 14
- 15
- 16
- 17
- 18
- 19
- 20
- 21
- 22
- 23
- 24
- 25
- 26
- 27
- 28
- 29
- 30
- 31
- 32
- 33
- 34
- 35
- 36
- 37
- 38
- 39
- 40
- 41
- 42
- 43
- 44
- 45
- 46
- 47
- 48
- 49
- 50
- 51
- 52
- 53
- 54
- 55
- 56
- 57
- 58
- 59
- 60
- 61
- 62
- 63
- 64
- 65
- 66
- 67
- 68
- 69
- 70
- 71
- 72
- 73
- 74
- 75
- 76
- 77
- 78
- 79
- 80
- 81
- 82
- 83
- 84
- 85
- 86
- 87
- 88
- 89
- 90
- 91
- 92
- 93
- 94
- 95
- 96
- 97
- 98
- 99
- 100
- 101
- 102
- 103
- 104
- 105
- 106
- 107
- 108
- 109
- 110
- 111
- 112
- 113
- 114
- 115
- 116
- 117
- 118
- 119
- 120
- 121
- 122
- 123
- 124
- 125
- 126
- 127
- 128
- 129
- 130
- 131
- 132
- 133
- 134
- 135
配置文件里可以添加多个server,server监听的端口不同,可以根据需要让nginx代理多个端口,当访问某个端口的时候,指定去做某些事情。我这里添加了一个server,这个server监听的端口为1234,server_name我指定为了test.com,也就是域名为test.com,当访问1234端口时会自动导航到/usr/local/nginx/tester/tester111.html页面,如下所示。
#user  nobody;

#开启进程数 <=CPU数

worker_processes  1;

#错误日志保存位置

#error_log  logs/error.log;

#error_log  logs/error.log  notice;

#error_log  logs/error.log  info;

#进程号保存文件

#pid        logs/nginx.pid;

#每个进程最大连接数(最大连接=连接数x进程数)每个worker允许同时产生多少个链接,默认1024

events {

    worker_connections  1024;

}

http {

    #文件扩展名与文件类型映射表

    include       mime.types;

    #默认文件类型

    default_type  application/octet-stream;

    #日志文件输出格式 这个位置相于全局设置

    #log_format  main  '$remote_addr - $remote_user [$time_local] "$request" '

    #                  '$status $body_bytes_sent "$http_referer" '

    #                  '"$http_user_agent" "$http_x_forwarded_for"';

    #请求日志保存位置

    #access_log  logs/access.log  main;

    #打开发送文件

    sendfile        on;

    #tcp_nopush     on;

    #keepalive_timeout  0;

    #连接超时时间

    keepalive_timeout  65;

    #打开gzip压缩

    #gzip  on;

    server {

        #监听端口

        listen       80;

        #监听域名

        server_name  localhost;

        #charset koi8-r;

        #nginx访问日志放在logs/host.access.log下,并且使用main格式(还可以自定义格式)

        #access_log  logs/host.access.log  main;

        #如果没有location更明确的匹配访问路径的话,访问请求都会被该location处理。

        location / {

            #root指定nginx的根目录为/usr/local/nginx/html

            root   html;

            #默认访问文件,欢迎页先去html目录下找index.html,如果找不到再去找index.htm

            index  index.html index.htm;

        }

        #error_page  404              /404.html;

        # redirect server error pages to the static page /50x.html

        #

        #错误页面及其返回地址,错误码为500、502、503、504都会返回50.html错误页面。

        error_page   500 502 503 504  /50x.html;

        #location后面是"="的话,说明是精确匹配

        location = /50x.html {

            root   html;

        }

        server {

            listen 1234;

            server_name test.com;

            location / {

                #正则表达式匹配uri方式:在/usr/local/nginx/tester下 建立一个tester111.html 然后使用正则匹配

                root tester;

                index tester111.html;

            }

        }

    }

} - 1
- 2
- 3
- 4
- 5
- 6
- 7
- 8
- 9
- 10
- 11
- 12
- 13
- 14
- 15
- 16
- 17
- 18
- 19
- 20
- 21
- 22
- 23
- 24
- 25
- 26
- 27
- 28
- 29
- 30
- 31
- 32
- 33
- 34
- 35
- 36
- 37
- 38
- 39
- 40
- 41
- 42
- 43
- 44
- 45
- 46
- 47
- 48
- 49
- 50
- 51
- 52
- 53
- 54
- 55
- 56
- 57
- 58
- 59
- 60
- 61
- 62
- 63
- 64
- 65
- 66
- 67
- 68
- 69
- 70
- 71
- 72
- 73
- 74
- 75
- 76
- 77
- 78
- 79
- 80
- 81
- 82
- 83
- 84
- 85
Nginx的安装与部署的更多相关文章
- CentOs Linux 对于Django uwsgi + Nginx 的安装与部署
Django Nginx+uWSGI 安装配置 链接:
- Nginx的安装和部署
Nginx简介 Nginx是一款轻量级的Web 服务器/反向代理服务器及电子邮件(IMAP/POP3)代理服务器,在BSD-like 协议下发行.其特点是占有内存少,并发能力强,事实上nginx的并发 ...
- CentOS Nginx的安装与部署
安装工具包 wget.vim和gcc yum install -y wget yum install -y vim-enhanced yum install -y make cmake gcc gcc ...
- Nginx 2.安装与部署配置
转 https://www.cnblogs.com/wcwnina/p/8728430.html > 下载 官方网站:https://nginx.org/en/download.html Win ...
- Nginx Linux安装与部署
Nginx (engine x) 是一个高性能的HTTP和反向代理服务,也是一款轻量级的Web 服务器/反向代理服务器及电子邮件(IMAP/POP3)代理服务器,并在一个BSD-like 协议下发行. ...
- 第四百零二节,Django+Xadmin打造上线标准的在线教育平台—生产环境部署,uwsgi安装和启动,nginx的安装与启动,uwsgi与nginx的配置文件+虚拟主机配置
第四百零二节,Django+Xadmin打造上线标准的在线教育平台—生产环境部署,uwsgi安装和启动,nginx的安装与启动,uwsgi与nginx的配置文件+虚拟主机配置 软件版本 uwsgi- ...
- 阿里云首次安装和部署nginx
1.执行yum命令安装依赖 yum -y install pcre* yum -y install openssl* 2.下载nginx //如果没有安装wget,下载已编译版本 yum instal ...
- ubuntu docker安装与部署java,mysql,nginx镜像
docker 安装与部署java,mysql,nginx docker 配置 安装docker $ sudo apt-get remove docker docker-engine docker.io ...
- 五步教你实现使用Nginx+uWSGI+Django方法部署Django程序
Django的部署可以有很多方式,采用nginx+uwsgi的方式是其中比较常见的一种方式. 在这种方式中,我们的通常做法是,将nginx作为服务器最前端,它将接收WEB的所有请求,统一管理请求.ng ...
随机推荐
- mui页面传值
以下代码全部在script标签内 一.通过mui.openWindow()打开新页面(若目标页面为已预加载成功的页面,则在openWindow方法中传递的extras参数无效): mui.openWi ...
- react-native 新手爬坑经历(unable to load script from assets 和could not connect to development server.)
按照https://reactnative.cn/docs/0.51/getting-started.html教程新建的项目 react-native init AwesomeProject cd A ...
- 浅析AnyCast网络技术
什么是BGP AnyCast? BGP anycast就是利用一个(多个) as号码在不同的地区广播相同的一个ip段.利用bgp的寻路原则,短的as path 会选成最优路径(bgp寻路原则之n),从 ...
- 解决HighChart开发遇到的2个问题
需求很简单,显示一条24小时的变化曲线 写完代码效果是只有一条直线,连时间轴都没有 第1个错误 Highcharts error #12 当通过要绘制的点超过1000个时就会报这个错,我按分钟计算间 ...
- 第一个只出现一次的字符字符(python)
题目描述 在一个字符串(0<=字符串长度<=10000,全部由字母组成)中找到第一个只出现一次的字符,并返回它的位置, 如果没有则返回 -1(需要区分大小写). # -*- codin ...
- 【POJ2778】DNA Sequence 【AC自动机,dp,矩阵快速幂】
题意 题目给出m(m<=10)个仅仅由A,T,C,G组成的单词(单词长度不超过10),然后给出一个整数n(n<=2000000000),问你用这四个字母组成一个长度为n的长文本,有多少种组 ...
- Linux驱动之同步、互斥、阻塞的应用
同步.互斥.阻塞的概念: 同步:在并发程序设计中,各进程对公共变量的访问必须加以制约,这种制约称为同步. 互斥机制:访问共享资源的代码区叫做临界区,这里的共享资源可能被多个线程需要,但这些共享资源又不 ...
- PHP开发——常量
概念 l 常量就是值永远不变的量.如:圆周率.身份证号码等. l 所谓常量值永远不变的量,是指在一次完整的HTTP请求过程中. l 常量在程序运行过程中,不能修改.也不能删除. l 常量比变量 ...
- Python开发——【循环】语句
while循环 while 条件: # 要执行的循环体 # 如果条件为真,那么循环体则执行 # 如果条件为假,那么循环体不执行 死循环 count = 0 while True:# 条件永远为真 pr ...
- python之运算符
运算符的定义 运算符用于执行程序代码运算,会针对一个以上操作数项目来进行运算. 运算符类型 .算数运算符 .比较运算符 .赋值运算符 .位运算符 .逻辑运算符 .成员运算符 7身份运算符 详情介绍 1 ...