
ASP.NET Core的身份认证框架IdentityServer4--(5)自定义用户登录(使用官网提供的UI)
IdentityServer官方提供web页面,可以根据需求修改样式。具体UI下载跟配置参考官网文档。
文档地址:https://identityserver4.readthedocs.io/en/release/quickstarts/3_interactive_login.html
使用UI登录涉及的知识点参考园里大佬@solenovex的文章。这里不在重复说明,感兴趣的同学可以去看看。原文地址:https://www.cnblogs.com/cgzl/p/9253667.html
我这里是根据官方提供的UI进行修改、自定义用户登录、访问API。
源码地址:https://github.com/YANGKANG01/IdentityServer4-IdentityAuth
一、配置IdentityServer
1、引入官网包:IdentityServer4
2、需要重新定义Web端信息,除了ClientId,AllowedGrantTypes,ClientSecrets,AllowedScopes等属性还需要配置登录成功或注销后的返回地址RedirectUris跟PostLogoutRedirectUris。Config文件配置如下:
using IdentityServer4;

using IdentityServer4.Models;

using System;

using System.Collections.Generic;

using System.Linq;

using System.Threading.Tasks;

namespace IdentityServer

{

    /// <summary>

    /// IdentityServer配置

    /// </summary>

    public class Config

    {

        /// <summary>

        /// 添加对OpenID Connect的支持

        /// </summary>

        /// <returns></returns>

        public static IEnumerable<IdentityResource> GetIdentityResources()

        {

            return new List<IdentityResource>

            {

                new IdentityResources.OpenId(), //必须要添加,否则报无效的scope错误

                new IdentityResources.Profile()

            };

        }

        /// <summary>

        /// 定义系统中的API资源

        /// </summary>

        /// <returns></returns>

        public static IEnumerable<ApiResource> GetApiResources()

        {

            return new List<ApiResource>

            {

                new ApiResource("api1", "My API")

            };

        }

        /// <summary>

        /// 客户端访问资源

        /// </summary>

        /// <returns></returns>

        public static IEnumerable<Client> GetClients()

        {

            // 客户端信息

            return new List<Client>

            {

             //自定义接口登录的客户端

             new Client

                {

                    //客户端ID名称

                    ClientId = "client1",

                    //客户端访问方式:密码验证

                    AllowedGrantTypes = GrantTypes.ResourceOwnerPassword,

                    //用于认证的密码加密方式

                    ClientSecrets =

                    {

                        new Secret("secret".Sha256())

                    },

                    //客户端有权访问的范围

                    AllowedScopes = { "api1",

                    IdentityServerConstants.StandardScopes.OpenId, //必须要添加,否则报403 forbidden错误

                    IdentityServerConstants.StandardScopes.Profile

                 }

                },

                //定义mvc客户端

                new Client

                {

                    //客户端ID名称

                    ClientId = "mvc",

                    ClientName = "MVC Client",

                    //访问类型

                    AllowedGrantTypes = GrantTypes.Hybrid,

                    //关闭确认是否返回身份信息界面

                    RequireConsent=false,

                   // 登录成功后重定向地址

                    RedirectUris = { "http://localhost:5002/signin-oidc" },

                   //注销成功后的重定向地址

                    PostLogoutRedirectUris = { "http://localhost:5002/signout-callback-oidc" },

                     //用于认证的密码加密方式

                    ClientSecrets =

                    {

                        new Secret("secret".Sha256())

                    },

                     //客户端有权访问的范围

                    AllowedScopes = new List<string>

                    {

                        IdentityServerConstants.StandardScopes.OpenId,

                        IdentityServerConstants.StandardScopes.Profile,

                        "api1",//要访问的api名称

                    },

                }

            };

        }

    }

}
3、Startup的配置跟前面自定义接口登录一样没什么变化,这里也贴下源码方便没看前篇的同学:
using System;

using System.Collections.Generic;

using System.Linq;

using System.Threading.Tasks;

using IdentityServer.Service;

using Microsoft.AspNetCore.Builder;

using Microsoft.AspNetCore.Hosting;

using Microsoft.AspNetCore.Http;

using Microsoft.Extensions.DependencyInjection;

namespace IdentityServer

{

    public class Startup

    {

        // This method gets called by the runtime. Use this method to add services to the container.

        // For more information on how to configure your application, visit https://go.microsoft.com/fwlink/?LinkID=398940

        public void ConfigureServices(IServiceCollection services)

        {

            //配置身份服务器与内存中的存储,密钥,客户端和资源

            services.AddIdentityServer()

                .AddDeveloperSigningCredential()

                .AddInMemoryIdentityResources(Config.GetIdentityResources())//用户信息建模

                .AddInMemoryApiResources(Config.GetApiResources())//添加api资源

                .AddInMemoryClients(Config.GetClients())//添加客户端

                .AddResourceOwnerValidator<LoginValidator>()//用户校验

                .AddProfileService<ProfileService>();

            //注册mvc服务

            services.AddMvc();

        }

        // This method gets called by the runtime. Use this method to configure the HTTP request pipeline.

        public void Configure(IApplicationBuilder app, IHostingEnvironment env)

        {

            if (env.IsDevelopment())

            {

                app.UseDeveloperExceptionPage();

            }

            //添加到HTTP管道中。

            app.UseIdentityServer();

            //添加静态资源访问

            app.UseStaticFiles();

            //添加mvc到管道中

            app.UseMvcWithDefaultRoute();

        }

    }

}
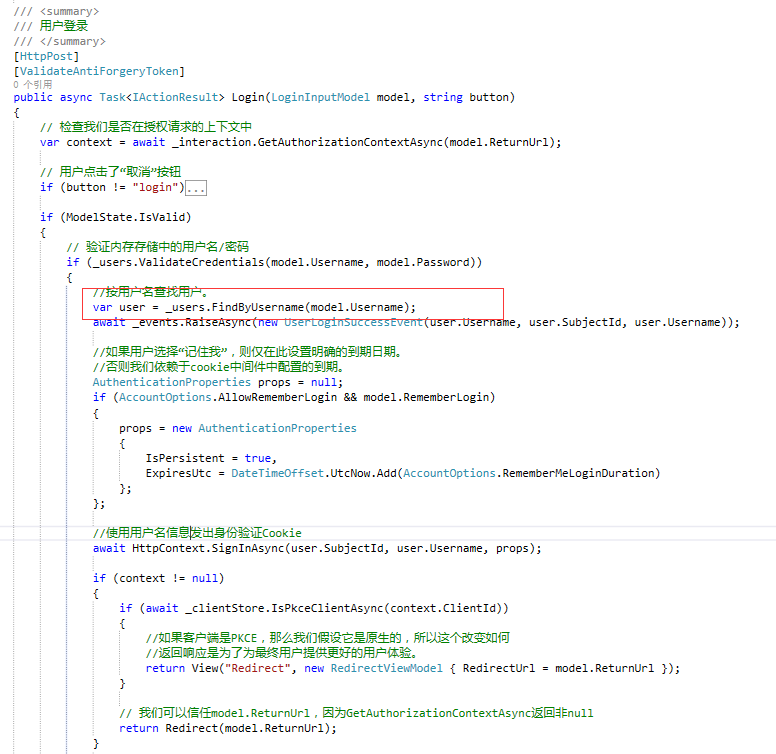
4、添加官网UI后找到AccountController类,修改登录方法Login ,把下图中的代码替换成自己的查询数据库用户即可,这里官方使用的是TestUsers类中自定义的用户来登录。
二、Web端配置获取登录后的用户信息
1、引入官网包:IdentityModel。
2、Startup配置如下。ResponseType返回类型详情可参考@solenovex的文章,大佬在文章说的比较详细,这里不在重复说明,地址:https://www.cnblogs.com/cgzl/p/9253667.html
using System;

using System.Collections.Generic;

using System.IdentityModel.Tokens.Jwt;

using System.Linq;

using System.Threading.Tasks;

using Microsoft.AspNetCore.Authentication;

using Microsoft.AspNetCore.Builder;

using Microsoft.AspNetCore.Hosting;

using Microsoft.AspNetCore.Http;

using Microsoft.AspNetCore.Mvc;

using Microsoft.Extensions.Configuration;

using Microsoft.Extensions.DependencyInjection;

namespace Web

{

    public class Startup

    {

        public Startup(IConfiguration configuration)

        {

            Configuration = configuration;

        }

        public IConfiguration Configuration { get; }

        // This method gets called by the runtime. Use this method to add services to the container.

        public void ConfigureServices(IServiceCollection services)

        {

            services.Configure<CookiePolicyOptions>(options =>

            {

                // This lambda determines whether user consent for non-essential cookies is needed for a given request.

                options.CheckConsentNeeded = context => true;

                options.MinimumSameSitePolicy = SameSiteMode.None;

            });

            JwtSecurityTokenHandler.DefaultInboundClaimTypeMap.Clear();

            services.AddAuthentication(options =>

            {

                options.DefaultScheme = "Cookies";

                options.DefaultChallengeScheme = "oidc";

            })

                .AddCookie("Cookies")

                .AddOpenIdConnect("oidc", options =>

                {

                    options.SignInScheme = "Cookies";

                    //授权端服务地址

                    options.Authority = "http://localhost:5000/";

                    //是否https请求

                    options.RequireHttpsMetadata = false;

                    //客户端ID名称

                    options.ClientId = "mvc";

                    options.ClientSecret = "secret";

                    //返回的类型

                    options.ResponseType = "code id_token";

                    //添加自定义用户信息

                    options.Scope.Clear();

                    options.Scope.Add("openid");

                    options.Scope.Add("profile");

                    //是否存储token

                    options.SaveTokens = true;

                    //用于设置在从令牌端点接收的id_token创建标识后,处理程序是否应转到用户信息端点

                    options.GetClaimsFromUserInfoEndpoint = true;

                    //访问名称api

                    options.Scope.Add("api1");

                    //避免claims被默认过滤掉,如果不想让中间件过滤掉nbf和amr, 把nbf和amr从被过滤掉集合里移除。可以使用下面这个方方式:

                    options.ClaimActions.Remove("nbf");

                    options.ClaimActions.Remove("amr");

                    //删除某些Claims

                    options.ClaimActions.DeleteClaim("sid");

                    options.ClaimActions.DeleteClaim("idp");

                });

            services.AddMvc().SetCompatibilityVersion(CompatibilityVersion.Version_2_1);

        }

        // This method gets called by the runtime. Use this method to configure the HTTP request pipeline.

        public void Configure(IApplicationBuilder app, IHostingEnvironment env)

        {

            if (env.IsDevelopment())

            {

                app.UseDeveloperExceptionPage();

            }

            else

            {

                app.UseExceptionHandler("/Home/Error");

            }

            app.UseStaticFiles();

            app.UseCookiePolicy();

            //添加用户验证中间件

            app.UseAuthentication();

            //

            app.UseMvc(routes =>

            {

                routes.MapRoute(

                    name: "default",

                    template: "{controller=Home}/{action=Index}/{id?}");

            });

        }

    }

}
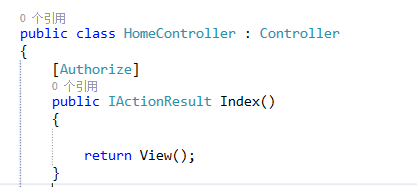
3、在需要登录的页面方法添加Authorize特性。
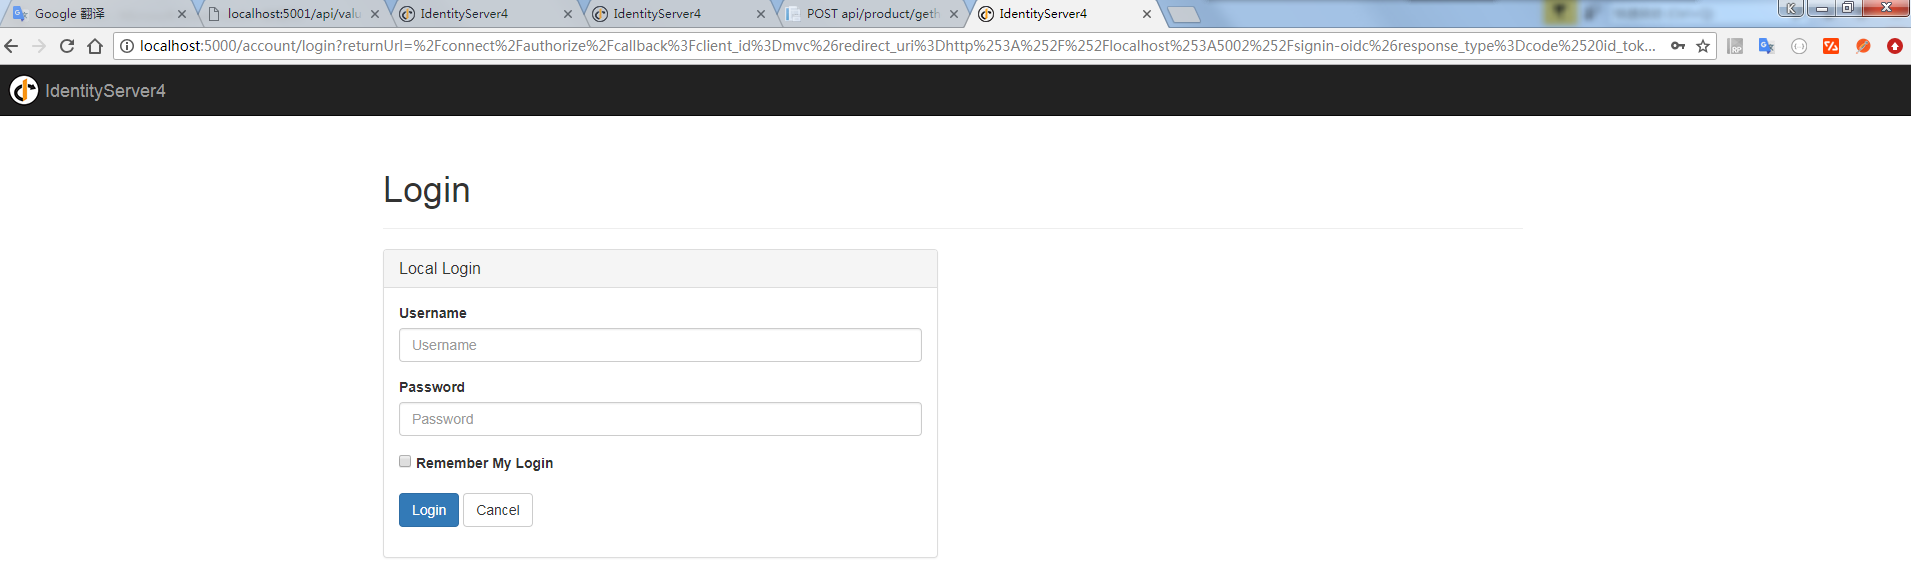
启动web 会看到页面自动重定向到登录页面效果如图:
4、获取用户信息可使用HttpContext.User.Identity来获取当前用户信息,代码如下:
 //获取用户信息

 var claimIdentity = (ClaimsIdentity)HttpContext.User.Identity;

 var claimsPrincipal = claimIdentity.Claims as List<Claim>;
5、获取用户token,这里的token是服务端生成发送给客户端,用于身份校验,可使用token访问需要登录权限的API接口。代码如下:
//获取用户token

var token = await HttpContext.GetTokenAsync(OpenIdConnectParameterNames.AccessToken);
Ps:注销登录默认跳转到退出信息提示页面,如不需要修改服务端的 AccountOptions类中的AutomaticRedirectAfterSignOut属性,默认为false,修改为true即可。
三、API配置
1、引入官网包:IdentityServer4.AccessTokenValidation。
2、Startup类配置如下:
using System;

using System.Collections.Generic;

using System.Linq;

using System.Threading.Tasks;

using Microsoft.AspNetCore.Builder;

using Microsoft.AspNetCore.Hosting;

using Microsoft.AspNetCore.Mvc;

using Microsoft.Extensions.Configuration;

using Microsoft.Extensions.DependencyInjection;

using Microsoft.Extensions.Logging;

using Microsoft.Extensions.Options;

namespace API

{

    public class Startup

    {

        public Startup(IConfiguration configuration)

        {

            Configuration = configuration;

        }

        public IConfiguration Configuration { get; }

        // This method gets called by the runtime. Use this method to add services to the container.

        public void ConfigureServices(IServiceCollection services)

        {

            services.AddMvcCore()

                    .AddAuthorization()//添加身份验证服务

                    .AddJsonFormatters();

            //AddAuthentication将身份验证服务添加到DI并配置"Bearer"为默认方案

            services.AddAuthentication("Bearer")

                    .AddIdentityServerAuthentication(options =>

                    {

                        options.Authority = "http://localhost:5000";//identifyServer服务地址

                        options.RequireHttpsMetadata = false;//是否使用https

                        options.ApiName = "api1";//进行身份验证的API资源的名称

                    });

        }

        // This method gets called by the runtime. Use this method to configure the HTTP request pipeline.

        public void Configure(IApplicationBuilder app, IHostingEnvironment env)

        {

            if (env.IsDevelopment())

            {

                app.UseDeveloperExceptionPage();

            }

            //将身份验证中间件添加到管道中

            app.UseAuthentication();

            app.UseMvc();

        }

    }

}
3、给对应的API接口添加Authorize特性,Web端登录通过token访问该接口。代码如下:
//获取用户token

var token = await HttpContext.GetTokenAsync(OpenIdConnectParameterNames.AccessToken);

//实例化HttpClient

var client = new HttpClient();

client.SetBearerToken(token);

//请求identity接口

var response = await client.GetAsync("http://localhost:5001/identity");

if (!response.IsSuccessStatusCode)

{

     Console.WriteLine(response.StatusCode);

}
ASP.NET Core的身份认证框架IdentityServer4--(5)自定义用户登录(使用官网提供的UI)的更多相关文章
- ASP.NET Core的身份认证框架IdentityServer4(3)-术语的解释
IdentityServer4 术语 IdentityServer4的规范.文档和对象模型使用了一些你应该了解的术语. 身份认证服务器(IdentityServer) IdentityServer是一 ...
- ASP.NET Core的身份认证框架IdentityServer4(7)- 使用客户端证书控制API访问
前言 今天(2017-9-8,写于9.8,今天才发布)一口气连续把最后几篇IdentityServer4相关理论全部翻译完了,终于可以进入写代码的过程了,比较累.目前官方的文档和Demo以及一些相关组 ...
- ASP.NET Core的身份认证框架IdentityServer4(1)-特性一览
IdentityServer4是ASP.NET Core的一个包含OpenID和OAuth 2.0协议的框架.OpenID和OAuth 的区别请看 https://www.zhihu.com/ques ...
- ASP.NET Core的身份认证框架IdentityServer4(6)- 开始
安装和概述 启动一个新的IdentityServer项目有两种基本方法: 从头开始 从Visual Studio中的ASP.NET身份模板开始 如果从头开始,我们提供了一些文档.项目帮助和内存存储支持 ...
- ASP.NET Core的身份认证框架IdentityServer4(5)- 包和构建
包和构建 IdentityServer有许多nuget包 IdentityServer4 nuget | github 包含IdentityServer核心对象模型,服务和中间件. 仅支持内存配置和用 ...
- ASP.NET Core的身份认证框架IdentityServer4(9)-使用OpenID Connect添加用户认证
OpenID Connect OpenID Connect 1.0是OAuth 2.0协议之上的一个简单的身份层. 它允许客户端基于授权服务器执行的身份验证来验证最终用户的身份,以及以可互操作和类似R ...
- ASP.NET Core的身份认证框架IdentityServer4--(4)添加第三方快捷登录
添加对外部认证的支持 接下来我们将添加对外部认证的支持.这非常简单,因为你真正需要的是一个兼容ASP.NET Core的认证处理程序. ASP.NET Core本身也支持Google,Facebook ...
- ASP.NET Core的身份认证框架IdentityServer4(8)- 使用密码认证方式控制API访问
前言 本文及IdentityServer这个系列使用的都是基于.net core 2.0的.上一篇博文在API项目中我使用了icrosoft.AspNetCore.Authentication.Jwt ...
- ASP.NET Core的身份认证框架IdentityServer4(4)- 支持的规范
IdentityServer实现以下规范: OpenID Connect OpenID Connect Core 1.0 (spec) OpenID Connect Discovery 1.0 (sp ...
随机推荐
- WCF 和 ASP.NET Web API
地址:https://docs.microsoft.com/zh-cn/dotnet/framework/wcf/wcf-and-aspnet-web-api WCF 是 Microsoft 为生成面 ...
- C#代码分析(第三周)
阅读下面程序,请回答如下问题: 问题1:这个程序要找的是符合什么条件的数? 问题2:这样的数存在么?符合这一条件的最小的数是什么? 问题3:在电脑上运行这一程序,你估计多长时间才能输出第一个结果?时间 ...
- Scrum 5.0(继4.0)
一,组员任务完成情况 首页设计初步完成但是需要优化界面,只能简单的输出信息和在首页进行登录.界面极其简单. 鸡汤版面设计有困难,问题在于用何种形式来管理用户的数据上传,但是经过小组间的讨论确定设计方向 ...
- 如何实现MySQL表数据随机读取?从mysql表中读取随机数据
文章转自 http://blog.efbase.org/2006/10/16/244/如何实现MySQL表数据随机读取?从mysql表中读取随机数据?以前在群里讨论过这个问题,比较的有意思.mysql ...
- dstat 监控时,无颜色显示
linux:Centos 6.6 dstat:0.7.0 注意,有这个提醒:Color support is disabled, python-curses is not installed good ...
- GS7 使用IPV6的数据库的注册方法
1. 首先保证 应用服务器和数据库服务器能够互相ping通 可以创建一个 bat 文件里面放上如下内容进行连接. start ping fe80::b0d4:::f3c5 -t start ping ...
- vSphere Client 连接ESXi 或者是vCenter 时虚拟机提示VMRC异常的解决办法
1. 自己的vSphere 连接vCenter 向管理虚拟机 结果发现总是有异常. 提示如图示 VMRC控制台的连接已经断开 2. 花了比较长的时间也没搞定. 后来百度发现 关闭一个进程 然后重新登录 ...
- hdu 1556 Color the ball(树状数组)
链接:http://acm.hdu.edu.cn/showproblem.php?pid=1556 题意:N个气球排成一排,从左到右依次编号为1,2,3....N.每次给定2个整数[a,b]之间的气球 ...
- vmware 已将该虚拟机配置为使用 64 位客户机操作系统。但是,无法执行 64 位操作。
错误提示:已将该虚拟机配置为使用 64 位客户机操作系统.但是,无法执行 64 位操作. 此主机支持 Intel VT-x,但 Intel VT-x 处于禁用状态. 如果已在 BIOS/固件设置中禁用 ...
- easyui布局隐藏伸缩按钮
1. 在html中加入 <script> /** * layout方法扩展 * @param {Object} jq * @param {Object} region */ $.exten ...