13-[Mysql]--pymysql模块
1、介绍
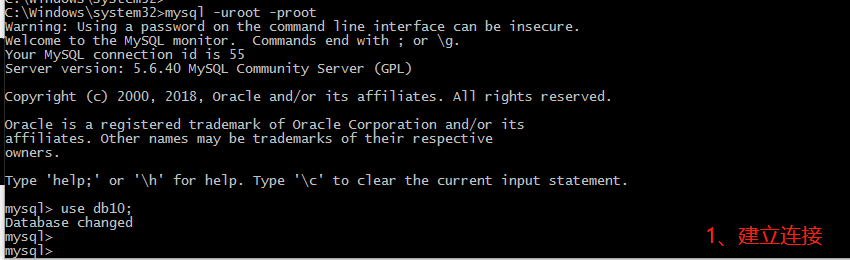
之前我们都是通过MySQL自带的命令行客户端工具mysql来操作数据库,那如何在python程序中操作数据库呢?这就用到了pymysql模块,该模块本质就是一个套接字客户端软件,使用前需要事先安装
pip3 install pymysql
import pymysql
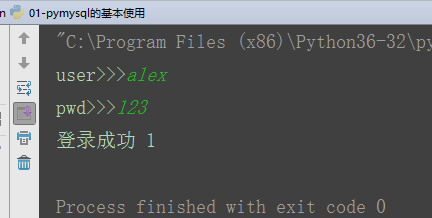
user = input('user>>>').strip()
pwd = input('pwd>>>').strip()
# 建立连接
conn = pymysql.connect(
host='127.0.0.1', # localhost
port=3306,
user='root',
password='root',
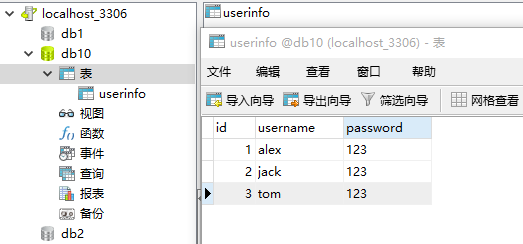
db='db10',
charset='utf8'
)
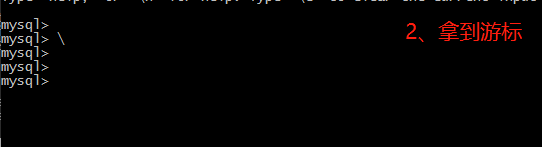
# 拿到游标
cursor=conn.cursor() #执行完毕返回的结果集默认以元组显示
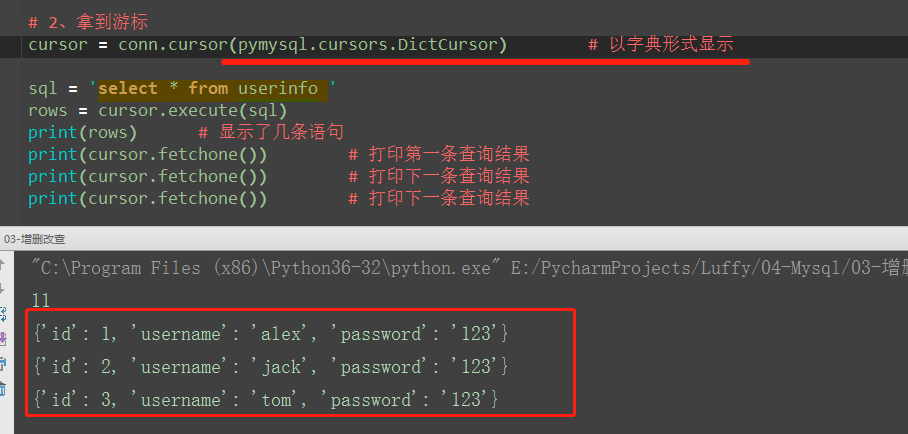
#cursor=conn.cursor(cursor=pymysql.cursors.DictCursor) # 以字典显示
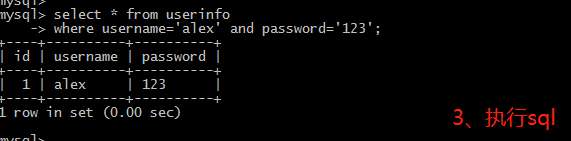
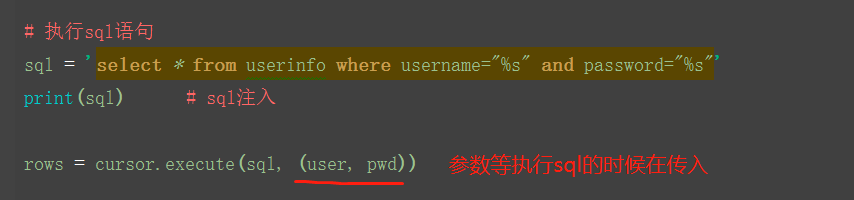
# 执行sql语句
sql = "select * from userinfo where username='%s' and password='%s'" % (user, pwd) #注意%s需要加引号
rows = cursor.execute(sql) # 执行sql语句,返回sql查询成功的记录数目
# 关闭游标
cursor.close()
# 关闭连接
conn.close()
if rows:
print('登录成功', rows)
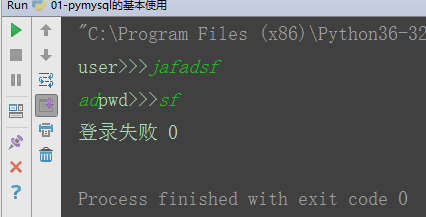
else:
print('登录失败', rows)

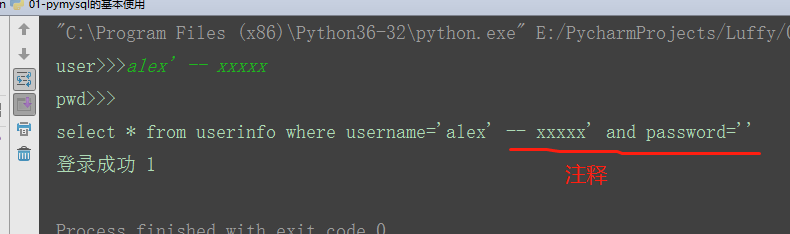
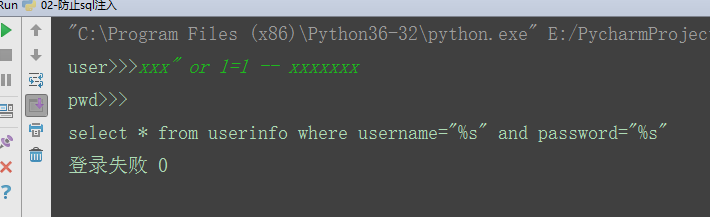
2、execute()之sql注入
(1)原理
注意:符号--会注释掉它之后的sql,正确的语法:--后至少有一个任意字符
根本原理:就根据程序的字符串拼接name='%s',我们输入一个xxx' -- haha,用我们输入的xxx加'在程序中拼接成一个判断条件name='xxx' -- haha'
最后那一个空格,在一条sql语句中如果遇到select * from t1 where id > 3 -- and name='egon';则--之后的条件被注释掉了 #1、sql注入之:用户存在,绕过密码
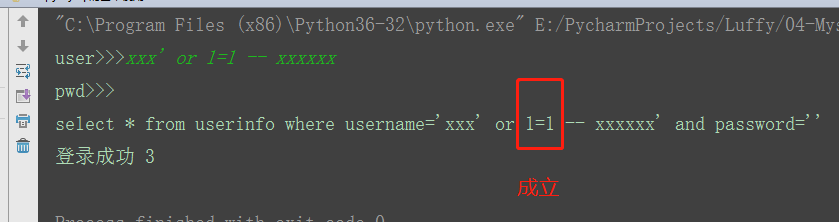
egon' -- 任意字符 #2、sql注入之:用户不存在,绕过用户与密码
xxx' or 1=1 -- 任意字符
(2)解决方法:
# 原来是我们对sql进行字符串拼接

# sql="select * from userinfo where name='%s' and password='%s'" %(user,pwd)

# print(sql)

# res=cursor.execute(sql)

#改写为(execute帮我们做字符串拼接,我们无需且一定不能再为%s加引号了)

sql="select * from userinfo where name=%s and password=%s"          #!!!注意%s需要去掉引号,因为pymysql会自动为我们加上

res=cursor.execute(sql,(user,pwd))                                  # pymysql模块自动帮我们解决sql注入的问题,只要我们按照pymysql的规矩来。
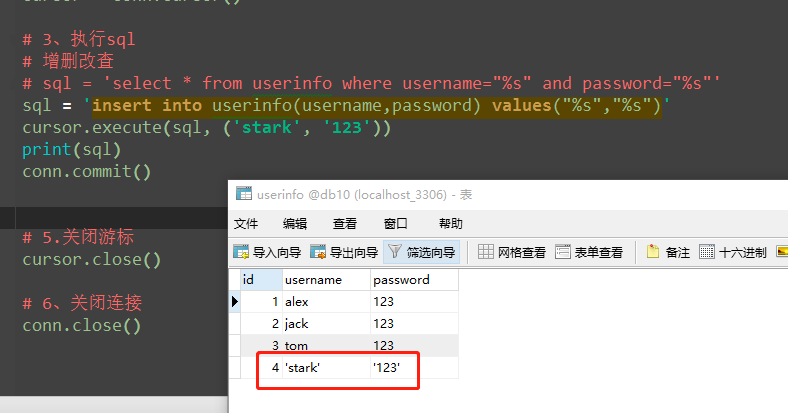
3、 增、删、改:conn.commit()
import pymysql

#链接

conn=pymysql.connect(host='localhost',user='root',password='',database='egon')

#游标

cursor=conn.cursor()

#part2

sql='insert into userinfo(name,password) values(%s,%s);'

res=cursor.execute(sql,("root",""))     # 增加一条数据

print(res)     # 执行sql语句,返回sql影响成功的行数

#part3

res=cursor.executemany(sql,[("root",""),("lhf",""),("eee","")])     # 增加多条数据

print(res)

conn.commit()    # 提交后才发现表中插入记录成功

cursor.close()

conn.close()

# in方法的使用
triggerid = ('10011', '10010')
sql = "select * from triggers where triggerid in %s"
ret = handle.execute(sql, triggerid)
print(ret)

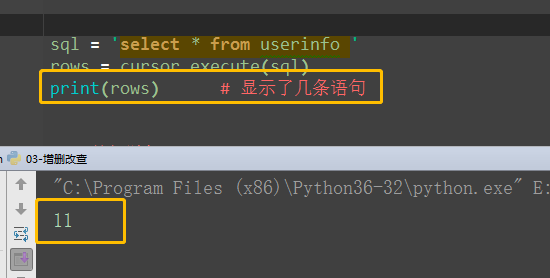

4、查:fetchone,fetchmany,fetchall

import pymysql
#链接
conn=pymysql.connect(host='localhost',user='root',password='',database='egon')
#游标
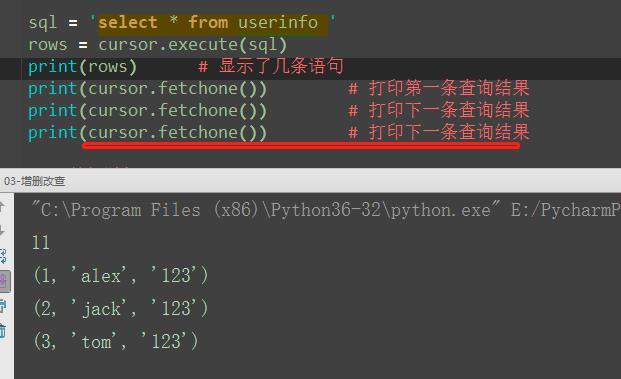
cursor=conn.cursor() #执行sql语句
sql='select * from userinfo;'
rows=cursor.execute(sql) #执行sql语句,返回sql影响成功的行数rows,将结果放入一个集合,等待被查询 res1=cursor.fetchone() # 取出第一条data
res2=cursor.fetchone() # 取出next数据
res3=cursor.fetchone()
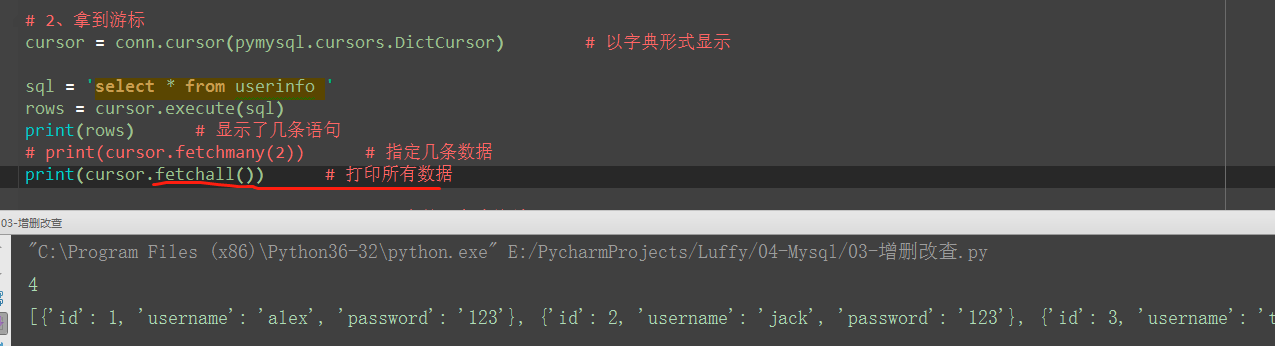
res4=cursor.fetchmany(2) # 取出2条数据
res5=cursor.fetchall() # 全部取出来
print(res1)
print(res2)
print(res3)
print(res4)
print(res5)
print('%s rows in set (0.00 sec)' %rows) cursor.close()
conn.close()

5、相对位置,绝对位置,获取插入的最后一条的自增id
import pymysql # 1.建立连接
conn = pymysql.connect(
host='127.0.0.1',
port=3306,
user='root',
password='root',
db='db10',
charset='utf8'
) # 2、拿到游标
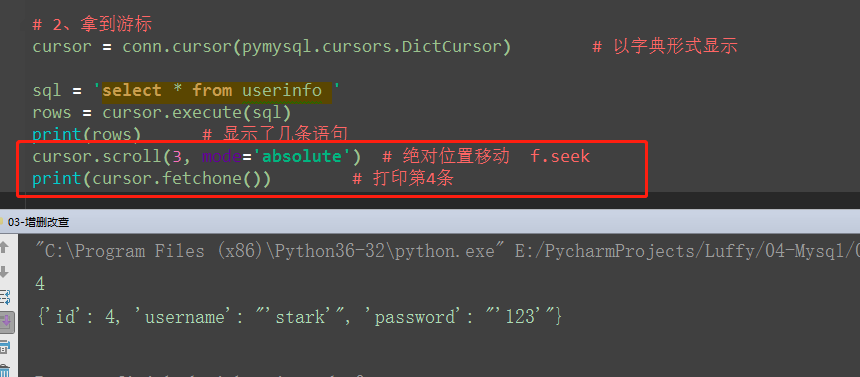
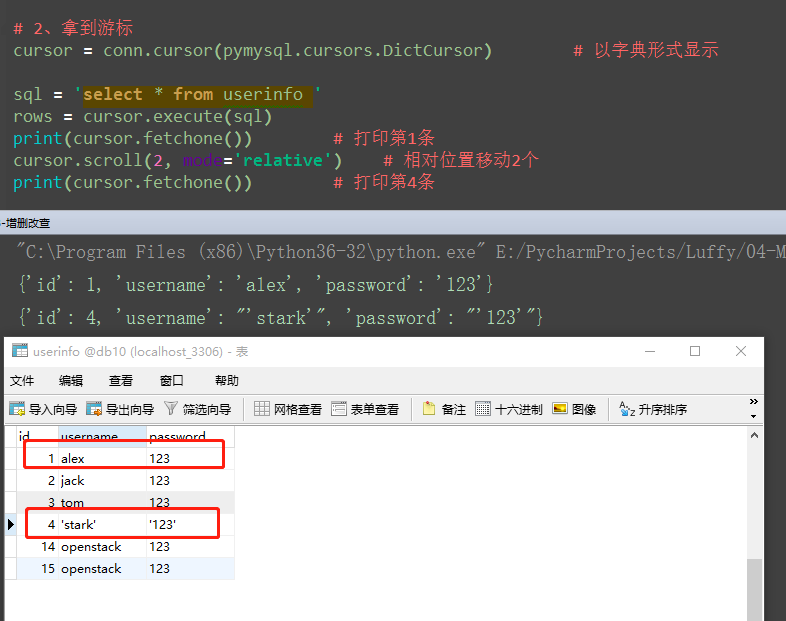
cursor = conn.cursor(pymysql.cursors.DictCursor) # 以字典形式显示 sql = 'select * from userinfo '
rows = cursor.execute(sql) cursor.scroll(3, mode='absolute') # 绝对位置移动 f.seek
print(cursor.fetchmany(2)) # 指定几条数据 # 5.关闭游标
cursor.close() # 6、关闭连接
conn.close()
import pymysql

# 1.建立连接

conn = pymysql.connect(

    host='127.0.0.1',

    port=3306,

    user='root',

    password='root',

    db='db10',

    charset='utf8'

)

# 2、拿到游标

cursor = conn.cursor(pymysql.cursors.DictCursor)        # 以字典形式显示

sql = 'select * from userinfo '

rows = cursor.execute(sql)

print(cursor.fetchone())        # 打印第1条

cursor.scroll(2, mode='relative')    # 相对位置移动2个

print(cursor.fetchone())        # 打印第4条

# 5.关闭游标

cursor.close()

# 6、关闭连接

conn.close()
import pymysql

conn=pymysql.connect(host='localhost',user='root',password='',database='egon')

cursor=conn.cursor()

sql='insert into userinfo(name,password) values("xxx","123");'

rows=cursor.execute(sql)

print(cursor.lastrowid)     # 在插入语句后查看

conn.commit()

cursor.close()

conn.close()

13-[Mysql]--pymysql模块的更多相关文章
- python开发mysql:Pymysql模块
pymysql模块的使用 #1 基本使用 # import pymysql # conn=pymysql.connect(host='localhost',user='root',password=' ...
- python连接MySQL pymysql模块,游标,SQL注入问题,增删改查操作
pymysql模块 pymysql是用python控制终端对MySQL数据库进行操作的第三方模块 import pymysql # 1.连接数据库 client = pymysql.connect( ...
- MySQL— pymysql模块(防止sql注入),可视化软件Navicat
一.Pymysql import pymysql #python2.X 中是 mysqldb 和 pythonmysql 用法是一模一样的 #pymysql可以伪装成上面这两个模块 user = in ...
- day40:python操作mysql:pymysql模块&SQL注入攻击
目录 part1:用python连接mysql 1.用python连接mysql的基本语法 2.用python 创建&删除表 3.用python操作事务处理 part2:sql注入攻击 1.s ...
- 多表查询、可视化工具、pymysql模块
create table dep( id int primary key auto_increment, name varchar(16), work varchar(16) ); create ta ...
- Navicat,SQL注入,pymysql模块
# 关键字exists(了解) 只返回布尔值 True False 返回True的时候外层查询语句执行 返回False的时候外层查询语句不再执行 select * from emp where exi ...
- Python中操作mysql的pymysql模块详解
Python中操作mysql的pymysql模块详解 前言 pymsql是Python中操作MySQL的模块,其使用方法和MySQLdb几乎相同.但目前pymysql支持python3.x而后者不支持 ...
- python 存储引擎 mysql(库,表, 行) 单表多表操作 (foreign key) sql_mode pymysql模块讲解
##################总结############### mysql 常用数据类型 整型:tinyint int(42亿条左右) bigint 小数:float double dec ...
- (转)Python中操作mysql的pymysql模块详解
原文:https://www.cnblogs.com/wt11/p/6141225.html https://shockerli.net/post/python3-pymysql/----Python ...
- python 全栈开发,Day63(子查询,MySQl创建用户和授权,可视化工具Navicat的使用,pymysql模块的使用)
昨日内容回顾 外键的变种三种关系: 多对一: 左表的多 对右表一 成立 左边的一 对右表多 不成立 foreign key(从表的id) refreences 主表的(id) 多对多 建立第三张表(f ...
随机推荐
- Oracle EBS 键弹性域 段限定词取值
中间是回车符 对应编码时 Chr(10) substr(replace(t.compiled_value_attributes, Chr(10), ''), 3, 1)
- I/O复用及epoll基础知识
IO multiplexing IO multiplexing这个词可能有点陌生,但是如果我说select,epoll,大概就都能明白了.有些地方也称这种IO方式为event driven IO.我们 ...
- Configuration Manager 和内容位置(包源文件)
Configuration Manager 2007 中的内容位置涉及 Configuration Manager 2007 客户端如何查找播发和软件更新的包源文件.当客户端需要查找内容时,它会将内容 ...
- DPM恢复点和保持期、常见问题排除指南
“恢复点计划”确定应为该保护组创建多少个恢复点. 对于文件保护,选择希望创建恢复点的日期和时间. 对于支持增量备份的应用程序数据保护,同步频率决定了恢复点计划. 对于不支持增量备份的应用程序数据保护, ...
- Linux zip命令详解
zip常见命令参数 Usage: zip [-options] [-b path] [-t mmddyyyy] [-n suffixes] [zipfile list] [-xi list] The ...
- 铁乐学python_day10_作业
1.继续整理函数相关知识点,写博客. 2.写函数,接收n个数字,求这些参数数字的和.(动态传参) def sum_n(*args): sum = 0 for i in args: sum += i r ...
- Mycat问题总结
Mycat问题总结 一丶自增主键设置 Mycat提供了几种设置自增主键的方式 本地文件方式 数据库方式 服务器时间戳方式 分布式ZK-ID生成器 第一种和第二种只适合单点设置,对于集群不适用.第四种方 ...
- 将Python打包成可执行文件exe的心路历程
导言: 我们有时候需要将做好的Python程序打包成为一个exe , 方便我们使用,查找了资料发现 pyinstaller .py2exe,最后还是选择的pyinstaller,用的时候踩过了挺多的坑 ...
- 学习python第三天数据库day2
day01回顾: 数据库: 定义:存储数据的仓库(database,简称db) 常用的数据库对象有哪些? 1).数据表(table) ***** 2).视图(view) 3).索引(index) 4) ...
- 1305. [CQOI2009]跳舞【最大流+二分】
Description 一次舞会有n个男孩和n个女孩.每首曲子开始时,所有男孩和女孩恰好配成n对跳交谊舞.每个男孩都不会和同一个女孩跳两首(或更多)舞曲.有一些男孩女孩相互喜欢,而其他相互不喜欢(不会 ...