
IdentityServer4【QuickStart】之使用asp.net core Identity
使用asp.net core Identity
IdentityServer灵活的设计中有一部分是可以将你的用户和他们的数据保存到数据库中的。如果你以一个新的用户数据库开始,那么,asp.net core Identity是一个选择。这个示例演示了如何在IdentityServer中使用asp.net core Ientity.
该示例假设你已经完成了前面的所有示例,这个示例将要用asp.net core Identity 模板创建一个新的项目,新项目会替换掉之前的IdentityServer。而其它的工程则没有影响。
新建一个asp.net core Identity工程
第一步是在你的解决方案中添加一个asp.net core Identity的工程。考虑到大量的代码都来源于asp.net core Identity,所以这里直接使用visual studio的一个模板。你最后得把旧的IdentityServer删除。但是你还得配置一下。
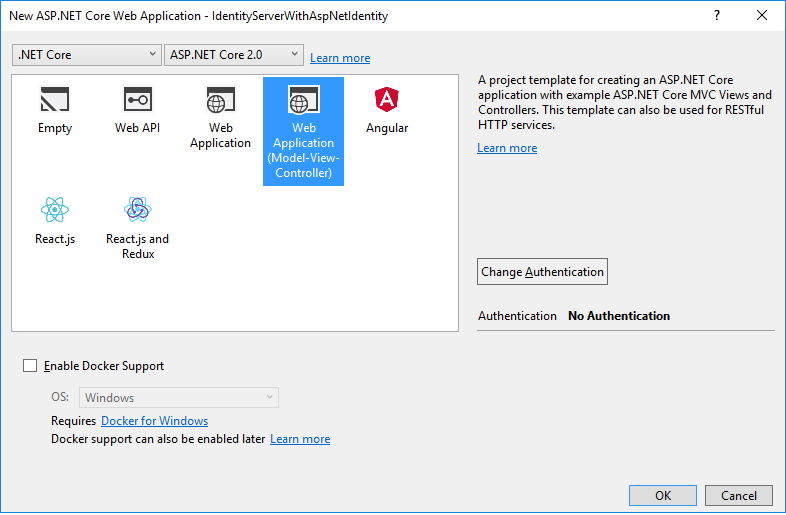
那就从创建一个asp.net core web app开始把:

然后选择MVC模板:
然后在更改身份验证这里选择“个人用户账户”: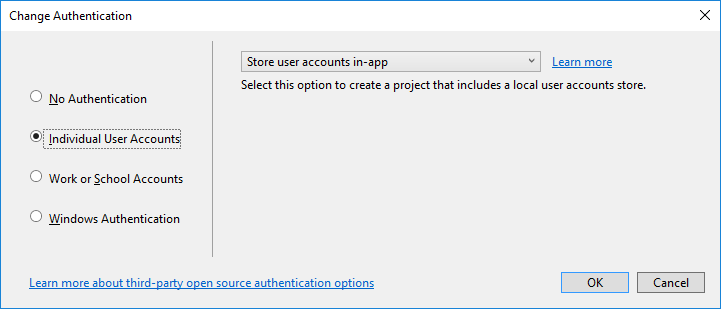
最后,当你选择好之后,点击确定。
修改宿主
别忘了把端口调整到5000.
这样才能兼容之间创建好的客户端和API。
添加IdentityServer的包
添加IdentityServer4.AspNetIdentity的nuget包。因为它依赖IdentityServer包,所以会自动的将IdentityServer4添加到项目中来。

Scopes和客户端的配置
虽然是一个新的项目,我们仍然可以将旧项目中的代码粘贴过来用一下。你现在将之前的IdentityServer中的Config类中的代码粘贴到新项目中。
有一个改变的地方是需要禁用一下确认页面的东西,因为我们现在还没有配置关于确认页面的任何东西。所以我们将RequireConsent设置为false:
new Client

{

    ClientId = "mvc",

    ClientName = "MVC Client",

    AllowedGrantTypes = GrantTypes.HybridAndClientCredentials,

    RequireConsent = false,

    ClientSecrets =

    {

        new Secret("secret".Sha256())

    },

    RedirectUris           = { "http://localhost:5002/signin-oidc" },

    PostLogoutRedirectUris = { "http://localhost:5002/signout-callback-oidc" },

    AllowedScopes =

    {

        IdentityServerConstants.StandardScopes.OpenId,

        IdentityServerConstants.StandardScopes.Profile,

        "api1"

    },

    AllowOfflineAccess = true

}
配置IdentityServer
还是和之前一样,需要在ConfigureServices和Configure这两个Startup中的方法中进行配置。
ConfigureServices
下面的代码显示了工程创建的时候生成的一些样本代码和底部添加的关于IdentityServer的代码。在之前的示例中,AddTestUsers扩展方法用来将用户注册到DI中,但是这会儿我们用AddAspNetIdentity取代了。这个方法需要一个泛型的类型参数,这个类型参数的类型是你asp.net Identity User的类型。
public void ConfigureServices(IServiceCollection services)

{

    services.AddDbContext<ApplicationDbContext>(options =>

        options.UseSqlServer(Configuration.GetConnectionString("DefaultConnection")));

    services.AddIdentity<ApplicationUser, IdentityRole>()

        .AddEntityFrameworkStores<ApplicationDbContext>()

        .AddDefaultTokenProviders();

    // Add application services.

    services.AddTransient<IEmailSender, EmailSender>();

    services.AddMvc();

    // configure identity server with in-memory stores, keys, clients and scopes

    services.AddIdentityServer()

        .AddDeveloperSigningCredential()

        .AddInMemoryPersistedGrants()

        .AddInMemoryIdentityResources(Config.GetIdentityResources())

        .AddInMemoryApiResources(Config.GetApiResources())

        .AddInMemoryClients(Config.GetClients())

        .AddAspNetIdentity<ApplicationUser>();

}
需要注意的是关于IdentityServer的逻辑应该写到AddIdentity方法之后。因为其中有一些方法被重写了。
Configure
这里展示了创建工程的时候生成的代码,还有添加了UseIdentityServer。
public void Configure(IApplicationBuilder app, IHostingEnvironment env)

{

    if (env.IsDevelopment())

    {

        app.UseDeveloperExceptionPage();

        app.UseBrowserLink();

        app.UseDatabaseErrorPage();

    }

    else

    {

        app.UseExceptionHandler("/Home/Error");

    }

    app.UseStaticFiles();

    // app.UseAuthentication(); // not needed, since UseIdentityServer adds the authentication middleware

    app.UseIdentityServer();

    app.UseMvc(routes =>

    {

        routes.MapRoute(

            name: "default",

            template: "{controller=Home}/{action=Index}/{id?}");

    });

}
创建数据库
现在已经给出了一个新的项目,你需要创建数据库。你可以通过项目目录下的命令行工具来执行dotnet ef database update -c ApplicationDbContext,像这样:

但我一般都会在程序包管理控制台上输入update-database
创建一个用户
接下来,你需要运行应用并将一个用户创建到数据库中。点击注册(Register)按钮:

然后在注册页面上注册一个用户:

现在,你已经拥有了一个用户,你可以登陆了。
在MVC客户端上面登陆
运行MVC客户端应用,然后你可以点击Secure这个链接来进行登陆:

你会被重定向到asp.net Identity的登陆页面上,输入你新创建的那个用户的信息:

然后你会被跳转到确认页面上,然后又迅速的重定向回MVC客户端(因为我们配置了RequireConsetn=false了。)。然后,关于你的user的一些claim回被列出来。

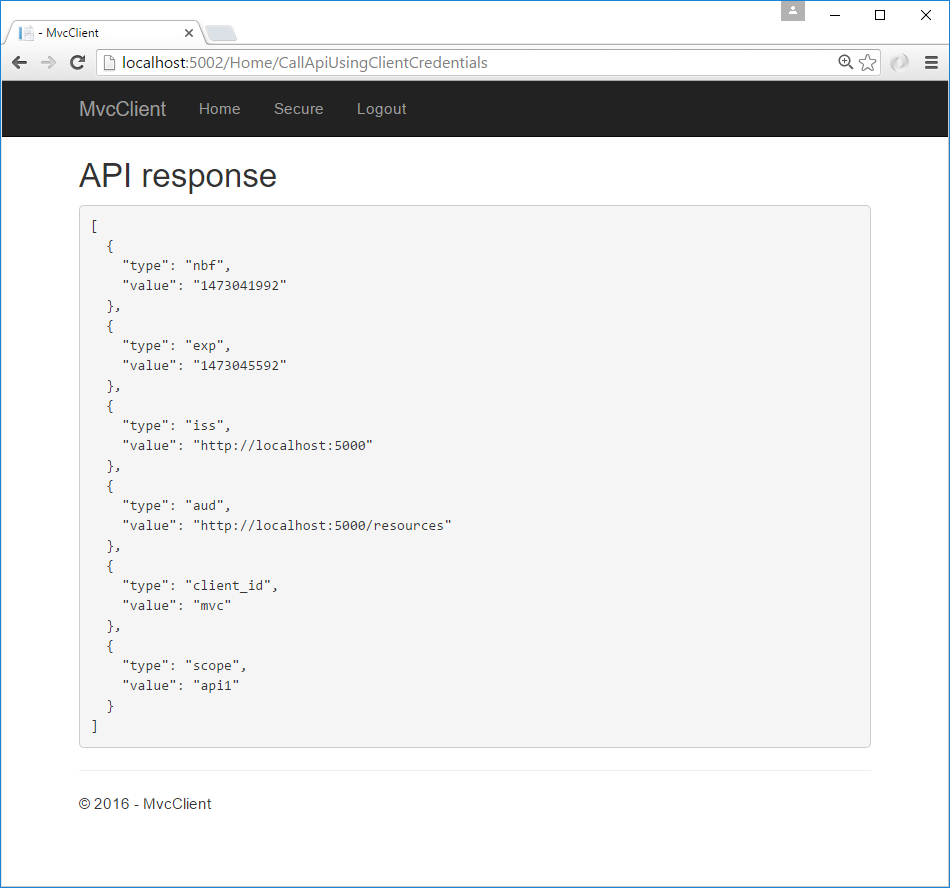
客户端可以代表你的用户来访问api,通过点击Call API using application identity:
下一步
先前的示例项目中有确认页面、错误页面和登出页面,这些缺失的部分你可以直接复制粘贴过来用。一旦你完成了,那个旧的项目就没用了。。然后你需要将RequireConsent改成true。
最后,放上源码:直接点击下载 sample code for this quickstart 吧。
IdentityServer4【QuickStart】之使用asp.net core Identity的更多相关文章
- 从零搭建一个IdentityServer——集成Asp.net core Identity
前面的文章使用Asp.net core 5.0以及IdentityServer4搭建了一个基础的验证服务器,并实现了基于客户端证书的Oauth2.0授权流程,以及通过access token访问被保护 ...
- IdentityServer4 中文文档 -14- (快速入门)使用 ASP.NET Core Identity
IdentityServer4 中文文档 -14- (快速入门)使用 ASP.NET Core Identity 原文:http://docs.identityserver.io/en/release ...
- IdentityServer(12)- 使用 ASP.NET Core Identity
IdentityServer具有非常好的扩展性,其中用户及其数据(包括密码)部分你可以使用任何想要的数据库进行持久化. 如果需要一个新的用户数据库,那么ASP.NET Core Identity是你的 ...
- ASP.NET Core Identity Hands On(1)——Identity 初次体验
ASP.NET Core Identity是用于构建ASP.NET Core Web应用程序的成员资格系统,包括成员资格.登录和用户数据存储 这是来自于 ASP.NET Core Identity 仓 ...
- ASP.NET Core Identity Hands On(2)——注册、登录、Claim
上一篇文章(ASP.NET Core Identity Hands On(1)--Identity 初次体验)中,我们初识了Identity,并且详细分析了AspNetUsers用户存储表,这篇我们将 ...
- ASP.NET Core Identity 实战(2)——注册、登录、Claim
上一篇文章(ASP.NET Core Identity Hands On(1)--Identity 初次体验)中,我们初识了Identity,并且详细分析了AspNetUsers用户存储表,这篇我们将 ...
- ASP.NET Core Identity 实战(4)授权过程
这篇文章我们将一起来学习 Asp.Net Core 中的(注:这样描述不准确,稍后你会明白)授权过程 前情提要 在之前的文章里,我们有提到认证和授权是两个分开的过程,而且认证过程不属于Identity ...
- 用一个应用场景理解ASP.NET Core Identity是什么?
目录 前言 基于声明的认证(Claims-based Authentication) 应用场景一 在ASP.NET Core 中Identity是如何实现的 类ClaimsPrincipal 考察另外 ...
- 用例子看ASP.NET Core Identity是什么?
原文:用例子看ASP.NET Core Identity是什么? 目录 前言 基于声明的认证(Claims-based Authentication) Claim 在ASP.NET Core Iden ...
随机推荐
- spring的基于XML方式的属性注入
1.掌握spring的属性注入的方法: 1.1构造方法注入普通值---------<constructor-arg>标签的使用 首先新建一个类 package spring.day1.de ...
- MySQL高级知识(十四)——行锁
前言:前面学习了表锁的相关知识,本篇主要介绍行锁的相关知识.行锁偏向InnoDB存储引擎,开销大,加锁慢,会出现死锁,锁定粒度小,发生锁冲突的概率低,但并发度高. 0.准备 #1.创建相关测试表tb_ ...
- day15--认识模块、导入模块、自执行与模块的区别
一.认识模块 什么是模块? 模块本质是一些功能的集合体 创建的一个py文件就是一个模块 使用模块: 在使用模块的py文件中 通过 import 或者 from import导入模块 模块的优点: 可 ...
- face recognition[翻译][深度人脸识别:综述]
这里翻译下<Deep face recognition: a survey v4>. 1 引言 由于它的非侵入性和自然特征,人脸识别已经成为身份识别中重要的生物认证技术,也已经应用到许多领 ...
- RichTextbox下Hyperlink的Click无效
原文:RichTextbox下Hyperlink的Click无效 两种方式解决: 1.<RichTextBox IsReadOnly="True" IsDocumentEna ...
- Java中的并发工具类(CountDownLatch、CyclicBarrier、Semaphore、Exchanger)
在JDK的并发包里提供了很多有意思的并发工具类.CountDownLatch.CyclicBarrier和Semaphore 工具类提供了一种并发流程控制的手段,Exchanger 工具类则提供了在线 ...
- jquery tooltip
这是个加了点淡入淡出效果的顶部tooltip控件,会自动消失 用法: <head> <title></title> <link href="base ...
- Python从菜鸟到高手(7):字符串
1. 单引号字符串和转义符 字符串与数字一样,都是值,可以直接使用,在Python控制台中直接输入字符串,如"Hello World",会按原样输出该字符串,只不过用单引号括了 ...
- C#中存储数据的集合:数组、集合、泛型、字典
为什么把这4个东西放在一起来说,因为c#中的这4个对象都是用来存储数据的集合……. 首先咱们把这4个对象都声明并实例化一下: //数组 ]; //集合 ArrayList m_AList = new ...
- vue webpack打包 -webkit-box-orient 失效
一行省略 overflow: hidden; white-space: nowrap; text-overflow: ellipsis; 超出两行省略 overflow: hidden; text-o ...