spring websocket 使用@SendToUser
spring websocket 使用@SendToUser
原文链接:https://blog.csdn.net/yingxiake/article/details/51224569
之前我们利用@SendTo在方法上进行注解,方法的返回值会被messageconverter转化并推送到消息代理器中,由消息代理器广播到订阅路径去
@MessageMapping("bar") //@MessageMapping接收客户端消息
@SendTo("/topic/brocast") //@SendTo广播消息出去
public String handle1(String msg) {
return msg;
}
上面msg会被广播到”/topic/brocast”这个订阅路径中,只要客户端订阅了这条路径,不管是哪个用户,都会接收到消息
那么需求来了,如果我只是想简单的用websocket向服务器请求资源而已,然后服务器你就把资源给我就行了,别的用户就不用你广播推送了,简单点,就是我请求,你就推送给我。
spring websocket 可以使用@SendToUser做到这一点,在使用@SendToUser之前,我们需要明白以下几点:
1.spring webscoket通道的建立最开始还是源于http协议的第一次握手,握手成功之后,就打开了浏览器和服务器的webscoket通过,这时,httprequest中的登录授权信息即javax.security.Principal会被绑定到websocket的session中
2.spring webscoket能识别带”/user”的订阅路径并做出处理,例如,如果浏览器客户端,订阅了’/user/topic/greetings’这条路径,
stompClient.subscribe('/user/topic/greetings', function(data) {
//...
});
就会被spring websocket利用UserDestinationMessageHandler进行转化成”/topic/greetings-usererbgz2rq”,”usererbgz2rq”中,user是关键字,erbgz2rq是sessionid,这样子就把用户和订阅路径唯一的匹配起来了
3.spring webscoket在使用@SendToUser广播消息的时候,
@MessageMapping("handle")
@SendToUser("/topic/greetings")
public String handle(String msg) {
//...
return msg;
}
“/topic/greetings”会被UserDestinationMessageHandler转化成”/user/role1/topic/greetings”,role1是用户的登录帐号,这样子就把消息唯一的推送到请求者的订阅路径中去,这时候,如果一个帐号打开了多个浏览器窗口,也就是打开了多个websocket session通道,这时,spring webscoket默认会把消息推送到同一个帐号不同的session,你可以利用broadcast = false把避免推送到所有的session中
@MessageMapping("handle")
@SendToUser(value = "/topic/greetings",broadcast = false)
public String handle(String msg) {
//...
return name;
}
下面来做个demo,首先是服务器要配置登录验证权限,这里利用tomcat的basic安全验证,在web.xml里面配置
| <security-constraint> <web-resource-collection> <web-resource-name>protect resources </web-resource-name> <url-pattern>/*</url-pattern> <http-method>HEAD</http-method> <http-method>GET</http-method> <http-method>POST</http-method> <http-method>PUT</http-method> <http-method>DELETE</http-method> </web-resource-collection> <auth-constraint> <role-name>role1</role-name> </auth-constraint> <user-data-constraint> <transport-guarantee>NONE</transport-guarantee> </user-data-constraint> </security-constraint> <login-config> <auth-method>BASIC</auth-method> </login-config> <security-role> <description>Role1</description> <role-name>role1</role-name> </security-role> |
role1是登录的角色名,其中验证信息可以在tomcat-users.xml里面配置
| <role rolename="tomcat"/> <role rolename="role1"/> <user username="tomcat" password="tomcat" roles="tomcat"/> <user username="both" password="tomcat" roles="tomcat,role1"/> <user username="role1" password="tomcat" roles="role1"/> |
这里有俩个帐号,role1和both,角色都有role1,password都是tomcat,我们可以利用这俩个帐号在IE9和谷歌浏览器进行登录
然后服务器,我们分别使用@SendTo和@SendToUser进行广播推送和精准推送
首先我们注册下spring webscoket服务器
|
@Configuration @Override //portfolio-stomp就是websocket的端点,客户端需要注册这个端点进行链接,withSockJS允许客户端利用sockjs进行浏览器兼容性处理 } @Override @Override return true; @Override @Override @Override } @Override } @Override } } |
然后写下服务的的接收和发送
|
@Controller /** return "精准推送,只推送到" + principal.getName(); /** return "广播推送,所有用户都收得到"; |
最后在浏览器客户端,我们利用sockjs和stomp.js链接并发送和订阅消息,其中在websocket.js代码就是这样子的
|
var socket = new SockJS('/whats/portfolio-stomp'); stompClient.subscribe('/user/topic/greetings1', function(data) { stompClient.subscribe('/topic/greetings2', function(data) { /** /** stompClient.send("/app/foo.handle1",{},{ } |
jsp页面其实就是这样子的
<%@ page language="java" contentType="text/html; charset=UTF-8"
pageEncoding="UTF-8"%>
<!DOCTYPE html >
<html>
<head>
<meta charset="UTF-8">
<title>websocket</title>
</head>
<body>
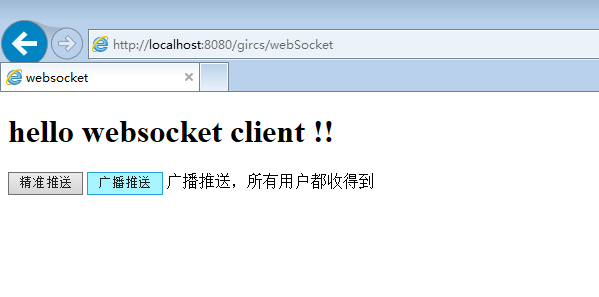
<h1>hello websocket client !!</h1>
<button id = "ws">精准推送</button>
<button id = "ws1">广播推送</button>
<span id ="ret"></span>
<script type="text/javascript" src="${pageContext.request.contextPath}/content/uilib/websocket/sockjs-1.0.3.js"></script>
<script type="text/javascript" src="${pageContext.request.contextPath}/content/uilib/websocket/stomp.js"></script>
<script type="text/javascript" src="${pageContext.request.contextPath}/content/js/websocket/websocket.js"></script>
</body>
</html>
到这里就完成了功能了
精准推送

广播推送
spring websocket 使用@SendToUser的更多相关文章
- 【转】Spring websocket 使用
http://docs.spring.io/spring/docs/current/spring-framework-reference/html/websocket.html https://spr ...
- spring websocket源码分析续Handler的使用
1. handler的定义 spring websocket支持的消息有以下几种: 对消息的处理就使用了Handler模式,抽象handler类AbstractWebSocketHandler.jav ...
- spring WebSocket详解
场景 websocket是Html5新增加特性之一,目的是浏览器与服务端建立全双工的通信方式,解决http请求-响应带来过多的资源消耗,同时对特殊场景应用提供了全新的实现方式,比如聊天.股票交易.游戏 ...
- spring+websocket整合
java-websocket的搭建非常之容易,没用框架的童鞋可以在这里下载撸主亲自调教好的java-websocket程序: Apach Tomcat 8.0.3+MyEclipse+maven+JD ...
- web即时通讯2--基于Spring websocket达到web聊天室
如本文所用,Spring4和websocket要构建web聊天室,根据框架SpringMVC+Spring+Hibernate的Maven项目,后台使用spring websocket进行消息转发和聊 ...
- spring+websocket综合(springMVC+spring+MyBatis这是SSM框架和websocket集成技术)
java-websocket该建筑是easy.儿童无用的框架可以在这里下载主线和个人教学好java-websocket计划: Apach Tomcat 8.0.3+MyEclipse+maven+JD ...
- Spring 学习——基于Spring WebSocket 和STOMP实现简单的聊天功能
本篇主要讲解如何使用Spring websocket 和STOMP搭建一个简单的聊天功能项目,里面使用到的技术,如websocket和STOMP等会简单介绍,不会太深,如果对相关介绍不是很了解的,请自 ...
- Spring Websocket实现简易在线聊天功能
针对Spring Websocket的实现,我参照了其他博主的文章https://www.cnblogs.com/leechenxiang/p/5306372.html 下面直接给出实现: 一.引入相 ...
- Spring WebSocket踩坑指南
Spring WebSocket踩坑指南 本次公司项目中需要在后台与安卓App间建立一个长连接,这里采用了Spring的WebSocket,协议为Stomp. 关于Stomp协议这里就不多介绍了,网上 ...
随机推荐
- GAN生成式对抗网络(一)——原理
生成式对抗网络(GAN, Generative Adversarial Networks )是一种深度学习模型 GAN包括两个核心模块. 1.生成器模块 --generator 2.判别器模块--de ...
- min_25筛学习笔记【待填坑】
看见ntf和pb两位大佬都来学了,然后就不自觉的来学了. 我们考虑这样一个问题. $$ans=\sum_{i=1}^nf(i)$$其中$1\leq n\leq 10^{10}$ 其中$f(i)$是一个 ...
- JVM——类加载
一.什么是类加载? JVM将class字节码文件加载到内存中, 并将这些静态数据转换成方法区中的运行时数据结构,在堆中生成一个代表这个类的java.lang.Class 对象,作为方法区类数据的访问入 ...
- deepin安装下载,部署在虚拟机上
第一次接触linux就用了很久的Ubuntu,后来尝试了Manjaro.Debian,还是用了Ubuntu,但是用VM虚拟机使用的ubuntu经常卡顿.我始终觉得ubuntu的默认桌面环境gnome可 ...
- phpstorm+xdebug安装配置
这个问题也困惑了我好久 烦死了 今天看了qing师傅的博客 跟着安装 运行环境: phpStorm 2018 PHP 5.45 nts VC9 Xdebug 2.4.1 0x01 PHP安装xdebu ...
- windows环境下启动mongodb服务
方法一1.打开命令窗口,切换到mongodb安装目录下的“bin”目录中. 输入命令:cd E:\software\MongoDB\Server\3.4\bin 2.启动服务.输入命令:”mongod ...
- 【原创】FltSendMessage蓝屏分析
INVALID_PROCESS_DETACH_ATTEMPT (6)Arguments:Arg1: 00000000Arg2: 00000000Arg3: 00000000Arg4: 00000000 ...
- jvm方法栈
调用栈 先入后出 栈是一个只有一个口的容器,先进入栈的会落到栈底,出栈的时候最后出.最后进入栈的,在栈顶,出栈时先出. 方法调用时,需要在内存中开辟一块存储空间做为线程栈空间 每个线程都由自己的栈 调 ...
- JNI调用C和C++存在的区别
JNI调用C和C++存在的区别 JNI是由C语言定义接口的,JNI通过函数名找函数入口,执行函数里的内容.这和函数用什么语言生成的并没有关系.只要保证函数名称符合JNI的协议.而使用C++要注意的 ...
- 性能优化 | 30个Java性能优化技巧,你会吗?
在Java程序中,性能问题的大部分原因并不在于Java语言,而是程序本身.养成良好的编码习惯非常重要,能够显著地提升程序性能. 1.尽量在合适的场合使用单例 使用单例可以减轻加载的负担,缩短加载的时间 ...