Swagger Learning Notes
swagger背景
首先指定schema[计划的提纲],实时更新最新API,降低集成风险;

早些年:制定word计划文档;
前后端分离:
   前端测试后端接口:postman
   后端提供接口,需要实时更新最新的消息改动
swagger简介
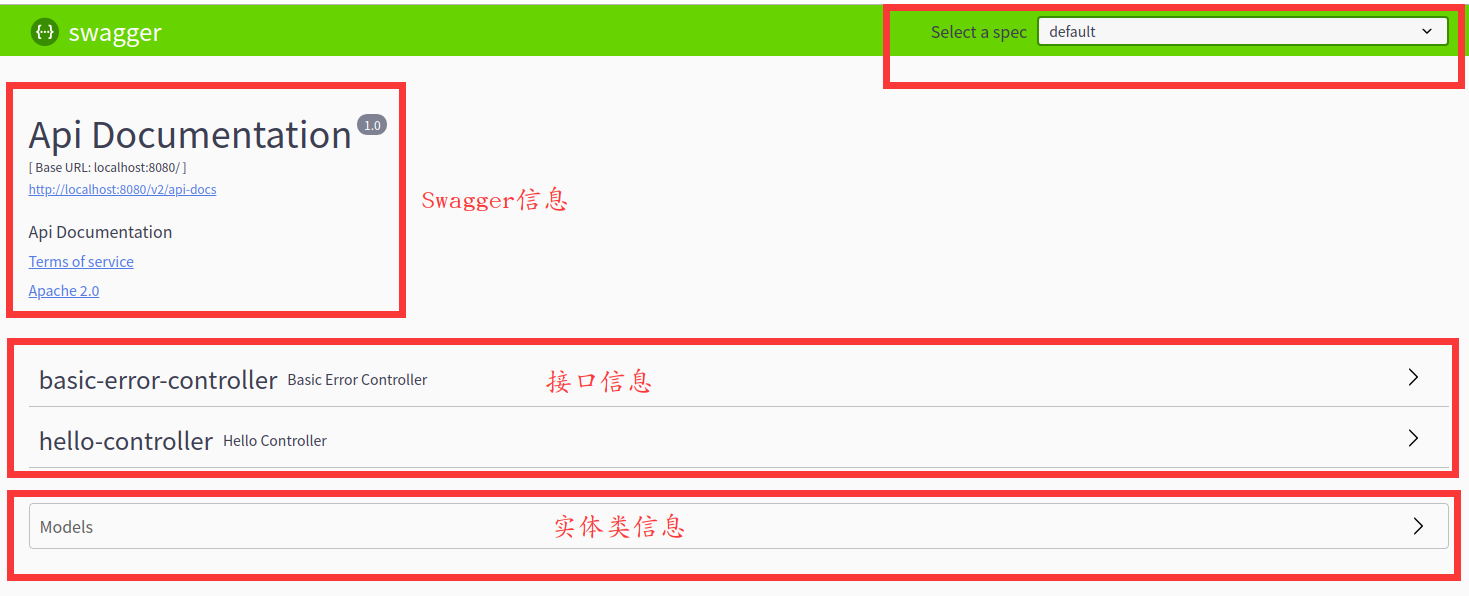
swagger2可以将项目的所有接口在一个UI界面上展示出来,同时表明了这个接口的用途,接口需要的参数是什么类型参数是否必须,输入了参数可以直接测试接口类似postman的功能,会显示接口请求的状态码和返回的数据结构。
号称世界上最流行的Api框架;

Restful   Api  文档在线自动生成工具 => Api 文档与Api 定义同步更新
直接运行,可以在线测试API接口
支持多种语言
swagger2+ui
swagger应用
springboot集成swagger
1.新建一个springboot web 项目
2.导入相关依赖
<!-- https://mvnrepository.com/artifact/io.springfox/springfox-swagger-ui -->

        <dependency>

            <groupId>io.springfox</groupId>

            <artifactId>springfox-swagger-ui</artifactId>

            <version>2.9.2</version>

        </dependency>

        <!-- https://mvnrepository.com/artifact/io.springfox/springfox-swagger2 -->

        <dependency>

            <groupId>io.springfox</groupId>

            <artifactId>springfox-swagger2</artifactId>

            <version>2.9.2</version>

        </dependency>
3.编写一个Hello工程
package com.mikey.swagger_demo.controller;

import org.springframework.stereotype.Controller;

import org.springframework.web.bind.annotation.RequestMapping;

import org.springframework.web.bind.annotation.RestController;

/**

 * @ProjectName swagger_demo

 * @Author 麦奇

 * @Email biaogejiushibiao@outlook.com

 * @Date 9/5/19 9:21 AM

 * @Version 1.0

 * @Description:

 **/

@RestController

public class HelloController {

    @RequestMapping("/hello")

    public String hello(){

        return "hello";

    }

}
HelloController
4.配置Swagger
package com.mikey.swagger_demo.config;

import org.springframework.context.annotation.Configuration;

import springfox.documentation.swagger2.annotations.EnableSwagger2;

/**

 * @ProjectName swagger_demo

 * @Author 麦奇

 * @Email biaogejiushibiao@outlook.com

 * @Date 9/5/19 9:25 AM

 * @Version 1.0

 * @Description:

 **/

@Configuration

@EnableSwagger2 //开启swagger

public class SwaggerConfig {

}
5.测试页面
http://localhost:8080/swagger-ui.html
Swagger配置
package com.mikey.swagger_demo.config; import org.springframework.context.annotation.Bean;
import org.springframework.context.annotation.Configuration;
import springfox.documentation.service.ApiInfo;
import springfox.documentation.service.Contact;
import springfox.documentation.spi.DocumentationType;
import springfox.documentation.spring.web.plugins.Docket;
import springfox.documentation.swagger2.annotations.EnableSwagger2; import java.util.ArrayList; /**
* @ProjectName swagger_demo
* @Author 麦奇
* @Email biaogejiushibiao@outlook.com
* @Date 9/5/19 9:25 AM
* @Version 1.0
* @Description:
**/
@Configuration
@EnableSwagger2 //开启swagger
public class SwaggerConfig { //配置了swagger的docket的bean实例
@Bean
public Docket docket(){
return new Docket(DocumentationType.SWAGGER_2).apiInfo(apiInfo());
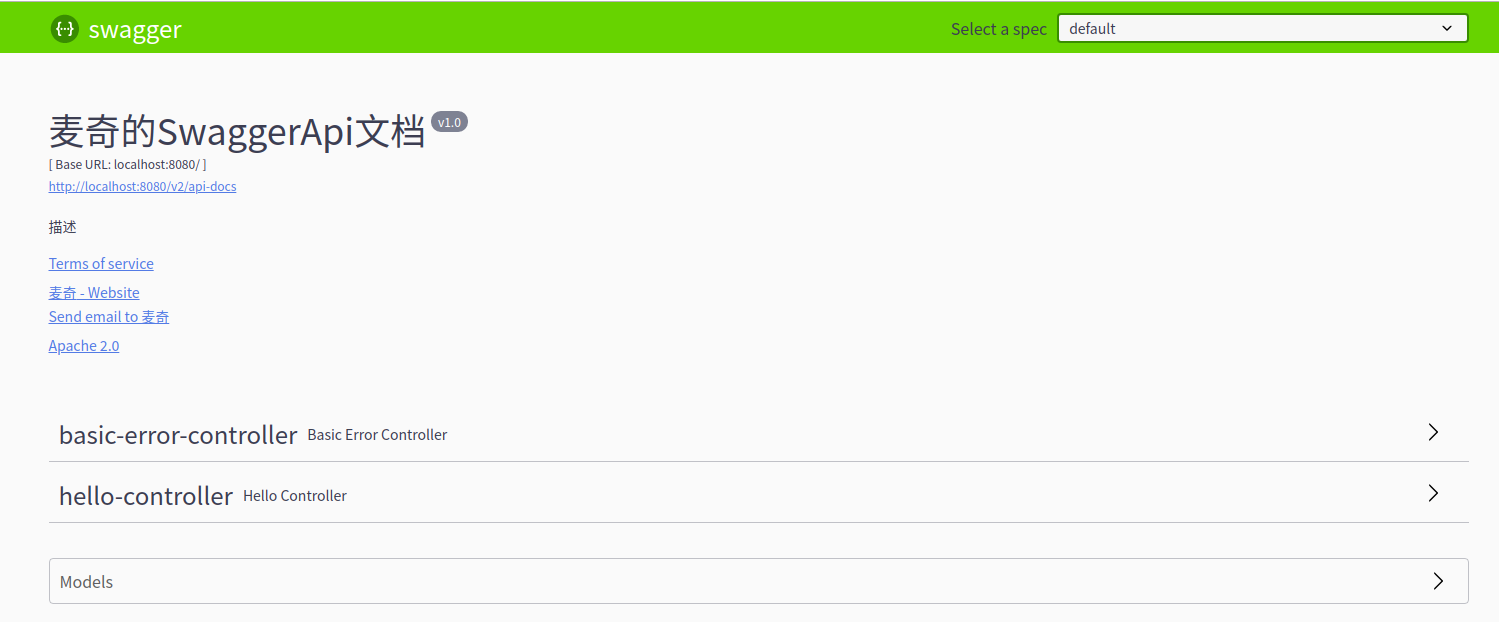
} //配置swagger信息 apiInfo private ApiInfo apiInfo(){ //作者信息
Contact DEFAULT_CONTACT = new Contact("麦奇", "www.mikey.com", "biaogejiushibiao@outlook.com"); return new ApiInfo("麦奇的SwaggerApi文档",
"描述",
"v1.0",
"https://www.cnblogs.com/biaogejiushibiao/",
DEFAULT_CONTACT,
"Apache 2.0",
"http://www.apache.org/licenses/LICENSE-2.0",
new ArrayList());
}
}
SwaggerConfig
Swagger扫描
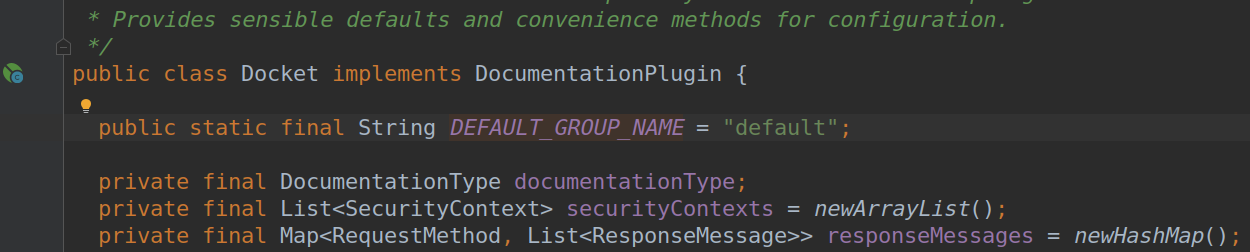
Docket.select()
package com.mikey.swagger_demo.config; import org.springframework.context.annotation.Bean;
import org.springframework.context.annotation.Configuration;
import org.springframework.core.env.Environment;
import org.springframework.core.env.Profiles;
import springfox.documentation.builders.PathSelectors;
import springfox.documentation.builders.RequestHandlerSelectors;
import springfox.documentation.service.ApiInfo;
import springfox.documentation.service.Contact;
import springfox.documentation.spi.DocumentationType;
import springfox.documentation.spring.web.plugins.Docket;
import springfox.documentation.swagger2.annotations.EnableSwagger2; import java.util.ArrayList; /**
* @ProjectName swagger_demo
* @Author 麦奇
* @Email biaogejiushibiao@outlook.com
* @Date 9/5/19 9:25 AM
* @Version 1.0
* @Description:
**/
@Configuration
@EnableSwagger2 //开启swagger
public class SwaggerConfig { //配置了swagger的docket的bean实例
@Bean
public Docket docket(Environment environment){ //设置要显示的swagger环境
Profiles profiles = Profiles.of("dev","test");
//获取项目的环境
//通过environment.acceptsProfiles判断是否处在自己设定的环境当中
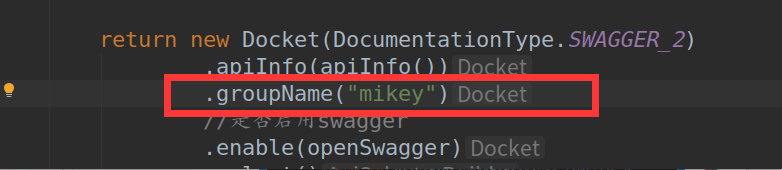
boolean openSwagger = environment.acceptsProfiles(profiles); return new Docket(DocumentationType.SWAGGER_2)
.apiInfo(apiInfo())
//是否启用swagger
.enable(openSwagger)
.select()
//requestHandler 配置要扫描接口方式
//basePackage 指定扫描包
//any 扫描全部
//none 不扫描
//withClassAnnotation 扫描类上的注解 参数是注解的反射对象
//withMethodAnnotation 扫描方法上的注解
.apis(RequestHandlerSelectors.basePackage("com.mikey.swagger_demo.controller"))
//过滤什么路径
//.paths(PathSelectors.ant("/"))
.build();
} //配置swagger信息 apiInfo private ApiInfo apiInfo(){ //作者信息
Contact DEFAULT_CONTACT = new Contact("麦奇", "www.mikey.com", "biaogejiushibiao@outlook.com"); return new ApiInfo("麦奇的SwaggerApi文档",
"描述",
"v1.0",
"https://www.cnblogs.com/biaogejiushibiao/",
DEFAULT_CONTACT,
"Apache 2.0",
"http://www.apache.org/licenses/LICENSE-2.0",
new ArrayList());
}
}
SwaggerConfig
Api文档分组

常用注解说明
- @Api()用于类;表示标识这个类是swagger的资源
- @ApiOperation()用于方法;表示一个http请求的操作
- @ApiParam()用于方法,参数,字段说明;表示对参数的添加元数据(说明或是否必填等)
- @ApiModel()用于类表示对类进行说明,用于参数用实体类接收
- @ApiModelProperty()用于方法,字段表示对model属性的说明或者数据操作更改
- @ApiIgnore()用于类,方法,方法参数表示这个方法或者类被忽略
- @ApiImplicitParam() 用于方法表示单独的请求参数
- @ApiImplicitParams() 用于方法,包含多个 @ApiImplicitParam
- @ApiKeyAuthDefinition()用于构造ApiKey身份验证安全定义
- @ApiResponse()描述操作的可能响应
- @ApiResponses()描述操作的可能响应
- @Authorization()定义要在资源或操作上使用的授权方案
- @AuthorizationScope()描述OAuth2授权作用域
- @BasicAuthDefinition()构造基本的身份验证安全定义
- @Contact()在Swagger定义的info部分中提供的联系人元数据
- @Example() 示例属性的可选命名列表。
- @ExampleProperty() Swagger示例中的mediaType/value属性
- @Extension() 扩展属性的可选命名列表。
- @ExtensionProperty()扩展名内的名称/值属性
- @ExternalDocs()表示外部文档说明。
- @Info()用于定义的高级元数据
- @License()在Swagger定义的info部分中提供许可证元数据
- @OAuth2Definition()用于构造OAuth安全定义的注释。
- @ResponseHeader()表示可作为响应的一部分提供的头。
- @Scope() OAuth2安全方案的可用作用域
- @SecurityDefinition() 所有安全定义的集合。
- @SwaggerDefinition()配置定义级元数据
- @Tag()定义级别标记对象
参考相关资料
官网:
github:
https://github.com/OAI/OpenAPI-Specification/blob/master/versions/2.0.md#tag-object
博文:
https://blog.csdn.net/u014231523/article/details/76522486
https://blog.csdn.net/sanyaoxu_2/article/details/80555328
https://www.jianshu.com/p/349e130e40d5
Swagger Learning Notes的更多相关文章
- rt-thread learning notes
rt-thread learning notes 2018-01-15 > 001 具有相同优先级的线程,每个线程的时间片大小都可以在初始化或创建该线程时指定 rt_thread_t rt_th ...
- Mybatis Learning Notes 1
Mybatis Learning Notes 主要的参考是博客园竹山一叶的Blog,这里记录的是自己补充的内容 实体类属性名和数据库不一致的处理 如果是实体类的结果和真正的数据库的column的名称不 ...
- Rust learning notes
Rust learning notes Rust Version 1.42.0 $ curl --proto '=https' --tlsv1.2 -sSf https://sh.rustup.rs ...
- D3 learning notes
D3 https://d3js.org/ 数据驱动文档显示, 利用 SVG HTML CSS技术. D3.js is a JavaScript library for manipulating doc ...
- Coursera, Machine Learning, notes
Basic theory (i) Supervised learning (parametric/non-parametric algorithms, support vector machine ...
- 【Learning Notes】线性链条件随机场(CRF)原理及实现
1. 概述条件随机场(Conditional Random Field, CRF)是概率图模型(Probabilistic Graphical Model)与区分性分类( Discriminative ...
- SQL Learning Notes
Sams Teach Yourself SQL in 10 Minutes
- go learning notes
1) cgo $go install test.go # command-line-arguments /usr/bin/ld: unrecognized option '--build-id=no ...
- Java learning notes (1):Basic Knowlege points
Basic Knowlege points: 1: it's necessary that there is only one public class in per .java file 2: .j ...
随机推荐
- 解决前端js、css缓存问题
去js标签库查询jquery.i18n.properties.js这个js引用到页面上: 新建一个配置文件:用上面的那个js方法调取配置文件里的版本号给其他的js加上: 示例: <script ...
- C++-怎样写程序(面向对象)
使用编程语言写好程序是有技巧的. 主要编程技术: 1. 编程风格 2. 算法 3. 数据结构 4. 设计模式 5. 开发方法 编程风格指的是编程的细节,比如变量名的选择方法.函数的写法等. 算法是解决 ...
- (转)KMP算法
转自:http://blog.csdn.net/yutianzuijin/article/details/11954939 我们首先用一个图来描述kmp算法的思想.在字符串O中寻找f,当匹配到位置i时 ...
- MyEclipse 安装及激活教程
一.下载安装MyEclipse 在进行下面的步骤之前,先安装好MyEclipse (10.0.2015版本或更高版本)和JDK,安装完成后暂时不要运行MyEclipse. 二.运行MyEclipse激 ...
- mybatis - @MapperScan
一. 测试代码 //实体类 public class User { private Integer id; private String name; private Integer age; priv ...
- MYSQL获取表空间大小
SELECT table_name AS "Table", round(((data_length + index_length) / 1024 / 1024), 2) as si ...
- python接口自动化之用HTMLTestRunner生成html测试报告
[第一步]:引入HTMLTestRunner包 1.下载HTMLTestRunner,下载地址:http://tungwaiyip.info/software/HTMLTestRunner.html ...
- C语言究竟是一门怎样的语言?
对于大部分程序员,C语言是学习编程的第一门语言,很少有不了解C的程序员. C语言除了能让你了解编程的相关概念,带你走进编程的大门,还能让你明白程序的运行原理,比如,计算机的各个部件是如何交互的,程序在 ...
- vue-cli 3 脚手架搭建(create)
地址:https://cli.vuejs.org/zh/guide/ 安装步骤: 提示:node 版本要 8.9+ 两种方式: (1) npm install -g @vue/cli (2) yarn ...
- es6模块化设计
//导出 //方式一 export const name = 'hello' export let addr = 'chengdu' export var list = [1,2,3] //方式二 c ...