tensorflow.js 视频图片多目标检测
前言:
Tensorflow.js 官方提供了很多常用模型库,涵盖了平时开发中大部分场景的模型。例如,前面提到的图片识别,除此之外还有人体姿态识别,目标物体识别,语音文字等识别。其中一些可能是 Python 转换而来,但都是开发人员用海量数据或资源训练的,个人觉得准确度能满足大部分功能开发要求。这里要介绍的是目标物体识别模型 ——CooSSD。
目标检测在机器视觉中已经很常见了,就是模型可以对图片或者视频中的物体进行识别,并预测其最大概率的名称和展示概率值。以下就先以 Github 上 Coo-SSD 图片目标检测为例,最后再弄一个视频的目标实时识别。
demo 运行:
tensorflow.js 提供的例子是通过 yarn,由于我本地环境原因,就以 npm 和 parcel 运行其效果。先本地创建项目文件夹,然后再分别创建 index.html, script.js, package.json 和添加几张图片。
1. 依赖包安装
(1). package.json 配置,安装 tfjs-backend-cpu, tfjs-backend-webgl 和模型
{

  "name": "tfjs-coco-ssd-demo",

  "version": "1.0.0",

  "description": "",

  "main": "index.js",

  "dependencies": {

    "@tensorflow-models/coco-ssd": "^2.2.2",

    "@tensorflow/tfjs-backend-cpu": "^3.3.0",

    "@tensorflow/tfjs-backend-webgl": "^3.3.0",

    "@tensorflow/tfjs-converter": "^3.3.0",

    "@tensorflow/tfjs-core": "^3.3.0",

    "stats.js": "^0.17.0"

  },

  "scripts": {

    "test": "echo \"Error: no test specified\" && exit 1"

  },

  "author": "",

  "license": "ISC",

  "browserslist": [

    "last 1 Chrome version"

  ]

}
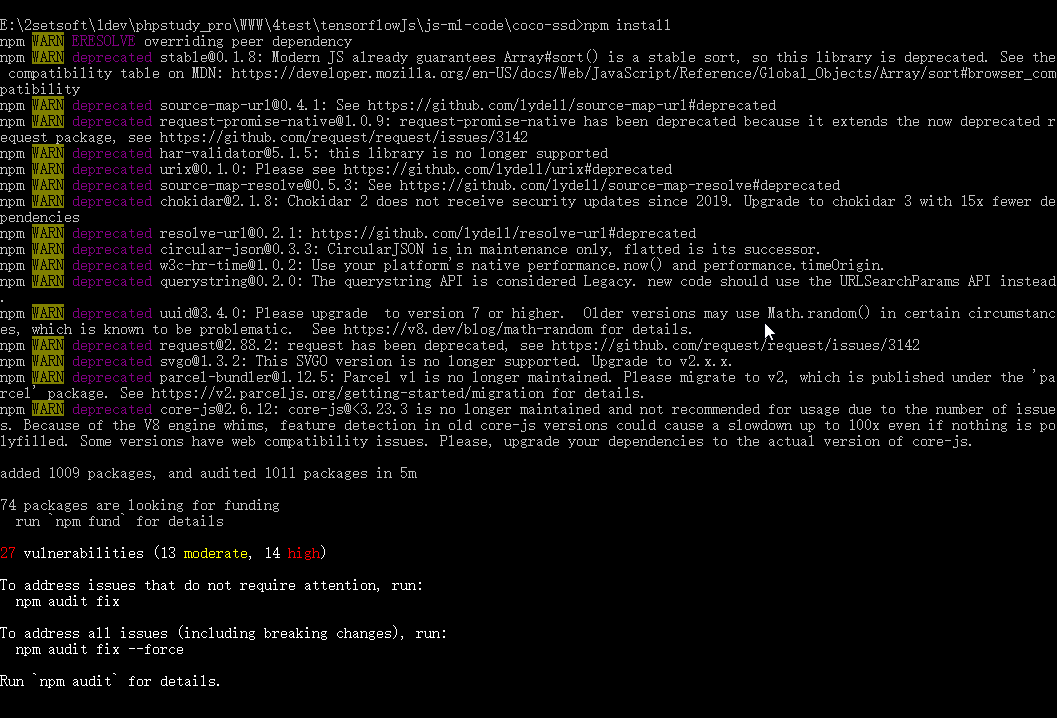
(2). 命令切换到项目目录,运行 npm install
2. 代码:
(1). index.html
<h1>TensorFlow.js Object Detection</h1>

<select id='base_model'>

	<option value="lite_mobilenet_v2">SSD Lite Mobilenet V2</option>

	<option value="mobilenet_v1">SSD Mobilenet v1</option>

	<option value="mobilenet_v2">SSD Mobilenet v2</option>

</select>

<button type="button" id="run">Run</button>

<button type="button" id="toggle">Toggle Image</button>

<div>

<img id="image" />

<canvas id="canvas" width="600" height="399"></canvas>

</div>

<script src="script.js"></script>
(2). script.js
import '@tensorflow/tfjs-backend-cpu';

import '@tensorflow/tfjs-backend-webgl';

import * as cocoSsd from '@tensorflow-models/coco-ssd';

import imageURL from './image3.jpg';

import image2URL from './image5.jpg';

let modelPromise;

window.onload = () => modelPromise = cocoSsd.load();

const button = document.getElementById('toggle');

button.onclick = () => {

  image.src = image.src.endsWith(imageURL) ? image2URL : imageURL;

};

const select = document.getElementById('base_model');

select.onchange = async (event) => {

  const model = await modelPromise;

  model.dispose();

  modelPromise = cocoSsd.load(

      {base: event.srcElement.options[event.srcElement.selectedIndex].value});

};

const image = document.getElementById('image');

image.src = imageURL;

const runButton = document.getElementById('run');

runButton.onclick = async () => {

  const model = await modelPromise;

  console.log('model loaded');

  console.time('predict1');

  const result = await model.detect(image);

  console.timeEnd('predict1');

  const c = document.getElementById('canvas');

  const context = c.getContext('2d');

  context.drawImage(image, 0, 0);

  context.font = '10px Arial';

  console.log(result);

  console.log('number of detections: ', result.length);

  for (let i = 0; i < result.length; i++) {

    context.beginPath();

    context.rect(...result[i].bbox);

    context.lineWidth = 1;

    context.strokeStyle = 'green';

    context.fillStyle = 'green';

    context.stroke();

    context.fillText(

        result[i].score.toFixed(3) + ' ' + result[i].class, result[i].bbox[0],

        result[i].bbox[1] > 10 ? result[i].bbox[1] - 5 : 10);

  }

};
(3). 切换到项目目录,运行 parcel index.html
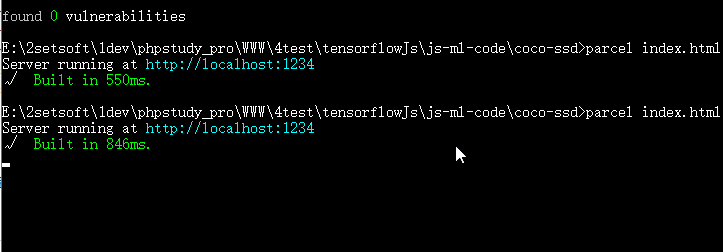
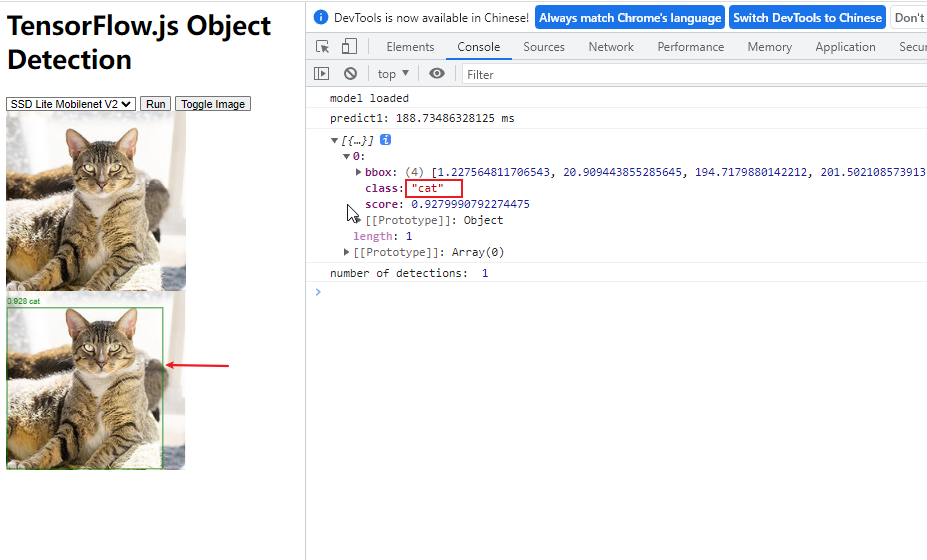
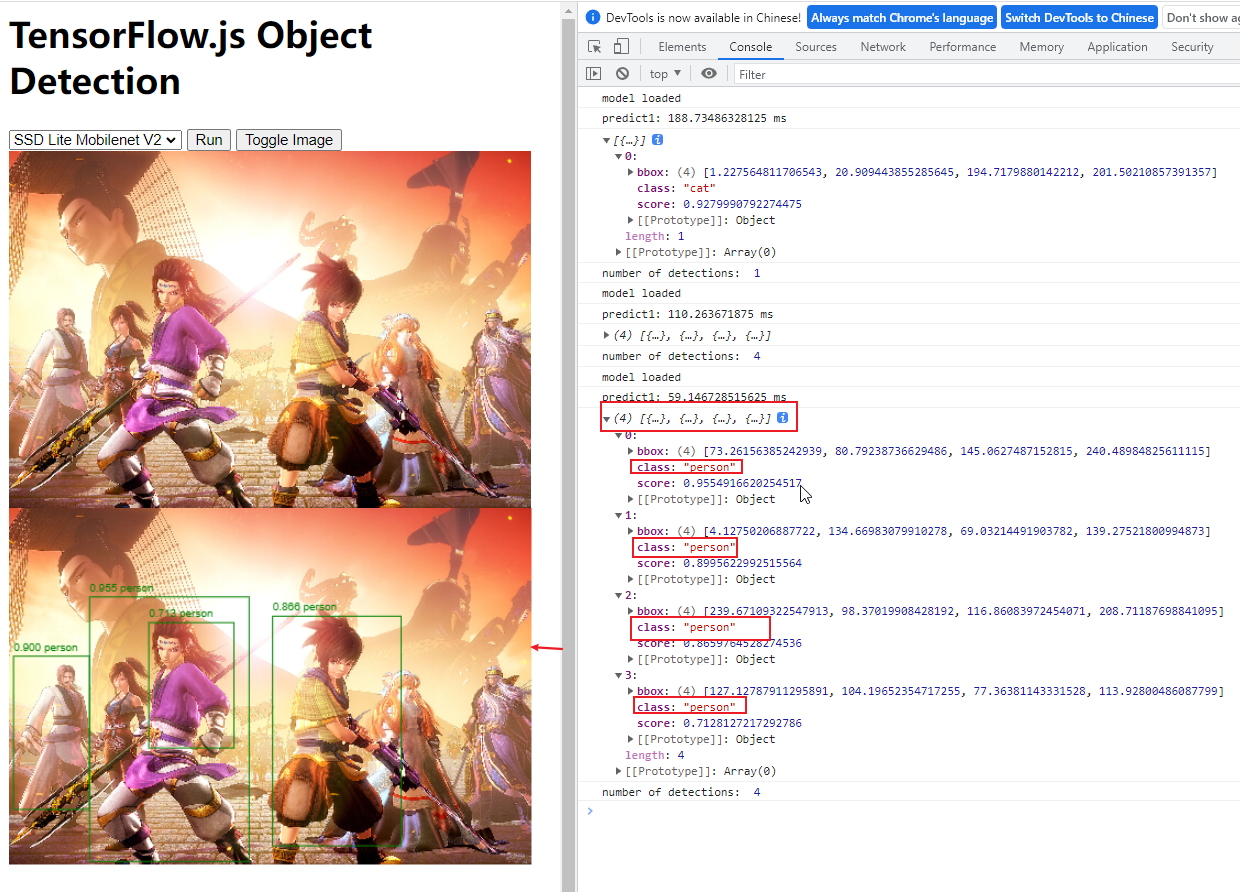
3. 运行效果
检测视频目标:
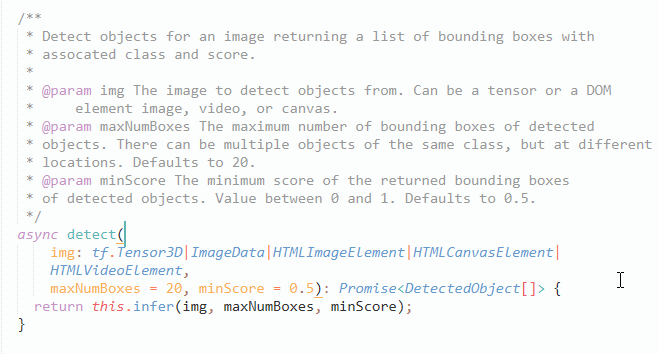
经过上面 demo 的图片检测发现,用于对某资源 (图片,视频) 进行检测的函数是 detect ()。查看该函数所处 Coco-SSD 文件发现,detect 函数接收三个参数,第一个参数可以是 tensorflow 张量,也可以分别是 DOM 里的图片,视频,画布等 HTML 元素,第二第三个参数分别用于过滤返回结果的最大识别目标数和最小概率目标,而返回自然就是一个 box, 按概率值降序排列。
1. 实现流程:
(1). 给视频标签添加播放监听
(2). 页面渲染完成加载 Coco-SSD 模型
(3). 模型加载成功轮询识别视频 (video 标签)
(4). 监听到视频播放停止关闭轮询检测
2. 编码:
(1). html 部分
<style>

    #big-box {

        position: relative;

    }

    #img-box {

        position: absolute;

        top: 0px;

        left: 0px;

    }

    #img-box div {

        position: absolute;

        /*border: 2px solid #f00;*/

        pointer-events: none;

    }

    #img-box div .className {

        position: absolute;

        top: 0;

        /* background: #f00; */

        color: #fff;

    }

    #myPlayer {

        max-width: 600px;

        width: 100%;

    }

</style>

<div id="showBox">等待模型加载...</div>

<br>

<div id="big-box">

    <video id="myPlayer" muted="true" autoplay src="persons.mp4" controls="" playsinline="" webkit-playsinline=""></video>

    <div id="img-box"></div>

</div>

<script src="persons.js"></script>
(2). js 部分
import '@tensorflow/tfjs-backend-cpu';

import '@tensorflow/tfjs-backend-webgl';

import * as cocoSsd from '@tensorflow-models/coco-ssd';

var myModel = null;

var V = null;

var requestAnimationFrameIndex = null;

var myPlayer = document.getElementById("myPlayer");

var videoHeight = 0;

var videoWidth = 0;

var clientHeight = 0;

var clientWidth = 0;

var modelLoad = false;

var videoLoad = false;

window.onload = function () {

    myPlayer.addEventListener("canplay", function () {

        videoHeight = myPlayer.videoHeight;

        videoWidth = myPlayer.videoWidth;

        clientHeight = myPlayer.clientHeight;

        clientWidth = myPlayer.clientWidth;

        V = this;

        videoLoad = true;

    })

    loadModel();

}

function loadModel() {

    if (modelLoad) {

        return;

    }

    cocoSsd.load().then(model => {

        var showBox = document.getElementById("showBox");

        showBox.innerHTML = "载入成功";

        myModel = model;

        detectImage();

        modelLoad = true;

    });

}

function detectImage() {

    var showBox = document.getElementById("showBox");

    // 分类名

    var classList = [];

    // 分类颜色框

    var classColorMap = ["red", "green", "blue", "white"];

    // 颜色角标

    var colorCursor = 0;

    showBox.innerHTML = "检测中...";

    if (videoLoad) {

        myModel.detect(V).then(predictions => {

            showBox.innerHTML = "检测结束";

            const $imgbox = document.getElementById('img-box');

            $imgbox.innerHTML = ""

            predictions.forEach(box => {

            	if (classList.indexOf(box.class) != -1) {

            		classList.push(box.class);

            	}

            	console.log(box);

            	var borderColor = classColorMap[colorCursor%4];

// console.log(colorCursor);

// console.log(borderColor);

                const $div = document.createElement('div')

                //$div.className = 'rect';

                $div.style.border = "2px solid "+borderColor;

                var heightScale = (clientHeight / videoHeight);

                var widthScale = (clientWidth / videoWidth)

                var transformTop = box.bbox[1] * heightScale;

                var transformLeft = box.bbox[0] * widthScale;

                var transformWidth = box.bbox[2] * widthScale;

                var transformHeight = box.bbox[3] * heightScale;

                var score = box.score.toFixed(3);

                $div.style.top = transformTop + 'px'

                $div.style.left = transformLeft + 'px'

                $div.style.width = transformWidth + 'px'

                $div.style.height = transformHeight + 'px'

                $div.innerHTML = `<span class='className'>${box.class} ${score}</span>`

                $imgbox.appendChild($div)

                colorCursor++;

            })

            setTimeout(function () {

                detectImage();

            }, 10);

        });

    }

}
3. 演示效果

tensorflow.js 视频图片多目标检测的更多相关文章
- tensorflow利用预训练模型进行目标检测(三):将检测结果存入mysql数据库
mysql版本:5.7 : 数据库:rdshare:表captain_america3_sd用来记录某帧是否被检测.表captain_america3_d用来记录检测到的数据. python模块,包部 ...
- TensorFlow + Keras 实战 YOLO v3 目标检测图文并茂教程
运行步骤 1.从 YOLO 官网下载 YOLOv3 权重 wget https://pjreddie.com/media/files/yolov3.weights 下载过程如图: 2.转换 Darkn ...
- tensorflow利用预训练模型进行目标检测(四):检测中的精度问题以及evaluation
一.tensorflow提供的evaluation Inference and evaluation on the Open Images dataset:https://github.com/ten ...
- tensorflow利用预训练模型进行目标检测(二):预训练模型的使用
一.运行样例 官网链接:https://github.com/tensorflow/models/blob/master/research/object_detection/object_detect ...
- tensorflow利用预训练模型进行目标检测(一):安装tensorflow detection api
一.tensorflow安装 首先系统中已经安装了两个版本的tensorflow,一个是通过keras安装的, 一个是按照官网教程https://www.tensorflow.org/install/ ...
- YOLO_Online 将深度学习最火的目标检测做成在线服务实战经验分享
YOLO_Online 将深度学习最火的目标检测做成在线服务 第一次接触 YOLO 这个目标检测项目的时候,我就在想,怎么样能够封装一下让普通人也能够体验深度学习最火的目标检测项目,不需要关注技术细节 ...
- AI佳作解读系列(二)——目标检测AI算法集杂谈:R-CNN,faster R-CNN,yolo,SSD,yoloV2,yoloV3
1 引言 深度学习目前已经应用到了各个领域,应用场景大体分为三类:物体识别,目标检测,自然语言处理.本文着重与分析目标检测领域的深度学习方法,对其中的经典模型框架进行深入分析. 目标检测可以理解为是物 ...
- 第三十二节,使用谷歌Object Detection API进行目标检测、训练新的模型(使用VOC 2012数据集)
前面已经介绍了几种经典的目标检测算法,光学习理论不实践的效果并不大,这里我们使用谷歌的开源框架来实现目标检测.至于为什么不去自己实现呢?主要是因为自己实现比较麻烦,而且调参比较麻烦,我们直接利用别人的 ...
- Python实现YOLO目标检测
作者:R语言和Python学堂 链接:https://www.jianshu.com/p/35cfc959b37c 1. 什么是目标检测? YOLO目标检测的一个示例 啥是目标检测? 拿上图 (用YO ...
- 【目标检测】用Fast R-CNN训练自己的数据集超详细全过程
目录: 一.环境准备 二.训练步骤 三.测试过程 四.计算mAP 寒假在家下载了Fast R-CNN的源码进行学习,于是使用自己的数据集对这个算法进行实验,下面介绍训练的全过程. 一.环境准备 我这里 ...
随机推荐
- cryptohack wp day(3)
第二节模运算----第一题( GCD ) 在做这道题前,了解下欧几里得算法: 欧几里得算法,也叫辗转相除法,用于求解两个非负整数a和b的最大公约数(Greatest Common Divisor, G ...
- 一站式统一返回值封装、异常处理、异常错误码解决方案—最强的Sping Boot接口优雅响应处理器
作者:京东物流 覃玉杰 1. 简介 Graceful Response是一个Spring Boot体系下的优雅响应处理器,提供一站式统一返回值封装.异常处理.异常错误码等功能. 使用Graceful ...
- 2022-04-30:在无限的平面上,机器人最初位于 (0, 0) 处,面朝北方。注意: 北方向 是y轴的正方向。 南方向 是y轴的负方向。 东方向 是x轴的正方向。 西方向 是x轴的负方向。 机器人
2022-04-30:在无限的平面上,机器人最初位于 (0, 0) 处,面朝北方.注意: 北方向 是y轴的正方向. 南方向 是y轴的负方向. 东方向 是x轴的正方向. 西方向 是x轴的负方向. 机器人 ...
- Python潮流周刊#1:如何系统地自学Python?
这里记录每周值得分享的 Python 及通用技术内容,部分内容为英文,已在小标题注明.(本期标题取自其中一则分享,不代表全部内容都是该主题,特此声明.) 文章&教程 1.编程语言的错误处理模式 ...
- MD5加密后为0e开头的字符串
QNKCDZO 0e830400451993494058024219903391 s878926199a 0e545993274517709034328855841020 s ...
- JS 数组常用操作全集
文章目录 1.push()方法 2.unshift()方法 3.pop() 方法 4.shift() 方法 5.filter() 方法 6.join()方法 7. indexOf() 方法 8.rev ...
- Java发展史、JDK环境配置、运行原理及开发工具(学习的前期准备)
一.Java的历史和三大版本 1.Java的发展史 Java由sun公司开发,Java之父James Gosling,Java是一门面向对象的编程语言,也称为"高级编程语言" Ja ...
- 基于SqlSugar的开发框架循序渐进介绍(31)-- 在查询接口中实现多表联合和单表对象的统一处理
在一些复杂的业务表中间查询数据,有时候操作会比较复杂一些,不过基于SqlSugar的相关操作,处理的代码会比较简单一些,以前我在随笔<基于SqlSugar的开发框架循序渐进介绍(2)-- 基于中 ...
- R 语言柱状图示例笔记
由于微信不允许外部链接,你需要点击文章尾部左下角的 "阅读原文",才能访问文章中链接. 一.基础柱状图 1. barplot 命令 基于barplot基础柱状图颜色.方向及分组的绘 ...
- [Java SE] 彻底搞懂Java程序的三大参数配置途径:系统变量与JVM参数(VM Option)/环境变量/启动程序参数args
0 序言 一次没搞懂,处处受影响.这个问题属于基础问题,但又经常踩坑,不得不重视一下了. 1 Java程序动态参数的配置途径:系统变量与JVM参数(VM Option) vs 环境变量 vs 启动程序 ...