SpringBoot 项目搭建(详细介绍+案例源码)
SpringBoot 项目搭建
SpringBoot 项目整合源码
博客地址:SpringBoot 项目整合源码
其实不用直接去看源码了,源码也是按下面步骤搭建完的结果
SpringBoot 项目整合
一、项目准备
1.1 快速创建 SpringBoot 项目
博客地址:快速搭建 SpringBoot 项目(看完 【 1. 快速创建 SpringBoot 项目】 就可以回到这里了)
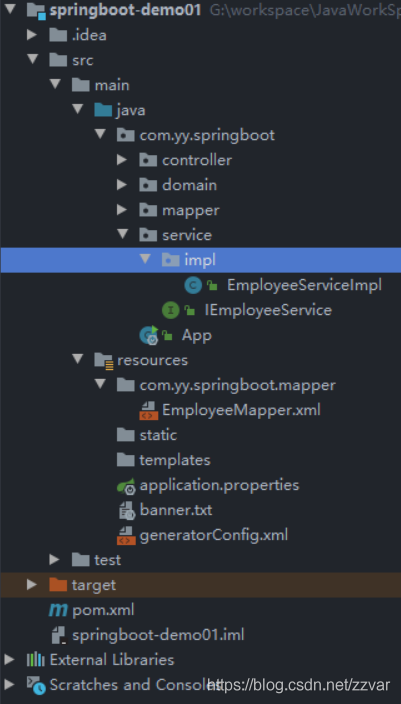
1.2 标准项目结构图如下
1.3 添加springboot-parent
<parent>

    <groupId>org.springframework.bootgroupId>

    <artifactId>spring-boot-starter-parentartifactId>

    <version>2.4.3version>

    <relativePath/>

parent>
1.4 添加 spring-boot-start-web
<dependency>

    <groupId>org.springframework.bootgroupId>

    <artifactId>spring-boot-starter-webartifactId>

dependency>
1.5 添加 Lambok 依赖
<dependency>

    <groupId>org.projectlombokgroupId>

    <artifactId>lombokartifactId>

dependency>
1.6 SpringBoot 打包插件
<plugin>

    <groupId>org.springframework.bootgroupId>

    <artifactId>spring-boot-maven-pluginartifactId>

plugin>
1.7 添加 application.properties
# 修改端口号

server.port=80
1.8 编写启动类App
@SpringBootApplication

@MapperScan("com.yy.mapper")

public class App {

    public static void main(String[] args) {

        SpringApplication.run(App.class, args);

    }

}
1.9 在 resources 创建static静态资源目录
1.10 在 resources 创建templates模板目录
1.11 在 resources 添加 banner.txt 文件
                   _ooOoo_

                  o8888888o

                  88" . "88

                  (| -_- |)

                  O\  =  /O

               ____/`---'\____

             .'  \\|     |//  `.

            /  \\|||  :  |||//  \

           /  _||||| -:- |||||_  \

           |   | \\\  -  /// |   |

           | \_|  ''\---/''  |   |

           \  .-\__  `-`  ___/-. /

         ___`. .'  /--.--\  `. . __

      ."" '<  `.___\_<|>_/___.'  >'"".

     | | :  `- \`.;`\ _ /`;.`/ - ` : | |

     \  \ `-.   \_ __\ /__ _/   .-` /  /

======`-.____`-.___\_____/___.-`____.-'======

                   `=---='

           佛祖保佑        永无BUG

^^^^^^^^^^^^^^^^^^^^^^^^^^^^^^^^^^^^^^^^^^^^^
二、整合数据库连接池
2.1 集成druid数据源
<dependency>

    <groupId>mysqlgroupId>

    <artifactId>mysql-connector-javaartifactId>

dependency>

<dependency>

    <groupId>com.alibabagroupId>

    <artifactId>druid-spring-boot-starterartifactId>

    <version>1.2.5version>

dependency>

<dependency>

    <groupId>org.springframework.bootgroupId>

    <artifactId>spring-boot-starter-jdbcartifactId>

dependency>
2.2 配置application.properties 文件
spring.datasource.driver-class-name=com.mysql.cj.jdbc.Driver

spring.datasource.url=jdbc:mysql:///springboot?useUnicode=true&characterEncoding=utf8&serverTimezone=GMT%2B8

spring.datasource.username=root

spring.datasource.password=admin
2.3 数据源
- 默认数据源-Hikari
在springboot2.0之后 , 采用的默认连接池就是Hikari, 号称"史上最快的连接池", 所以我们没有添加依赖也能直接用, springboot的自动配置中含有DataSourceAutoConfiguration配置类, 会先检查容器中是否已经有连接池对象, 没有则会使用默认的连接池, 并根据特定的属性来自动配置连接池对象, 用到的属性值来源于DataSourceProperties对象。
- 配置 Druid 数据源
只需要添加依赖即可, 此时加的是Druid的springboot自动配置包, 里面包含了DruidDataSourceAutoConfigure自动配置类,会自动创建druid的连接池对象, 所以springboot发现已经有连接池对象了,则不会再使用Hikari。
<dependency>

    <groupId>com.alibabagroupId>

    <artifactId>druid-spring-boot-starterartifactId>

    <version>1.2.5version>

dependency>
注意: 如果添加的依赖是以前那种普通包, 也就是和以前 ssm 项目一样,只添加 Druid 自身的依赖, 并不是自动配置包, 则需要以下配置(一般如果已经提供了springboot相关的自动配置包 , 直接使用自动配置的会更方便些):
<dependency>

    <groupId>com.alibabagroupId>

    <artifactId>druidartifactId>

    <version>1.1.19version>

dependency>
还要在 application.properties 中加上一下配置。
spring.datasource.type=com.alibaba.druid.pool.DruidDataSource
三、集成MyBatis
3.1 案例准备
需求:员工列表
1:将项目一里面员工表拷贝到新建的springboot表
2:拷贝逆向工程,创建员工domain, mapper
3:整合mybatis
3.2 准备依赖
<dependency>

    <groupId>org.mybatis.spring.bootgroupId>

    <artifactId>mybatis-spring-boot-starterartifactId>

    <version>2.1.4version>

dependency>
3.3 配置Mapper接口扫描器
只要在配置类上贴个注解@MapperScan(…)即可。
@SpringBootApplication

@MapperScan("com.yy.mapper")

public class App {

	public static void main(String[] args) {

		SpringApplication.run(App.class, args);

	}

}
3.4 配置属性
application.properties
以前在XML配置了哪些mybatis的属性在这里就配置哪些属性,属性前缀mybatis。
#mybatis.configuration.lazy-loading-enabled=true

#mybatis.configuration.lazy-load-trigger-methods=clone

#mybatis.mapper-locations=classpath:cn/wolfcode/*/mapper/*Mapper.xml

#mybatis.type-aliases-package=cn.wolfcode.sb.domain
3.5 设置SQL打印日志
#打印SQL日志

logging.level.cn.wolfcode.crm.mapper=trace
四、添加事务管理
4.1 准备依赖
<dependency>

    <groupId>org.springframework.bootgroupId>

    <artifactId>spring-boot-starter-aopartifactId>

dependency>
XML方式(了解)
采取配置类和XML混用的策略, 在配置类上使用@ImportResource(“classpath:spring-tx.xml”)。注解方式
直接在业务层实现类上或者其方法上直接贴@Transactional注解即可。
#SpringBoot默认优先选择CGLIB代理,如果需要改为优先使用JDK代理,需要做以下配置

#spring.aop.proxy-target-class=false #优先使用JDK代理
SpringBoot 自动配置中提供了TransactionAutoConfiguration事务注解自动配置类 , 引入了事务的依赖后, 可直接使用@Transactional注解 。
五、静态资源处理
默认情况下,Springboot会从classpath下的 /static , /public , /resources , /META-INF/resources下加载静态资源;
可以在application.properties中配置spring.resources.staticLocations属性来修改静态资源加载地址;
因为应用是打成jar包,所以之前的src/main/webapp就作废了,如果有文件上传,那么就的必须去配置图片所在的路径;
六、集成FreeMarker
6.1 准备依赖
<dependency>

    <groupId>org.springframework.bootgroupId>

    <artifactId>spring-boot-starter-freemarkerartifactId>

dependency>
6.2 配置资源文件
#一般我们会做3个配置,其余默认即可

#暴露session对象的属性

spring.freemarker.expose-session-attributes=true

#配置为传统模式,空值自动处理

spring.freemarker.settings.classic_compatible=true

#重新指定模板文件后缀 springboot 2.2.x 后 默认后缀为 .ftlh

spring.freemarker.suffix=.ftl
6.3 常见配置属性
spring.freemarker.enabled=true: 是否开启freemarker支持

spring.freemarker.charset=UTF-8: 模板编码

spring.freemarker.content-type=text/html: 模板contenttype

spring.freemarker.expose-session-attributes: 是否开启session属性暴露,默认false

spring.freemarker.prefix: 加载模板时候的前缀

spring.freemarker.settings.*: 直接配置freemarker参数

spring.freemarker.suffix: 模板文件后缀

spring.freemarker.template-loader-path=classpath:/templates/: 模板加载地址
七、统一异常处理
7.1 框架自带方式
SpringBoot默认情况下,会把所有错误都交给BasicErrorController类完成处理,错误的视图导向到 classpath:/static/error/ 和 classpath:/templates/error/ 路径上,http状态码就是默认视图的名称
如: 出现404错误 -> classpath:/static/error/404.html 或者 出现5xx类错误 -> classpath:/static/error/5xx.html
7.2 控制器增强器方式
自己定义一个控制器增强器,专门用于统一异常处理,该方式一般用于5xx类错误
@ControllerAdvice //控制器增强器

public class ExceptionControllerAdvice {

    @ExceptionHandler(RuntimeException.class) //处理什么类型的异常

    public String handlException(RuntimeException e, Model model) {

        return "errorView"; //错误页面视图名称

    }

}
八、添加拦截器
8.1 自定义拦截器
@Component

public class LoginInterceptor implements HandlerInterceptor {

    @Override

    public boolean preHandle(HttpServletRequest request, HttpServletResponse response, Object handler) throws Exception {

        String url = request.getRequestURI();

        if (url.contains("/employee")) {

            response.setContentType("application/json;charset=utf-8");

            response.getWriter().write("请先登录");

            return false;

        }

        return true;

    }

}
8.2 注册拦截器
声明一个配置类, 实现WebMvcConfigurer接口 ,在addInterceptors方法注册拦截器
@SpringBootApplication

// mybatis 中 mapper 接口扫描器,指定参数为:mapper 接口所在路径

// 功能:将包中路径下所有接口动态代理,创建 mapper 接口实现类交给 spring 容器管理

@MapperScan(basePackages = "com.yy.springboot.mapper")

public class MvcJavaConfig implements WebMvcConfigurer {

    @Autowired

    private LoginInterceptor loginInterceptor;

    @Autowired

    private PermissionInterceptor permissionInterceptor;

    public void addInterceptors(InterceptorRegistry registry) {

        // 注册登录拦截器

        registry.addInterceptor(loginInterceptor)

            // 对哪些资源起过滤作用

            .addPathPatterns("/**")

            // 对哪些资源起排除作用

            .excludePathPatterns("/loginUser","/login.html","/css/**","/js/**");

    }

    public static void main(String[] args) {

        SpringApplication.run(App.class, args);

    }

}
九、添加系统日志
9.1 SpringBoot中的日志介绍
- Springboot默认已经开启日志
默认的日志格式为: 时间 日志级别 线程ID 线程名称 日志类 日志说明;
Springboot的日志分为: 系统日志和应用日志;
日志级别,设置的级别越高,输出的内容越少, 如果设置的级别为info, 则debug以及trace级别的都无法显示
trace < debug < info < warn < error;Springboot默认选择Logback作为日志框架,也能选择其他日志框架,但是没有必要
common-logging / java-logging / log4j / log4j2 / logback / slf4j;SpringBoot 默认日志级别是 info,因为 debug、trace 低于 info 级别,所以不会显示,除非主动配置;
9.2 类中使用日志输出
方式1: 在类中定义一个静态Logger对象
这里传入当前类的作用是方便输出日志时可以清晰地看到该日志信息是属于哪个类的(导入的包是 org.slf4j)
private static final Logger log = LoggerFactory.getLogger(当前类.class);
方式2: 使用lombok提供的@Slf4j注解来简化代码 , 其实和方式1的作用是一样的
@Slf4j

@Service

public class PermissionServiceImpl implements IPermissionService {}
在需要输出日志的地方使用日志的输出方法(一般我们在 CRUD 操作前后进行日志信息输出,error 一般在 catch 中输出)
log.info(...);

log.error(...);

...

//输出日志中有变量可以使用{}作为占位符

log.info("删除id为{}的数据", id);
十、逆向工程
10.1 导入逆向工程插件
<build>

    <plugins>

        <plugin>

            <groupId>org.mybatis.generatorgroupId>

            <artifactId>mybatis-generator-maven-pluginartifactId>

            <version>1.3.2version>

            <configuration>

                <verbose>trueverbose>

                <overwrite>falseoverwrite>

            configuration>

            <dependencies>

                <dependency>

                    <groupId>mysqlgroupId>

                    <artifactId>mysql-connector-javaartifactId>

                    <version>5.1.45version>

                dependency>

            dependencies>

        plugin>

    plugins>

build>
10.2 generatorConfig.xml 配置文件
<generatorConfiguration>

	<context id="mysql" defaultModelType="hierarchical"

			 targetRuntime="MyBatis3Simple">

		<property name="autoDelimitKeywords" value="false" />

		<property name="javaFileEncoding" value="UTF-8" />

		<property name="javaFormatter"

				  value="org.mybatis.generator.api.dom.DefaultJavaFormatter" />

		<property name="xmlFormatter"

				  value="org.mybatis.generator.api.dom.DefaultXmlFormatter" />

		<property name="beginningDelimiter" value="`" />

		<property name="endingDelimiter" value="`" />

		<commentGenerator>

			<property name="suppressDate" value="true" />

			<property name="suppressAllComments" value="true" />

		commentGenerator>

		<jdbcConnection driverClass="com.mysql.jdbc.Driver"

						connectionURL="jdbc:mysql:///car" userId="root" password="admin">

		jdbcConnection>

		<javaTypeResolver

				type="org.mybatis.generator.internal.types.JavaTypeResolverDefaultImpl">

			<property name="forceBigDecimals" value="false" />

		javaTypeResolver>

		<javaModelGenerator targetPackage="com.yy.homework.domain"

							targetProject="src/main/java">

			<property name="constructorBased" value="false" />

			<property name="immutable" value="false" />

		javaModelGenerator>

		<sqlMapGenerator targetPackage="com.yy.homework.mapper"

						 targetProject="src/main/resources">

			<property name="enableSubPackages" value="true" />

		sqlMapGenerator>

		<javaClientGenerator targetPackage="com.yy.homework.mapper"

							 type="XMLMAPPER" targetProject="src/main/java">

			<property name="enableSubPackages" value="true" />

		javaClientGenerator>

		<table tableName="message_reply">

			<property name="useActualColumnNames" value="false"/>

			<property name="constructorBased" value="false" />

			<generatedKey column="id" sqlStatement="JDBC" />

		table>

	context>

generatorConfiguration>
十一、分页查询
11.1 导入依赖
<dependency>

    <groupId>com.github.pagehelpergroupId>

    <artifactId>pagehelper-spring-boot-starterartifactId>

    <version>1.3.0version>

dependency>
11.2 分页代码-EmployeeQuery
@Setter

@Getter

public class QueryObject {

    private int currentPage = 1;

    private int pageSize = 5;

}

@Setter

@Getter

public class EmployeeQuery extends QueryObject {

    private String keyword;

}
11.3 分页逻辑代码
public PageInfo<Employee> query(QueryObject qo) {

    PageHelper.startPage(qo.getCurrentPage(),qo.getPageSize());

    List<Employee> employees = employeeMapper.selectForList(qo);

    return new PageInfo<>(employees);

}
  <sql id="where_sql">

    <where>

      <if test="keyword != null and keyword !=''">

        and (e.name like concat('%', #{keyword} ,'%') or e.email like concat('%', #{keyword} ,'%'))

    where>

  sql>

  <select id="selectForList" resultMap="BaseResultMap">

    select e.id, e.name,e.username, e.password, e.email, e.age, e.admin, e.deptId

    from employee e

    <include refid="where_sql" />

  select>
11.4 测试
@RequestMapping("/list")

public String list(Model model, @ModelAttribute("qo") EmployeeQuery qo){

    model.addAttribute("pageInfo", employeeService.query(qo));

    return "employee/list";

}
总结
以上就是 SpringBoot 项目搭建的介绍了,代码仅供参考,欢迎讨论交流。
SpringBoot 项目入门请看我上一篇博客,博客地址:SpringBoot快速入门(解析+入门案例源码实现)
SpringBoot 项目搭建(详细介绍+案例源码)的更多相关文章
- 使用 IDEA 创建 SpringBoot 项目(详细介绍)+ 源码案例实现
使用 IDEA 创建 SpringBoot 项目 一.SpringBoot 案例实现源码 二.SpringBoot 相关配置 1. 快速创建 SpringBoot 项目 1.1 新建项目 1.2 填写 ...
- 前端项目模块化的实践1:搭建 NPM 私有仓库管理源码及依赖
以下是关于前端项目模块化的实践,包含以下内容: 搭建 NPM 私有仓库管理源码及依赖: 使用 Webpack 打包基础设施代码: 使用 TypeScript 编写可靠类库 使用 TypeScript ...
- SpringBoot之入门教程-SpringBoot项目搭建
SpringBoot大大的简化了Spring的配置,把Spring从配置炼狱中解救出来了,以前天天配置Spring和Mybatis,Springmvc,Hibernate等整合在一起,感觉用起来还是挺 ...
- java实现 swing模仿金山打字 案例源码
java实现 swing模仿金山打字 案例源码,更多Java技术就去Java教程网.http://java.662p.com 代码: <font size="3">im ...
- Spring3 + Spring MVC+ Mybatis 3+Mysql 项目整合(注解及源码)
Spring3 + Spring MVC+ Mybatis 3+Mysql 项目整合(注解及源码) 备注: 之前在Spring3 + Spring MVC+ Mybatis 3+Mysql 项目整合中 ...
- SpringBoot之DispatcherServlet详解及源码解析
在使用SpringBoot之后,我们表面上已经无法直接看到DispatcherServlet的使用了.本篇文章,带大家从最初DispatcherServlet的使用开始到SpringBoot源码中Di ...
- appium ios真机自动化环境搭建&运行(送源码)
appium ios真机自动化环境搭建&运行(送源码) 原创: f i n 测试开发社区 6天前 Appium测试环境的搭建相对比较烦琐,不少初学者在此走过不少弯路 首先是熟悉Mac的使用 ...
- appium ios真机自动化环境搭建&运行(送源码)
appium ios真机自动化环境搭建&运行(送源码) 原创: f i n 测试开发社区 6天前 Appium测试环境的搭建相对比较烦琐,不少初学者在此走过不少弯路 首先是熟悉Mac的使用 ...
- APICloud案例源码、模块源码、考试源码、开发工具大集合!赶快收藏
APICloud专注于APP开发定制技术,多年来不停为开发者奉献更多的资源.此次,APICloud将以往的的资源进行更新.整合,以合集的形式分享给广大的用户. APICloud应用案例源码合集 API ...
随机推荐
- mysql-索引对性能影响
1.添加索引后查询速度会变快 mysql中索引是存储引擎层面用于快速查询找到记录的一种数据结构,索引对性能的影响非常重要,特别是表中数据量很大的时候,正确的索引会极大的提高查询效率.简单理解索引,就相 ...
- java几种数据的默认扩容机制
当底层实现涉及到扩容时,容器或重新分配一段更大的连续内存(如果是离散分配则不需要重新分配,离散分配都是插入新元素时动态分配内存),要将容器原来的数据全部复制到新的内存上, 这无疑使效率大大降低.加载因 ...
- egg-jwt的使用
安装 npm install egg-jwt --save 配置 // config/config.default.js config.jwt = { secret: 'zidingyi', // 自 ...
- CentOS下mysql常用命令
CentOS下mysql常用命令 1.开启和关闭 1.1.开启 service mysql start 1.2.关闭 service mysql stop 1.3.重启 service mysql ...
- 什么是CSRF跨站请求伪造?(from表单效验csrf-ajdax效验csrf-Ajax设置csrf-CBV装饰器验证csrf)
目录 一:csrf跨站请求伪造 1.什么是CSRF? 2.CSRF攻击案例(钓鱼网站) 3.钓鱼网站 内部原理 4.CSRF原理(钓鱼网站内部本质) 5.从上图可以看出,要完成一次CSRF攻击,受害者 ...
- GitLab 常用命令
1. 进入本地仓库访问位置之后执行命令 1) 远程仓库相关命令检出仓库:$ git clone git://github.com/jquery/jquery.git查看远程仓库:$ git remot ...
- 如何让 if/else 更优雅?
if else 是我们写代码时,使用频率最高的关键词之一,然而有时过多的 if else 会让我们感到脑壳疼,有没有什么方法可以让我们避免来写这么多的 if else 呢? 1.使用 return 我 ...
- 在 Ubuntu 上使用源码安装 OpenResty
镜像下载.域名解析.时间同步请点击 阿里云开源镜像站 本文将介绍如何在 Ubuntu 上使用源码安装 OpenResty. 目标 Ubuntu 18.04 OpenResty 1.19.3.2 安装依 ...
- CVE-2015-1427(Groovy 沙盒绕过 && 代码执行漏洞)
1.vulhub环境搭建 https://blog.csdn.net/qq_36374896/article/details/84102101 2.启动docker环境 cd vulhub-maste ...
- DDOS流量攻击
0x01 环境 包含2台主机 attact 作为攻击方,使用Centos7.2 windows_server ,用于被攻击,同时抓包分析流量 ,任意版本均可.安装wireshark,用于抓包 0x02 ...