SpringBoot自动装配-Condition
1. 简介
@Conditional注解在Spring4.0中引入,其主要作用就是判断条件是否满足,从而决定是否初始化并向容器注册Bean。
2. 定义
2.1 @Conditional
@Conditional注解定义如下:其内部只有一个参数为Class对象数组,且必须继承自Condition接口,通过重写Condition接口的matches方法来判断是否需要加载Bean
@Target({ElementType.TYPE, ElementType.METHOD})

@Retention(RetentionPolicy.RUNTIME)

@Documented

public @interface Conditional {

  Class<? extends Condition>[] value();

}
2.2 Condition
Condition接口定义如下:该接口为一个函数式接口,只有一个matches接口,形参为ConditionContext context, AnnotatedTypeMetadata metadata。ConditionContext定义如2.2.1,AnnotatedTypeMetadata见名知意,就是用来获取注解的元信息的
@FunctionalInterface

public interface Condition {

  boolean matches(ConditionContext context, AnnotatedTypeMetadata metadata);

}
2.2.1 ConditionContext
ConditionContext接口定义如下:通过查看源码可以知道,从这个类中可以获取很多有用的信息
public interface ConditionContext {

  /**

   * 返回Bean定义信息

   * Return the {@link BeanDefinitionRegistry} that will hold the bean definition

   * should the condition match.

   * @throws IllegalStateException if no registry is available (which is unusual:

   * only the case with a plain {@link ClassPathScanningCandidateComponentProvider})

   */

  BeanDefinitionRegistry getRegistry();

  /**

   * 返回Bean工厂

   * Return the {@link ConfigurableListableBeanFactory} that will hold the bean

   * definition should the condition match, or {@code null} if the bean factory is

   * not available (or not downcastable to {@code ConfigurableListableBeanFactory}).

   */

  @Nullable

  ConfigurableListableBeanFactory getBeanFactory();

  /**

   * 返回环境变量 比如在application.yaml中定义的信息

   * Return the {@link Environment} for which the current application is running.

   */

  Environment getEnvironment();

  /**

   * 返回资源加载器

   * Return the {@link ResourceLoader} currently being used.

   */

  ResourceLoader getResourceLoader();

  /**

   * 返回类加载器

   * Return the {@link ClassLoader} that should be used to load additional classes

   * (only {@code null} if even the system ClassLoader isn't accessible).

   * @see org.springframework.util.ClassUtils#forName(String, ClassLoader)

   */

  @Nullable

  ClassLoader getClassLoader();

}
3. 使用说明
通过一个简单的小例子测试一下@Conditional是不是真的能实现Bean的条件化注入。
3.1 创建项目
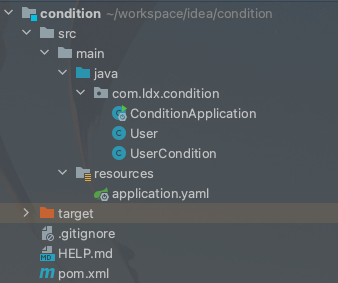
首先我们创建一个SpringBoot项目
3.1.1 导入依赖
这里我们除了springboot依赖,再添加个lombok依赖
<?xml version="1.0" encoding="UTF-8"?>

<project xmlns="http://maven.apache.org/POM/4.0.0" xmlns:xsi="http://www.w3.org/2001/XMLSchema-instance"

         xsi:schemaLocation="http://maven.apache.org/POM/4.0.0 https://maven.apache.org/xsd/maven-4.0.0.xsd">

    <modelVersion>4.0.0</modelVersion>

    <parent>

        <groupId>org.springframework.boot</groupId>

        <artifactId>spring-boot-starter-parent</artifactId>

        <version>2.5.3</version>

        <relativePath/> <!-- lookup parent from repository -->

    </parent>

    <groupId>com.ldx</groupId>

    <artifactId>condition</artifactId>

    <version>0.0.1-SNAPSHOT</version>

    <name>condition</name>

    <description>Demo project for Spring Boot</description>

    <properties>

        <java.version>1.8</java.version>

    </properties>

    <dependencies>

        <dependency>

            <groupId>org.springframework.boot</groupId>

            <artifactId>spring-boot-starter</artifactId>

        </dependency>

        <dependency>

            <groupId>org.projectlombok</groupId>

            <artifactId>lombok</artifactId>

            <version>1.18.12</version>

        </dependency>

    </dependencies>

    <build>

        <plugins>

            <plugin>

                <groupId>org.springframework.boot</groupId>

                <artifactId>spring-boot-maven-plugin</artifactId>

            </plugin>

        </plugins>

    </build>

</project>
3.1.2 添加配置信息
在application.yaml 中加入配置信息
user:

  enable: false
3.1.3 创建User类
package com.ldx.condition;

import lombok.AllArgsConstructor;

import lombok.Data;

/**

 * 用户信息

 * @author ludangxin

 * @date 2021/8/1

 */

@Data

@AllArgsConstructor

public class User {

   private String name;

   private Integer age;

}
3.1.4 创建条件实现类
package com.ldx.condition;

import org.springframework.context.annotation.Condition;

import org.springframework.context.annotation.ConditionContext;

import org.springframework.core.env.Environment;

import org.springframework.core.type.AnnotatedTypeMetadata;

/**

 * 用户bean条件判断

 * @author ludangxin

 * @date 2021/8/1

 */

public class UserCondition implements Condition {

   @Override

   public boolean matches(ConditionContext conditionContext, AnnotatedTypeMetadata annotatedTypeMetadata) {

      Environment environment = conditionContext.getEnvironment();

      // 获取property user.enable

      String property = environment.getProperty("user.enable");

      // 如果user.enable的值等于true 那么返回值为true,反之为false

      return "true".equals(property);

   }

}
3.1.5 修改启动类
package com.ldx.condition;

import lombok.extern.slf4j.Slf4j;

import org.springframework.boot.SpringApplication;

import org.springframework.boot.autoconfigure.SpringBootApplication;

import org.springframework.context.ConfigurableApplicationContext;

import org.springframework.context.annotation.Bean;

import org.springframework.context.annotation.Conditional;

@Slf4j

@SpringBootApplication

public class ConditionApplication {

   public static void main(String[] args) {

      ConfigurableApplicationContext applicationContext = SpringApplication.run(ConditionApplication.class, args);

      // 获取类型为User类的Bean

      User user = applicationContext.getBean(User.class);

      log.info("user bean === {}", user);

   }

  /**

   * 注入User类型的Bean

   */

   @Bean

   @Conditional(UserCondition.class)

   public User getUser(){

      return new User("张三",18);

   }

}
3.2 测试
3.2.1 当user.enable=false
报错找不到可用的User类型的Bean
  .   ____          _            __ _ _

 /\\ / ___'_ __ _ _(_)_ __  __ _ \ \ \ \

( ( )\___ | '_ | '_| | '_ \/ _` | \ \ \ \

 \\/  ___)| |_)| | | | | || (_| |  ) ) ) )

  '  |____| .__|_| |_|_| |_\__, | / / / /

 =========|_|==============|___/=/_/_/_/

 :: Spring Boot ::                (v2.5.3)

2021-08-01 17:07:51.994  INFO 47036 --- [           main] com.ldx.condition.ConditionApplication   : Starting ConditionApplication using Java 1.8.0_261 on ludangxindeMacBook-Pro.local with PID 47036 (/Users/ludangxin/workspace/idea/condition/target/classes started by ludangxin in /Users/ludangxin/workspace/idea/condition)

2021-08-01 17:07:51.997  INFO 47036 --- [           main] com.ldx.condition.ConditionApplication   : No active profile set, falling back to default profiles: default

2021-08-01 17:07:52.461  INFO 47036 --- [           main] com.ldx.condition.ConditionApplication   : Started ConditionApplication in 0.791 seconds (JVM running for 1.371)

Exception in thread "main" org.springframework.beans.factory.NoSuchBeanDefinitionException: No qualifying bean of type 'com.ldx.condition.User' available

	at org.springframework.beans.factory.support.DefaultListableBeanFactory.getBean(DefaultListableBeanFactory.java:351)

	at org.springframework.beans.factory.support.DefaultListableBeanFactory.getBean(DefaultListableBeanFactory.java:342)

	at org.springframework.context.support.AbstractApplicationContext.getBean(AbstractApplicationContext.java:1172)

	at com.ldx.condition.ConditionApplication.main(ConditionApplication.java:16)

Process finished with exit code 1
3.2.2 当user.enable=true
正常输出UserBean实例信息
  .   ____          _            __ _ _

 /\\ / ___'_ __ _ _(_)_ __  __ _ \ \ \ \

( ( )\___ | '_ | '_| | '_ \/ _` | \ \ \ \

 \\/  ___)| |_)| | | | | || (_| |  ) ) ) )

  '  |____| .__|_| |_|_| |_\__, | / / / /

 =========|_|==============|___/=/_/_/_/

 :: Spring Boot ::                (v2.5.3)

2021-08-01 17:13:38.022  INFO 47129 --- [           main] com.ldx.condition.ConditionApplication   : Starting ConditionApplication using Java 1.8.0_261 on ludangxindeMacBook-Pro.local with PID 47129 (/Users/ludangxin/workspace/idea/condition/target/classes started by ludangxin in /Users/ludangxin/workspace/idea/condition)

2021-08-01 17:13:38.024  INFO 47129 --- [           main] com.ldx.condition.ConditionApplication   : No active profile set, falling back to default profiles: default

2021-08-01 17:13:38.434  INFO 47129 --- [           main] com.ldx.condition.ConditionApplication   : Started ConditionApplication in 0.711 seconds (JVM running for 1.166)

2021-08-01 17:13:38.438  INFO 47129 --- [           main] com.ldx.condition.ConditionApplication   : user bean === User(name=张三, age=18)
3.3 小结
上面的例子通过使用@Conditional和Condition接口,实现了spring bean的条件化注入。
好处:
- 可以实现某些配置的开关功能,如上面的例子,我们可以将UserBean换成开启缓存的配置,当property的值为true时,我们才开启缓存的配置。
- 当有多个同名的bean时,如何抉择的问题。
- 实现自动化的装载。如判断当前classpath中有mysql的驱动类时(说明我们当前的系统需要使用mysql),我们就自动的读取application.yaml中的mysql配置,实现自动装载;当没有驱动时,就不加载。
4. 改进
从上面的使用说明中我们了解到了条件注解的大概使用方法,但是代码中还是有很多硬编码的问题。比如:UserCondition中的property的key包括value都是硬编码,其实我们可以通过再扩展一个注解来实现动态的判断和绑定。
4.1 创建注解
import org.springframework.context.annotation.Conditional;

import java.lang.annotation.*;

/**

 * 自定义条件属性注解

 * <p>

 *   当配置的property name对应的值 与设置的 value值相等时,则注入bean

 * @author ludangxin

 * @date 2021/8/1

 */

@Target({ElementType.TYPE, ElementType.METHOD})

@Retention(RetentionPolicy.RUNTIME)

@Documented

// 指定condition的实现类

@Conditional({UserCondition.class})

public @interface MyConditionOnProperty {

   // 配置信息的key

   String name();

   // 配置信息key对应的值

   String value();

}
4.2 修改UserCondition
package com.ldx.condition;

import org.springframework.context.annotation.Condition;

import org.springframework.context.annotation.ConditionContext;

import org.springframework.core.env.Environment;

import org.springframework.core.type.AnnotatedTypeMetadata;

import java.util.Map;

/**

 * 用户bean条件判断

 * @author ludangxin

 * @date 2021/8/1

 */

public class UserCondition implements Condition {

   @Override

   public boolean matches(ConditionContext conditionContext, AnnotatedTypeMetadata annotatedTypeMetadata) {

      Environment environment = conditionContext.getEnvironment();

      // 获取自定义的注解

      Map<String, Object> annotationAttributes = annotatedTypeMetadata.getAnnotationAttributes("com.ldx.condition.MyConditionOnProperty");

      // 获取在注解中指定的name的property的值 如:user.enable的值

      String property = environment.getProperty(annotationAttributes.get("name").toString());

      // 获取预期的值

      String value = annotationAttributes.get("value").toString();

      return value.equals(property);

   }

}
测试后,结果符合预期。
其实在spring中已经内置了许多常用的条件注解,其中我们刚实现的就在内置的注解中已经实现了,如下。
5. Spring内置条件注解
| 注解 | 说明 |
|---|---|
@ConditionalOnSingleCandidate |
当给定类型的bean存在并且指定为Primary的给定类型存在时,返回true |
@ConditionalOnMissingBean |
当给定的类型、类名、注解、昵称在beanFactory中不存在时返回true.各类型间是or的关系 |
@ConditionalOnBean |
与上面相反,要求bean存在 |
@ConditionalOnMissingClass |
当给定的类名在类路径上不存在时返回true,各类型间是and的关系 |
@ConditionalOnClass |
与上面相反,要求类存在 |
@ConditionalOnCloudPlatform |
当所配置的CloudPlatform为激活时返回true |
@ConditionalOnExpression |
spel表达式执行为true |
@ConditionalOnJava |
运行时的java版本号是否包含给定的版本号.如果包含,返回匹配,否则,返回不匹配 |
@ConditionalOnProperty |
要求配置属性匹配条件 |
@ConditionalOnJndi |
给定的jndi的Location 必须存在一个.否则,返回不匹配 |
@ConditionalOnNotWebApplication |
web环境不存在时 |
@ConditionalOnWebApplication |
web环境存在时 |
@ConditionalOnResource |
要求制定的资源存在 |
SpringBoot自动装配-Condition的更多相关文章
- 一步步从Spring Framework装配掌握SpringBoot自动装配
目录 Spring Framework模式注解 Spring Framework@Enable模块装配 Spring Framework条件装配 SpringBoot 自动装配 本章总结 Spring ...
- Spring Boot之从Spring Framework装配掌握SpringBoot自动装配
Spring Framework模式注解 模式注解是一种用于声明在应用中扮演“组件”角色的注解.如 Spring Framework 中的 @Repository 标注在任何类上 ,用于扮演仓储角色的 ...
- SpringBoot源码学习1——SpringBoot自动装配源码解析+Spring如何处理配置类的
系列文章目录和关于我 一丶什么是SpringBoot自动装配 SpringBoot通过SPI的机制,在我们程序员引入一些starter之后,扫描外部引用 jar 包中的META-INF/spring. ...
- springboot自动装配
Spring Boot自动配置原理 springboot自动装配 springboot配置文件 Spring Boot的出现,得益于“习惯优于配置”的理念,没有繁琐的配置.难以集成的内容(大多数流行第 ...
- SpringBoot启动流程分析(五):SpringBoot自动装配原理实现
SpringBoot系列文章简介 SpringBoot源码阅读辅助篇: Spring IoC容器与应用上下文的设计与实现 SpringBoot启动流程源码分析: SpringBoot启动流程分析(一) ...
- springboot自动装配(3)---条件注解@Conditional
之前有说到springboot自动装配的时候,都是去寻找一个XXXAutoConfiguration的配置类,然而我们的springboot的spring.factories文件中有各种组件的自动装配 ...
- SpringBoot自动装配原理解析
本文包含:SpringBoot的自动配置原理及如何自定义SpringBootStar等 我们知道,在使用SpringBoot的时候,我们只需要如下方式即可直接启动一个Web程序: @SpringBoo ...
- springboot自动装配原理
最近开始学习spring源码,看各种文章的时候看到了springboot自动装配实现原理.用自己的话简单概括下. 首先打开一个基本的springboot项目,点进去@SpringBootApplica ...
- springboot自动装配原理,写一个自己的start
springboot自动装配原理 第一次使用springboot的时候,都感觉很神奇.只要加入一个maven的依赖,写几行配置,就能注入redisTemple,rabbitmqTemple等对象. 这 ...
随机推荐
- 《四大点,搞懂Redis到底快在哪里?》
一.开发语言 二.纯内存访问 三.单线程 四.非阻塞多路I/O复用机制 前言 Redis是一种基于键值对(Key-Value)的NoSQL数据库 ,Redis的Value可以由String,hash, ...
- SVN分支的创建与使用
首先放出右键菜单点击Branch/tag... 所示位置输入想新建分支的路径 然后ok就完成了 之后就是切换分支上传代码了 点击Switch... 在里面就可以切换分支了To path
- Kubernetes Pod中容器的Liveness、Readiness和Startup探针
我最新最全的文章都在南瓜慢说 www.pkslow.com,欢迎大家来喝茶! 1 探针的作用 在Kubernetes的容器生命周期管理中,有三种探针,首先要知道,这探针是属于容器的,而不是Pod: 存 ...
- 全新安装Windows版 Atlassian Confluence 7.3.1 + MySQL 8.0,迁移数据,并设置服务自启
Confluence是一个专业的企业知识管理与协同软件,也可以用于构建企业wiki.使用简单,但它强大的编辑和站点管理特征能够帮助团队成员之间共享信息.文档协作.集体讨论,信息推送. 安装Conflu ...
- xf浅谈_最短路
最短路问题(short-path problem):最短路问题是图论研究中的一个经典算法问题,指在寻找图(由结点和路径组成的)中两结点之间的最短路径.算法具体的形式包括: 1.确定起点的最短路径问题 ...
- [心得笔记]Java多线程中的内存模型
一:现代计算机的高速缓存 在计算机组成原理中讲到,现代计算机为了匹配 计算机存储设备的读写速度 与 处理器运算速度,在CPU和内存设备之间加入了一个名为Cache的高速缓存设备来作为缓冲:将运算需要 ...
- mybatis 批量新增-批量修改-批量删除操作
mapper.xml <!-- 批量新增 --> <insert id="saveBatch" parameterType="java.util.Lis ...
- 每日英语——the rest of my life
<the rest of My life> 词面意思:我的余生 实际意思:我的余生 1. 歌曲:<The Rest of My life> Less Than Jake 歌词 ...
- GitHub 多人协作开发 三种方式(转)
一.Fork 方式 网上介绍比较多的方式(比较大型的开源项目,比如cocos2d-x) 开发者 fork 自己生成一个独立的分支,跟主分支完全独立,pull代码后,项目维护者可根据代码质量决定是否me ...
- LeetCode解题记录(贪心算法)(二)
1. 前言 由于后面还有很多题型要写,贪心算法目前可能就到此为止了,上一篇博客的地址为 LeetCode解题记录(贪心算法)(一) 下面正式开始我们的刷题之旅 2. 贪心 763. 划分字母区间(中等 ...