
LaTeX技巧892: Ubuntu 安装新版本TeXLive并更新
原文地址:http://www.latexstudio.net/archives/9788.html
摘要: 本文比较系统地介绍了在Ubuntu下的TeXLive的安装与配置测试过程,建议使用Ubuntu的重度LaTeX用户可以看看该文章,另外,文章中也解决了乌班图安装TeXLive并更新问题。 TeXLive在CTAN最新版本下载地址
https://www.tug.org/texlive/acquire-iso.html
该页面下有texlive最新版本ISO种子问题下载链接。
https://www.tug.org/texlive/files/texlive2016.iso.torrent
TeXLive在国内下载源很多,现仅以清华大学和阿里云为例。
https://mirrors.tuna.tsinghua.edu.cn/#
找到常用发行版 iso 和应用工具安装包直接下载,点击应用软件,TeXLive2016下载链接如下
https://mirrors.tuna.tsinghua.edu.cn/CTAN/systems/texlive/Images/texlive2016-20160523.iso
阿里云下载链接:
http://mirrors.aliyun.com/CTAN/systems/texlive/Images/
选择对应版本下载即可。 下载可以使用wget下载,也可以在Windows上面将ISO文件复制到系统目录。 下载完成就可以挂载ISO镜像。 CTAN官方网站ISO挂载教程如下。
mount -t iso9660 -o ro,loop,noauto /yourISOFileDictory/texlive.iso /mnt
笔者挂载记录如下:
dell@DELL-Server:~$ sudo mount -o loop texlive2016.iso /mnt/

mount: /home/dell/texlive2016.iso is already mounted

dell@DELL-Server:~$ ls /mnt/

archive      install-tl               LICENSE.CTAN  readme-html.dir    release-texlive.txt  tlpkg

autorun.inf  install-tl-advanced.bat  LICENSE.TL    readme-txt.dir     source               tl-tray-menu.exe

index.html   install-tl-windows.bat   README        README.usergroups  texlive-doc

dell@DELL-Server:~$
安装命令
dell@DELL-Server:~$ cd /mnt/

dell@DELL-Server:/mnt$ sudo ./install-tl --gui
该命令可以在图形化界面下安装。
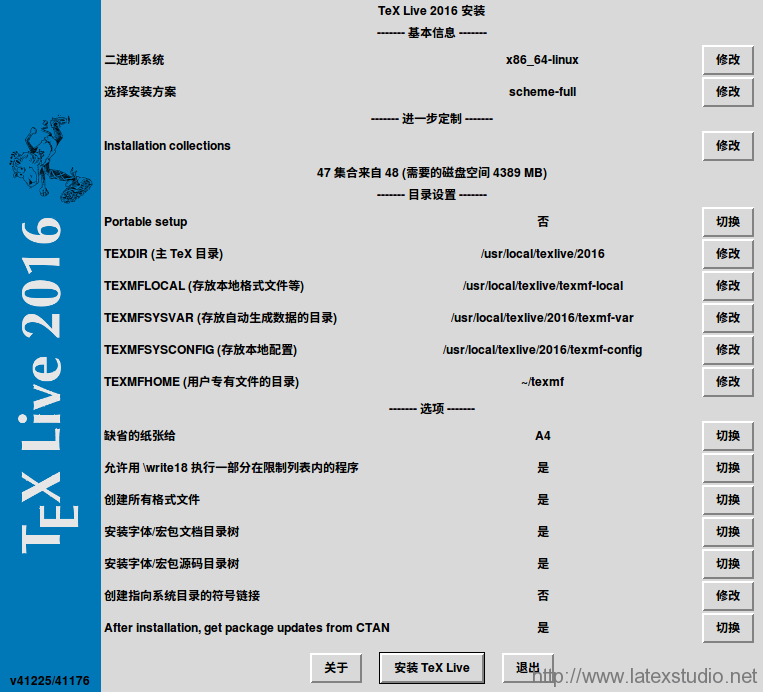
安装过程和完成截图如下。
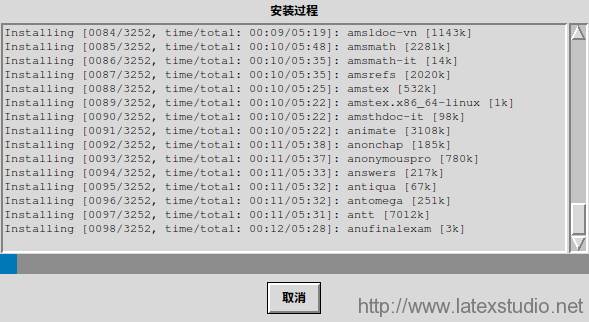
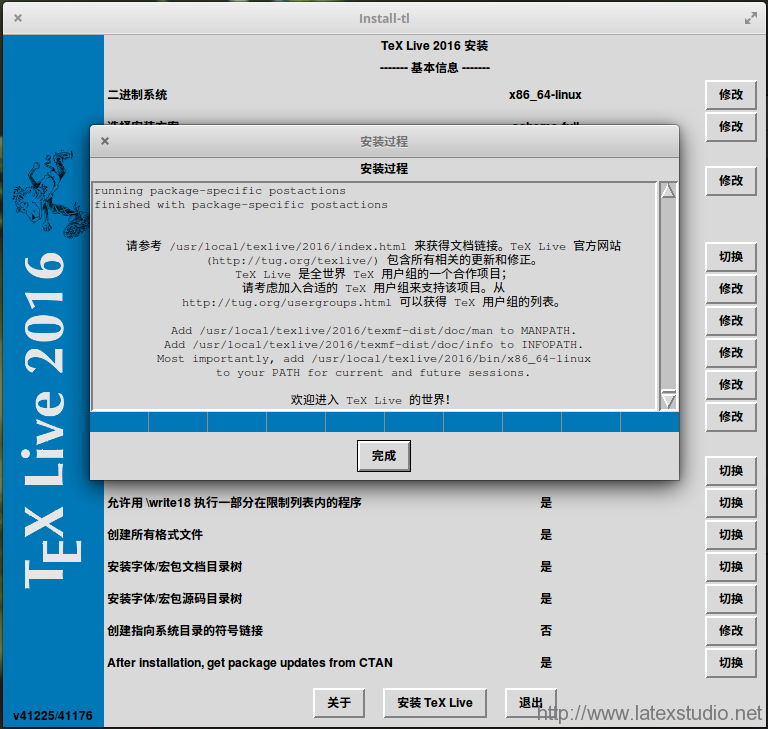
安装界面有很多安装选项,无特殊要求直接点击安装texlive,等待安装过程完成。 完成安装后,卸载镜像。
sudo umount /mnt
也可以将ISO解压后复制到Linux系统。复制文件方法这里不再赘述。 增加环境变量。
# TeX Live 2016

#命令可以直接复制运行,每次运行一条命令

export TeXLiveMANPATH=/urs/local/texlive/2016/texmf-dist/doc/man

export TeXLiveINFOPATH=/usr/local/texlive/2016/texmf-dist/doc/info

#64位系统

export TeXLivePATH=/usr/local/texlive/2016/bin/x86_64-linux
具体安装路径请以安装时选择目录为准。 本机运行结果如下:
dell@DELL-Server:~$ export TeXLiveMANPATH=/urs/local/texlive/2016/texmf-dist/doc/man

dell@DELL-Server:~$ export TeXLiveINFOPATH=/usr/local/texlive/2016/texmf-dist/doc/info

dell@DELL-Server:~$ export TeXLivePATH=/usr/local/texlive/2016/bin/x86_64-linux

dell@DELL-Server:~$ echo $TeXLiveMANPATH

/urs/local/texlive/2016/texmf-dist/doc/man

dell@DELL-Server:~$ echo $TeXLiveINFOPATH

/usr/local/texlive/2016/texmf-dist/doc/info

dell@DELL-Server:~$ echo $TeXLivePATH

/usr/local/texlive/2016/bin/x86_64-linux

dell@DELL-Server:~$
建议安装前将Windows字体复制到Linux,复制字体方法和复制ISO解压后文件方法一样,等待字体安装完成后再安装texlive。 在Linux系统字体目录下创建winfonts文件夹(可选项),前提是已复制字体到Linux主机。
#创建Windows字体文件目录,目录名称可自定义

dell@DELL-Server:~$ sudo mkdir /usr/share/fonts/WindowsFonts

#查看目录

dell@DELL-Server:~$ ls /usr/share/fonts/

cmap  opentype  truetype  type1  WindowsFonts  X11
复制字体到winfonts文件夹。
dell@DELL-Server:~$ sudo cp /home/dell/Fonts/* /usr/share/fonts/WindowsFonts/

#查看字体复制情况

dell@DELL-Server:~$ ls /usr/share/fonts/WindowsFonts/
安装字体命令。
dell@DELL-Server:mkfontscale

dell@DELL-Server:mkfontdir

dell@DELL-Server:sudo fc-cache -fv

dell@DELL-Server:~$ sudo fc-cache -fsv

/usr/share/fonts: caching, new cache contents: 0 fonts, 6 dirs

/usr/share/fonts/WindowsFonts: caching, new cache contents: 1188 fonts, 0 dirs

/usr/share/fonts/X11: caching, new cache contents: 0 fonts, 4 dirs

/usr/share/fonts/X11/Type1: caching, new cache contents: 8 fonts, 0 dirs

/usr/share/fonts/X11/encodings: caching, new cache contents: 0 fonts, 1 dirs

/usr/share/fonts/X11/encodings/large: caching, new cache contents: 0 fonts, 0 dirs

/usr/share/fonts/X11/misc: caching, new cache contents: 59 fonts, 0 dirs

/usr/share/fonts/X11/util: caching, new cache contents: 0 fonts, 0 dirs

/usr/share/fonts/cmap: caching, new cache contents: 0 fonts, 5 dirs

/usr/share/fonts/cmap/adobe-cns1: caching, new cache contents: 0 fonts, 0 dirs

/usr/share/fonts/cmap/adobe-gb1: caching, new cache contents: 0 fonts, 0 dirs

/usr/share/fonts/cmap/adobe-japan1: caching, new cache contents: 0 fonts, 0 dirs

/usr/share/fonts/cmap/adobe-japan2: caching, new cache contents: 0 fonts, 0 dirs

/usr/share/fonts/cmap/adobe-korea1: caching, new cache contents: 0 fonts, 0 dirs

/usr/share/fonts/opentype: caching, new cache contents: 0 fonts, 5 dirs

/usr/share/fonts/opentype/mondulkiri: caching, new cache contents: 8 fonts, 0 dirs

/usr/share/fonts/opentype/noto: caching, new cache contents: 36 fonts, 0 dirs

/usr/share/fonts/opentype/opendyslexic: caching, new cache contents: 9 fonts, 0 dirs

/usr/share/fonts/opentype/stix: caching, new cache contents: 29 fonts, 0 dirs

/usr/share/fonts/opentype/stix-word: caching, new cache contents: 5 fonts, 0 dirs

/usr/share/fonts/truetype: caching, new cache contents: 2 fonts, 38 dirs

/usr/share/fonts/truetype/abyssinica: caching, new cache contents: 1 fonts, 0 dirs

/usr/share/fonts/truetype/ancient-scripts: caching, new cache contents: 1 fonts, 0 dirs

/usr/share/fonts/truetype/arphic: caching, new cache contents: 8 fonts, 0 dirs

/usr/share/fonts/truetype/capture-it-elementary: caching, new cache contents: 2 fonts, 0 dirs

/usr/share/fonts/truetype/croscore: caching, new cache contents: 12 fonts, 0 dirs

/usr/share/fonts/truetype/daniel-elementary: caching, new cache contents: 3 fonts, 0 dirs

/usr/share/fonts/truetype/dejavu: caching, new cache contents: 21 fonts, 0 dirs

/usr/share/fonts/truetype/fonts-guru-extra: caching, new cache contents: 1 fonts, 0 dirs

/usr/share/fonts/truetype/freefont: caching, new cache contents: 12 fonts, 0 dirs

/usr/share/fonts/truetype/hvd-bodedo-elementary: caching, new cache contents: 1 fonts, 0 dirs

/usr/share/fonts/truetype/jenna-sue-elementary: caching, new cache contents: 1 fonts, 0 dirs

/usr/share/fonts/truetype/kacst: caching, new cache contents: 15 fonts, 0 dirs

/usr/share/fonts/truetype/kacst-one: caching, new cache contents: 2 fonts, 0 dirs

/usr/share/fonts/truetype/lao: caching, new cache contents: 1 fonts, 0 dirs

/usr/share/fonts/truetype/lato: caching, new cache contents: 18 fonts, 0 dirs

/usr/share/fonts/truetype/liberation: caching, new cache contents: 16 fonts, 0 dirs

/usr/share/fonts/truetype/limelight-elementary: caching, new cache contents: 1 fonts, 0 dirs

/usr/share/fonts/truetype/lobster-elementary: caching, new cache contents: 1 fonts, 0 dirs

/usr/share/fonts/truetype/lohit-punjabi: caching, new cache contents: 1 fonts, 0 dirs

/usr/share/fonts/truetype/nanum: caching, new cache contents: 8 fonts, 0 dirs

/usr/share/fonts/truetype/noto: caching, new cache contents: 175 fonts, 0 dirs

/usr/share/fonts/truetype/open-sans-elementary: caching, new cache contents: 10 fonts, 0 dirs

/usr/share/fonts/truetype/openoffice: caching, new cache contents: 1 fonts, 0 dirs

/usr/share/fonts/truetype/operating-instructions-elementary: caching, new cache contents: 1 fonts, 0 dirs

/usr/share/fonts/truetype/padauk: caching, new cache contents: 4 fonts, 0 dirs

/usr/share/fonts/truetype/plainblack-elementary: caching, new cache contents: 6 fonts, 0 dirs

/usr/share/fonts/truetype/raleway-elementary: caching, new cache contents: 9 fonts, 0 dirs

/usr/share/fonts/truetype/redacted-elementary: caching, new cache contents: 3 fonts, 0 dirs

/usr/share/fonts/truetype/roboto: caching, new cache contents: 0 fonts, 1 dirs

/usr/share/fonts/truetype/roboto/hinted: caching, new cache contents: 18 fonts, 0 dirs

/usr/share/fonts/truetype/roboto-mono-elementary: caching, new cache contents: 10 fonts, 0 dirs

/usr/share/fonts/truetype/sinhala: caching, new cache contents: 1 fonts, 0 dirs

/usr/share/fonts/truetype/takao-gothic: caching, new cache contents: 3 fonts, 0 dirs

/usr/share/fonts/truetype/takao-mincho: caching, new cache contents: 3 fonts, 0 dirs

/usr/share/fonts/truetype/tibetan-machine: caching, new cache contents: 1 fonts, 0 dirs

/usr/share/fonts/truetype/tlwg: caching, new cache contents: 58 fonts, 0 dirs

/usr/share/fonts/truetype/ttf-khmeros-core: caching, new cache contents: 2 fonts, 0 dirs

/usr/share/fonts/truetype/ubuntu-font-family: caching, new cache contents: 13 fonts, 0 dirs

/usr/share/fonts/truetype/unfonts-core: caching, new cache contents: 12 fonts, 0 dirs

/usr/share/fonts/type1: caching, new cache contents: 0 fonts, 1 dirs

/usr/share/fonts/type1/gsfonts: caching, new cache contents: 35 fonts, 0 dirs

/usr/local/share/fonts: caching, new cache contents: 0 fonts, 0 dirs

Re-scanning /usr/share/fonts: caching, new cache contents: 0 fonts, 6 dirs

Re-scanning /usr/share/fonts/X11: caching, new cache contents: 0 fonts, 4 dirs

Re-scanning /usr/share/fonts/X11/encodings: caching, new cache contents: 0 fonts, 1 dirs

Re-scanning /usr/share/fonts/cmap: caching, new cache contents: 0 fonts, 5 dirs

Re-scanning /usr/share/fonts/opentype: caching, new cache contents: 0 fonts, 5 dirs

Re-scanning /usr/share/fonts/truetype: caching, new cache contents: 2 fonts, 38 dirs

Re-scanning /usr/share/fonts/truetype/roboto: caching, new cache contents: 0 fonts, 1 dirs

Re-scanning /usr/share/fonts/type1: caching, new cache contents: 0 fonts, 1 dirs

/var/cache/fontconfig: cleaning cache directory

fc-cache: succeeded

dell@DELL-Server:~$
Ubuntu网络安装TeXLive比较简单,只需要执行一条命令并等待安装完成。 首先要安装基础依赖软件。
sudo apt-get install libdigest-perl-md5-perl perl-tk

sudo apt install texlive-full
但该方法安装存在一个弊端,即不能更新宏包(包括所有Debian和Ubuntu发行版本)。 当我们执行命令
tlmgr update -all
我们可以使用 时会有报错。报错信息如下:
jiangjuan@OptiPlex-390:~$ tlmgr update --all

(running on Debian, switching to user mode!)

cannot setup TLPDB in /home/jiangjuan/texmf at /usr/bin/tlmgr line 5604.
其他tlmgr命令也无效。所以我们需要其他方法安装TeXLive。下文将加以介绍。 所有宏包均是打包时老版本,部分软件包会在Ubuntu 安装源发布后更新,本方法可以解决安装源太旧问题。 首先,执行命令:
sudo apt install git
安装git客户端,克隆代码到本地。git完成后如下图。 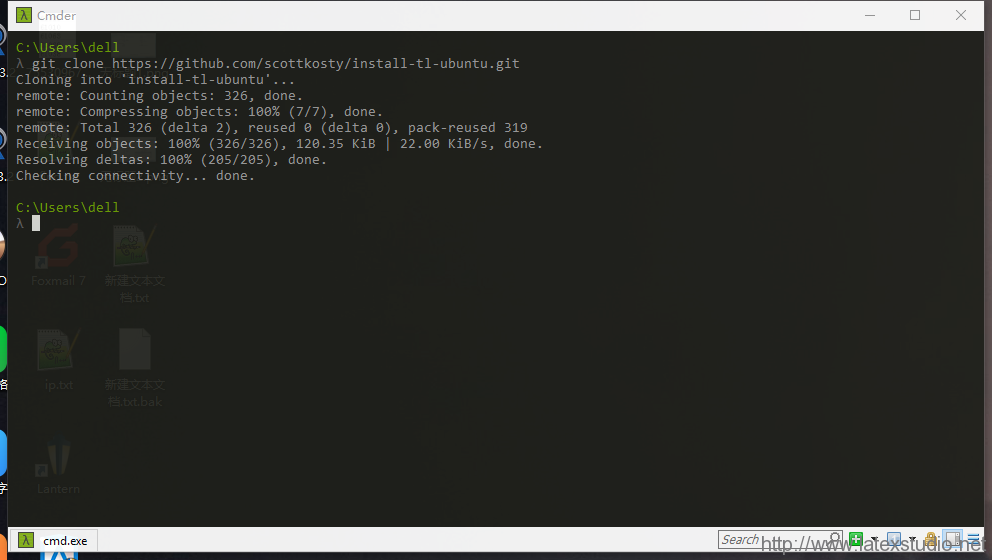 install-tl-ubuntuGitHub地址。 https://github.com/scottkosty/install-tl-ubuntu . 下面是重要环节,git 同步 install-tl-ubuntu代码,并安装。代码如下:
git clone https://github.com/scottkosty/install-tl-ubuntu.git

cd cd install-tl-ubuntu

chmod +x ./install-tl-ubuntu

sudo ./install-tl-ubuntu
等待程序自动选择安装源并自动安装,大功告成。 提示:该方法需要全网络极为稳定,否则可能会出现断线重新安装。 安装完成后,检查安装情况,可以执行命令。
xelatex -version
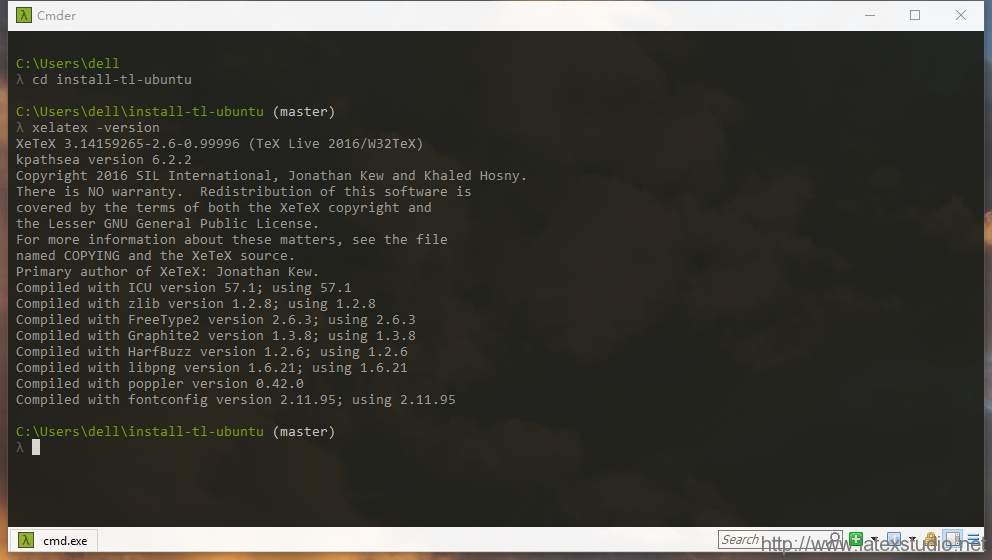 程序安装完成后,开始菜单会增加一个选项--TeXLive Package Manager,通过该软件可以完成宏包更新和管理等操作。 图片是在Windows 环境下面执行结果,可能与Ubuntu执行结果略有差异。 示例代码如下,
\documentclass{book}

\usepackage{amsmath}

\usepackage{ctex}

%\usepackage{ctex}%(PDF)LaTeX编译方式请选择此行,注释上一行代码

\begin{document}

你好,中国。

勾股定律

$$a^2+b^2=c^2$$

Happy TeXing.

\end{document}
将代码保存至/home/dell/文档/tex/Hello目录下,该目录是笔者电脑目录,可根据实际情况选择保存目录。
/home/dell/文档/tex/Hello/hello.tex
编译文件,
#切换到tex源文件目录

cd /home/dell/文档/Hello/

#xelatex命令编译文件,可选其他选项

xelatex hello.tex
等待编译完成。
LaTeX技巧892: Ubuntu 安装新版本TeXLive并更新的更多相关文章
- Ubuntu安装新版本nodejs的5种姿势
引言: 写这篇文章之前,关于ubuntu14.04(Trusty)默认安装的NodeJS版本是0.10.25百思不解(什么鬼,哪一年的NodeJS) 写这篇文章之时,NodeJS的LTS版本号都已经1 ...
- Ubuntu安装CUDA9.2(不更新驱动)
1.先装驱动,以为安装CUDA时安装最新驱动导致CUDA用不了 sudo apt-get install nvidia-396 2.参考这,安装好CUDA 9.2 https://developer. ...
- Linux (Ubuntu)安装svn
1 先查看是否已经安装了svn 如果没有安装svn则: ubuntu@ip----:~$ svn --version The program 'svn' is currently not instal ...
- Latex加速: TexStudio的安装和使用
TexStudio可以加速Latex的编辑和写作,这里简单介绍一下TexStudio的安装,配置和使用.但是有一个重要的前提,TexStudio会使Latex源代码和pdf文件并排显示,比较占用桌面的 ...
- Latex:简介及安装
http://blog.csdn.net/pipisorry/article/details/53998352 LaTex是一个排版工具,功能强大.它是一个"所想即所得"的工具,你 ...
- ubuntu安装以及卸载软件
dpkg安装以及卸载软件 deb文件是linux发行版debian系统的安装包格式,还有像基于debian系统的发型版ubuntu等系统就是使用的deb格式安装包,我们可以使用dpkg命令进行安装管理 ...
- ubuntu安装mysql并使用Navicat连接
今天配置了一下自己的服务器,发现网上很多教程都有点老,而且不是很全.干脆就写一篇Ubuntu安装mysql,并用Navicat连接的全流程 一.安装mysql 1. sudo apt-get inst ...
- Ubuntu安装docker(摘自官网,自用)
在 Ubuntu 上安装 Docker 引擎(按照标红顺序执行命令) 预计阅读时间:11分钟 适用于 Linux 的 Docker 桌面 Docker Desktop 可帮助您在 Mac 和 Wind ...
- Mac OS、Ubuntu 安装及使用 Consul
Consul 概念(摘录): Consul 是 HashiCorp 公司推出的开源工具,用于实现分布式系统的服务发现与配置.与其他分布式服务注册与发现的方案,比如 Airbnb 的 SmartStac ...
随机推荐
- Abp vNext 切换MySql数据库
Abp vNext是Abp的下一代版本,目前还在经一步完善,代码已经全部重写了,好的东西保留了下来,去除了很多笨重的东西,从官宣来看,Abp vNext主要是为了以后微服务架构而诞生的. 从源码来看, ...
- SqlServer2008_r2安装功能选择
勾上数据引擎服务.客户端工具链接.sdk.管理工具.客户连接SDK.最后一个 sql2008安装时,怎么选择服务账户NT Authority\System ,系统内置账号,对本地系统拥有完全控制权限: ...
- c选择排序算法
void selectsort(int *a,int len) { int i,j; int temp; for(i=0;i<len-1;i++) { for(j=i+1;j<len;j+ ...
- flask 实现登录 登出 检查登录状态 的两种方法的总结
这里我是根据两个项目的实际情况做的总结,方法一(来自项目一)的登录用的是用户名(字符串)和密码,前后端不分离,用form表单传递数据:方法二用的是手机号和密码登录,前后端分离,以json格式传递数据, ...
- Python——模块——随机模块
1.引用模块 import random 2.随机整数 random.randint(a,b) 3.随机浮点数 random.uniform(a,b) 4.从列表中随机取元素 random.choic ...
- C# 数组、HashSet等内存耗尽的解决办法
在C#中,如果数据量太大,就会出现 'System.OutOfMemoryException' 异常. 解决办法来自于Stack Overflow和MSDN https://docs.micro ...
- hdu-3416(最短路+网络流)
题意:给你一个有向权图,问你从S到E有几条最短路,每条边直走一次的情况下: 解题思路:每条边直走一次,最大流边权为1,因为要算几条最短路,那么能得到最短路的路径标记下,然后跑最大流 代码: #incl ...
- Django+Vue打造购物网站(八)
购物车.订单管理和远程调试 添加商品到购物车 trade/serializers.py from rest_framework import serializers from goods.models ...
- Codeforces Round #513 总结
首次正式的$Codeforces$比赛啊,虽然滚粗了,然而终于有$rating$了…… #A Phone Numbers 签到题,然而我第一次写挂了(因为把11看成8了……) 只需要判断一下有多少个 ...
- 【AGC015E】Mr.Aoki Incubator DP
题目描述 数轴上有\(n\)个人,每个人的位置是\(x_i\),速度是\(v_i\). 最开始有一些人感染了传染病. 如果某一时刻一个正常人和一个被感染的人处于同一位置,那么这个正常人也会被感染. 问 ...