[UWP 自定义控件]了解模板化控件(5.1):TemplatePart vs. VisualState
1. TemplatePart vs. VisualState
在前面两篇文章中分别使用了TemplatePart及VisualState的方式实现了相同的功能,其中明显VisualState的方式更灵活一些。如果遇到这种情况通常我更倾向使用VisualState。不过在实际应用中这两种实现方式并不是互斥的,很多模板化控件都同时使用这两种方式,
使用VisualState有如下好处:
- 代码和UI分离。
- 可以更灵活地扩展控件。
- 可以使用Blend轻松实现动画。
并不是说VisualState好处这么多就一定要用VisualState实现所有功能,下面这些情况我会选择使用TemplatePart:
- 需要快速实现一个控件。
- 某个行为时固定的,不需要扩展。
- 需要在代码中操作UI,譬如Slider或ComboBox。
- 为了强调某个部件是控件必须的。
- 为了隐藏实现细节,限制派生类或ControlTemplate修改重要的逻辑。
其中,使用TemplatePart产生的扩展性问题是我谨慎使用这种方案的最大因素。
2. TemplatePart vs. TemplateBinding
除了VisualState,TemplatePart的功能也常常会被TemplateBinding代替。前面的例子展示了使用VisualState在UI上的优势,这次用另一个控件DateTimeSelector来讨论使用TemplatePart在扩展性上的其它问题。
2.1 使用TemplatePart
DateTimeSelector组合了CalendarDatePicker和TimePicker,用于选择日期和时间(SelectedDateTime)。它的XAML如下:
<Style TargetType="local:DateTimeSelector">

    <Setter Property="Template">

        <Setter.Value>

            <ControlTemplate TargetType="local:DateTimeSelector">

                <StackPanel Background="{TemplateBinding Background}"

                            BorderBrush="{TemplateBinding BorderBrush}"

                            BorderThickness="{TemplateBinding BorderThickness}">

                    <CalendarDatePicker x:Name="DateElement"

                                        Margin="0,0,0,5" />

                    <TimePicker x:Name="TimeElement" />

                </StackPanel>

            </ControlTemplate>

        </Setter.Value>

    </Setter>

</Style>
代码如下:
[TemplatePart(Name = DateElementPartName, Type = typeof(CalendarDatePicker))]

[TemplatePart(Name = TimeElementPartName, Type = typeof(TimePicker))]

public class DateTimeSelector : Control

{

    public const string DateElementPartName = "DateElement";

    public const string TimeElementPartName = "TimeElement";

    /// <summary>

    /// 标识 SelectedDateTime 依赖属性。

    /// </summary>

    public static readonly DependencyProperty SelectedDateTimeProperty =

        DependencyProperty.Register("SelectedDateTime", typeof(DateTime), typeof(DateTimeSelector), new PropertyMetadata(DateTime.Now, OnSelectedDateTimeChanged));

    private static void OnSelectedDateTimeChanged(DependencyObject obj, DependencyPropertyChangedEventArgs args)

    {

        DateTimeSelector target = obj as DateTimeSelector;

        DateTime oldValue = (DateTime)args.OldValue;

        DateTime newValue = (DateTime)args.NewValue;

        if (oldValue != newValue)

            target.OnSelectedDateTimeChanged(oldValue, newValue);

    }

    public DateTimeSelector()

    {

        this.DefaultStyleKey = typeof(DateTimeSelector);

    }

    /// <summary>

    /// 获取或设置SelectedDateTime的值

    /// </summary>

    public DateTime SelectedDateTime

    {

        get { return (DateTime)GetValue(SelectedDateTimeProperty); }

        set { SetValue(SelectedDateTimeProperty, value); }

    }

    private CalendarDatePicker _dateElement;

    private TimePicker _timeElement;

    private bool _isUpdatingDateTime;

    protected override void OnApplyTemplate()

    {

        base.OnApplyTemplate();

        if (_dateElement != null)

            _dateElement.DateChanged -= OnDateElementDateChanged;

        _dateElement = GetTemplateChild(DateElementPartName) as CalendarDatePicker;

        if (_dateElement != null)

            _dateElement.DateChanged += OnDateElementDateChanged;

        if (_timeElement != null)

            _timeElement.TimeChanged -= OnTimeElementTimeChanged;

        _timeElement = GetTemplateChild(TimeElementPartName) as TimePicker;

        if (_timeElement != null)

            _timeElement.TimeChanged += OnTimeElementTimeChanged;

        UpdateElement();

    }

    protected virtual void OnSelectedDateTimeChanged(DateTime oldValue, DateTime newValue)

    {

        UpdateElement();

    }

    private void OnDateElementDateChanged(CalendarDatePicker sender, CalendarDatePickerDateChangedEventArgs args)

    {

        UpdateSelectDateTime();

    }

    private void OnTimeElementTimeChanged(object sender, TimePickerValueChangedEventArgs e)

    {

        UpdateSelectDateTime();

    }

    private void UpdateElement()

    {

        _isUpdatingDateTime = true;

        try

        {

            if (_dateElement != null)

                _dateElement.Date = SelectedDateTime.Date;

            if (_timeElement != null)

                _timeElement.Time = SelectedDateTime.TimeOfDay;

        }

        finally

        {

            _isUpdatingDateTime = false;

        }

    }

    private void UpdateSelectDateTime()

    {

        if (_isUpdatingDateTime)

            return;

        DateTime dateTime = DateTime.Now;

        if (_dateElement != null && _dateElement.Date.HasValue)

            dateTime = _dateElement.Date.Value.Date;

        if (_timeElement != null)

            dateTime = dateTime.Add(_timeElement.Time);

        SelectedDateTime = dateTime;

    }

}
可以看出,DateTimeSelector通过监视CalendarDatePicker的DateChanged和TimePicker的TimeChanged来改变SelectedDateTime的值。
DateTimeSelector的代码很简单,控件也工作得很好,但如果某天需要将CalendarDatePicker 替换为DatePicker或某个第三方的日期选择控件,DateTimeSelector就无能为力了,既不能通过修改ControlTemplate,也不能通过继承来达到目的。
2.2. 使用TemplateBinding
通常在构建这类控件时应先考虑它的数据和行为,而不关心它的UI。DateTimeSelector最核心的功能是通过选择Date和Time得出组合起来的DateTime,那么就可以先写出如下的类:
public class DateTimeSelector2 : Control

{

    /// <summary>

    /// 标识 Date 依赖属性。

    /// </summary>

    public static readonly DependencyProperty DateProperty =

        DependencyProperty.Register("Date", typeof(DateTime), typeof(DateTimeSelector2), new PropertyMetadata(DateTime.Now, OnDateChanged));

    private static void OnDateChanged(DependencyObject obj, DependencyPropertyChangedEventArgs args)

    {

        DateTimeSelector2 target = obj as DateTimeSelector2;

        DateTime oldValue = (DateTime)args.OldValue;

        DateTime newValue = (DateTime)args.NewValue;

        if (oldValue != newValue)

            target.OnDateChanged(oldValue, newValue);

    }

    /// <summary>

    /// 标识 Time 依赖属性。

    /// </summary>

    public static readonly DependencyProperty TimeProperty =

        DependencyProperty.Register("Time", typeof(TimeSpan), typeof(DateTimeSelector2), new PropertyMetadata(TimeSpan.Zero, OnTimeChanged));

    private static void OnTimeChanged(DependencyObject obj, DependencyPropertyChangedEventArgs args)

    {

        DateTimeSelector2 target = obj as DateTimeSelector2;

        TimeSpan oldValue = (TimeSpan)args.OldValue;

        TimeSpan newValue = (TimeSpan)args.NewValue;

        if (oldValue != newValue)

            target.OnTimeChanged(oldValue, newValue);

    }

    /// <summary>

    /// 标识 DateTime 依赖属性。

    /// </summary>

    public static readonly DependencyProperty DateTimeProperty =

        DependencyProperty.Register("DateTime", typeof(DateTime), typeof(DateTimeSelector2), new PropertyMetadata(DateTime.Now, OnDateTimeChanged));

    private static void OnDateTimeChanged(DependencyObject obj, DependencyPropertyChangedEventArgs args)

    {

        DateTimeSelector2 target = obj as DateTimeSelector2;

        DateTime oldValue = (DateTime)args.OldValue;

        DateTime newValue = (DateTime)args.NewValue;

        if (oldValue != newValue)

            target.OnDateTimeChanged(oldValue, newValue);

    }

    public DateTimeSelector2()

    {

        this.DefaultStyleKey = typeof(DateTimeSelector2);

    }

    /// <summary>

    /// 获取或设置Date的值

    /// </summary>

    public DateTime Date

    {

        get { return (DateTime)GetValue(DateProperty); }

        set { SetValue(DateProperty, value); }

    }

    /// <summary>

    /// 获取或设置Time的值

    /// </summary>

    public TimeSpan Time

    {

        get { return (TimeSpan)GetValue(TimeProperty); }

        set { SetValue(TimeProperty, value); }

    }

    /// <summary>

    /// 获取或设置DateTime的值

    /// </summary>

    public DateTime DateTime

    {

        get { return (DateTime)GetValue(DateTimeProperty); }

        set { SetValue(DateTimeProperty, value); }

    }

    private bool _isUpdatingDateTime;

    protected virtual void OnDateChanged(DateTime oldValue, DateTime newValue)

    {

        UpdateDateTime();

    }

    protected virtual void OnTimeChanged(TimeSpan oldValue, TimeSpan newValue)

    {

        UpdateDateTime();

    }

    protected virtual void OnDateTimeChanged(DateTime oldValue, DateTime newValue)

    {

        _isUpdatingDateTime = true;

        try

        {

                Date = newValue.Date;

                Time = newValue.TimeOfDay;

        }

        finally

        {

            _isUpdatingDateTime = false;

        }

    }

    private void UpdateDateTime()

    {

        if (_isUpdatingDateTime)

            return;

            DateTime = Date.Date.Add(Time);

    }

}
控件的代码并不清楚ControlTemplate中包含什么控件,它只关心自己的数据。
XAML中通过绑定使用这些数据。
<Style TargetType="local:DateTimeSelector2">

    <Setter Property="Template">

        <Setter.Value>

            <ControlTemplate TargetType="local:DateTimeSelector2">

                <StackPanel Background="{TemplateBinding Background}"

                            BorderBrush="{TemplateBinding BorderBrush}"

                            BorderThickness="{TemplateBinding BorderThickness}">

                    <CalendarDatePicker Margin="0,0,0,5"

                                        Date="{Binding Date,RelativeSource={RelativeSource Mode=TemplatedParent},Mode=TwoWay,Converter={StaticResource DateTimeOffsetConverter}}" />

                    <TimePicker Time="{Binding Time,RelativeSource={RelativeSource Mode=TemplatedParent},Mode=TwoWay}" />

                </StackPanel>

            </ControlTemplate>

        </Setter.Value>

    </Setter>

</Style>

<Style x:Key="DateTimeSelector2CustomStyle"

       TargetType="local:DateTimeSelector2">

    <Setter Property="Template">

        <Setter.Value>

            <ControlTemplate TargetType="local:DateTimeSelector2">

                <StackPanel Background="{TemplateBinding Background}"

                            BorderBrush="{TemplateBinding BorderBrush}"

                            BorderThickness="{TemplateBinding BorderThickness}">

                    <DatePicker Margin="0,0,0,5"

                                Date="{Binding Date,RelativeSource={RelativeSource Mode=TemplatedParent},Mode=TwoWay,Converter={StaticResource DateTimeOffsetConverter}}" />

                    <TimePicker Time="{Binding Time,RelativeSource={RelativeSource Mode=TemplatedParent},Mode=TwoWay}" />

                </StackPanel>

            </ControlTemplate>

        </Setter.Value>

    </Setter>

</Style>
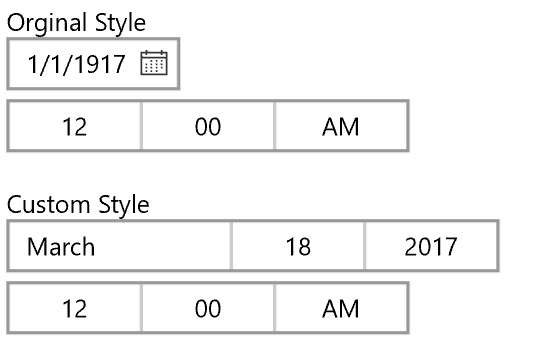
这里给出了两个Style,分别使用了CalendarDatePicker 和DatePicker ,通过TwoWay Binding访问DateTimeSelector2中的Date属性。如果你的TemplatedControl需要有良好的扩展能力,可以尝试使用这种方式。
[UWP 自定义控件]了解模板化控件(5.1):TemplatePart vs. VisualState的更多相关文章
- [UWP 自定义控件]了解模板化控件(4):TemplatePart
1. TemplatePart TemplatePart(部件)是指ControlTemplate中的命名元素.控件逻辑预期这些部分存在于ControlTemplate中,并且使用protected ...
- UWP 自定义控件:了解模板化控件 系列文章
UWP自定义控件的入门文章 [UWP 自定义控件]了解模板化控件(1):基础知识 [UWP 自定义控件]了解模板化控件(2):模仿ContentControl [UWP 自定义控件]了解模板化控件(2 ...
- [UWP 自定义控件]了解模板化控件(10):原则与技巧
1. 原则 推荐以符合以下原则的方式编写模板化控件: 选择合适的父类:选择合适的父类可以节省大量的工作,从UWP自带的控件中选择父类是最安全的做法,通常的选择是Control.ContentContr ...
- [UWP 自定义控件]了解模板化控件(8):ItemsControl
1. 模仿ItemsControl 顾名思义,ItemsControl是展示一组数据的控件,它是UWP UI系统中最重要的控件之一,和展示单一数据的ContentControl构成了UWP UI的绝大 ...
- [UWP 自定义控件]了解模板化控件(1):基础知识
1.概述 UWP允许开发者通过两种方式创建自定义的控件:UserControl和TemplatedControl(模板化控件).这个主题主要讲述如何创建和理解模板化控件,目标是能理解模板化控件常见的知 ...
- [UWP 自定义控件]了解模板化控件(2):模仿ContentControl
ContentControl是最简单的TemplatedControl,而且它在UWP出场频率很高.ContentControl和Panel是VisualTree的基础,可以说几乎所有VisualTr ...
- [UWP 自定义控件]了解模板化控件(3):实现HeaderedContentControl
1. 概述 来看看这段XMAL: <StackPanel Width="300"> <TextBox Header="TextBox" /&g ...
- [UWP 自定义控件]了解模板化控件(5):VisualState
1. 功能需求 使用TemplatePart实现上篇文章的两个需求(Header为空时隐藏HeaderContentPresenter,鼠标没有放在控件上时HeaderContentPresent半透 ...
- [UWP 自定义控件]了解模板化控件(5.2):UserControl vs. TemplatedControl
1. UserControl vs. TemplatedControl 在UWP中自定义控件常常会遇到这个问题:使用UserControl还是TemplatedControl来自定义控件. 1.1 使 ...
随机推荐
- late_initcall和module_init的区别
在init.h中有如下定义: 详情参照:linux 设备驱动加载的先后顺序 #define pure_initcall(fn) __define_initcall("0",fn,1 ...
- java.lang.RuntimeException: org.apache.ibatis.binding.BindingException: Invalid bound statement (not found): com.demoDao.getXXX;
java.lang.RuntimeException: org.apache.ibatis.binding.BindingException: Invalid bound statement (not ...
- 【HDU4507】恨7不成妻
Description 单身! 依然单身! 吉哥依然单身! DS级码农吉哥依然单身! 所以,他生平最恨情人节,不管是214还是77,他都讨厌! 吉哥观察了214和77这两个数,发现: 2+1+4=7 ...
- JEECG 开源平台全视频和文档
版权声明:本文为博主原创文章,未经博主同意不得转载. https://blog.csdn.net/zhangdaiscott/article/details/26488439 jeecg v3.0入门 ...
- 洛谷P1621-集合
Problem 洛谷P1621-集合 Accept:496 Submit: 1.4k Time Limit: 1000 mSec Memory Limit : 128MB Problem De ...
- php如何控制用户对图片的访问 PHP禁止图片盗链
本文摘自网络仅供学习只用 本人根据教程总结了一下https://www.imooc.com/video/13412 主要是利用apache的htacess进行控制,,拿什么判断是不是通过本站点访问的呢 ...
- Hue添加Spark notebook
参考自https://blogs.msdn.microsoft.com/pliu/2016/06/18/run-hue-spark-notebook-on-cloudera/ 说明 使用Clouder ...
- Qt 编程指南 4 按钮
1按钮类的控件 逐个解释一下各个用途:(1)按压按钮 QPushButton最基本的按钮,点击该按钮通常是通知程序进行一个操作,比如弹个窗.下一步.保存.退出等等,这是经常用到的,操作系统里的对话框里 ...
- 2017-2018-2 20155314《网络对抗技术》Exp8 Web基础
2017-2018-2 20155314<网络对抗技术>Exp8 Web基础 目录 实验内容 实验环境 基础问题回答 预备知识 实验步骤 1 macOS下Apache的配置 2 macOS ...
- MongoDB数据库中查询数据(下)
MongoDB数据库中查询数据(下) 在find中,options参数值为一个对象,用来设置查询数据时使用的选项,下面我们来对该参数值对象中可以使用的属性进行介绍: 1. fields; 该属性值为一 ...