mpvue+小程序云开发,纯前端实现婚礼邀请函
请勿使用本文章及源码作为商业用途!
前言
当初做这个小程序是为了婚礼前的需要,结婚之后,希望这个小程序能够留存下来,特地花了一些空闲时间将小程序转化成为“相册类小程序”
体验码

准备工作
注意:使用mpvue前,首先你得先熟悉vue框架的基本使用
项目结构介绍
注意:接下来展示的代码,有几个对比,分别是本人优化前和优化后的代码对比,感兴趣的可以着重看一下优化后的成熟写法。


- common目录: 放一些公共资源,如js,css,json
- components目录:组件相关的.vue文件都放在这里
- pages目录:所有页面都放在这个目录
- utils目录:使用mpvue时自动生成,可忽略
- app.json文件:
{
  "pages": [
    "pages/index/main",
    "pages/photo/main",
    "pages/map/main",
    "pages/greet/main",
    "pages/message/main"
  ],
  "window": {
    "backgroundTextStyle": "light",
    "navigationBarBackgroundColor": "#fff",
    "navigationBarTitleText": "WeChat",
    "navigationBarTextStyle": "black"
  },
  "tabBar": {
    "color": "#ccc",
    "selectedColor": "#ff4c91",
    "borderStyle": "white",
    "backgroundColor": "#ffffff",
    "list": [
      {
          "pagePath": "pages/index/main",
          "iconPath": "static/images/1-1.png",
          "selectedIconPath": "static/images/1-2.png",
          "text": "邀请函"
      },
      {
          "pagePath": "pages/photo/main",
          "iconPath": "static/images/2-1.png",
          "selectedIconPath": "static/images/2-2.png",
          "text": "甜蜜相册"
      },
      {
          "pagePath": "pages/map/main",
          "iconPath": "static/images/3-1.png",
          "selectedIconPath": "static/images/3-2.png",
          "text": "酒店导航"
      },
      {
          "pagePath": "pages/greet/main",
          "iconPath": "static/images/4-1.png",
          "selectedIconPath": "static/images/4-2.png",
          "text": "好友祝福"
      },
      {
          "pagePath": "pages/message/main",
          "iconPath": "static/images/5-1.png",
          "selectedIconPath": "static/images/5-2.png",
          "text": "留言评论"
      }
    ]
  },
  "requiredBackgroundModes": ["audio"]
}
- App.vue文件 (本人主要是为了增加项目更新后的提醒),所以在这个文件加了些相关内容,内容如下:
<script>
export default {
  onLaunch () {
    // 检测小程序是否有新版本更新
    if (wx.canIUse('getUpdateManager')) {
      const updateManager = wx.getUpdateManager()
      updateManager.onCheckForUpdate(function (res) {
        // 请求完新版本信息的回调
        if (res.hasUpdate) {
          updateManager.onUpdateReady(function () {
            wx.showModal({
              title: '更新提示',
              content: '新版本已经准备好,是否重启应用?',
              success: function (res) {
                if (res.confirm) {
                  // 新的版本已经下载好,调用 applyUpdate 应用新版本并重启
                  updateManager.applyUpdate()
                }
              }
            })
          })
          // 小程序有新版本,会主动触发下载操作(无需开发者触发)
          wx.getUpdateManager().onUpdateFailed(function () {
            // 当新版本下载失败,会进行回调
            wx.showModal({
              title: '提示',
              content: '检查到有新版本,下载失败,请检查网络设置',
              showCancel: false
            })
          })
        }
      })
    } else { // 版本过低则无法使用该方法
      wx.showModal({
        title: '提示',
        confirmColor: '#5BB53C',
        content: '当前微信版本过低,无法使用该功能,请升级到最新微信版本后重试。'
      })
    }
  }
}
</script>

<style lang="stylus">
page
    height 100%
image
    display block
</style>
- main.js文件:
import Vue from 'vue'
import App from './App'

Vue.config.productionTip = false
App.mpType = 'app'

wx.cloud.init({
  env: '云开发环境ID'
})

const app = new Vue(App)
app.$mount()
- functions目录:主要放一些云函数,这里不清楚云函数的文章后面会提及
- images目录:主要放一些静态资源图片
页面介绍
首页——邀请函
首页着重和大家讲解下背景音乐的实现方法
const audioCtx = wx.createInnerAudioContext()
wx.createInnerAudioContext 接口获取实例
接着,通过实例的相关方法来实现音乐的播放与暂停功能
具体代码如下:
<script>
import IndexSwiper from 'components/indexSwiper'
import tools from 'common/js/h_tools'
const audioCtx = wx.createInnerAudioContext()
export default {
  name: 'Index',
  components: {
    IndexSwiper
  },
  data () {
    return {
      isPlay: true,
      list: []
    }
  },
  onShow () {
    const that = this
    that.isPlay = true
    that.getMusicUrl()
  },

  methods: {
    audioPlay () {
      const that = this
      if (that.isPlay) {
        audioCtx.pause()
        that.isPlay = false
        tools.showToast('您已暂停音乐播放~')
      } else {
        audioCtx.play()
        that.isPlay = true
        tools.showToast('背景音乐已开启~')
      }
    },

    getList () {
      const that = this
      const db = wx.cloud.database()
      const banner = db.collection('banner')
      banner.get().then(res => {
        that.list = res.data[0].bannerList
      })
    },

    getMusicUrl () {
      const that = this
      const db = wx.cloud.database()
      const music = db.collection('music')
      music.get().then(res => {
        let musicUrl = res.data[0].musicUrl
        audioCtx.src = musicUrl
        audioCtx.loop = true
        audioCtx.play()
        that.getList()
      })
    }
  },

  onShareAppMessage: function (res) {
    return {
      path: '/pages/index/main'
    }
  }
}
</script>
以上代码中使用到了云开发相关功能,文章后面会介绍,请大家稍安勿躁
相册页——就一个轮播图,这里就不过多介绍
地图页——这里着重讲一下地图标签map
map标签 关于map组件的使用文档
这里讲一下标记点markers:
data () {
    return {
      // qqSdk: '',
      markers: [{
        iconPath: '../../static/images/nav.png',
        id: 0,
        latitude: 30.08059,
        longitude: 115.93027,
        width: 50,
        height: 50
      }]
    }
  }
<template>
    <div class="map">
        <image mode="aspectFit" class="head-img" src="../../static/images/t1.png"/>
        <map class="content" id="map" longitude="115.93027" latitude="30.08059" :markers="markers" scale="18" @tap="toNav">
        </map>
        <div class="call">
            <div class="left" @tap="linkHe">
                <image src="../../static/images/he.png"/>
                <span>呼叫新郎</span>
            </div>
            <div class="right" @tap="linkShe">
                <image src="../../static/images/she.png"/>
                <span>呼叫新娘</span>
            </div>
        </div>
        <image class="footer" src="../../static/images/grren-flower-line.png"/>
    </div>
</template>
祝福页——也是云开发相关内容,后面会介绍
留言页——也是云开发相关内容,后面会介绍
云开发介绍
project.config.json文件:
"cloudfunctionRoot": "static/functions/"
进行云开发首先我们需要找到上面这个文件,在上面这个json文件中加上上面这行代码
cloudfunctionRoot 用于指定存放云函数的目录
app.json文件:
"window": {
    "backgroundTextStyle": "light",
    "navigationBarBackgroundColor": "#fff",
    "navigationBarTitleText": "WeChat",
    "navigationBarTextStyle": "black"
},
"cloud": true
增加字段 "cloud": true实现云开发能力的兼容性
开通云开发
在开发者工具工具栏左侧,点击 “云开发” 按钮即可开通云开发
云开发控制台

数据库
云开发提供了一个 JSON 数据库
存储
云开发提供了一块存储空间,提供了上传文件到云端、带权限管理的云端下载能力,开发者可以在小程序端和云函数端通过 API 使用云存储功能。
云函数
云函数是一段运行在云端的代码,无需管理服务器,在开发工具内编写、一键上传部署即可运行后端代码。
使用云开发
云能力初始化
在小程序端开始使用云能力前,需先调用 wx.cloud.init 方法完成云能力初始化
import Vue from 'vue'
import App from './App'

Vue.config.productionTip = false
App.mpType = 'app'

wx.cloud.init({
  env: '云开发环境ID'
})

const app = new Vue(App)
app.$mount()
数据库的使用
在开始使用数据库 API 进行增删改查操作之前,需要先获取数据库的引用。以下调用获取默认环境的数据库的引用:
const db = wx.cloud.database()
要操作一个集合,需先获取它的引用:
const todos = db.collection('todos')
操作数据库的相关示例
例:首页获取背景音乐资源
getMusicUrl () {
      const that = this
      const db = wx.cloud.database()
      const music = db.collection('music')
      music.get().then(res => {
        let musicUrl = res.data[0].musicUrl
        audioCtx.src = musicUrl
        audioCtx.loop = true
        audioCtx.play()
        that.getList()
      })
}
例:首页获取轮播图数组
getList () {
      const that = this
      const db = wx.cloud.database()
      const banner = db.collection('banner')
      banner.get().then(res => {
        that.list = res.data[0].bannerList
      })
}
例:祝福页,用户送上祝福存储用户
<script>
import tools from 'common/js/h_tools'
export default {
  name: 'Greet',
  data () {
    return {
      userList: [],
      openId: '',
      userInfo: ''
    }
  },
  onShow () {
    const that = this
    that.getUserList()
  },
  methods: {
    scroll (e) {
      console.log(e)
    },

    sendGreet (e) {
      const that = this
      if (e.target.errMsg === 'getUserInfo:ok') {
        wx.getUserInfo({
          success: function (res) {
            that.userInfo = res.userInfo
            that.getOpenId()
          }
        })
      }
    },

    addUser () {
      const that = this
      const db = wx.cloud.database()
      const user = db.collection('user')
      user.add({
        data: {
          user: that.userInfo
        }
      }).then(res => {
        that.getUserList()
      })
    },

    getOpenId () {
      const that = this
      wx.cloud.callFunction({
        name: 'user',
        data: {}
      }).then(res => {
        that.openId = res.result.openid
        that.getIsExist()
      })
    },

    getIsExist () {
      const that = this
      const db = wx.cloud.database()
      const user = db.collection('user')
      user.where({
        _openid: that.openId
      }).get().then(res => {
        if (res.data.length === 0) {
          that.addUser()
        } else {
          tools.showToast('您已经送过祝福了~')
        }
      })
    },

    getUserList () {
      const that = this
      wx.cloud.callFunction({
        name: 'userList',
        data: {}
      }).then(res => {
        that.userList = res.result.data.reverse()
      })
    }
  }
}
</script>
获取送祝福的好友列表
getUserList () {
      const that = this
      wx.cloud.callFunction({
        name: 'userList',
        data: {}
      }).then(res => {
        that.userList = res.result.data.reverse()
      })
}
这里用到了云函数,之所以用云函数是因为小程序端在获取集合数据时服务器一次默认并且最多返回 20 条记录,云函数端这个数字则是 100。
云函数的使用方法
上面我们讲过在project.config.json文件中配置云函数存放位置
下面是云函数messageList的index.js文件:
不成熟写法:
const cloud = require('wx-server-sdk')
cloud.init()
const db = cloud.database()
const MAX_LIMIT = 100
exports.main = async (event, context) => {
  // 先取出集合记录总数
  const countResult = await db.collection('message').count()
  const total = countResult.total
  // 计算需分几次取
  const batchTimes = Math.ceil(total / 100)
  // 承载所有读操作的 promise 的数组
  const tasks = []
  for (let i = 0; i < batchTimes; i++) {
    const promise = db.collection('message').skip(i * MAX_LIMIT).limit(MAX_LIMIT).get()
    tasks.push(promise)
  }
  // 等待所有
  return (await Promise.all(tasks)).reduce((acc, cur) => ({
    data: acc.data.concat(cur.data),
    errMsg: acc.errMsg
  }))
}
- 成熟写法(分页查询):
const cloud = require('wx-server-sdk')
cloud.init()
const db = cloud.database()
exports.main = async (event, context) => {
  const wxContext = cloud.getWXContext()
  const dbName = 'message'
  const filter = event.filter ? event.filter : null
  const pageNum = event.pageNum ? event.pageNum : 1
  const pageSize = event.pageSize ? event.pageSize : 10
  const countResult = await db.collection(dbName).where(filter).count()
  const total = countResult.total
  const totalPage = Math.ceil(total / pageSize)
  let hasMore
  if (pageNum >= totalPage) {
    hasMore = false
  } else {
    hasMore = true
  }
  return db.collection(dbName).orderBy('time', 'desc').where(filter).skip((pageNum - 1) * pageSize).limit(pageSize).get().then(res => {
    res.hasMore = hasMore
    res.total = total
    res.openId = wxContext.OPENID
    return res
  })
}

使用云函数前,在开发者工具上,找到messageList目录,右键如图:

点击上传并部署:云端安装依赖(不上传node_modules)
得到如图的提示:

安装完点击完成就能使用当前云函数了,使用方法即:
getUserList () {
      const that = this
      wx.cloud.callFunction({
        name: 'userList',
        data: {}
      }).then(res => {
        that.userList = res.result.data.reverse()
      })
}
数组之所以要倒序是因为希望新祝福的的用户在最前面显示
用户送上祝福的时候存储用户
这里我们用到了云函数获取用户信息,
当小程序端调用云函数时,云函数的传入参数中会被注入小程序端用户的 openid,开发者无需校验 openid 的正确性,因为微信已经完成了这部分鉴权,开发者可以直接使用该 openid
- 不成熟写法:
下面是云函数user的index.js文件:
// 云函数入口文件
const cloud = require('wx-server-sdk')

cloud.init()

// 云函数入口函数
exports.main = async (event, context) => {
  const wxContext = cloud.getWXContext()

  return {
    event,
    openid: wxContext.OPENID,
    appid: wxContext.APPID,
    unionid: wxContext.UNIONID
  }
}
主要是为了获取当前操作用户的openid,获取当前用户的openid方法:
getOpenId () {
      const that = this
      wx.cloud.callFunction({
        name: 'user',
        data: {}
      }).then(res => {
        that.openId = res.result.openid
        that.getIsExist()
      })
}
接着判断当前用户是否已经存在于数据库中,即getIsExist()方法:
getIsExist () {
      const that = this
      const db = wx.cloud.database()
      const user = db.collection('user')
      user.where({
        _openid: that.openId
      }).get().then(res => {
        if (res.data.length === 0) {
          that.addUser()
        } else {
          tools.showToast('您已经送过祝福了~')
        }
      })
}
如果得到的数组长度为零则添加改用户到数据库,否则则提醒当前用户已经送过祝福
接下来介绍存储用户信息的方法,即addUser():
addUser () {
      const that = this
      const db = wx.cloud.database()
      const user = db.collection('user')
      user.add({
        data: {
          user: that.userInfo
        }
      }).then(res => {
        that.getUserList()
      })
}
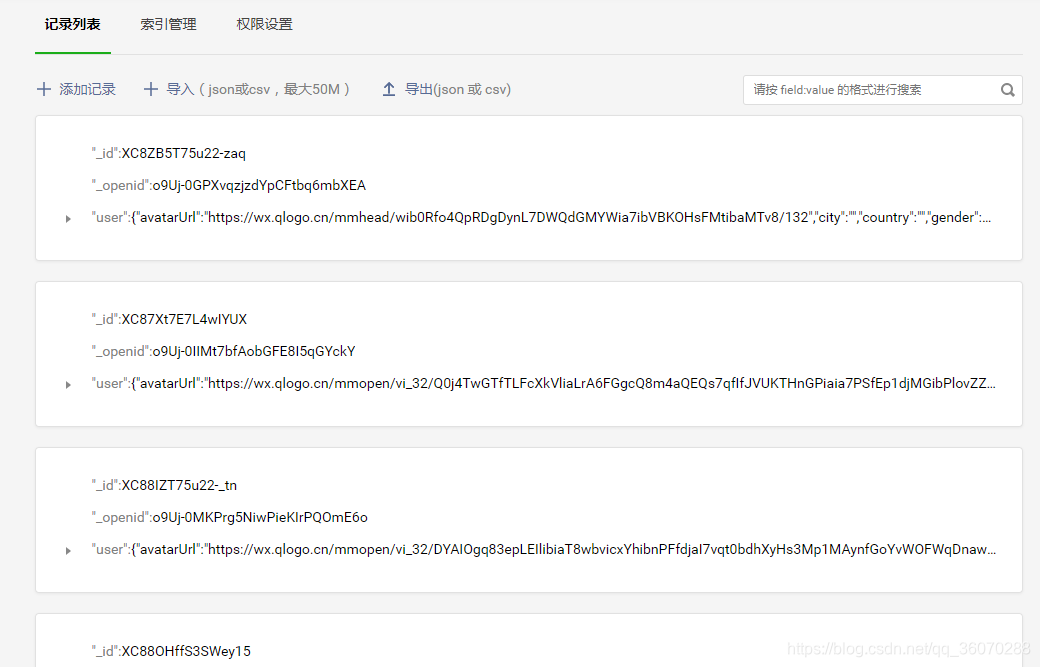
存入到数据库的信息是这样的:
成熟写法(使用云函数一次搞定):
// 云函数入口文件
const cloud = require('wx-server-sdk')
cloud.init()
const db = cloud.database()
exports.main = async (event, context) => {
  const wxContext = cloud.getWXContext()
  const dbName = 'user'
  const filter = {
    _openid: wxContext.OPENID
  }
  const countResult = await db.collection(dbName).where(filter).count()
  const total = countResult.total
  if (total) {
    return {
      has: true
    }
  } else {
    return db.collection(dbName).add({
      data: {
        user: event.user,
        _openid: wxContext.OPENID,
        time: db.serverDate()
      }
    })
  }
}
toMessage (e) {
      const that = this
      if (e.target.errMsg === 'getUserInfo:ok') {
        wx.getUserInfo({
          success: function (res) {
            that.userInfo = res.userInfo
            wx.navigateTo({
              url: `/pages/writeMessage/main?avatar=${that.userInfo.avatarUrl}&name=${that.userInfo.nickName}`
            })
            that.addUser(that.userInfo)
          }
        })
      }
    },
    addUser (obj) {
      wx.cloud.callFunction({
        name: 'addUser',
        data: {
          user: obj
        }
      })
    }
总结
大概的功能就是这么多,希望可以帮助到大家,觉得写得不错的记得给作者点个赞,你们的支持是我不断更新的最大动力!
源码地址
后续优化
- 留言审核
- 一些动画效果
- 分页处理
- 云函数优化
- 回到顶部
最后
希望对那些有想法又不会后台开发的朋友一些启示作用,祝你早日做出只属于你自己的个人小程序
mpvue+小程序云开发,纯前端实现婚礼邀请函的更多相关文章
- mpvue+小程序云开发,纯前端实现婚礼邀请函(相册小程序)
请勿使用本文章及源码作为商业用途! 前言 当初做这个小程序是为了婚礼前的需要,结婚之后,希望这个小程序能够留存下来,特地花了一些空闲时间将小程序转化成为“相册类小程序” 体验码 准备工作 mpvue框 ...
- 前端微信小程序云开发基础讲解
什么是云开发 云开发与传统模式的对比 云开发能力介绍云开发对小程序开发的变革 云开发是微信团队联合腾讯云提供的原生serverless云服务,致力于帮助更多的开发者快速实现小程序业务的开发,快速迭代. ...
- 基于微信小程序云开发实现的婚礼邀请函模板,可自行定制开发
这个婚礼邀请函是之前帮别人做的,现在人家婚礼举办过了也没啥关系了,想着就修改成通用模板进行开源,方便大家尤其是小白们克隆项目之后稍微修改就能够直接使用. 当时自己开始这个项目时候也是查阅了很多教程文章 ...
- 【微信小程序云开发】从陌生到熟悉
前言 微信小程序在9月10号正式上线了云开发的功能,弱化后端和运维概念,以前开发一个小程序需要申请一个小程序,准备一个https的域名,开发需要一个前端一个服务端,有了云开发只有申请一个小程序,一个前 ...
- 微信小程序云开发获取文件夹下所有文件
上周一个高中同学让我帮他做个图片展示的公众号,因为一直在加班的原因,所以一时忘了,昨晚想起来就赶紧加班加点的帮他弄了下,遇到了个问题,记录一下. 他的需求是要有个后台给他上传图片并且将图片归类,前端公 ...
- 微信小程序云开发指南
一.初识云开发 官方文档 小程序·云开发是微信团队联合腾讯云推出的专业的小程序开发服务. 开发者可以使用云开发快速开发小程序.小游戏.公众号网页等,并且原生打通微信开放能力. 开发者无需搭建服务器,可 ...
- 微信小程序云开发更换云开发环境
小程序云开发环境初始化默认是第一个环境,但是我们可以指定环境id //app.js App({ onLaunch: function () { if (!wx.cloud) { console.err ...
- 技本功丨收藏!斜杠青年与你共探微信小程序云开发(下篇)
2019年2月26日,人们为了一个杯子疯了一天. 星巴克猫爪杯,一场已经与猫无关了的“圣杯战争“.网上的倒卖价格,已炒至近千元! 求而不得,舍而不能,得而不惜.这是人最大的悲哀... 所以,请珍惜以下 ...
- 微信小程序-云开发(手记)
微信小程序-云开发(手记) 1.创建data.json文件 注意以下几点要求: 入门示例: init方法的env:默认环境配置,传入字符串形式的环境 ID(理解为数据库)可以指定所有服务的默认环境(意 ...
随机推荐
- python编程基础之十二
列表:一种有序的集合,可以同时存储多个数据,列表元素可修改,属于可变序列 创建列表: 列表名 = [列表选项一,列表选项二,列表选项三,......] list1 = [] list2 = [10,2 ...
- LeetCode_933-Number of Recent Calls
求最近3000毫秒内有多少次调用请求,每一次ping的时间一定比上一次的时间高:解法可以判断最后面一个数t1与最前一个数t2的差不大于3000毫秒,如果大于就直接舍弃,t1与t2之间的个数就是请求次数 ...
- 使用dynamic来简化反射实现,调用指定方法或构造函数
dynamic是Framework4.0的新特性,dynamic的出现让C#具有了弱语言类型的特性,编译器在编译的时候,不再对类型进行检查,不会报错,但是运行时如果执行的是不存在的属性或者方法,运行程 ...
- http服务端架构演进
摘要 在详解http报文相关文章中我们介绍了http协议是如何工作的,那么构建一个真实的网站还需要引入组件呢?一些常见的名词到底是什么含义呢? 什么叫正向代理,什么叫反向代理 服务代理与负载均衡的差别 ...
- 记个mimikatz小坑
今晚回学校无聊搞搞自己school 实战的时候遇到mimikatz抓密码报错 以前没遇过 记一下(水一篇) 爆ERROR kuhl_m_privilege_simple ; RtlAdjustPr ...
- caffe中softmax源码阅读
(1) softmax函数 (1) 其中,zj 是softmax层的bottom输入, f(zj)是softmax层的top输 ...
- 为程序员节日献礼--2019中国.NET开发者峰会主题内容发布
2019年10月24日,组委会正式发布了China .NET Conf 2019中国 .NET 开发者峰会的主题内容. 2014年微软组织并成立.NET基金会,微软在成为主要的开源参与者的道路上又前进 ...
- c使用二叉链表创建二叉树遇到的一些疑问和思考
二叉链表存储二叉树 学习的时候参考的是<大话数据结构>,书中是这样定义的 typedef char TElemType; typedef struct BiTNode { TElemTyp ...
- Myeclipse 反编译工具插件
JadClipse是java的反编译工具,是命令行执行,反编译出来的源文件可读性较高.可惜用起来不太方便.还好 找到myeclipse下的插件,叫JadClipse,安装好之后,只要双击.class文 ...
- LeetCode刷题笔记(6)按照索引计算int[] 数组中的和([Time Limit Exceeded]问题)
Easy303 Easy633 package easy; public class e303 { private int[] sums; public e303(int[] nums) { sums ...