Android 自定义View可拖动移动位置及边缘拉伸放大缩小
一.首先说一下定义这样一个View有什么用?在一些app中,需要设置头像,而用户选择的图片可能是使用摄像头拍摄,也可能是选择的相册里面的图片,总之,这样的图片大小不一,就比如在使用某个聊天软件的时候,设置头像,需要对图片进行截取.
要实现这样一个功能,首先,需要分析用户的操作,即用户所点击的View的位置,如下图,我把View分为9个区域,
- 当ACTION_DOWN时如果坐标为1.2.3.4四个区域,则对View进行相应的左上/右上/左下/右下拉伸;
- 当ACTION_DOWN时如果坐标为5.6.7.8四个区域,则分别对上/右/下/左四个方向进行拉伸;
- 当ACTION_DOWN时如果坐标为9这个区域,则对View进行移动;

理论分析完成,下面来看具体实现;
在下面的类中,有五个方法center/left/top/bottom/right分别对应移动/向左拉伸/向上拉伸/向下拉伸/向右拉伸,当Action_down为1-4所在的区域时,组合前面的对应的两个拉伸方法即可,如左上角拉伸则对应执行left+top方法,这也是把四个单独一条边的边缘拉伸独立出来的原因;
在View中,我设定了View的最小宽度和高度,都是200,所以当用户点击边缘进行缩小操作时,能缩小的最小值也就是200;分别在left/top/bottom/right中体现;
/**

 * @see http://www.cnblogs.com/a284628487/

 * @author Cj

 *

 */

public class DragScaleView extends View implements OnTouchListener {

    protected int screenWidth;

    protected int screenHeight;

    protected int lastX;

    protected int lastY;

    private int oriLeft;

    private int oriRight;

    private int oriTop;

    private int oriBottom;

    private int dragDirection;

    private static final int TOP = 0x15;

    private static final int LEFT = 0x16;

    private static final int BOTTOM = 0x17;

    private static final int RIGHT = 0x18;

    private static final int LEFT_TOP = 0x11;

    private static final int RIGHT_TOP = 0x12;

    private static final int LEFT_BOTTOM = 0x13;

    private static final int RIGHT_BOTTOM = 0x14;

    private static final int CENTER = 0x19;

    private int offset = 20;

    protected Paint paint = new Paint();

    /**

     * 初始化获取屏幕宽高

     */

    protected void initScreenW_H() {

        screenHeight = getResources().getDisplayMetrics().heightPixels - 40;

        screenWidth = getResources().getDisplayMetrics().widthPixels;

    }

    public DragScaleView(Context context, AttributeSet attrs, int defStyle) {

        super(context, attrs, defStyle);

        setOnTouchListener(this);

        initScreenW_H();

    }

    public DragScaleView(Context context, AttributeSet attrs) {

        super(context, attrs);

        setOnTouchListener(this);

        initScreenW_H();

    }

    public DragScaleView(Context context) {

        super(context);

        setOnTouchListener(this);

        initScreenW_H();

    }

    @Override

    protected void onDraw(Canvas canvas) {

        super.onDraw(canvas);

        paint.setColor(Color.RED);

        paint.setStrokeWidth(4.0f);

        paint.setStyle(Style.STROKE);

        canvas.drawRect(offset, offset, getWidth() - offset, getHeight()

                - offset, paint);

    }

    @Override

    public boolean onTouch(View v, MotionEvent event) {

        int action = event.getAction();

        if (action == MotionEvent.ACTION_DOWN) {

            oriLeft = v.getLeft();

            oriRight = v.getRight();

            oriTop = v.getTop();

            oriBottom = v.getBottom();

            lastY = (int) event.getRawY();

            lastX = (int) event.getRawX();

            dragDirection = getDirection(v, (int) event.getX(),

                    (int) event.getY());

        }

        // 处理拖动事件

        delDrag(v, event, action);

        invalidate();

        return false;

    }

    /**

     * 处理拖动事件

     *

     * @param v

     * @param event

     * @param action

     */

    protected void delDrag(View v, MotionEvent event, int action) {

        switch (action) {

        case MotionEvent.ACTION_MOVE:

            int dx = (int) event.getRawX() - lastX;

            int dy = (int) event.getRawY() - lastY;

            switch (dragDirection) {

            case LEFT: // 左边缘

                left(v, dx);

                break;

            case RIGHT: // 右边缘

                right(v, dx);

                break;

            case BOTTOM: // 下边缘

                bottom(v, dy);

                break;

            case TOP: // 上边缘

                top(v, dy);

                break;

            case CENTER: // 点击中心-->>移动

                center(v, dx, dy);

                break;

            case LEFT_BOTTOM: // 左下

                left(v, dx);

                bottom(v, dy);

                break;

            case LEFT_TOP: // 左上

                left(v, dx);

                top(v, dy);

                break;

            case RIGHT_BOTTOM: // 右下

                right(v, dx);

                bottom(v, dy);

                break;

            case RIGHT_TOP: // 右上

                right(v, dx);

                top(v, dy);

                break;

            }

            if (dragDirection != CENTER) {

                v.layout(oriLeft, oriTop, oriRight, oriBottom);

            }

            lastX = (int) event.getRawX();

            lastY = (int) event.getRawY();

            break;

        case MotionEvent.ACTION_UP:

            dragDirection = 0;

            break;

        }

    }

    /**

     * 触摸点为中心->>移动

     *

     * @param v

     * @param dx

     * @param dy

     */

    private void center(View v, int dx, int dy) {

        int left = v.getLeft() + dx;

        int top = v.getTop() + dy;

        int right = v.getRight() + dx;

        int bottom = v.getBottom() + dy;

        if (left < -offset) {

            left = -offset;

            right = left + v.getWidth();

        }

        if (right > screenWidth + offset) {

            right = screenWidth + offset;

            left = right - v.getWidth();

        }

        if (top < -offset) {

            top = -offset;

            bottom = top + v.getHeight();

        }

        if (bottom > screenHeight + offset) {

            bottom = screenHeight + offset;

            top = bottom - v.getHeight();

        }

        v.layout(left, top, right, bottom);

    }

    /**

     * 触摸点为上边缘

     *

     * @param v

     * @param dy

     */

    private void top(View v, int dy) {

        oriTop += dy;

        if (oriTop < -offset) {

            oriTop = -offset;

        }

        if (oriBottom - oriTop - 2 * offset < 200) {

            oriTop = oriBottom - 2 * offset - 200;

        }

    }

    /**

     * 触摸点为下边缘

     *

     * @param v

     * @param dy

     */

    private void bottom(View v, int dy) {

        oriBottom += dy;

        if (oriBottom > screenHeight + offset) {

            oriBottom = screenHeight + offset;

        }

        if (oriBottom - oriTop - 2 * offset < 200) {

            oriBottom = 200 + oriTop + 2 * offset;

        }

    }

    /**

     * 触摸点为右边缘

     *

     * @param v

     * @param dx

     */

    private void right(View v, int dx) {

        oriRight += dx;

        if (oriRight > screenWidth + offset) {

            oriRight = screenWidth + offset;

        }

        if (oriRight - oriLeft - 2 * offset < 200) {

            oriRight = oriLeft + 2 * offset + 200;

        }

    }

    /**

     * 触摸点为左边缘

     *

     * @param v

     * @param dx

     */

    private void left(View v, int dx) {

        oriLeft += dx;

        if (oriLeft < -offset) {

            oriLeft = -offset;

        }

        if (oriRight - oriLeft - 2 * offset < 200) {

            oriLeft = oriRight - 2 * offset - 200;

        }

    }

    /**

     * 获取触摸点flag

     *

     * @param v

     * @param x

     * @param y

     * @return

     */

    protected int getDirection(View v, int x, int y) {

        int left = v.getLeft();

        int right = v.getRight();

        int bottom = v.getBottom();

        int top = v.getTop();

        if (x < 40 && y < 40) {

            return LEFT_TOP;

        }

        if (y < 40 && right - left - x < 40) {

            return RIGHT_TOP;

        }

        if (x < 40 && bottom - top - y < 40) {

            return LEFT_BOTTOM;

        }

        if (right - left - x < 40 && bottom - top - y < 40) {

            return RIGHT_BOTTOM;

        }

        if (x < 40) {

            return LEFT;

        }

        if (y < 40) {

            return TOP;

        }

        if (right - left - x < 40) {

            return RIGHT;

        }

        if (bottom - top - y < 40) {

            return BOTTOM;

        }

        return CENTER;

    }

    /**

     * 获取截取宽度

     *

     * @return

     */

    public int getCutWidth() {

        return getWidth() - 2 * offset;

    }

    /**

     * 获取截取高度

     *

     * @return

     */

    public int getCutHeight() {

        return getHeight() - 2 * offset;

    }

}
二.使用View,如果想要对View进行移动,需要在xml中配置android:clickable="true"属性;
    <xxx.DragScaleView

        android:id="@+id/ds"

        android:layout_width="180dip"

        android:layout_height="180dip"

        android:clickable="true" />
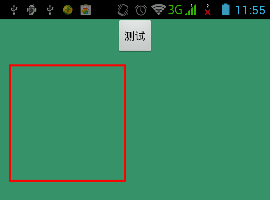
三.效果图,右图是拉伸后的效果

四.关于MotionEvent.getX()和MotionEvent.getRawX()的区别
getX表示触摸点距离View的左边缘的距离,而getRawX表示触摸点距离手机屏幕左侧的距离;
Android 自定义View可拖动移动位置及边缘拉伸放大缩小的更多相关文章
- Android自定义View实战(SlideTab-可滑动的选择器)
转载请标明出处: http://blog.csdn.net/xmxkf/article/details/52178553 本文出自:[openXu的博客] 目录: 初步分析重写onDraw绘制 重写o ...
- Android 自定义View (五)——实践
前言: 前面已经介绍了<Android 自定义 view(四)-- onMeasure 方法理解>,那么这次我们就来小实践下吧 任务: 公司现有两个任务需要我完成 (1)监测液化天然气液压 ...
- Android 自定义 view(三)—— onDraw 方法理解
前言: 上一篇已经介绍了用自己定义的属性怎么简单定义一个view<Android 自定义view(二) -- attr 使用>,那么接下来我们继续深究自定义view,下一步将要去简单理解自 ...
- Android 自定义View
Android 自定义View流程中的几个方法解析: onFinishInflate():从布局文件.xml加载完组件后回调 onMeasure() :调用该方法负责测量组件大小 onSizeChan ...
- Android自定义View之CircleView
Android自定义View之CircleView 版权声明:本文为博主原创文章,未经博主允许不得转载. 转载请表明出处:http://www.cnblogs.com/cavalier-/p/5999 ...
- Android 自定义View及其在布局文件中的使用示例(三):结合Android 4.4.2_r1源码分析onMeasure过程
转载请注明出处 http://www.cnblogs.com/crashmaker/p/3549365.html From crash_coder linguowu linguowu0622@gami ...
- Android 自定义View及其在布局文件中的使用示例(二)
转载请注明出处 http://www.cnblogs.com/crashmaker/p/3530213.html From crash_coder linguowu linguowu0622@gami ...
- Android自定义View
转载请标明出处:http://blog.csdn.net/lmj623565791/article/details/24252901 很多的Android入门程序猿来说对于Android自定义View ...
- android自定义View之NotePad出鞘记
现在我们的手机上基本都会有一个记事本,用起来倒也还算方便,记事本这种东东,如果我想要自己实现,该怎么做呢?今天我们就通过自定义View的方式来自定义一个记事本.OK,废话不多说,先来看看效果图. 整个 ...
随机推荐
- ios 64位下编译webrtc的libvpx库出现错误Bad cputype for object file.Currently only tested for CPU_TYPE_x86_64
diff --git a/libvpx.gyp b/libvpx.gypindex 4f8cb2b..4eb6866 100644--- a/libvpx.gyp+++ b/libvpx.gyp@@ ...
- Name control
static: (Page 406) In both C and C++ the keyword static has two basic meanings, which unfortunately ...
- 服务器返回的JSON字符串
异步请求将type设为"json",或者利 用$.getJSON()方法获得服务器返回,那么就不需要eval()方法,因为这时候得到的结果已经是json对象
- hadoop1中partition和combiner作用
---恢复内容开始--- 1.解析Partiton 把map任务的输出的中间结果按照key的范围进行划分成r份,r代表reduce任务的个数.hadoop默认有个类HashPartition实现分区, ...
- django查询常用操作符及models和admin的写法
以Publisher.Author.Book的model为例子 #coding=utf-8 from django.db import models # Create your models here ...
- POJ 2252 Dungeon Master 三维水bfs
题目: http://poj.org/problem?id=2251 #include <stdio.h> #include <string.h> #include <q ...
- sqlserver access 多数据库操作
今天搞了一天的事情, 更新 ACCESS 數據庫 ,要從 SQL SERVER 2008數據庫中 查詢資料.沒找到資料 只能自己做了. 首先查找一下 ,如何 用SQL 語句 select * ...
- 为你的TabBar添加Badge-感谢分享
实现过程 首先定义了三种Badge类型 typedef NS_ENUM(NSUInteger, CustomBadgeType){ kCustomBadgeStyleRedDot, //显示普通红点类 ...
- skiplist 跳表(1)
最近学习中遇到一种新的数据结构,很实用,搬过来学习. 原文地址:skiplist 跳表 为什么选择跳表 目前经常使用的平衡数据结构有:B树,红黑树,AVL树,Splay Tree, Treep等. ...
- POJ 2992 Divisors
每个数都可以分解成素数的乘积: 写成指数形式:n=p1^e1*p2^e2*...*pn^en:(p都是素数) 那么n的因数的数量m=(e1+1)*(e2+1)*...*(en+1): 所以用筛选法筛出 ...