机器学习:DeepDreaming with TensorFlow (二)
在前面一篇博客里,我们介绍了利用TensorFlow 和训练好的 Googlenet 来生成简单的单一通道的pattern,接下来,我们要进一步生成更为有趣的一些pattern,之前的简单的pattern都是基于单一通道,单一尺度的,现在我们来试试多尺度下生成的pattern
# 这部分代码和之前单一通道的一样

# boilerplate code

from __future__ import print_function

import os

from io import BytesIO

import numpy as np

from functools import partial

import PIL.Image

from IPython.display import clear_output, Image, display, HTML

import tensorflow as tf

# !wget https://storage.googleapis.com/download.tensorflow.org/models/inception5h.zip && unzip inception5h.zip

model_fn = 'tensorflow_inception_graph.pb'

# creating TensorFlow session and loading the model

graph = tf.Graph()

sess = tf.InteractiveSession(graph=graph)

with tf.gfile.FastGFile(model_fn, 'rb') as f:

    graph_def = tf.GraphDef()

    graph_def.ParseFromString(f.read())

t_input = tf.placeholder(np.float32, name='input') # define the input tensor

imagenet_mean = 117.0

t_preprocessed = tf.expand_dims(t_input-imagenet_mean, 0)

tf.import_graph_def(graph_def, {'input':t_preprocessed})

layers = [op.name for op in graph.get_operations() if op.type=='Conv2D' and 'import/' in op.name]

feature_nums = [int(graph.get_tensor_by_name(name+':0').get_shape()[-1]) for name in layers]

print('Number of layers', len(layers))

print('Total number of feature channels:', sum(feature_nums))

# Picking some internal layer. Note that we use outputs before applying the ReLU nonlinearity

# to have non-zero gradients for features with negative initial activations.

layer = 'mixed4d_3x3_bottleneck_pre_relu'

channel = 64

# start with a gray image with a little noise

img_noise = np.random.uniform(size=(224,224,3)) + 100.0

# Multiscale image generation

# 多尺度图像的生成

def tffunc(*argtypes):

    # Helper that transforms TF-graph generating function into a regular one.

    # See "resize" function below.

    placeholders = list(map(tf.placeholder, argtypes))

    def wrap(f):

        out = f(*placeholders)

        def wrapper(*args, **kw):

            return out.eval(dict(zip(placeholders, args)), session=kw.get('session'))

        return wrapper

    return wrap

# Helper function that uses TF to resize an image

def resize(img, size):

    img = tf.expand_dims(img, 0)

    return tf.image.resize_bilinear(img, size)[0,:,:,:]

resize = tffunc(np.float32, np.int32)(resize)

def calc_grad_tiled(img, t_grad, tile_size=512):

    # Compute the value of tensor t_grad over the image in a tiled way.

    # Random shifts are applied to the image to blur tile boundaries over

    # multiple iterations.

    sz = tile_size

    h, w = img.shape[:2]

    sx, sy = np.random.randint(sz, size=2)

    img_shift = np.roll(np.roll(img, sx, 1), sy, 0)

    grad = np.zeros_like(img)

    for y in range(0, max(h-sz//2, sz),sz):

        for x in range(0, max(w-sz//2, sz),sz):

            sub = img_shift[y:y+sz,x:x+sz]

            g = sess.run(t_grad, {t_input:sub})

            grad[y:y+sz,x:x+sz] = g

    return np.roll(np.roll(grad, -sx, 1), -sy, 0)

# octave_n 表示阶数

# octave_scale 表示尺度变化的倍数

def render_multiscale(t_obj, img0=img_noise, iter_n=10, step=1.0, octave_n=3, octave_scale=1.4):

    t_score = tf.reduce_mean(t_obj) # defining the optimization objective

    t_grad = tf.gradients(t_score, t_input)[0] # behold the power of automatic differentiation!

    img = img0.copy()

    for octave in range(octave_n):

        if octave>0:

            hw = np.float32(img.shape[:2])*octave_scale

            img = resize(img, np.int32(hw))

        for i in range(iter_n):

            g = calc_grad_tiled(img, t_grad)

            # normalizing the gradient, so the same step size should work

            g /= g.std()+1e-8         # for different layers and networks

            img += g*step

            print('.', end = ' ')

        clear_output()

        showarray(visstd(img))

render_multiscale(T(layer)[:,:,:,channel])
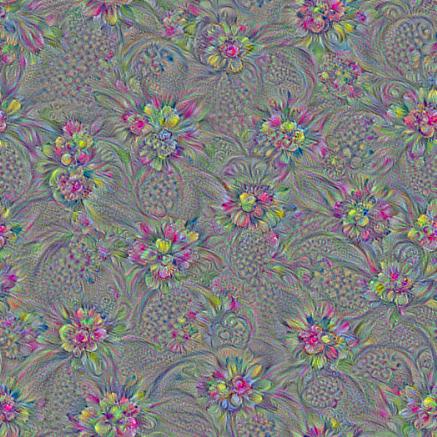
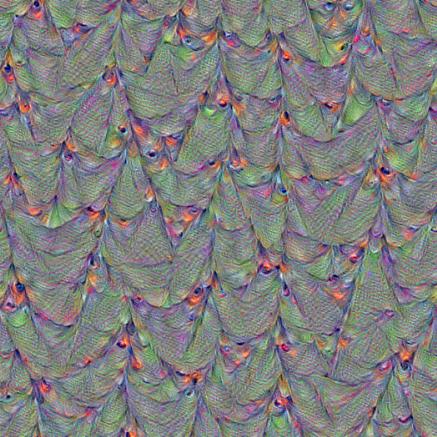
看看一些生成的效果图:
layer = ‘mixed4d_3x3_bottleneck_pre_relu’
channel = 100
octave_n=4, octave_scale=1.25

layer = ‘mixed4d_3x3_bottleneck_pre_relu’
channel = 60
octave_n=4, octave_scale=1.25

layer = ‘mixed4d_3x3_bottleneck_pre_relu’
channel = 139
octave_n=4, octave_scale=1.25
layer = ‘mixed4b_3x3_bottleneck_pre_relu’
channel = 24
octave_n=4, octave_scale=1.25
参考来源:
机器学习:DeepDreaming with TensorFlow (二)的更多相关文章
- 机器学习: DeepDreaming with TensorFlow (一)
在TensorFlow 的官网上,有一个很有趣的教程,就是用 TensorFlow 以及训练好的深度卷积神经(GoogleNet)网络去生成一些有趣的pattern,通过这些pattern,可以更加深 ...
- ng机器学习视频笔记(二) ——梯度下降算法解释以及求解θ
ng机器学习视频笔记(二) --梯度下降算法解释以及求解θ (转载请附上本文链接--linhxx) 一.解释梯度算法 梯度算法公式以及简化的代价函数图,如上图所示. 1)偏导数 由上图可知,在a点 ...
- 机器学习之支持向量机(二):SMO算法
注:关于支持向量机系列文章是借鉴大神的神作,加以自己的理解写成的:若对原作者有损请告知,我会及时处理.转载请标明来源. 序: 我在支持向量机系列中主要讲支持向量机的公式推导,第一部分讲到推出拉格朗日对 ...
- Google机器学习课程基于TensorFlow : https://developers.google.cn/machine-learning/crash-course
Google机器学习课程基于TensorFlow : https://developers.google.cn/machine-learning/crash-course https ...
- Andrew Ng机器学习课程笔记(二)之逻辑回归
Andrew Ng机器学习课程笔记(二)之逻辑回归 版权声明:本文为博主原创文章,转载请指明转载地址 http://www.cnblogs.com/fydeblog/p/7364636.html 前言 ...
- 机器学习:DeepDreaming with TensorFlow (三)
我们看到,利用TensorFlow 和训练好的Googlenet 可以生成多尺度的pattern,那些pattern看起来比起单一通道的pattern你要更好,但是有一个问题就是多尺度的pattern ...
- ML.NET 发布0.11版本:.NET中的机器学习,为TensorFlow和ONNX添加了新功能
微软发布了其最新版本的机器学习框架:ML.NET 0.11带来了新功能和突破性变化. 新版本的机器学习开源框架为TensorFlow和ONNX添加了新功能,但也包括一些重大变化, 这也是发布RC版本之 ...
- 机器学习算法总结(十二)——流形学习(Manifold Learning)
1.什么是流形 流形学习的观点:认为我们所能观察到的数据实际上是由一个低维流行映射到高维空间的.由于数据内部特征的限制,一些高维中的数据会产生维度上的冗余,实际上这些数据只要比较低的维度就能唯一的表示 ...
- Python3实现机器学习经典算法(二)KNN实现简单OCR
一.前言 1.ocr概述 OCR (Optical Character Recognition,光学字符识别)是指电子设备(例如扫描仪或数码相机)检查纸上打印的字符,通过检测暗.亮的模式确定其形状,然 ...
随机推荐
- 《编程导论(Java)·4.1数据抽象的含义》
You have no choice about the necessity to integrateyour observations, your experiences, your knowled ...
- linux下FAT32格式u盘只读的问题及解决方法
以下是网上看到的解决办法:http://blog.csdn.net/heqiuya/article/details/7870554 其实是掉电保护,之前挂在的SD变成了制度文件,只需要将SD卡重新挂载 ...
- 使用xerces库的一个注意事项
作者:朱金灿 来源:http://blog.csdn.net/clever101 使用xerces库解析xml文件,结果出现这样一些链接错误: public: static classxercesc_ ...
- php 微信支付企业付款
1.所需参数 字段名 变量名 必填 示例值 类型 描述 公众账号appid mch_appid 是 wx8888888888888888 String 公众号的appId 商户号 mchid 是 19 ...
- iOS中OC给Category加入属性
引: 非常多人知道能够用Category给已有的类加入一些新方法,可是不同于swift中的extension,Objective-C中的Category(类别)是不支持直接加入属性的.那假设就是须要加 ...
- java中的subString具体解释及应用
substring(參数)是java中截取字符串的一个方法 有两种传參方式 一种是public String substring(int beginIndex) 返回一个新的字符串,它是此字符串的一个 ...
- 【物理/数学】概念的理解 —— pivot、position
0. 基本释义 pivot: n. 枢轴:中心点:旋转运动 vt. 以-为中心旋转:把-置于枢轴上 vi. 在枢轴上转动:随-转移 adj. 枢轴的:关键的 position: n. 位置,方位:职位 ...
- matlab 下的集成学习工具箱
matlab 当前支持的弱学习器(weak learners)类型分别为: 'Discriminant' 'knn' 'tree' 可通过 templateTree 定义: 1. fitcensemb ...
- 使用pprof及Go 程序的性能优化
使用Golang 程序的性能优化及 Pprof 程序的性能优化无非就是对程序占用资源的优化.对于服务器而言,最重要的两项资源莫过于 CPU 和内存.性能优化,就是在对于不影响程序数据处理能力的情况下, ...
- AngularJS之基本指令(init、repeat)
<h3>ng-init初始化变量</h3> <div ng-init="name='aurora';age='18'"> <p ng-bi ...