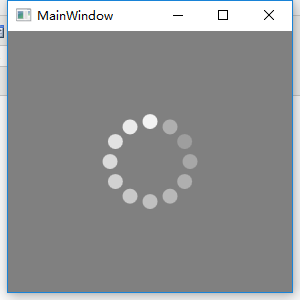
WPF 简单的绕圈进度条(无cs代码)
方案: 图标位置不变化的情况下设置透明度实现
代码:
<Window
x:Class="WpfApp1.MainWindow"
xmlns="http://schemas.microsoft.com/winfx/2006/xaml/presentation"
xmlns:x="http://schemas.microsoft.com/winfx/2006/xaml"
xmlns:d="http://schemas.microsoft.com/expression/blend/2008"
xmlns:ec="http://schemas.microsoft.com/expression/2010/controls"
xmlns:local="clr-namespace:WpfApp1"
xmlns:mc="http://schemas.openxmlformats.org/markup-compatibility/2006"
Title="MainWindow"
Width="300"
Height="300"
mc:Ignorable="d"> <Window.Resources>
<Duration x:Key="AnimationTime">0:0:.84</Duration>
</Window.Resources>
<Grid Background="Gray">
<Ellipse
x:Name="ellipse"
Width="80"
Height="80"
RenderTransformOrigin="0.5,0.5" />
<ec:PathListBox HorizontalAlignment="Left" VerticalAlignment="Top">
<ec:PathListBox.LayoutPaths>
<ec:LayoutPath Distribution="Even" SourceElement="{Binding ElementName=ellipse}" />
</ec:PathListBox.LayoutPaths>
<Ellipse
Width="15"
Height="15"
Fill="White">
<Ellipse.Triggers>
<EventTrigger RoutedEvent="Window.Loaded">
<BeginStoryboard>
<Storyboard>
<DoubleAnimation
BeginTime="0:0:.770"
RepeatBehavior="Forever"
Storyboard.TargetProperty="Opacity"
From=".2"
To="1"
Duration="{StaticResource AnimationTime}" />
</Storyboard>
</BeginStoryboard>
</EventTrigger>
</Ellipse.Triggers>
</Ellipse>
<Ellipse
Width="15"
Height="15"
Fill="White">
<Ellipse.Triggers>
<EventTrigger RoutedEvent="Window.Loaded">
<BeginStoryboard>
<Storyboard>
<DoubleAnimation
BeginTime="0:0:.700"
RepeatBehavior="Forever"
Storyboard.TargetProperty="Opacity"
From=".2"
To="1"
Duration="{StaticResource AnimationTime}" />
</Storyboard>
</BeginStoryboard>
</EventTrigger>
</Ellipse.Triggers>
</Ellipse>
<Ellipse
Width="15"
Height="15"
Fill="White">
<Ellipse.Triggers>
<EventTrigger RoutedEvent="Window.Loaded">
<BeginStoryboard>
<Storyboard>
<DoubleAnimation
BeginTime="0:0:.630"
RepeatBehavior="Forever"
Storyboard.TargetProperty="Opacity"
From=".2"
To="1"
Duration="{StaticResource AnimationTime}" />
</Storyboard>
</BeginStoryboard>
</EventTrigger>
</Ellipse.Triggers>
</Ellipse>
<Ellipse
Width="15"
Height="15"
Fill="White">
<Ellipse.Triggers>
<EventTrigger RoutedEvent="Window.Loaded">
<BeginStoryboard>
<Storyboard>
<DoubleAnimation
BeginTime="0:0:.560"
RepeatBehavior="Forever"
Storyboard.TargetProperty="Opacity"
From=".2"
To="1"
Duration="{StaticResource AnimationTime}" />
</Storyboard>
</BeginStoryboard>
</EventTrigger>
</Ellipse.Triggers>
</Ellipse>
<Ellipse
Width="15"
Height="15"
Fill="White">
<Ellipse.Triggers>
<EventTrigger RoutedEvent="Window.Loaded">
<BeginStoryboard>
<Storyboard>
<DoubleAnimation
BeginTime="0:0:.490"
RepeatBehavior="Forever"
Storyboard.TargetProperty="Opacity"
From=".2"
To="1"
Duration="{StaticResource AnimationTime}" />
</Storyboard>
</BeginStoryboard>
</EventTrigger>
</Ellipse.Triggers>
</Ellipse>
<Ellipse
Width="15"
Height="15"
Fill="White">
<Ellipse.Triggers>
<EventTrigger RoutedEvent="Window.Loaded">
<BeginStoryboard>
<Storyboard>
<DoubleAnimation
BeginTime="0:0:.420"
RepeatBehavior="Forever"
Storyboard.TargetProperty="Opacity"
From=".2"
To="1"
Duration="{StaticResource AnimationTime}" />
</Storyboard>
</BeginStoryboard>
</EventTrigger>
</Ellipse.Triggers>
</Ellipse>
<Ellipse
Width="15"
Height="15"
Fill="White">
<Ellipse.Triggers>
<EventTrigger RoutedEvent="Window.Loaded">
<BeginStoryboard>
<Storyboard>
<DoubleAnimation
BeginTime="0:0:.350"
RepeatBehavior="Forever"
Storyboard.TargetProperty="Opacity"
From=".2"
To="1"
Duration="{StaticResource AnimationTime}" />
</Storyboard>
</BeginStoryboard>
</EventTrigger>
</Ellipse.Triggers>
</Ellipse>
<Ellipse
Width="15"
Height="15"
Fill="White">
<Ellipse.Triggers>
<EventTrigger RoutedEvent="Window.Loaded">
<BeginStoryboard>
<Storyboard>
<DoubleAnimation
BeginTime="0:0:0.280"
RepeatBehavior="Forever"
Storyboard.TargetProperty="Opacity"
From=".2"
To="1"
Duration="{StaticResource AnimationTime}" />
</Storyboard>
</BeginStoryboard>
</EventTrigger>
</Ellipse.Triggers>
</Ellipse>
<Ellipse
Width="15"
Height="15"
Fill="White">
<Ellipse.Triggers>
<EventTrigger RoutedEvent="Window.Loaded">
<BeginStoryboard>
<Storyboard>
<DoubleAnimation
BeginTime="0:0:0.210"
RepeatBehavior="Forever"
Storyboard.TargetProperty="Opacity"
From=".2"
To="1"
Duration="{StaticResource AnimationTime}" />
</Storyboard>
</BeginStoryboard>
</EventTrigger>
</Ellipse.Triggers>
</Ellipse>
<Ellipse
Width="15"
Height="15"
Fill="White">
<Ellipse.Triggers>
<EventTrigger RoutedEvent="Window.Loaded">
<BeginStoryboard>
<Storyboard>
<DoubleAnimation
BeginTime="0:0:0.140"
RepeatBehavior="Forever"
Storyboard.TargetProperty="Opacity"
From=".2"
To="1"
Duration="{StaticResource AnimationTime}" />
</Storyboard>
</BeginStoryboard>
</EventTrigger>
</Ellipse.Triggers>
</Ellipse>
<Ellipse
Width="15"
Height="15"
Fill="White">
<Ellipse.Triggers>
<EventTrigger RoutedEvent="Window.Loaded">
<BeginStoryboard>
<Storyboard>
<DoubleAnimation
BeginTime="0:0:0.7"
RepeatBehavior="Forever"
Storyboard.TargetProperty="Opacity"
From=".2"
To="1"
Duration="{StaticResource AnimationTime}" />
</Storyboard>
</BeginStoryboard>
</EventTrigger>
</Ellipse.Triggers>
</Ellipse>
<Ellipse
Width="15"
Height="15"
Fill="White">
<Ellipse.Triggers>
<EventTrigger RoutedEvent="Window.Loaded">
<BeginStoryboard>
<Storyboard>
<DoubleAnimation
BeginTime="0:0:0"
RepeatBehavior="Forever"
Storyboard.TargetProperty="Opacity"
From=".2"
To="1"
Duration="{StaticResource AnimationTime}" />
</Storyboard>
</BeginStoryboard>
</EventTrigger>
</Ellipse.Triggers>
</Ellipse>
</ec:PathListBox>
</Grid>
</Window>
WPF 简单的绕圈进度条(无cs代码)的更多相关文章
- WPF 绕圈进度条(二)
一 以前的方案 以前写过一个圆点绕圈的进度条,根据参数圆点个数和参数每次旋转角度,主要是在cs文件中动态添加圆点,通过后台定时器,动态设置角度后用正弦余弦计算(x,y)的位置. 此方案优点:动态添加L ...
- WPF 自定义绕圈进度条
在设计界面时,有时会遇到进度条,本次讲解如何设计自定义的绕圈进度条,直接上代码: 1.控件界面 <UserControl x:Class="ProgressBarControl&quo ...
- WPF 绕圈进度条(一)
在设计界面时,有时会遇到进度条,本次讲解如何设计自定义的绕圈进度条,直接上代码: 1.控件界面 <UserControl x:Class="ProgressBarControl&quo ...
- WPF 自定义绕圈进度条(转)
在设计界面时,有时会遇到进度条,本次讲解如何设计自定义的绕圈进度条,直接上代码: 1.控件界面 <UserControl x:Class="ProgressBarControl&quo ...
- WPF利用动画实现圆形进度条
原文:WPF利用动画实现圆形进度条 这是我的第一篇随笔,最近因为工作需要,开始学习WPF相关技术,自己想实现以下圆形进度条的效果,逛了园子发现基本都是很久以前的文章,实现方式一般都是GDI实现的,想到 ...
- C# WPF 解压缩7zip文件 带进度条 sevenzipsharp
vs2013附件 :http://download.csdn.net/detail/u012663700/7427461 C# WPF 解压缩7zip文件 带进度条 sevenzipsharp W ...
- 使用ajax实现简单的带百分比进度条
需求:当进行文件上传保存等操作时,能在页面显示一个带百分比的进度条,给用户一个好的交互体验 实现步骤 JSP页面 1.添加table标签 <table id="load" w ...
- 最简单的android自定义进度条样式
一.自定义圆形进度条样式 1.在安卓项目drawable目录下新建一个xml文件如下:<?xml version="1.0" encoding="utf-8&quo ...
- [WPF]有滑动效果的进度条
先给各位看看效果,可能不太完美,不过效果还是可行的. 我觉得,可能直接放个GIF图片上去会更好. 我这个不是用图片,而是用DrawingBrush画出来的.接着重做ProgressBar控件的模板,把 ...
随机推荐
- html5-7 html5语义标签和视频
html5-7 html5语义标签和视频 一.总结 一句话总结:设计网站的时候要兼顾早期浏览器的话,最新技术要缓着用,自己可以先尝试. 1.html5所有标签共有属性有哪四种? 1.id2.clas ...
- MFC 之 OnClose 与 OnCancel
在一个对话框其中.按下esc键 与 上面的红叉,默认都是调用OnCancel()函数. 如今我要在按下esc键盘后不关闭程序而是弹出一个对话框,可是这个时候点击红叉 程序也不会关闭,为了解决问题.我 ...
- Gibbs 采样的应用
Gibbs 采样的最大作用在于使得对高维连续概率分布的抽样由复杂变得简单. 可能的应用: 计算高维连续概率分布函数的数学期望, Gibbs 采样得到 n 个值,再取均值: 比如用于 RBM:
- C语言实现使用动态数组来构造栈结构
我在面前一篇博客<C语言实现使用静态数组来构造栈结构>中使用了静态数组来模拟栈的操作.静态数组的大小是在代码中写死的.是存储在用户栈上面的,使用起来不灵活.在这篇博客中我会使用动态数组来构 ...
- 混合使用C++语言和Objective-C语言
如果你的源文件扩展名是.m的,你还需要改成.mm,这样编译器才知道你将会在该文件中混合使用C++语言和Objective-C语言.
- java-线程-生产者-消费者
概述 在Java中有四种方法支持同步,其中前三个是同步方法,一个是管道方法. wait() / notify()方法 await() / signal()方法 BlockingQueue阻塞队列方法 ...
- form的get与post方式的区别(转)
form元素的method属性用来指定发送form的http方法 使用get时,form数据集被附加到form元素的action属性所指定的URL后面,仅仅是拼接一个URL,然后直接向服务区请求数据, ...
- zoj 1008 Gnome Tetravex
开放式存储阵列为每平方米有几个,否则,超时-- #include <stdio.h> #include <string.h> #include <iostream> ...
- android studio报错提示: Gradle DSL method not found: 'android() 解决方案
原文错误提示: Error:(16, 0) Gradle DSL method not found: 'Android()'Possible causes:<ul><li>Th ...
- parfor —— matlab 下的并行循环
parfor:parallel for 循环 我们知道,matlab 更适合的处理对象是矩阵,而不是大规模的循环运算.当有时不得不使用 for 循环时,如果提高 for 循环的执行效率呢.这就是 pa ...