Scrapy命令行详解
官方文档:https://doc.scrapy.org/en/latest/
Global commands:
Project-only commands: 在项目目录下才可以执行
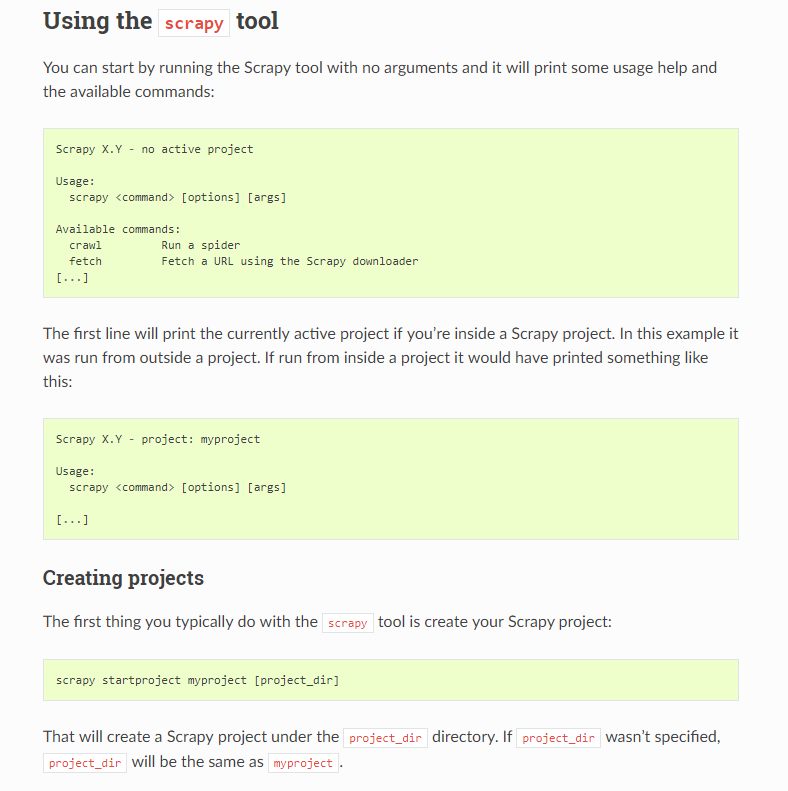
startproject
- Syntax:
scrapy startproject <project_name> [project_dir] - Requires project: no
Creates a new Scrapy project named project_name, under the project_dir directory. If project_dir wasn’t specified, project_dirwill be the same as project_name.
Usage example:
$ scrapy startproject myproject
genspider
- Syntax:
scrapy genspider [-t template] <name> <domain> - Requires project: no
Create a new spider in the current folder or in the current project’s spiders folder, if called from inside a project. The <name> parameter is set as the spider’s name, while <domain> is used to generate the allowed_domains and start_urls spider’s attributes.
Usage example:
$ scrapy genspider -l

Available templates:

  basic

  crawl

  csvfeed

  xmlfeed

$ scrapy genspider example example.com

Created spider 'example' using template 'basic'

$ scrapy genspider -t crawl scrapyorg scrapy.org

Created spider 'scrapyorg' using template 'crawl'
This is just a convenience shortcut command for creating spiders based on pre-defined templates, but certainly not the only way to create spiders. You can just create the spider source code files yourself, instead of using this command.
crawl
- Syntax:
scrapy crawl <spider> - Requires project: yes
Start crawling using a spider.
Usage examples:
$ scrapy crawl myspider

[ ... myspider starts crawling ... ]
check
- Syntax:
scrapy check [-l] <spider> - Requires project: yes
Run contract checks.
Usage examples:
$ scrapy check -l

first_spider

  * parse

  * parse_item

second_spider

  * parse

  * parse_item

$ scrapy check

[FAILED] first_spider:parse_item

>>> 'RetailPricex' field is missing

[FAILED] first_spider:parse

>>> Returned 92 requests, expected 0..4
list
- Syntax:
scrapy list - Requires project: yes
List all available spiders in the current project. The output is one spider per line.
Usage example:
$ scrapy list

spider1

spider2
edit
- Syntax:
scrapy edit <spider> - Requires project: yes
Edit the given spider using the editor defined in the EDITORenvironment variable or (if unset) the EDITOR setting.
This command is provided only as a convenience shortcut for the most common case, the developer is of course free to choose any tool or IDE to write and debug spiders.
Usage example:
$ scrapy edit spider1
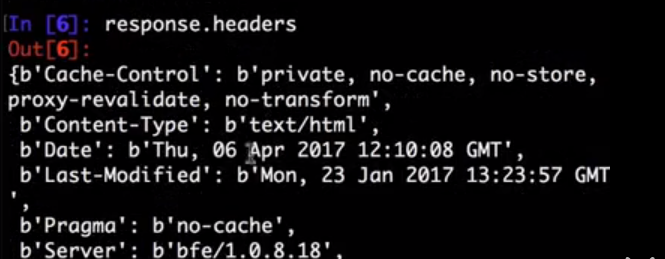
fetch
- Syntax:
scrapy fetch <url> - Requires project: no
Downloads the given URL using the Scrapy downloader and writes the contents to standard output.
The interesting thing about this command is that it fetches the page how the spider would download it. For example, if the spider has a USER_AGENT attribute which overrides the User Agent, it will use that one.
So this command can be used to “see” how your spider would fetch a certain page.
If used outside a project, no particular per-spider behaviour would be applied and it will just use the default Scrapy downloader settings.
Supported options:
--spider=SPIDER: bypass spider autodetection and force use of specific spider--headers: print the response’s HTTP headers instead of the response’s body--no-redirect: do not follow HTTP 3xx redirects (default is to follow them) #有重定向的连接时候使用这个参数
Usage examples:
$ scrapy fetch --nolog http://www.example.com/some/page.html

[ ... html content here ... ]

$ scrapy fetch --nolog --headers http://www.example.com/

{'Accept-Ranges': ['bytes'],

 'Age': ['1263   '],

 'Connection': ['close     '],

 'Content-Length': ['596'],

 'Content-Type': ['text/html; charset=UTF-8'],

 'Date': ['Wed, 18 Aug 2010 23:59:46 GMT'],

 'Etag': ['"573c1-254-48c9c87349680"'],

 'Last-Modified': ['Fri, 30 Jul 2010 15:30:18 GMT'],

 'Server': ['Apache/2.2.3 (CentOS)']}
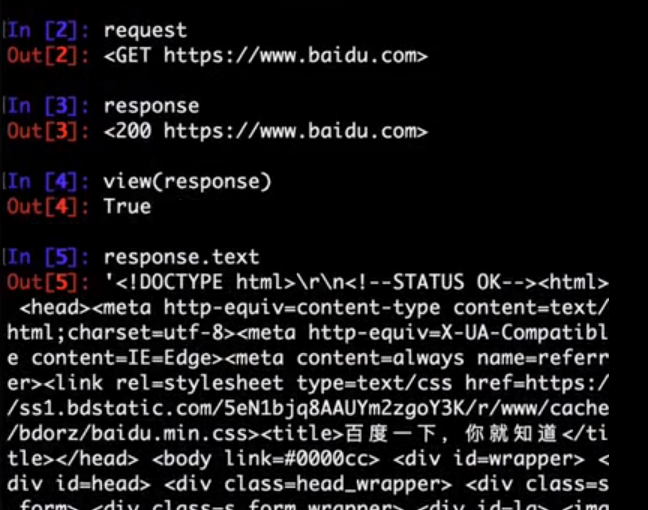
view
- Syntax:
scrapy view <url> - Requires project: no
Opens the given URL in a browser, as your Scrapy spider would “see” it. Sometimes spiders see pages differently from regular users, so this can be used to check what the spider “sees” and confirm it’s what you expect.
Supported options:
--spider=SPIDER: bypass spider autodetection and force use of specific spider--no-redirect: do not follow HTTP 3xx redirects (default is to follow them)
Usage example:
$ scrapy view http://www.example.com/some/page.html

[ ... browser starts ... ]
shell
- Syntax:
scrapy shell [url] - Requires project: no
Starts the Scrapy shell for the given URL (if given) or empty if no URL is given. Also supports UNIX-style local file paths, either relative with ./ or ../ prefixes or absolute file paths. See Scrapy shell for more info.
Supported options:
--spider=SPIDER: bypass spider autodetection and force use of specific spider-c code: evaluate the code in the shell, print the result and exit--no-redirect: do not follow HTTP 3xx redirects (default is to follow them); this only affects the URL you may pass as argument on the command line; once you are inside the shell,fetch(url)will still follow HTTP redirects by default.
Usage example:
$ scrapy shell http://www.example.com/some/page.html

[ ... scrapy shell starts ... ]

$ scrapy shell --nolog http://www.example.com/ -c '(response.status, response.url)'

(200, 'http://www.example.com/')

# shell follows HTTP redirects by default

$ scrapy shell --nolog http://httpbin.org/redirect-to?url=http%3A%2F%2Fexample.com%2F -c '(response.status, response.url)'

(200, 'http://example.com/')

# you can disable this with --no-redirect

# (only for the URL passed as command line argument)

$ scrapy shell --no-redirect --nolog http://httpbin.org/redirect-to?url=http%3A%2F%2Fexample.com%2F -c '(response.status, response.url)'

(302, 'http://httpbin.org/redirect-to?url=http%3A%2F%2Fexample.com%2F')
parse
- Syntax:
scrapy parse <url> [options] - Requires project: yes
Fetches the given URL and parses it with the spider that handles it, using the method passed with the --callback option, or parse if not given.
Supported options:
--spider=SPIDER: bypass spider autodetection and force use of specific spider--a NAME=VALUE: set spider argument (may be repeated)--callbackor-c: spider method to use as callback for parsing the response--metaor-m: additional request meta that will be passed to the callback request. This must be a valid json string. Example: –meta=’{“foo” : “bar”}’--pipelines: process items through pipelines--rulesor-r: useCrawlSpiderrules to discover the callback (i.e. spider method) to use for parsing the response--noitems: don’t show scraped items--nolinks: don’t show extracted links--nocolour: avoid using pygments to colorize the output--depthor-d: depth level for which the requests should be followed recursively (default: 1)--verboseor-v: display information for each depth level
Usage example:
$ scrapy parse http://www.example.com/ -c parse_item

[ ... scrapy log lines crawling example.com spider ... ]

>>> STATUS DEPTH LEVEL 1 <<<

# Scraped Items  ------------------------------------------------------------

[{'name': 'Example item',

 'category': 'Furniture',

 'length': '12 cm'}]

# Requests  -----------------------------------------------------------------

[]
settings
- Syntax:
scrapy settings [options] - Requires project: no
Get the value of a Scrapy setting.
If used inside a project it’ll show the project setting value, otherwise it’ll show the default Scrapy value for that setting.
Example usage:
$ scrapy settings --get BOT_NAME

scrapybot

$ scrapy settings --get DOWNLOAD_DELAY

0


runspider
- Syntax:
scrapy runspider <spider_file.py> - Requires project: no #全局执行
Run a spider self-contained in a Python file, without having to create a project.
Example usage:
$ scrapy runspider myspider.py

[ ... spider starts crawling ... ]

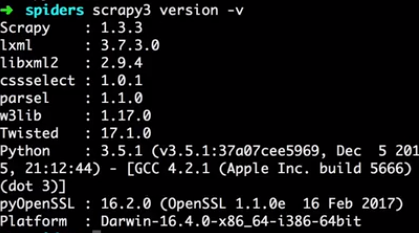
version
- Syntax:
scrapy version [-v] - Requires project: no
Prints the Scrapy version. If used with -v it also prints Python, Twisted and Platform info, which is useful for bug reports.

bench
New in version 0.17.
- Syntax:
scrapy bench - Requires project: no
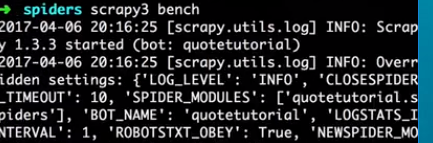
Run a quick benchmark test. Benchmarking.

Scrapy命令行详解的更多相关文章
- 爬虫(十):scrapy命令行详解
建爬虫项目 scrapy startproject 项目名例子如下: localhost:spider zhaofan$ scrapy startproject test1 New Scrapy pr ...
- Scrapy框架的命令行详解【转】
Scrapy框架的命令行详解 请给作者点赞 --> 原文链接 这篇文章主要是对的scrapy命令行使用的一个介绍 创建爬虫项目 scrapy startproject 项目名例子如下: loca ...
- [转载]OpenSSL中文手册之命令行详解(未完待续)
声明:OpenSSL之命令行详解是根据卢队长发布在https://blog.csdn.net/as3luyuan123/article/details/16105475的系列文章整理修改而成,我自己 ...
- 7Z命令行详解
7z.exe在CMD窗口的使用说明如下: 7-Zip (A) 4.57 Copyright (c) 1999-2007 Igor Pavlov 2007-12-06 Usage: 7za <co ...
- 7-zip命令行详解
一.简介 7z,全称7-Zip, 是一款开源软件.是目前公认的压缩比例最大的压缩解压软件. 主要特征: # 全新的LZMA算法加大了7z格式的压缩比 # 支持格式: * 压缩 / 解压缩:7z, XZ ...
- Python爬虫从入门到放弃(十三)之 Scrapy框架的命令行详解
这篇文章主要是对的scrapy命令行使用的一个介绍 创建爬虫项目 scrapy startproject 项目名例子如下: localhost:spider zhaofan$ scrapy start ...
- Python之爬虫(十五) Scrapy框架的命令行详解
这篇文章主要是对的scrapy命令行使用的一个介绍 创建爬虫项目 scrapy startproject 项目名例子如下: localhost:spider zhaofan$ scrapy start ...
- gcc命令行详解
介绍] ----------------------------------------- 常见用法: GCC 选项 GCC 有超过100个的编译选项可用. 这些选项中的许多你可能永远都不会用到, 但 ...
- [转]TFS常用的命令行详解
本文转自:http://blchen.com/tfs-common-commands/ 微软的TFS和Visual Studio整合的非常好,但是在开发过程中,很多时候只用GUI图形界面就会发现一些复 ...
随机推荐
- 用TensorFlow教你手写字识别
博主原文链接:用TensorFlow教你做手写字识别(准确率94.09%) 如需转载,请备注出处及链接,谢谢. 2012 年,Alex Krizhevsky, Geoff Hinton, and Il ...
- Cglib动态代理浅析
原文同步发表至个人博客[夜月归途] 原文链接:http://www.guitu18.com/se/java/2018-06-29/18.html 作者:夜月归途 出处:http://www.guitu ...
- Linux学习笔记之MySql的安装(CentOS)
一.移除mariadb 由于CentOS默认安装了mariadb,所以在安装MySql之前先移除mariadb,使用命令:yum remove mariadb-libs.x86_64,如下图所示: 二 ...
- mysql服务器主从数据库同步配置
首先需要在同一个局域网内的两台机器(当然也可以用一台机器虚拟两台机器出来),都安装上mysql服务. 主机A: 192.168.1.100 从机B: 192.168.1.101 可以有多台从机. 1. ...
- Spring Cloud Eureka 常用配置及说明
配置参数 默认值 说明 服务注册中心配置 Bean类:org.springframework.cloud.netflix.eureka.server.EurekaServerConfigBean eu ...
- springboot之mybatis注解形式
springboot整合mybatis对数据库进行访问,本实例采用注解的方式,如下: pom.xml文件 <parent> <groupId>org.springframewo ...
- CSS3 font-face使用
在 CSS3 之前,web 设计师必须使用已在用户计算机上安装好的字体. 通过 CSS3,web 设计师可以使用他们喜欢的任意字体. 当您找到或购买到希望使用的字体时,可将该字体文件存放到 web 服 ...
- vue生成二维码插件qrcodejs2
1.页面 <div id="qrCode" ref="qrCodeDiv"></div> 2.导入插件 import QRCode fr ...
- ArcGIS API for JavaScript:Layer之间那点儿事
先来看一个模型: |–TiledMapServiceLayer | |–ArcGISTiledMapServiceLayer |–DynamicLayer | |–Dyn ...
- 虚拟主机、VPS主机与云服务器的区别
本文转载自星光云 http://www.365yun.top/news/list.asp?newsid=22 虚拟主机是利用虚拟技术将一台物理服务器划分成多个“虚拟”服务器,虚拟主机的出现大大节省了服 ...