
一个交互式可视化Python库——Bokeh
本篇为《Python数据可视化实战》第十篇文章,我们一起学习一个交互式可视化Python库——Bokeh。
Bokeh基础
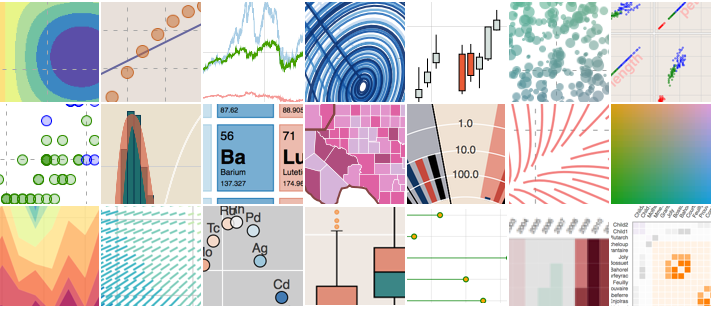
Bokeh是一个专门针对Web浏览器的呈现功能的交互式可视化Python库。这是Bokeh与其它可视化库最核心的区别。
Bokeh绘图步骤
①获取数据
②构建画布figure()
③添加图层,绘图line,circle,square,scatter,multi_line等;参数co
lor,legend
④自定义视觉属性
⑤选择性展示折线数据,建立复选框激活显示,复选框(checkbox)
导入库和数据
import numpy as np

import bokeh

from bokeh.layouts import gridplot

from bokeh.plotting import figure, output_file, show
图表实例
1.散点图
import numpy as np

import bokeh

from bokeh.layouts import gridplot

from bokeh.plotting import figure, output_file, show

# output_file("patch.html")  #输出网页形式

p = figure(plot_width=100, plot_height=100)

#数据

N=9

x=np.linspace(-2,2,N)

y=x**2

sizes=np.linspace(10,20,N)

xpts=np.array([-0.09,-0.12,0.0,0.12,0.09])

ypts=np.array([-0.1,0.02,0.1,0.02,-0.1])

p=figure(title="annular_wedge")

p.annular_wedge(x,y,10,20,0.3,4.1,color="#8888ee",inner_radius_units="screen",outer_radius_units="screen")

# Set to output the plot in the notebook

output_notebook()

show(p)
_20200316133935.png)
2.多分类的散点图
from bokeh.sampledata.iris import flowers

from bokeh.plotting import figure

from bokeh.io import show, output_notebook

#配色

colormap={'setosa':'red','versicolor':'green','virginica':'blue'}

colors=[colormap[x] for x in flowers['species']]

#画布

p=figure(title='Tris Morphology')

#绘图

#flowers['petal_length']为x,flowers['petal_width']为y,fill_alpha=0.3为填充透明度

p.circle(flowers['petal_length'],flowers['petal_width'],color=colors,fill_alpha=0.3,size=10)

#显示

output_notebook()

show(p)
_20200316133941.png)
3.数值大小以散点图大小来表示
import numpy as np

from bokeh.sampledata.iris import flowers

from bokeh.plotting import figure

from bokeh.io import show, output_notebook

x=[1,2,3,4]

y=[5,7,9,12]

sizes=np.array(y)+10  #气泡大小

p=figure(title='bubble chart')

p=figure(plot_width=300,plot_height=300)

p.scatter(x,y,marker="circle",size=sizes,color="navy")

output_notebook()

show(p)
_20200316134035.png)
4.折线图line
from bokeh.layouts import column, gridplot

from bokeh.models import BoxSelectTool, Div

from bokeh.plotting import figure

from bokeh.io import show, output_notebook

# 数据

x = [1, 2, 3, 4, 5, 6, 7]

y = [6, 7, 2, 4, 5, 10, 4]

# 画布:坐标轴标签,画布大小

p = figure(title="line example", x_axis_label='x', y_axis_label='y', width=400, height=400)

# 画图:数据、图例、线宽

p.line(x, y, legend="Temp.", line_width=2)  # 折线图

# 显示

output_notebook()

show(p)
_20200316134039.png)
5.同时展示不同函数,以散点和折线方式
# 数据,同时展示不同函数,以散点和折线方式

x = [0.1, 0.5, 1.0, 1.5, 2.0, 2.5, 3.0]

y0 = [i**2 for i in x]

y1 = [10**i for i in x]

y2 = [10**(i**2) for i in x]

# 创建画布

p = figure(

    tools="pan,box_zoom,reset,save",

    y_axis_type="log", title="log axis example",

    x_axis_label='sections', y_axis_label='particles',

    width=700, height=350)  # y轴类型:log指数或linear线性

# 增加图层,绘图

p.line(x, x, legend="y=x")

p.circle(x, x, legend="y=x", fill_color="white", size=8)

p.line(x, y0, legend="y=x^2", line_width=3)

p.line(x, y1, legend="y=10^x", line_color="red")

p.circle(x, y1, legend="y=10^x", fill_color="red", line_color="red", size=6)

p.line(x, y2, legend="y=10^x^2", line_color="orange", line_dash="4 4")

# 显示

output_notebook()

show(p)
_20200316134107.png)
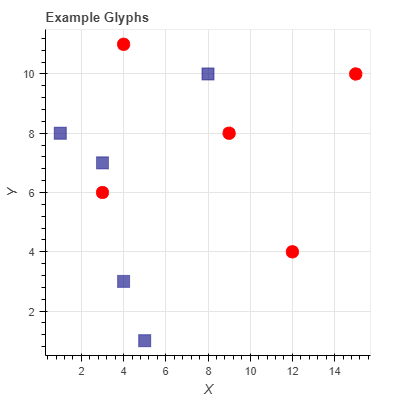
6.不同颜色不同形状表示不同类别的事物
# 数据,同时展示不同函数,以散点和折线方式

x = [0.1, 0.5, 1.0, 1.5, 2.0, 2.5, 3.0]

y0 = [i**2 for i in x]

y1 = [10**i for i in x]

y2 = [10**(i**2) for i in x]

# 创建画布

p = figure(

    tools="pan,box_zoom,reset,save",

    y_axis_type="log", title="log axis example",

    x_axis_label='sections', y_axis_label='particles',

    width=700, height=350)  # y轴类型:log指数或linear线性

# 增加图层,绘图

p.line(x, x, legend="y=x")

p.circle(x, x, legend="y=x", fill_color="white", size=8)

p.line(x, y0, legend="y=x^2", line_width=3)

p.line(x, y1, legend="y=10^x", line_color="red")

p.circle(x, y1, legend="y=10^x", fill_color="red", line_color="red", size=6)

p.line(x, y2, legend="y=10^x^2", line_color="orange", line_dash="4 4")

# 显示

output_notebook()

show(p)
7.不同函数设置创建复选框库选择性显示
x = np.linspace(0, 4 * np.pi, 100)

# 画布

p = figure()

# 折线属性

props = dict(line_width=4, line_alpha=0.7)

# 绘图3条函数序列

l0 = p.line(x, np.sin(x), color=Viridis3[0], legend="Line 0", **props)

l1 = p.line(x, 4 * np.cos(x), color=Viridis3[1], legend="Line 1", **props)

l2 = p.line(x, np.tan(x), color=Viridis3[2], legend="Line 2", **props)

# 复选框激活显示,复选框(checkbox),三个函数序列可选择性展示出来

checkbox = CheckboxGroup(labels=["Line 0", "Line 1", "Line 2"],

                         active=[0, 1, 2], width=100)

#

checkbox.callback = CustomJS(args=dict(l0=l0, l1=l1, l2=l2, checkbox=checkbox), code="""

l0.visible = 0 in checkbox.active;

l1.visible = 1 in checkbox.active;

l2.visible = 2 in checkbox.active;

""")

# 添加图层

layout = row(checkbox, p)

output_notebook()

# 显示

show(layout)
_20200316134133.png)
8.收盘价的时序图走势和散点图
import numpy as np

from bokeh.plotting import figure

from bokeh.io import show, output_notebook

from bokeh.layouts import row  #row()的作用是将多个图像以行的方式放到同一张图中

from bokeh.palettes import Viridis3

from bokeh.models import CheckboxGroup, CustomJS  #CheckboxGroup 创建复选框库

# 数据

aapl = np.array(AAPL['adj_close'])

aapl_dates = np.array(AAPL['date'], dtype=np.datetime64)

window_size = 30

window = np.ones(window_size)/float(window_size)

aapl_avg = np.convolve(aapl, window, 'same')

# 画布

p = figure(width=800, height=350, x_axis_type="datetime")

# 图层

p.circle(aapl_dates, aapl, size=4, color='darkgrey', alpha=0.2, legend='close') #散点图

p.line(aapl_dates, aapl_avg, color='red', legend='avg') #折线时序图

# 自定义视觉属性

p.title.text = "AAPL One-Month Average"

p.legend.location = "top_left"

p.grid.grid_line_alpha=0

p.xaxis.axis_label = 'Date'

p.yaxis.axis_label = 'Price'

p.ygrid.band_fill_color="gray"

p.ygrid.band_fill_alpha = 0.1

p.legend.click_policy="hide" # 点击图例显示隐藏数据

# 显示结果

output_notebook()

show(p)
_20200316134143.png)

一个交互式可视化Python库——Bokeh的更多相关文章
- 一文总结数据科学家常用的Python库(上)
概述 这篇文章中,我们挑选了24个用于数据科学的Python库. 这些库有着不同的数据科学功能,例如数据收集,数据清理,数据探索,建模等,接下来我们会分类介绍. 您觉得我们还应该包含哪些Python库 ...
- 总结数据科学家常用的Python库
概述 这篇文章中,我们挑选了24个用于数据科学的Python库. 这些库有着不同的数据科学功能,例如数据收集,数据清理,数据探索,建模等,接下来我们会分类介绍. 您觉得我们还应该包含哪些Python库 ...
- 数据处理一条龙!这15个Python库不可不知
如果你是一名数据科学家或数据分析师,或者只是对这一行业感兴趣,那下文中这些广受欢迎且非常实用的Python库你一定得知道. 从数据收集.清理转化,到数据可视化.图像识别和网页相关,这15个Python ...
- [资料搜集狂]D3.js数据可视化开发库
偶然看到一个强大的D3.js,存档之. D3.js 是近年来十分流行的一个数据可视化开发库. 采用BSD协议 源码:https://github.com/mbostock/d3 官网:http://d ...
- python库-Arrow处理时间
Arrow是一个处理时间的python库,能一键转换dates/times/timestamps等时间格式而不需要大量导致各种时间模块和格式转换函数,十分快捷方便 使用Arrow需要两步转换操作: 1 ...
- Bokeh 0.9.0dev 发布,交互式可视化库
快速使用Romanysoft LAB的技术实现 HTML 开发Mac OS App,并销售到苹果应用商店中. <HTML开发Mac OS App 视频教程> 土豆网同步更新:http: ...
- 基于Python的交互式可视化工具 [转]
前几天发现一个可视化工具Dash,当看到它的交互式效果后突然就觉得眼前一亮.早就想写出来分享给大家,今天利用睡前一点时间发出来,希望能给有需要的朋友带来一点帮助或者多一个参考. Dash介绍 在Pyt ...
- sopt:一个简单的python最优化库
引言 最近有些朋友总来问我有关遗传算法的东西,我是在大学搞数学建模的时候接触过一些最优化和进化算法方面的东西,以前也写过几篇博客记录过,比如遗传算法的C语言实现(一):以非线性函数求极值为例和 ...
- #华为云·寻找黑马程序员# 如何实现一个优雅的Python的Json序列化库
在Python的世界里,将一个对象以json格式进行序列化或反序列化一直是一个问题.Python标准库里面提供了json序列化的工具,我们可以简单的用json.dumps来将一个对象序列化.但是这种序 ...
随机推荐
- java实现银行管理系统
Bank类 package First; import java.util.TreeSet; //银行类public class Bank { private String Bankna ...
- OpenCV 对两幅图像求和(求混合(blending))
#include <cv.h> #include <highgui.h> #include <iostream> using namespace cv; int m ...
- PEAKS|NovoHMM|Nover|DeepNovo|MAYUPercolator|UniprotKB|Swiss-prot|Mascot|SEQUEST|X!Tandem|pFind|MaxQuant|Msconvert|PEPMASS|LC|
质谱仪: 质谱分析法是先将大分子电离为带电粒子,按质核比分离,由质谱仪识别电信号得到质谱图. Top-down直接得到结果是蛋白. Bottom down使用shutgun方法得到结果是肽段. 由蛋白 ...
- npm相关说明
https://my.oschina.net/dkvirus?tab=newest&catalogId=5669676 https://my.oschina.net/dkvirus/blog/ ...
- 默认的Settings.xml文件(无修改过)-Maven
Tip: 当什么都不作修改时,默认是从Maven中央仓库进行下载,https://repo.maven.apache.org/maven2. 打开maven源码下的lib文件夹,找到maven-mod ...
- Word目录生成
之所以写这篇文章,是因为每次写报告都需要生成相应目录,但常常只记得个大概,最终还得要重新百度,十分头疼,故在此记录一下. 大概分为3个步骤 步骤1 设置标题级数 进入大纲模式 选择相应级数,这里选的是 ...
- python 通过socket实现ssh功能
功能:实现从客户端向服务端发送cmd指令,服务端将结果返回给客户端的功能. #coding:utf-8 '''服务端''' import socket,os server=socket.socket( ...
- ChatterBot聊天机器人呢结构(五):ChatterBot对话流程
原文地址:http://www.bugingcode.com/blog/ChatterBot_Dialogue_process.html 创建机器人 部署机器人的各种属性,根据前面的章节里聊天机器人的 ...
- SpringBoot入门系列(一)如何快速创建SpringBoot项目
这段时间也没什么事情,所以就重新学习整理了Spring Boot的相关内容.今天开始整理更新Spring Boot学习笔记,感兴趣的朋友可以关注我的博客:https://www.cnblogs.com ...
- 从0开发3D引擎(补充):介绍领域驱动设计
我们使用领域驱动设计(英文缩写为DDD)的方法来设计引擎,在引擎开发的过程中,领域模型会不断地演化. 本文介绍本系列使用的领域驱动设计思想的相关概念和知识点,给出了相关的资料. 上一篇博文 从0开发3 ...