[转]教你实践ASP.NET Core Authorization
本文转自:http://www.cnblogs.com/rohelm/p/Authorization.html
本文目录
Asp.net Core 对于授权的改动很友好,非常的灵活,本文以MVC为主,当然如果说webapi或者其他的分布式解决方案授权,也容易就可以实现单点登录都非常的简单,可以使用现成的IdentityServer框架或者自定义实现动非常方便和干净,如果你在运行示例代码的时候未达到预期效果,请把文章拉到结尾寻找答案。
本文示例代码下载,github我这访问不了,暂且直接上传博客园存储了。
准备
- 创建一个名为AuthorizationForoNetCore的(web)解决方案,选择Empty模板
- 添加相关nuget包引用Microsoft.AspNetCore.Mvc(选择最新版本)
- 编辑Startup.cs文件,添加mvcservice并进行默认路由配置

 1 public class Startup

 2     {

 3         public void ConfigureServices(IServiceCollection services)

 4         {

 5             services.AddMvc();

 6         }

 7

 8         public void Configure(IApplicationBuilder app)

 9         {

10             app.UseMvc(routes =>

11             {

12                 routes.MapRoute(

13                      name: "default",

14                      template: "{controller=Home}/{action=Index}/{id?}");

15             });

16         }

17 } 添加Controllers文件夹,添加HomeContrller
 public class HomeController : Controller

    {

        public IActionResult Index()

        {

            return View();

        }

    }
创建
Views/Home文件夹,并添加Index(Action)对应的Index.cshtml文件123456<!--Index.cshtml-->假如生活欺骗了你假如生活欺骗了你,不要悲伤,不要心急!忧郁的日子里须要镇静:相信吧,快乐的日子将会来临!
使用Authorization
- 添加相关nuget包(均使用最新版本)
- Microsoft.AspNetCore.Authorization
- Microsoft.AspNetCore.Authentication.Cookies
- 在ConfigureServices()方法中添加对应服务: services.AddAuthorization()
- 在Index(Action)方法上添加 [Authorize] 特性,毫无疑问,添加后执行dotnet run 指令后后会返回401的授权码,那么接着操作
- 编辑Startup.cs在Configureapp.UseMvc()方法之前,我们添加一个cookie 中间件,用于持久化请求管道中的身份配置信息
12345678
app.UseCookieAuthentication(newCookieAuthenticationOptions{AuthenticationScheme ="MyCookieMiddlewareInstance",LoginPath =newPathString("/Account/Unauthorized/"),AccessDeniedPath =newPathString("/Account/Forbidden/"),AutomaticAuthenticate =true,AutomaticChallenge =true}); tip:相关配置参数细节请参阅:https://docs.asp.net/en/latest/security/authentication/cookie.html
- 添加Controllers/Account文件夹,添加 AccountController.cs 控制器文件,实现上述指定的方法,可能这里你会疑惑,为什么文档里不是一个 /Account/Login 这类的,文档说了别较真,这就是个例子而已,继续你就明白了。
- 添加并实现上述中间件重定向的action 方法如下,你可以看到其实Unauthorized方法模拟实现了登陆的过程。tip:假如你添加Unauthorized视图,并且没有该不实现模拟登陆,那么运行你会直接看到 Unauthorized.cshtml 的内容,这里我们不需要添加该视图,仅作说明。
public class AccountController : Controller

{

     public async Task<IActionResult> Unauthorized(string returnUrl = null)

     {

         List<Claim> claims = new List<Claim>();

         claims.Add(new Claim(ClaimTypes.Name, "halower", ClaimValueTypes.String, "https://www.cnblogs.com/rohelm"));

         var userIdentity = new ClaimsIdentity("管理员");

         userIdentity.AddClaims(claims);

         var userPrincipal = new ClaimsPrincipal(userIdentity);

         await HttpContext.Authentication.SignInAsync("MyCookieMiddlewareInstance", userPrincipal,

             new AuthenticationProperties

             {

                 ExpiresUtc = DateTime.UtcNow.AddMinutes(20),

                 IsPersistent = false,

                 AllowRefresh = false

             });

        if (Url.IsLocalUrl(returnUrl))

         {

             return Redirect(returnUrl);

         }

         else

         {

             return RedirectToAction("Index", "Home");

         }

     }

     public IActionResult Forbidden()

     {

         return View();

     }

}
编辑
Home/Index.schtml@using System.Security.Claims; @if (User.Identities.Any(u => u.IsAuthenticated))
{
<h1>
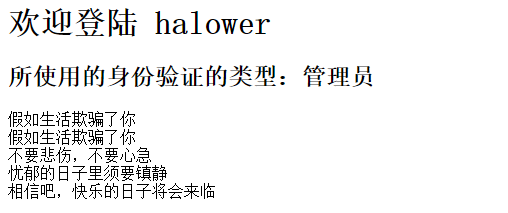
欢迎登陆 @User.Identities.First(u => u.IsAuthenticated).FindFirst(ClaimTypes.Name).Value
</h1>
<h2>所使用的身份验证的类型:@User.Identity.AuthenticationType</h2>
}
<article>
假如生活欺骗了你<br />
假如生活欺骗了你<br />
不要悲伤,不要心急<br />
忧郁的日子里须要镇静<br />
相信吧,快乐的日子将会来临
</article>- 运行代码你会看到如下结果(程序获取我们提供的由issuer发布claims并展示在视图中,后续会检查Claims看他们是否匹配)
使用全局授权策略
- 去除Home/Index (Action)上的 [Authorize] 特性
- 添加 Views/Account/Forbidden.cshtml 页面,内容为 <h1>拒绝访问</h1>
- 修改 ConfigureServices 方法中的 services.AddMvc() 使用它的 AddMvc(this IServiceCollection services, Action<MvcOptions> setupAction) 重载
- 运行查看结果,你会发现这几乎成了一个无限的重定向从而造成错误,因为每个页面都需要授权。
- 为 AccountController 添加 [AllowAnonymous] 特性,启动匿名访问,再次运行项目,查看结果
- 结果就是重定向到了 Forbidden.cshtml 页面
使用角色授权
- 在 HomeController 上添加 [Authorize(Roles = "Administrator")] 特性
- 在模拟登陆处( Unauthorized方法中 )添加角色说明的身份信息条目:
- claims.Add(new Claim(ClaimTypes.Role, "Administrator", ClaimValueTypes.String, "https://www.cnblogs.com/rohelm"));
- 运行项目查看结果
可以使用中你会发现Asp.net Core安全验证方面较以往的版本最大的改变就是全部采用中间件的方式进行验证授权,并很好的使用了Policy (策略)这个概念,下那么继续~。
基于声明的授权
- 返回Startup.cs,修改 services.AddAuthorization() 方法如下:
services.AddAuthorization(options =>

{

    options.AddPolicy("EmployeeOnly", policy => policy.RequireClaim("EmployeeNumber"));

}); - 修改HomeController上的特性,添加 [Authorize(Policy = "EmployeeOnly")]
- 运行项目查看结果,发现被拒绝了
- 在模拟登陆处 Unauthorize方法添加:
claims.Add(new Claim("EmployeeNumber", "123456", ClaimValueTypes.String, "http://www.cnblogs.com/rohelm")); - goto 3.
- 多重策略的应用,与之前的版本几乎一样,例如本次修改的结果可以为:
 [Authorize(Roles = "Administrator")]

    public class HomeController:Controller

    {

        [Authorize(Policy = "EmployeeOnly")]

        public IActionResult Index()

        {

            return View();

        }

} - 详情请参阅:https://docs.asp.net/en/latest/security/authorization/claims.html的说明
自定义授权策略
自定义授权策略的实现,包括实现一个 IAuthorizationRequirement 的Requirement,和实现 AuthorizationHandler<TRequirement> 的处理器,这里使用文档
https://docs.asp.net/en/latest/security/authorization/policies.html中的Code。
- 添加 MinimumAgeHandler 处理器实现
public class MinimumAgeRequirement: AuthorizationHandler<MinimumAgeRequirement>, IAuthorizationRequirement

    {

        int _minimumAge;

        public MinimumAgeRequirement(int minimumAge)

        {

            _minimumAge = minimumAge;

        }

        protected override void Handle(AuthorizationContext context, MinimumAgeRequirement requirement)

        {

            if (!context.User.HasClaim(c => c.Type == ClaimTypes.DateOfBirth))

            {

                return;

            }

            var dateOfBirth = Convert.ToDateTime(

                context.User.FindFirst(c => c.Type == ClaimTypes.DateOfBirth).Value);

            int calculatedAge = DateTime.Today.Year - dateOfBirth.Year;

            if (dateOfBirth > DateTime.Today.AddYears(-calculatedAge))

            {

                calculatedAge--;

            }

            if (calculatedAge >= _minimumAge)

            {

                context.Succeed(requirement);

            }

        }

} - 在 AddAuthorization 中添加一个名为Over21的策略
options.AddPolicy("Over21", policy => policy.Requirements.Add(new MinimumAgeRequirement(21))); - 在HomeController上应用该策略 [Authorize(Policy = "Over21")]
- 在 Unauthorized 函数中添加对应的声明信息条目 claims.Add(new Claim(ClaimTypes.DateOfBirth, "1900-01-01", ClaimValueTypes.Date));
修改时间(例如小于21岁的生日,2000-01-01)并运行调试,查看结果
对一个Requirement应用多个处理器
tip:上面的演示,我们使用了一个同时实现AuthorizationHandler<MinimumAgeRequirement>, IAuthorizationRequirement的MinimumAgeRequirement来做演示,但是如果一个Requirement徐要实现多个处理器就需要分开写了,原因很简单,这里无法实现类的多重继承。
下面我们实现一个使用Token登陆的需求
- 添加一个LoginRequirement的需求
    public class LoginRequirement: IAuthorizationRequirement

    {

} - 添加一个使用用户名密码登陆的处理器
 public class HasPasswordHandler : AuthorizationHandler<LoginRequirement>

    {

        protected override void Handle(AuthorizationContext context, LoginRequirement requirement)

        {

            if (!context.User.HasClaim(c => c.Type == "UsernameAndPassword" && c.Issuer == "http://www.cnblogs.com/rohelm"))

                return;

            context.Succeed(requirement);

        }

} - 在一些场景中我们也会使用发放访问令牌的方式让用户登陆
public class HasAccessTokenHandler : AuthorizationHandler<LoginRequirement>

    {

        protected override void Handle(AuthorizationContext context, LoginRequirement requirement)

        {

            if (!context.User.HasClaim(c => c.Type == "AccessToken" && c.Issuer == "http://www.cnblogs.com/rohelm"))

                return;

            var toeknExpiryIn = Convert.ToDateTime(context.User.FindFirst(c => c.Type == "AccessToken" && c.Issuer == "http://www.cnblogs.com/rohelm").Value);

            if (toeknExpiryIn > DateTime.Now)

            {

                context.Succeed(requirement);

            }

        }

} - 在 AddAuthorization 中添加一个名为CanLogin的策略
options.AddPolicy("CanLogin", policy => policy.Requirements.Add(new LoginRequirement())); - 注册自定义策略
  services.AddSingleton<IAuthorizationHandler, HasPasswordHandler>();

services.AddSingleton<IAuthorizationHandler, HasAccessTokenHandler>(); - 在Unauthorized 函数中添加对应的声明信息条目
  claims.Add(new Claim("UsernameAndPassword", "123456", ClaimValueTypes.String, "http://www.cnblogs.com/rohelm"));
 // 测试切换登陆声明方式
// claims.Add(new Claim("AccessToken", DateTime.Now.AddMinutes(1).ToString(), ClaimValueTypes.String, "http://www.cnblogs.com/rohelm")); - 在HomeController上应用该策略 [Authorize(Policy = "CanLogin")]
- 运行并查看结果。
基于资源的Requirements
在实际开发者中,除了基于用户的授权验证外,通过我们也会遇到针对一些资源的授权限制,例如有的人可以编辑文档,有的人只能查看文档,由此引出该话题
https://docs.asp.net/en/latest/security/authorization/resourcebased.html
- 定义一个Document类
public class Document

    {

        public int Id { get; set; }

        public string Author { get; set; }

} - 定义Document仓储接口
public interface IDocumentRepository

    {

        IEnumerable<Document> Get();

        Document Get(int id);

} - 模拟实现上述接口
public class FakeDocumentRepository : IDocumentRepository

    {

        static List<Document> _documents = new List<Document> {

            new Document { Id = 1, Author = "halower" },

            new Document { Id = 2, Author = "others" }

        };

        public IEnumerable<Document> Get()

        {

            return _documents;

        }

        public Document Get(int id)

        {

            return _documents.FirstOrDefault(d => d.Id == id);

        }

} - 注册接口实现类
services.AddSingleton<IDocumentRepository, FakeDocumentRepository>();
- 创建一个 DocumentController 并修改为如下内容
public class DocumentController : Controller

    {

        IDocumentRepository _documentRepository;

        public DocumentController(IDocumentRepository documentRepository)

        {

            _documentRepository = documentRepository;

        }

        public IActionResult Index()

        {

            return View(_documentRepository.Get());

        }

        public IActionResult Edit(int id)

        {

            var document = _documentRepository.Get(id);

            if (document == null)

                return new NotFoundResult();

            return View(document);

        }

} - 添加对应 Index.cshtml 视图文件
@model IEnumerable<AuthorizationForoNetCore.Modles.Document>

<h1>文档列表</h1>

@foreach (var document in Model)

{

    <p>

        @Html.ActionLink("文档 #" + document.Id, "编辑", new { id = document.Id })

    </p>

} - 添加对应的 Edit.cshtml 视图文件
@model AuthorizationForoNetCore.Modles.Document

<h1>文档 #@Model.Id</h1>

<h2>作者: @Model.Author</h2> - 定义EditRequirement
public class EditRequirement : IAuthorizationRequirement

 {

} - 添加对应的编辑文档处理器
public class DocumentEditHandler : AuthorizationHandler<EditRequirement, Document>

    {

        protected override void Handle(AuthorizationContext context, EditRequirement requirement, Document resource)

        {

            if (resource.Author == context.User.FindFirst(ClaimTypes.Name).Value)

            {

                context.Succeed(requirement);

            }

        }

} - 在 ConfigureServices() 方法中注册处理器实现
1 services.AddSingleton<IAuthorizationHandler, DocumentEditHandler>();
- 由于对于文档的授权服务仅仅反正在操作方法的内部,因此我们需要直接注入 IAuthorizationService 对象并在需要的Action内部直接处理
public class DocumentController : Controller

    {

        IDocumentRepository _documentRepository;

        IAuthorizationService _authorizationService;

        public DocumentController(IDocumentRepository documentRepository, IAuthorizationService authorizationService)

        {

            _documentRepository = documentRepository;

            _authorizationService = authorizationService;

        }

        public IActionResult Index()

        {

            return View(_documentRepository.Get());

        }

        public async Task<IActionResult> Edit(int id)

        {

            var document = _documentRepository.Get(id);

            if (document == null)

                return new NotFoundResult();

            if (await _authorizationService.AuthorizeAsync(User, document, new EditRequirement()))

            {

                return View(document);

            }

            else

            {

                return new ChallengeResult();

            }

        }

} - 运行查看结果
在视图中进行授权
问题来了额,上面示例的视图中怎么做限制了,那就继续了
1.使用 @inject 命令注入 AuthorizationService
2.应用该上述同样策略,做简单修改
@using Microsoft.AspNetCore.Authorization

@model IEnumerable<AuthorizationForoNetCore.Modles.Document>

@inject IAuthorizationService AuthorizationService

@using AuthorizationForoNetCore.Policy

<h1>文档列表</h1>

@{

    var requirement = new EditRequirement();

    foreach (var document in Model)

    {

        if (await AuthorizationService.AuthorizeAsync(User, document, requirement)) {

    <p>

        @Html.ActionLink("文档 #" + document.Id, "编辑", new { id = document.Id })

    </p>

    }

}

}
请在运行时清理Cookie,或者在试验时直接暂时禁用
之前写的一个插件,谁有时间帮升级支持下asp.net Core:https://github.com/halower/JqGridForMvc
[转]教你实践ASP.NET Core Authorization的更多相关文章
- 教你实践ASP.NET Core Authorization
本文目录 Asp.net Core 对于授权的改动很友好,非常的灵活,本文以MVC为主,当然如果说webapi或者其他的分布式解决方案授权,也容易就可以实现单点登录都非常的简单,可以使用现成的Iden ...
- ASP.NET Core Authorization
ASP.NET Core Authorization 本文目录 Asp.net Core 对于授权的改动很友好,非常的灵活,本文以MVC为主,当然如果说webapi或者其他的分布式解决方案授权,也容易 ...
- win10 uwp 手把手教你使用 asp dotnet core 做 cs 程序
本文是一个非常简单的博客,让大家知道如何使用 asp dot net core 做后台,使用 UWP 或 WPF 等做前台. 本文因为没有什么业务,也不想做管理系统,所以看到起来是很简单. Visua ...
- 一篇文章教你学会ASP.Net Core LINQ基本操作
一篇文章教你学会ASP.Net Core LINQ基本操作 为什么要使用LINQ LINQ中提供了很多集合的扩展方法,配合lambda能简化数据处理. 例如我们想要找出一个IEnumerable< ...
- ASP.NET Core & Docker 实战经验分享
一.前言 最近一直在研究和实践ASP.NET Core.Docker.持续集成.在ASP.NET Core 和 Dcoker结合下遇到了一些坑,在此记录和分享,希望对大家有一些帮助. 二.中间镜像 我 ...
- Building microservices with ASP.NET Core (without MVC)(转)
There are several reasons why it makes sense to build super-lightweight HTTP services (or, despite a ...
- win10 uwp 使用 asp dotnet core 做图床服务器客户端
原文 win10 uwp 使用 asp dotnet core 做图床服务器客户端 本文告诉大家如何在 UWP 做客户端和 asp dotnet core 做服务器端来做一个图床工具 服务器端 从 ...
- 《ASP.NET Core应用开发入门教程》与《ASP.NET Core 应用开发项目实战》正式出版
“全书之写印,实系初稿.有时公私琐务猬集,每写一句,三搁其笔:有时兴会淋漓,走笔疾书,絮絮不休:有时意趣萧索,执笔木坐,草草而止.每写一段,自助覆阅,辄摇其首,觉有大不妥者,即贴补重书,故剪刀浆糊乃不 ...
- ASP.NET Core OceLot 微服务实践
1.OceLot中间件介绍 在传统的BS应用中,随着业务需求的快速发展变化,需求不断增长,迫切需要一种更加快速高效的软件交付方式.微服务可以弥补单体应用不足,是一种更加快速高效软件架构风格.单体应用被 ...
随机推荐
- MongoDB 存储引擎:WiredTiger和In-Memory
存储引擎(Storage Engine)是MongoDB的核心组件,负责管理数据如何存储在硬盘(Disk)和内存(Memory)上.从MongoDB 3.2 版本开始,MongoDB 支持多数据存储引 ...
- SQL Server 合并复制遇到identity range check报错的解决
最近帮一个客户搭建跨洋的合并复制,由于数据库非常大,跨洋网络条件不稳定,因此只能通过备份初始化,在初始化完成后向海外订阅端插入数据时发现报出如下错误: Msg 548, Level 16, S ...
- JavaScript资源大全中文版(Awesome最新版)
Awesome系列的JavaScript资源整理.awesome-javascript是sorrycc发起维护的 JS 资源列表,内容包括:包管理器.加载器.测试框架.运行器.QA.MVC框架和库.模 ...
- angular2系列教程(二)模板语法
今天我们要讲的是angualr2的模板语法,官网写的很清楚,但我也用通俗易懂的讲法再罗列一下吧! 例子
- 设计模式(十一):从文Finder中认识"组合模式"(Composite Pattern)
上一篇博客中我们从从电影院中认识了"迭代器模式"(Iterator Pattern),今天我们就从文件系统中来认识一下“组合模式”(Composite Pattern).说到组合模 ...
- 使用VS2015进行C++开发的6个主要原因
使用VS2015进行C++开发的6个主要原因 使用Visual Studio 2015进行C++开发 在今天的 Build 大会上,进行了“将你的 C++ 代码转移至 VS2015 的 6 个原因”的 ...
- 记录一次bug解决过程:规范变量名称和mybatis的使用以及代码优化
一.总结 Mybatis中当parameterType为基本数据类型的时候,统一采用_parameter来代替基本数据类型变量. Mybatis中resultMap返回一个对象,resultType返 ...
- 生成Tab键或逗号分隔的CSV
<?php header("Content-type:text/csv;charset=utf-8"); header("Content-Disposition:a ...
- 来玩Play框架06 用户验证
作者:Vamei 出处:http://www.cnblogs.com/vamei 欢迎转载,也请保留这段声明.谢谢! 用户验证(User Authentification)复合的使用Play框架的数个 ...
- file命令
命令简介: 该命令用来识别文件类型,也可用来辨别一些文件的编码格式.它是通过查看文件的头部信息来获取文件类型,而不是像Windows通过扩展名来确定文件类型的. 执行权限 :All User 指令所在 ...