34.qt quick-Popup弹出窗口自定义
1.Popup介绍
Popup是一个弹出窗口的控件
它的常用属性如下所示:
- anchors.centerIn : Object,用来设置居中在谁窗口中.
- closePolicy : enumeration,设置弹出窗口的关闭策略,默认值为默认值为Popup.CloseOnEscape|Popup.CloseOnPressOutside,取值有:
- Popup.NoAutoClose : 只有在手动调用close()后,弹出窗口才会关闭(比如加载进度时,不XIANG)。
- Popup.CloseOnPressOutside : 当鼠标按在弹出窗口外时,弹出窗口将关闭。
- Popup.CloseOnPressOutsideParent : 当鼠标按在其父项之外时,弹出窗口将关闭。
- Popup.CloseOnReleaseOutside : 当鼠标在弹出窗口外部松开按下时,弹出窗口将关闭。
- Popup.CloseOnReleaseOutsideParent : 当鼠标在其父项松开按下时,弹出窗口将关闭。
- Popup.CloseOnEscape : 当弹出窗口具有活动焦点时,按下ESC键时,弹出窗口将关闭。
- dim : bool,昏暗属性,默认为undefined,设置为false,则模态窗口弹出后的其它背景不会昏暗
- modal : bool,模态,默认为false(非模态,非阻塞调用,指出现该对话框时,也可以与父窗口进行交互,此时dim是无效果的)
- enter : Transition,进入弹出窗口时的动画过渡
- exit : Transition,退出弹出窗口时的动画过渡
它的信号如下所示:
- void aboutToHide(): 当弹出窗口即将隐藏时,会发出此信号。
- void aboutToShow(): 当弹出窗口即将显示时,会发出此信号。
- void closed(): 当弹出窗口关闭时发出此信号。
- void opened(): 打开弹出窗口时发出此信号。
它的方法如下所示:
- void close(): 关闭弹出窗口。
- forceActiveFocus(reason = Qt.OtherFocusReason): 强制设置焦点
- void open() : 打开弹出窗口。
然后我们来自定义实现一个带指标的popup弹出窗口.
2.自定义Popup
由于Popup的锚布局只有一个anchors.centerIn,假如们想让Popup位于某个控件的左上方时,必须得自定义一个.
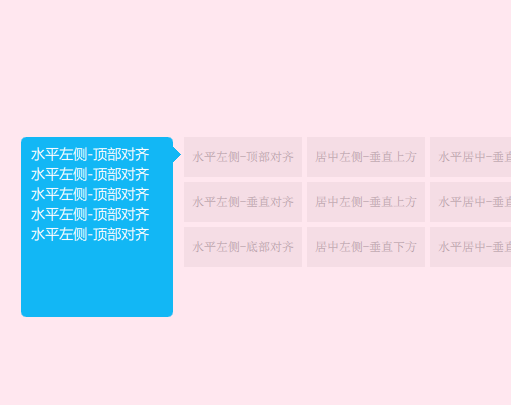
实现截图如下所示(已上传群里):

实现效果如下所示:
首先我们需要实现horizontalPosBase和verticalPosBase两个属性.来实现Popup位于目标对象的哪个方位.
- 一个是设置popup在目标对象的水平方向的位置
- 一个是popup在目标对象的垂直方向的位置.
由于我们已经知道了方位,那么指标的坐标也就可以自动计算出来了.
具体实现代码如下所示:
     // 指示器方向,根据horizontalPosBase和verticalPosBase 自动计算

     enum IndicatorStyle {

         IndicatorLeft,

         IndicatorRight,

         IndicatorTop,

         IndicatorBottom

     }

     function updateIndicatorPos(indicatorStyle) {

          switch (indicatorStyle)

         {

             case IndicatorPopup.IndicatorLeft:

                 indicator.x = - indicator.width*0.4;

                 indicator.y =  back.height <= myTarget.height ? (back.height)/2-indicatorLen :

                                verticalPosBase === IndicatorPopup.TopAlign ? (myTarget.height)/2 -indicatorLen :

                                verticalPosBase === IndicatorPopup.VerticalAlign ? (back.height)/2 -indicatorLen :

                                back.height -  (myTarget.height)/2 -indicatorLen;

                 break;

             case IndicatorPopup.IndicatorRight:

                 indicator.x = width - indicator.width*1.2;

                 indicator.y =  back.height <= myTarget.height ? (back.height)/2-indicatorLen :

                                verticalPosBase === IndicatorPopup.TopAlign ? (myTarget.height)/2 -indicatorLen :

                                verticalPosBase === IndicatorPopup.VerticalAlign ? (back.height)/2 -indicatorLen :

                                back.height -  (myTarget.height)/2 -indicatorLen;

                 break;

             case IndicatorPopup.IndicatorTop:

                 indicator.x =  back.width <= myTarget.width ? (back.width)/2-indicatorLen :

                                horizontalPosBase === IndicatorPopup.PosBaseToRight ? (myTarget.width)/2 -indicatorLen :

                                horizontalPosBase === IndicatorPopup.PosBaseToHorizontal ? (back.width)/2 -indicatorLen :

                                back.width -  (myTarget.width)/2 -indicatorLen;

                 indicator.y =  - indicator.width*0.4;

                 break;

             case IndicatorPopup.IndicatorBottom:

                 indicator.x =  back.width <= myTarget.width ? (back.width)/2-indicatorLen :

                                horizontalPosBase === IndicatorPopup.PosBaseToRight ? (myTarget.width)/2 -indicatorLen :

                                horizontalPosBase === IndicatorPopup.PosBaseToHorizontal ? (back.width)/2 -indicatorLen :

                                back.width -  (myTarget.width)/2 -indicatorLen;

                 indicator.y =  height - indicator.height*1.2;

                 break;

         }

         console.log("indicator",indicator.x,indicator.y,indicator.width,indicator.height)

     }

     function updatePopupPos() {

        var indicatorStyle;

         switch (horizontalPosBase)

        {

            case IndicatorPopup.PosBaseToLeft:     // popup位于目标水平左侧

                x = myTarget.x - width - targetSpacing;

                y = verticalPosBase === IndicatorPopup.TopAlign ? myTarget.y :

                    verticalPosBase === IndicatorPopup.VerticalAlign ? myTarget.y + myTarget.height/2 - height/2 :

                    myTarget.y - height + myTarget.height

                indicatorStyle = IndicatorPopup.IndicatorRight;

                break;

            case IndicatorPopup.PosBaseToHorizontal: // popup水平中间

                x = myTarget.x + myTarget.width/2 - width/2;

                y = verticalPosBase === IndicatorPopup.PosBaseToTop ? myTarget.y - height - targetSpacing :

                    verticalPosBase === IndicatorPopup.PosBaseToBottom ? myTarget.y + myTarget.height + targetSpacing :

                    myTarget.y + myTarget.height + targetSpacing

                indicatorStyle = verticalPosBase === IndicatorPopup.PosBaseToTop ? IndicatorPopup.IndicatorBottom :

                                                                                   IndicatorPopup.IndicatorTop;

                break;

            case IndicatorPopup.PosBaseToRight:   // popup位于目标水平右侧

                x = myTarget.x + myTarget.width + targetSpacing;

                y = verticalPosBase === IndicatorPopup.TopAlign ? myTarget.y :

                    verticalPosBase === IndicatorPopup.VerticalAlign ? myTarget.y + myTarget.height/2 - height/2 :

                    myTarget.y - height + myTarget.height

                indicatorStyle = IndicatorPopup.IndicatorLeft

                console.log("PosBaseToRight",x,y,indicatorStyle);

                break;

        }

        back.anchors.leftMargin = indicatorStyle === IndicatorPopup.IndicatorLeft ? indicatorLen : 0

        back.anchors.rightMargin = indicatorStyle === IndicatorPopup.IndicatorRight ? indicatorLen : 0

        back.anchors.bottomMargin = indicatorStyle === IndicatorPopup.IndicatorBottom ? indicatorLen : 0

        back.anchors.topMargin = indicatorStyle === IndicatorPopup.IndicatorTop ? indicatorLen : 0

        leftPadding = indicatorStyle === IndicatorPopup.IndicatorLeft ? indicatorLen : 0

        rightPadding = indicatorStyle === IndicatorPopup.IndicatorRight ? indicatorLen : 0

        bottomPadding = indicatorStyle === IndicatorPopup.IndicatorBottom ? indicatorLen : 0

        topPadding = indicatorStyle === IndicatorPopup.IndicatorTop ? indicatorLen : 0

        console.log(x,y,indicatorStyle);

        updateIndicatorPos(indicatorStyle);

     }
比如我们想让这个popup位于目标的左侧,顶部对齐,就可以这样写(无需指定popup的X,Y坐标了):
Button {

        id: btn

        text: "水平左侧-顶部对齐"

        onClicked: {

            popup.backgroundColor = "#12B7F5"

            popup.horizontalPosBase = IndicatorPopup.PosBaseToLeft

            popup.verticalPosBase = IndicatorPopup.TopAlign

            popup.indicatorOpen(btn)

        }

    }

    IndicatorPopup {

        id: popup

        width : 180

        height: 200

        modal: false

        focus: true

        parent: Overlay.overlay // Overlay.overlay表示主窗口的意思,附加到任何的item、popup中,避免当前界面不是主界面的情况,无法显示弹出窗口

        TextArea {

            anchors.fill: parent

            text: "1234567890"

            color: "#FFF"

            font.pixelSize: 14

            font.family: "Microsoft Yahei"

            wrapMode: TextEdit.WrapAnywhere

        }

        closePolicy: Popup.CloseOnEscape | Popup.CloseOnPressOutside

}
如果我们使用模态的弹出窗口,并且想设置弹出窗口外的背景色,可以设置Overlay.modal附加属性,比如设置为谈红色:
Overlay.modal: Rectangle {

    color: "#aaffdbe7"

}
效果如下所示:
34.qt quick-Popup弹出窗口自定义的更多相关文章
- 读《深入理解Windows Phone 8.1 UI控件编程》1.4.3 框架的应用示例:自定义弹出窗口有感
前些天买了园子里林政老师的两本 WP8.1 的书籍.毕竟想要学得深入的话,还是得弄本书跟着前辈走的. 今天读到 1.4.3 节——框架的应用示例:自定义弹出窗口这一小节.总的来说,就是弄一个像 Mes ...
- 【Android】百度地图自定义弹出窗口
我们使用百度地图的时候,点击地图上的Marker,会弹出一个该地点详细信息的窗口,如下左图所示,有时候,我们希望自己定义这个弹出窗口的内容,或者,干脆用自己的数据来构造这样的弹出窗口,但是,在百度地图 ...
- Add an Action that Displays a Pop-up Window 添加显示弹出窗口按钮
In this lesson, you will learn how to create an Action that shows a pop-up window. This type of Acti ...
- OAF_开发系列08_实现OAF通过Popup参数式弹出窗口(案例)
20150711 Created By BaoXinjian
- CSS3/jQuery自定义弹出窗口
简单演示一下,精简了演示效果和css样式文件,更利于在项目中的实际应用 引入style.css index.js <!DOCTYPE HTML PUBLIC "-//W3C//DT ...
- html5+css3+javascript 自定义弹出窗口
效果图: 源码: 1.demo.jsp <%@ page contentType="text/html;charset=UTF-8" language="java& ...
- jQuery弹出窗口完整代码
jQuery弹出窗口完整代码 效果体验:http://keleyi.com/keleyi/phtml/jqtexiao/1.htm 1 <!DOCTYPE html PUBLIC "- ...
- PyQt5 笔记(03):弹出窗口大全
本文实现了PyQt5个各种弹出窗口:输入框.消息框.文件对话框.颜色对话框.字体对话框.自定义对话框 其中,为了实现自定义对话框的返回值,使用了信号/槽 本文基于 windows 7 + python ...
- pentaho cde popup弹出框口
弹出窗口在pentaho cde里面相对比较容易,不过还是记录一下,以防时间久了,忘记关键参数. 先看一下效果图: 画出自己想要在弹出框展示的图形,把他的HtmlObject设置成弹出窗口,如图: 然 ...
随机推荐
- jenkins邮件报警机制配置
1.下载email插件 Jenkins配置email前需要先安装email插件:Email Extension.Email Extension Template Plugin 2.系统配置 在Jenk ...
- centos7 启动引导顺序
查看默认启动项 grub2-editenv list 查看启动项列表 awk -F\' '$1=="menuentry " {print $2}' /etc/grub2.cfg 设 ...
- Rust模块化
Rust模块化 模块化有助于代码的管理和层次逻辑的清晰 Rust模块化有多种方式: 1.嵌套模块 嵌套模块就是直接在要使用模块的文件中声明模块 mod food{//声明模块 pub struct C ...
- Centos7环境初始化
最近在做公司的一个环境搭建的任务的时候,要用到三台Centos7服务器,在上面要预装java1.8,docker,zookeeper并且要在docker中跑一个mysql,还要部署其他的软件.由于不是 ...
- 11.6 mpstat:CPU信息统计
mpstat 是Multiprocessor Statistics的缩写,是一种实时系统监控工具.mpstat命令会输出CPU的一些统计信息,这些信息存放在/proc/stat文件中.在多CP ...
- gpgj - 06.估值分析举例
06.估值分析举例 1.举个栗子-贵州茅台的护城河 品牌效益高 只有高档产品 不卖中低档,不会拉低公司收入 { "question": "我们来复习一下护城河要如何分 ...
- 开源月刊《HelloGitHub》第 62 期
兴趣是最好的老师,HelloGitHub 让你对编程感兴趣! 简介 分享 GitHub 上有趣.入门级的开源项目. 这里有实战项目.入门教程.黑科技.开源书籍.大厂开源项目等,涵盖多种编程语言 Pyt ...
- harobor私有docker镜像仓库
Harbor是一个用于存储和分发Docker镜像的企业级Registry服务器,由VMware开源,其通过添加一些企业必需的功能特性,例如安全.标识和管理等,扩展了开源 Docker Distribu ...
- Go语言安装配置
一.Go语言下载 官方下载地址:https://golang.google.cn/dl/ 选择自己需要的版本下载即可. 二.Go语言安装 下载完成之后,双击go1.16.4.windows-amd64 ...
- NOIP 模拟4 T2
本题属于二和一问题 子问题相互对称 考虑对于问题一:知a求b 那么根据b数组定义式 显然能发现问题在于如何求dis(最短路) 有很多算法可供选择 dijsktra,floyed,bfs/dfs,spf ...