Flutter实战视频-移动电商-17.首页_楼层组件的编写技巧
17.首页_楼层组件的编写技巧
博客地址:
https://jspang.com/post/FlutterShop.html#toc-b50
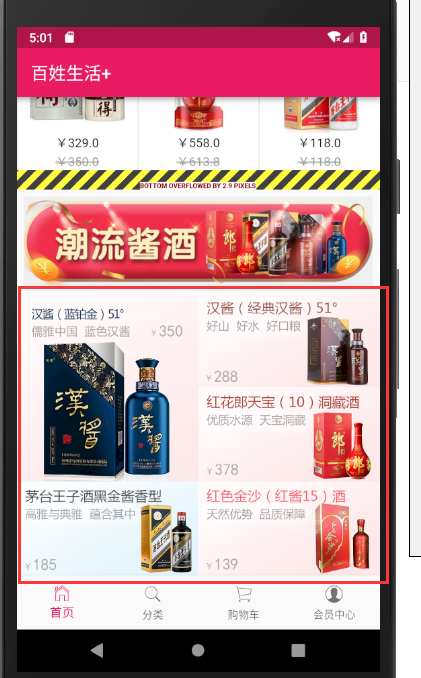
楼层的效果:
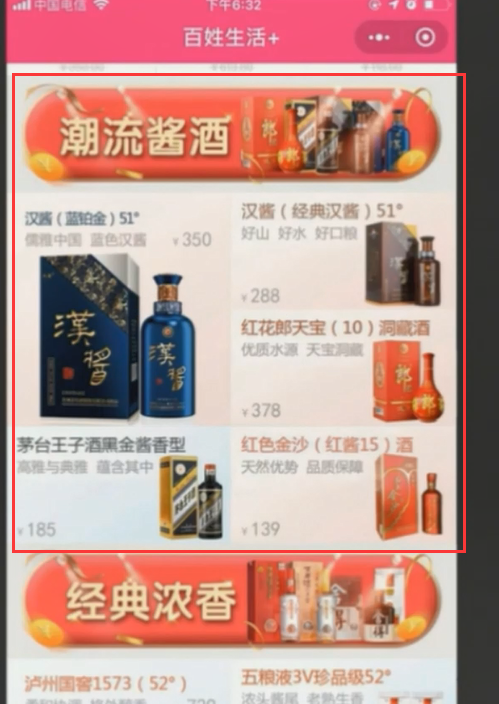
标题
stlessW快速生成:
接收一个String类型的参数

标题的各个边上有内边距我们先设置一下

这样我们的标题组件就写完了

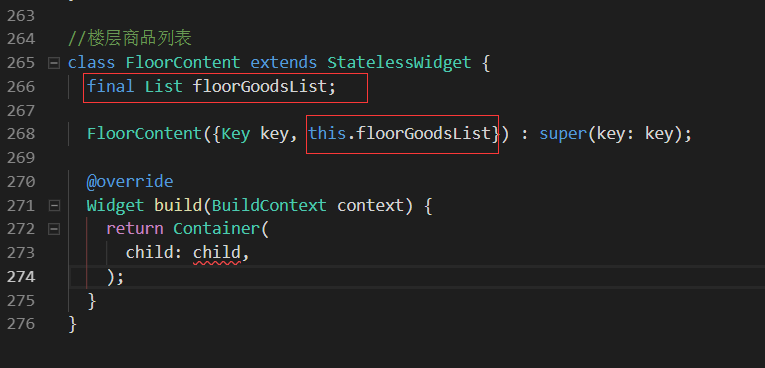
楼层商品内容
然后再学些每个楼层的商品。接收一个List数组
里面的每个子项拆分成item,这里我们先写个内部方法,接收一个Map类型的goods的商品子项
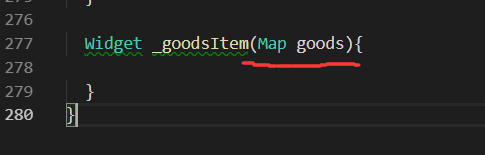
这样我们的子组件就写完了

商品我们分成两行,我们先写第一行的商品。
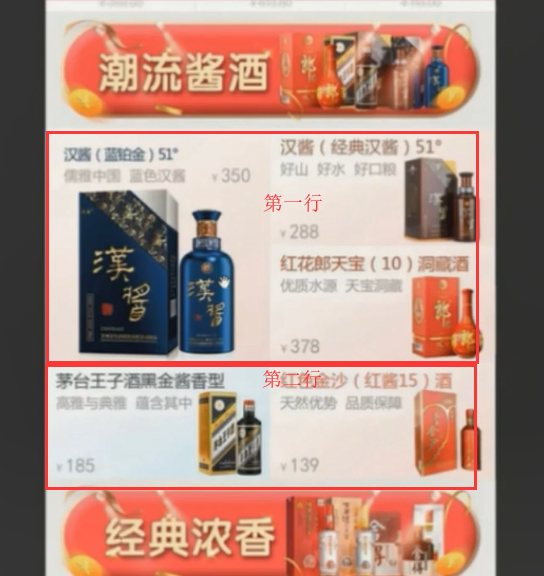
第一行:有两列,第一个列是一个大图,第二列是又分为两列,我们用column就可以了。
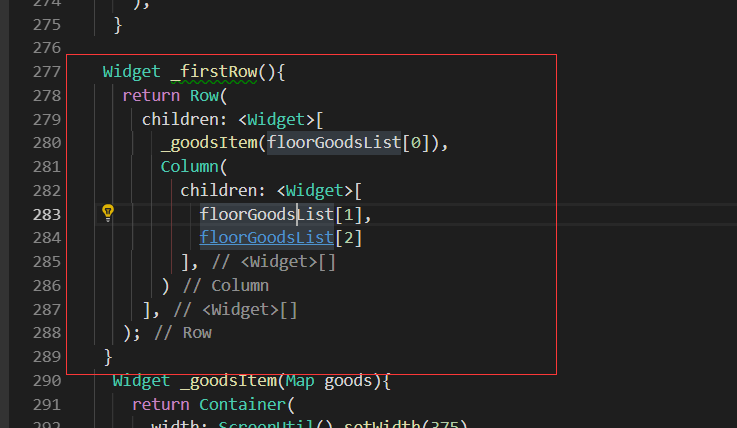
第二行:一行两列,每一列是一个商品元素

这样我们就把 上下两快,当做一个column。
准备数据
标题效果展示

纠正一个错误的代码:这里我之前写的是时候没有调用goodItem方法
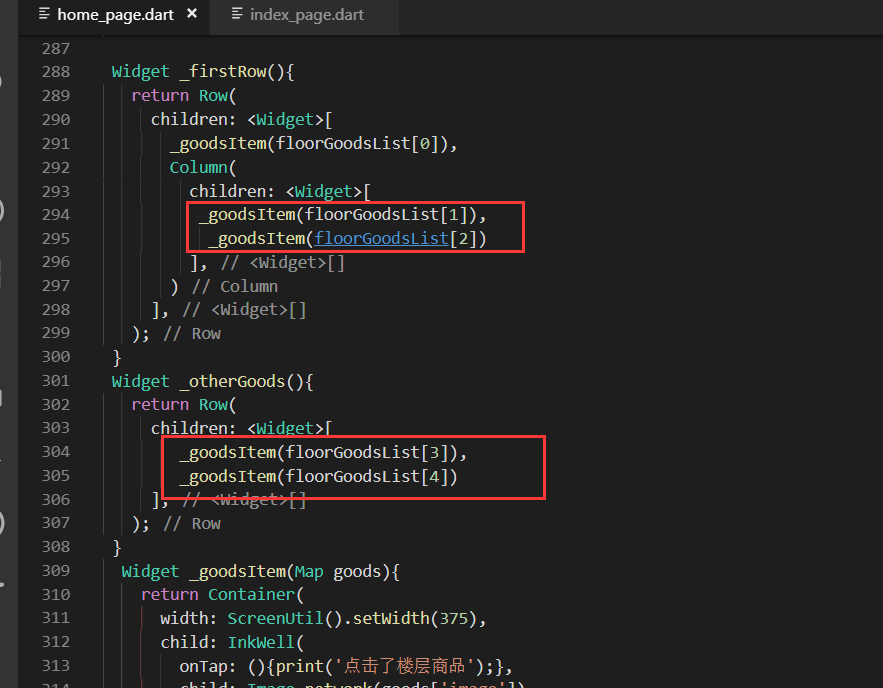
第二行的内容

最终展示效果
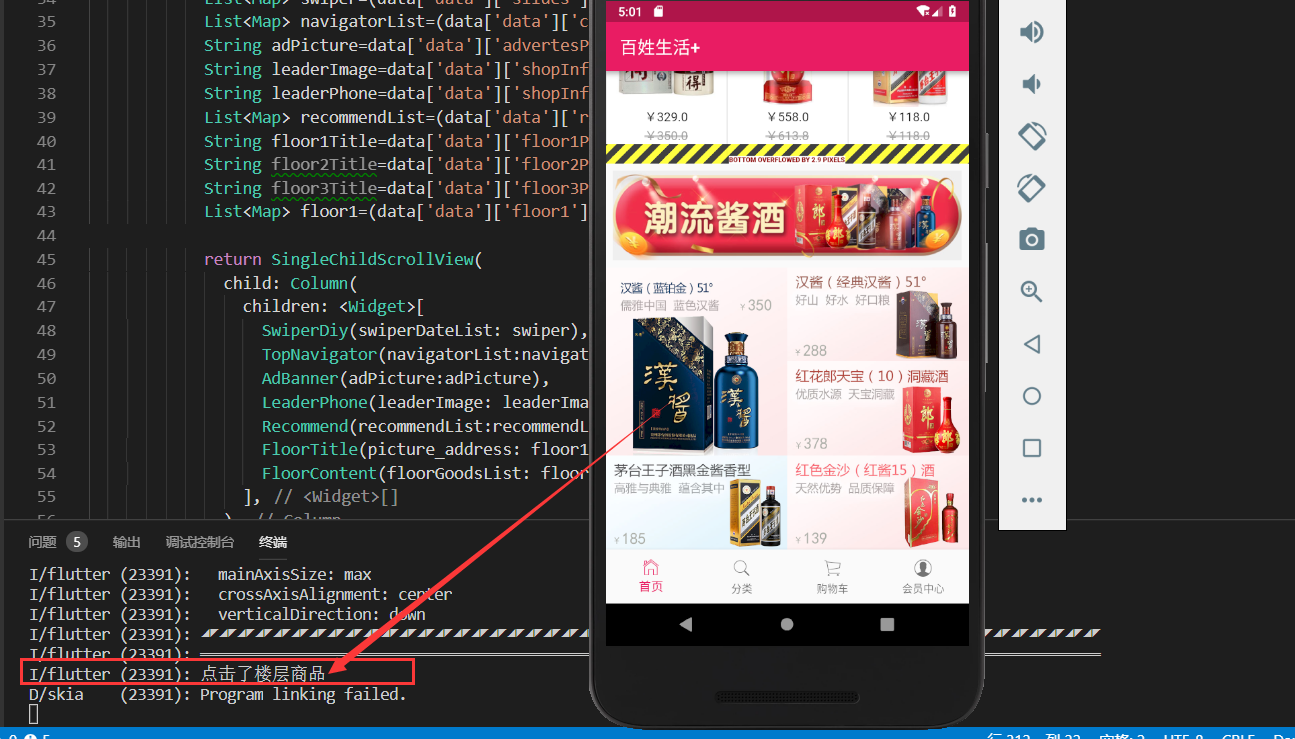
点击图片会有点击事件
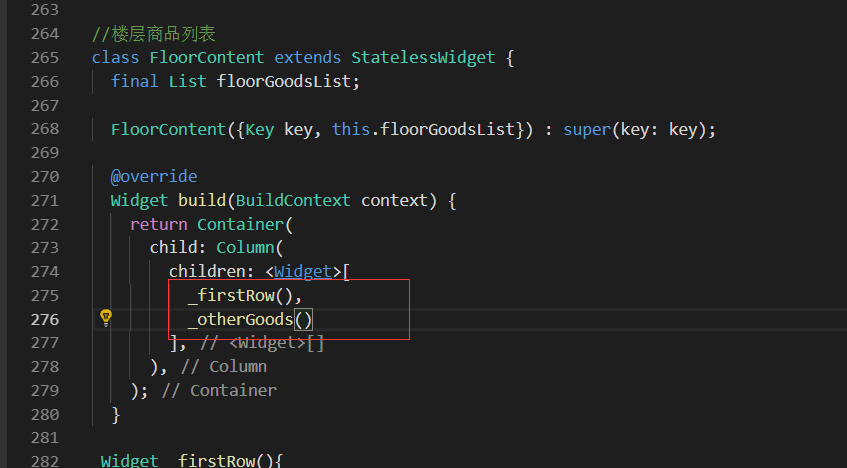
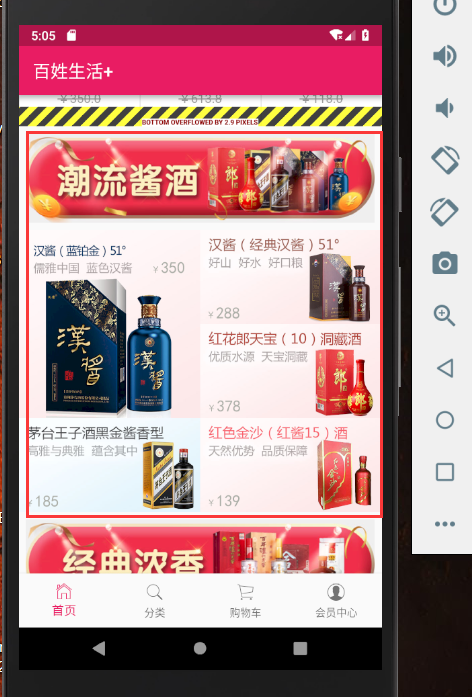
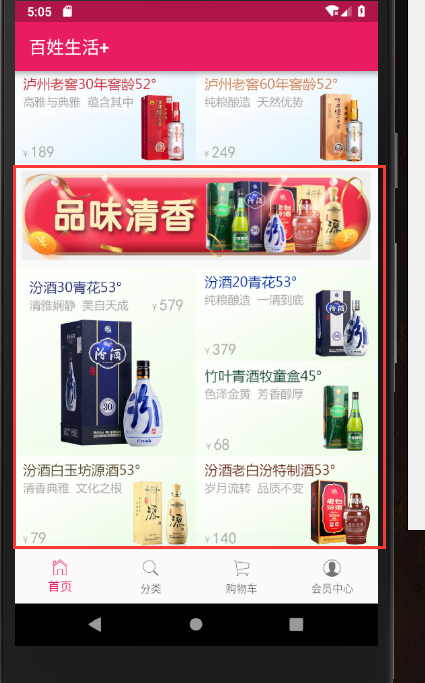
其他两层楼的商品信息
一共分为三个列表。都是一个标题一个列表。

最终效果图

最终代码
import 'package:flutter/material.dart';
import '../service/service_method.dart';
import 'package:flutter_swiper/flutter_swiper.dart';
import 'dart:convert';
import 'package:flutter_screenutil/flutter_screenutil.dart';
import 'package:url_launcher/url_launcher.dart'; class HomePage extends StatefulWidget {
@override
_HomePageState createState() => _HomePageState();
} class _HomePageState extends State<HomePage> with AutomaticKeepAliveClientMixin{ @override
bool get wantKeepAlive => true; @override
void initState() {
super.initState();
print('');
} String homePageContent='正在获取数据';
@override
Widget build(BuildContext context) {
return Scaffold(
appBar: AppBar(title: Text('百姓生活+')),
body: FutureBuilder(
future: getHomePageContent(),
builder: (context, snapshot) {
if(snapshot.hasData){
var data=json.decode(snapshot.data.toString());
List<Map> swiper=(data['data']['slides'] as List).cast();
List<Map> navigatorList=(data['data']['category'] as List).cast();
String adPicture=data['data']['advertesPicture']['PICTURE_ADDRESS'];
String leaderImage=data['data']['shopInfo']['leaderImage'];
String leaderPhone=data['data']['shopInfo']['leaderPhone'];
List<Map> recommendList=(data['data']['recommend'] as List).cast();
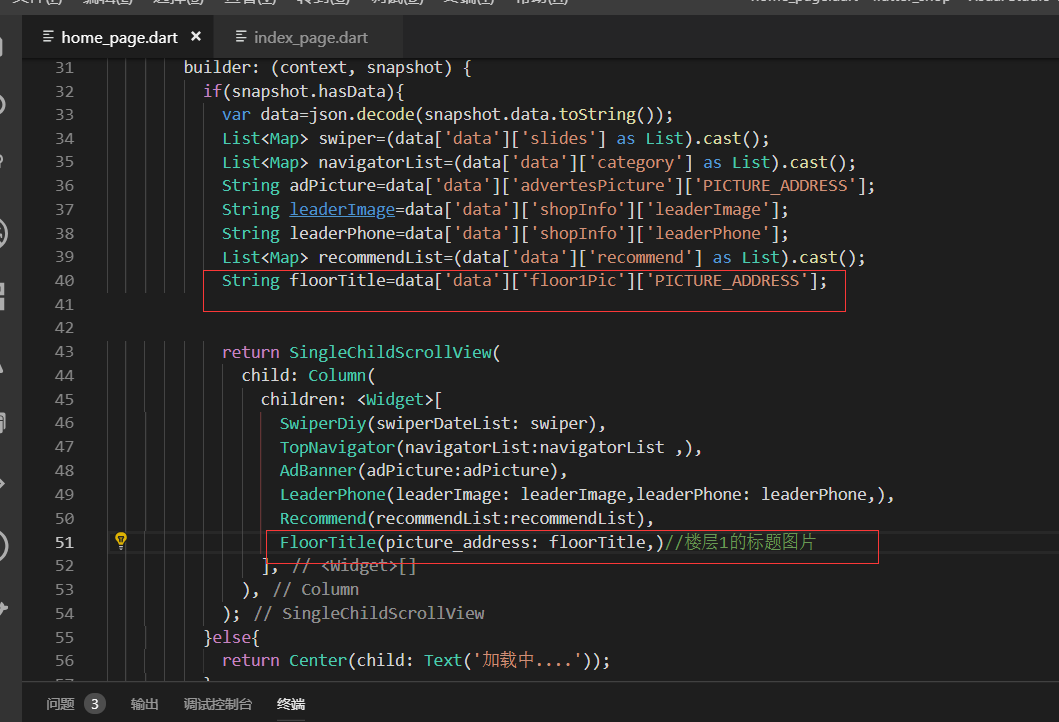
String floor1Title=data['data']['floor1Pic']['PICTURE_ADDRESS'];
String floor2Title=data['data']['floor2Pic']['PICTURE_ADDRESS'];
String floor3Title=data['data']['floor3Pic']['PICTURE_ADDRESS'];
List<Map> floor1=(data['data']['floor1'] as List).cast();
List<Map> floor2=(data['data']['floor2'] as List).cast();
List<Map> floor3=(data['data']['floor3'] as List).cast(); return SingleChildScrollView(
child: Column(
children: <Widget>[
SwiperDiy(swiperDateList: swiper),
TopNavigator(navigatorList:navigatorList ,),
AdBanner(adPicture:adPicture),
LeaderPhone(leaderImage: leaderImage,leaderPhone: leaderPhone,),
Recommend(recommendList:recommendList),
FloorTitle(picture_address: floor1Title,),//楼层1的标题图片
FloorContent(floorGoodsList: floor1),
FloorTitle(picture_address: floor2Title,),//楼层1的标题图片
FloorContent(floorGoodsList: floor2),
FloorTitle(picture_address: floor3Title,),//楼层1的标题图片
FloorContent(floorGoodsList: floor3)
],
),
);
}else{
return Center(child: Text('加载中....'));
}
},
),
);
}
}
//首页轮播插件
class SwiperDiy extends StatelessWidget {
final List swiperDateList;
//构造函数
SwiperDiy({this.swiperDateList}); @override
Widget build(BuildContext context) { // print('设备的像素密度:${ScreenUtil.pixelRatio}');
// print('设备的高:${ScreenUtil.screenWidth}');
// print('设备的宽:${ScreenUtil.screenHeight}'); return Container(
height: ScreenUtil().setHeight(),//
width:ScreenUtil().setWidth(),
child: Swiper(
itemBuilder: (BuildContext context,int index){
return Image.network("${swiperDateList[index]['image']}",fit: BoxFit.fill,);
},
itemCount: swiperDateList.length,
pagination: SwiperPagination(),
autoplay: true,
),
);
}
} class TopNavigator extends StatelessWidget {
final List navigatorList; TopNavigator({Key key, this.navigatorList}) : super(key: key); Widget _gridViewItemUI(BuildContext context,item){
return InkWell(
onTap: (){print('点击了导航');},
child: Column(
children: <Widget>[
Image.network(item['image'],width: ScreenUtil().setWidth()),
Text(item['mallCategoryName'])
],
),
);
}
@override
Widget build(BuildContext context) {
if(this.navigatorList.length>){
this.navigatorList.removeRange(,this.navigatorList.length);//从第十个截取,后面都截取掉
}
return Container(
height: ScreenUtil().setHeight(),//只是自己大概预估的一个高度,后续可以再调整
padding: EdgeInsets.all(3.0),//为了不让它切着屏幕的边缘,我们给它一个padding
child: GridView.count(
crossAxisCount: ,//每行显示5个元素
padding: EdgeInsets.all(5.0),//每一项都设置一个padding,这样他就不挨着了。
children: navigatorList.map((item){
return _gridViewItemUI(context,item);
}).toList(),
),
);
}
} class AdBanner extends StatelessWidget {
final String adPicture; AdBanner({Key key, this.adPicture}) : super(key: key); @override
Widget build(BuildContext context) {
return Container(
child: Image.network(adPicture),
);
}
} //店长电话模块
class LeaderPhone extends StatelessWidget {
final String leaderImage;//店长图片
final String leaderPhone;//店长电话 LeaderPhone({Key key, this.leaderImage,this.leaderPhone}) : super(key: key); @override
Widget build(BuildContext context) {
return Container(
child: InkWell(
onTap: _launchURL,
child: Image.network(leaderImage),
),
);
} void _launchURL() async {
String url = 'tel:'+leaderPhone;
//String url = 'http://jspang.com';
if(await canLaunch(url)){
await launch(url);
}else{
throw 'url不能进行访问,异常';
}
}
} //商品推荐
class Recommend extends StatelessWidget {
final List recommendList; Recommend({Key key, this.recommendList}) : super(key: key); //商品标题
Widget _titleWidget(){
return Container(
alignment: Alignment.centerLeft,//局长靠左对齐
padding: EdgeInsets.fromLTRB(10.0, 2.0, , 5.0),//左上右下
decoration: BoxDecoration(
color: Colors.white,
border: Border(
bottom: BorderSide(width: 0.5,color: Colors.black12) //设置底部的bottom的边框,Black12是浅灰色
),
),
child: Text(
'商品推荐',
style:TextStyle(color: Colors.pink)
),
);
}
//商品单独项方法
Widget _item(index){
return InkWell(
onTap: (){},//点击事件先留空
child: Container(
height: ScreenUtil().setHeight(),//兼容性的高度 用了ScreenUtil
width: ScreenUtil().setWidth(),//750除以3所以是250
padding: EdgeInsets.all(8.0),
decoration: BoxDecoration(
color: Colors.white,
border: Border(
left: BorderSide(width: ,color: Colors.black12)//右侧的 边线的样式 宽度和 颜色
)
),
child: Column(
children: <Widget>[
Image.network(recommendList[index]['image']),
Text('¥${recommendList[index]['mallPrice']}'),
Text(
'¥${recommendList[index]['price']}',
style: TextStyle(
decoration: TextDecoration.lineThrough,//删除线的样式
color: Colors.grey//浅灰色
),
),
],
),
),
);
}
//横向列表方法
Widget _recommendList(){
return Container(
height: ScreenUtil().setHeight(),
child: ListView.builder(
scrollDirection: Axis.horizontal,//横向的
itemCount: recommendList.length,
itemBuilder: (context,index){
return _item(index);
},
),
);
} @override
Widget build(BuildContext context) {
return Container(
height: ScreenUtil().setHeight(),//列表已经设置为330了因为还有上面标题,所以要比330高,这里先设置为380
margin: EdgeInsets.only(top: 10.0),
child: Column(
children: <Widget>[
_titleWidget(),
_recommendList()
],
),
);
}
} //楼层标题
class FloorTitle extends StatelessWidget {
final String picture_address; FloorTitle({Key key, this.picture_address}) : super(key: key); @override
Widget build(BuildContext context) {
return Container(
padding: EdgeInsets.all(8.0),
child: Image.network(picture_address),
);
}
} //楼层商品列表
class FloorContent extends StatelessWidget {
final List floorGoodsList; FloorContent({Key key, this.floorGoodsList}) : super(key: key); @override
Widget build(BuildContext context) {
return Container(
child: Column(
children: <Widget>[
_firstRow(),
_otherGoods()
],
),
);
} Widget _firstRow(){
return Row(
children: <Widget>[
_goodsItem(floorGoodsList[]),
Column(
children: <Widget>[
_goodsItem(floorGoodsList[]),
_goodsItem(floorGoodsList[])
],
)
],
);
}
Widget _otherGoods(){
return Row(
children: <Widget>[
_goodsItem(floorGoodsList[]),
_goodsItem(floorGoodsList[])
],
);
}
Widget _goodsItem(Map goods){
return Container(
width: ScreenUtil().setWidth(),
child: InkWell(
onTap: (){print('点击了楼层商品');},
child: Image.network(goods['image']),
),
);
}
}
home_page.dart
Flutter实战视频-移动电商-17.首页_楼层组件的编写技巧的更多相关文章
- Flutter实战视频-移动电商-15.首页_商品推荐模块编写
15.首页_商品推荐模块编写 商品推荐,我们做成可以横向滚动的 分析: 上面是标题,下面是ListView,里面是一个Column, column分三层,第一是图片,第二是价格,第三是市场价格 小细节 ...
- Flutter实战视频-移动电商-09.首页_项目结构建立和获取数据
09.首页_项目结构建立和获取数据 在config下创建service_url.dart 用来配置我们后端接口的配置文件 一个变量存 接口地址,一个接口方法地址 所有后天请求数据的方法都放在这个文件夹 ...
- Flutter实战视频-移动电商-11.首页_屏幕适配方案讲解
11.首页_屏幕适配方案讲解 国人写的屏幕适配插件: https://github.com/OpenFlutter/flutter_screenutil 最新版本是0.5.1 在pubspec.yam ...
- Flutter实战视频-移动电商-13.首页_广告Banner组件制作
13.首页_广告Banner组件制作 主要是做这个小广告条. 其实就是读取一个图片做一个widget放到这里 使用stlessW快速生成 定义一个变量存放图片的url地址: 这样我们的广告条就写完了 ...
- Flutter实战视频-移动电商-18.首页_火爆专区后台接口调试
18.首页_火爆专区后台接口调试 楼层结束之后有个火爆专区.到地图有个上拉加载的效果 lib/config/service_url.dart 首先找到我们的接口配置文件,增加接口的配置 lib/ser ...
- Flutter实战视频-移动电商-19.首页_火爆专区界面布局编写
19.首页_火爆专区界面布局编写 看一下图片的效果 一个标题栏,下面是多行两列.里面可以用column布局,外面用Warp流式布局 有得小伙伴说这里可以用网格布局,网格布局的话还是有一定的效率问题.这 ...
- Flutter实战视频-移动电商-20.首页_火爆专区上拉加载效果
20.首页_火爆专区上拉加载效果 上拉加载的插件比较都.没有一个一枝独秀的 可以自定义酷炫的header和footer 一直在更新 推荐使用这个插件: https://github.com/xuelo ...
- Flutter实战视频-移动电商-10.首页_FlutterSwiper轮播效果制作
10.首页_FlutterSwiper轮播效果制作 博客地址: https://jspang.com/post/FlutterShop.html#toc-5c2 flutter_swiper http ...
- Flutter实战视频-移动电商-12.首页_GridView类别导航制作
12.首页_GridView类别导航制作 首页导航区的制作 外面用一个gridview来写.里面单独提出来 新建导航组件 还是在home_page.dart里面写代码 新建一个静态的组件: 快捷键写组 ...
随机推荐
- DateTime操作,时间范围,加减
DB里边存的是char类型数组的时间,例如20151111 12171220000,现在需要把这个时间加减5s,组成 一个时间范围 然后再写存储过程. 想到的办法就是把这个时间先转换成DateTime ...
- java基础&&高薪面试
董鹏老师 ,多年经验总结出 [高薪就业必备]之java基础面试题[更新中]: 第01篇 学习Java基础的目的? 第02天 java语言中有没有gotoke ...
- Ubuntu16.04下屏幕侧边栏的设置
ubnutu的任务栏都是在左侧: zhang@zhang-virtual-machine:~$ gsettings set com.canonical.Unity.Launcher launcher- ...
- BUAAOO P13-P14 UML Interaction
- 记使用WaitGroup时的一个错误
记使用WaitGroup时的一个错误 近期重构我之前写的server代码时,不当使用了WaitGroup,碰到了个错误,记录下. package main import ( "fmt&quo ...
- iOS側拉栏抽屉效果Demo
源代码下载 側拉栏抽屉效果Demo 须要导入第三方的类库例如以下: 抽屉效果所需第三方类库下载 效果:既能够两側都实现抽屉效果也可仅仅实现左側栏或者右側栏的抽屉效果 waterm ...
- VS2005 调试不能设置断点的解决办法
[ 1] 以前也遇到过同样的问题,但没有问个为什么,也没有探个毕竟.昨天调试一个DLL,添加输出信息吧,太麻烦而且不轻易定位, 但设置断点后按“F5”,断点不可用,气泡提示“当前不会命中断点,还没有为 ...
- IOS8 TouchID使用介绍
本文转载至 http://blog.csdn.net/jinkaiouyang/article/details/35555123 IOS8将指纹识别技术开放出来了.我们能够利用用户设置的touch I ...
- ios上视频与音乐合成后出现播放兼容问题的解决方法
近期EasyDarwin开源流媒体团队EasyVideoRecorder小组同学Carl在支持一款短视频应用上线时,遇到一个问题:我们在IOS上合成"图片+音乐"成为视频之后,在P ...
- HDFS HBase Solr Which one?
从访问模式角度决策 HDFS 压缩性能最优.扫描速度最快:不支持随机访问,仅支持昂贵.复杂的文件查询 HBase适合随机访问 Solr 适合检索需求 HBase访问单个记录的时间为毫秒级别,而HDFS ...