微软提供的 Web 版 Raspberry Pi 模拟器
Overview of Raspberry Pi web simulator
Click the button to launch Raspberry Pi online simulator.
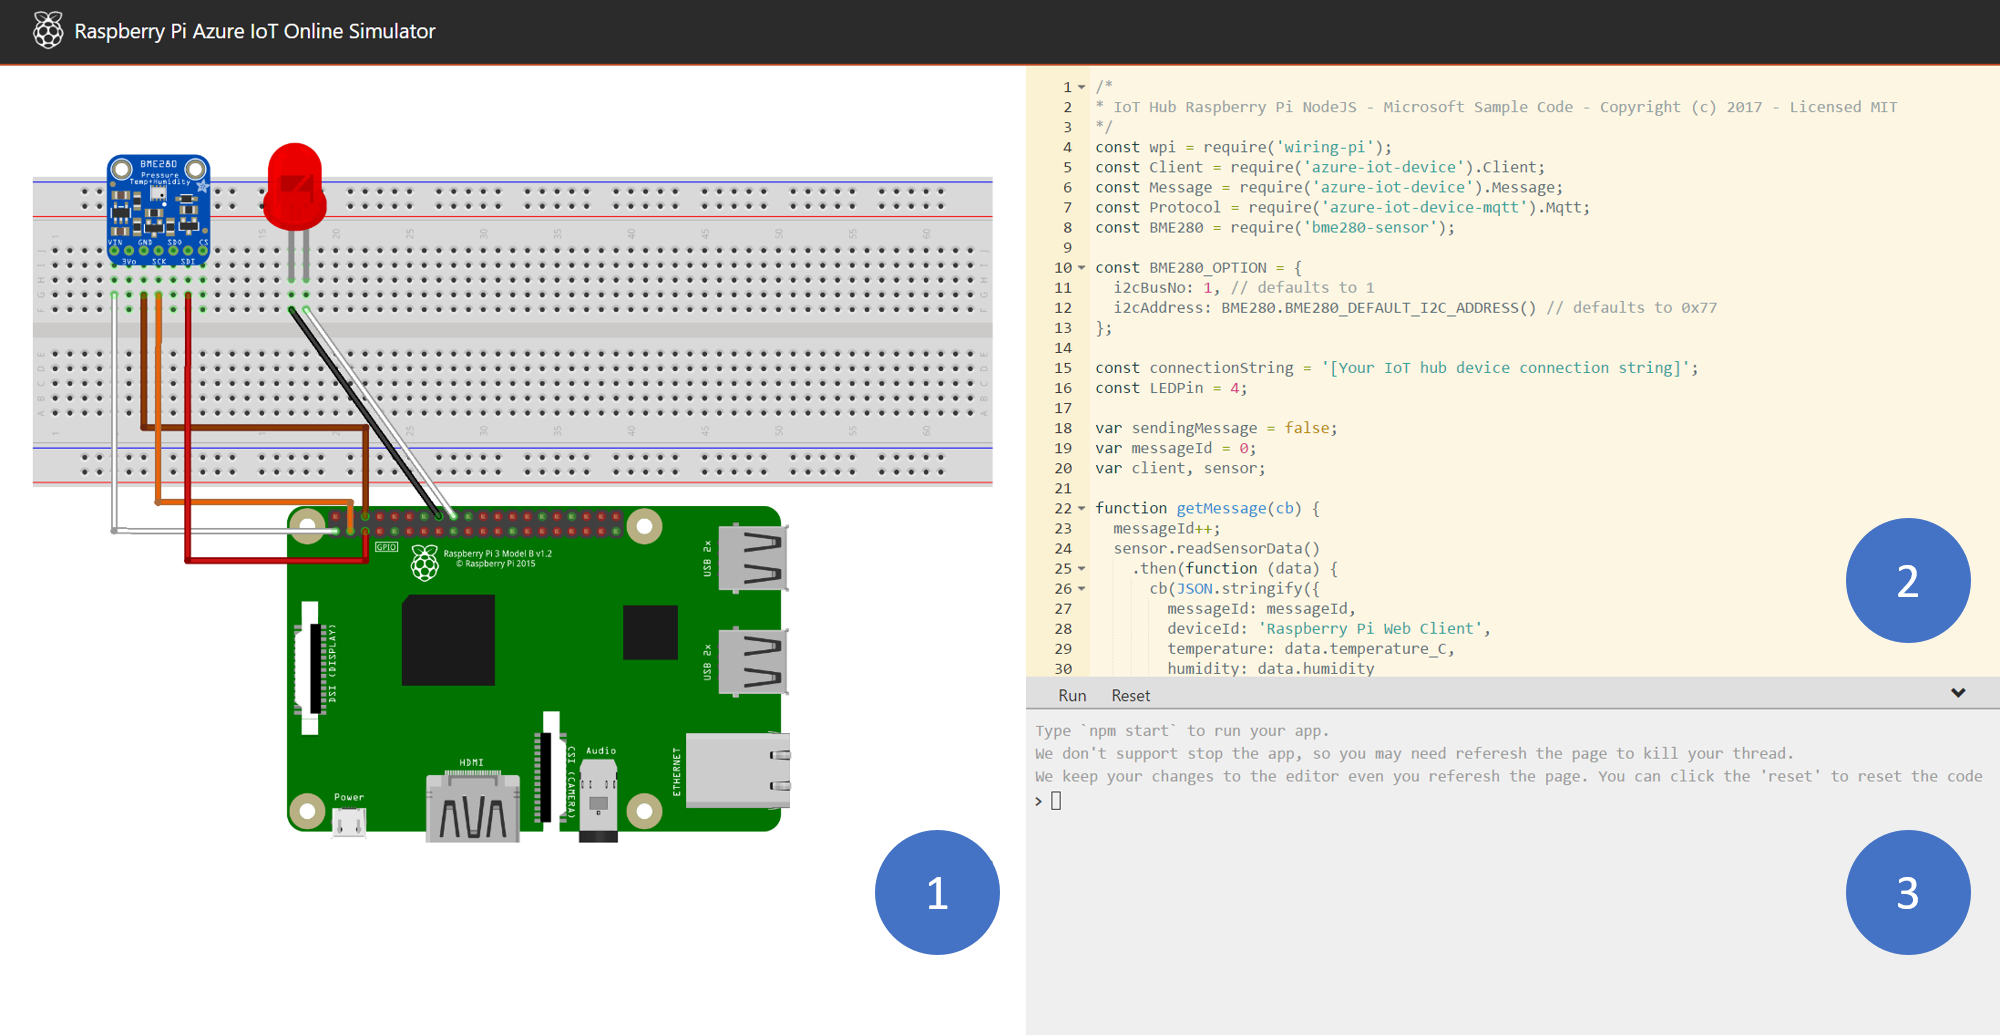
There are three areas in the web simulator.
- Assembly area - The default circuit is that a Pi connects with a BME280 sensor and an LED. The area is locked in preview version so currently you cannot do customization.
- Coding area - An online code editor for you to code with Raspberry Pi. The default sample application helps to collect sensor data from BME280 sensor and sends to your Azure IoT Hub. The application is fully compatible with real Pi devices.
- Integrated console window - It shows the output of your code. At the top of this window, there are three buttons.
- Run - Run the application in the coding area.
- Reset - Reset the coding area to the default sample application.
- Fold/Expand - On the right side there is a button for you to fold/expand the console window.
Note
The Raspberry Pi web simulator is now available in preview version. We'd like to hear your voice in the Gitter Chatroom. The source code is public on Github.
Create an IoT hub
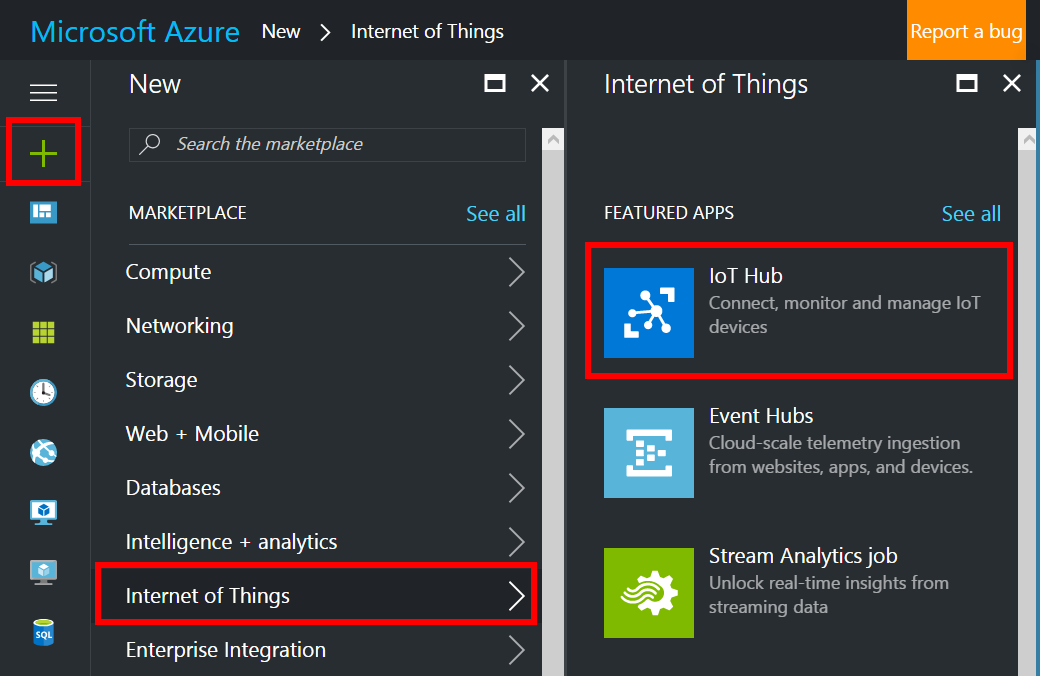
In the Azure portal, click New > Internet of Things > IoT Hub.
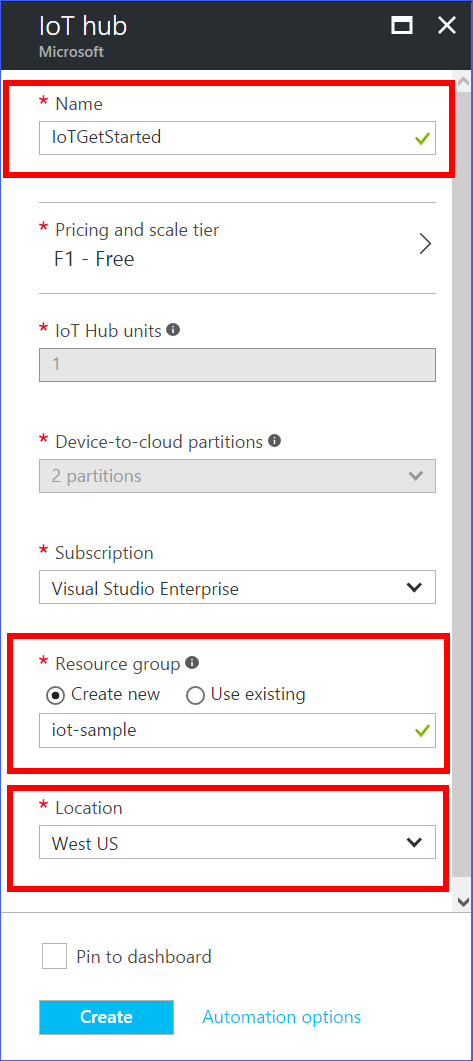
In the IoT hub pane, enter the following information for your IoT hub:
Name: Enter the name of your IoT hub. If the name you enter is valid, a green check mark appears.
Pricing and scale tier: Select the F1 - Free tier. This option is sufficient for this demo. For more information, see the Pricing and scale tier.
Resource group: Create a resource group to host the IoT hub or use an existing one. For more information, see Use resource groups to manage your Azure resources.
Location: Select the closest location to you where the IoT hub is created.
Pin to dashboard: Select this option for easy access to your IoT hub from the dashboard.
Important
The IoT hub will be publicly discoverable as a DNS endpoint, so make sure to avoid any sensitive information while naming it.
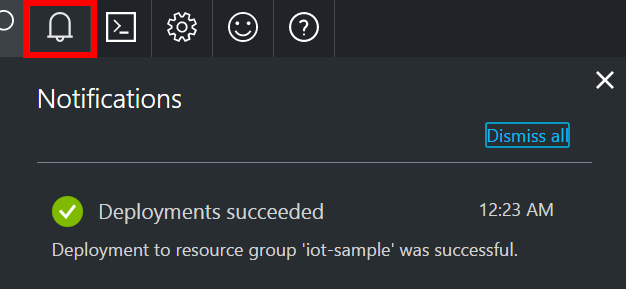
Click Create. Your IoT hub might take a few minutes to create. You can see progress in the Notifications pane.
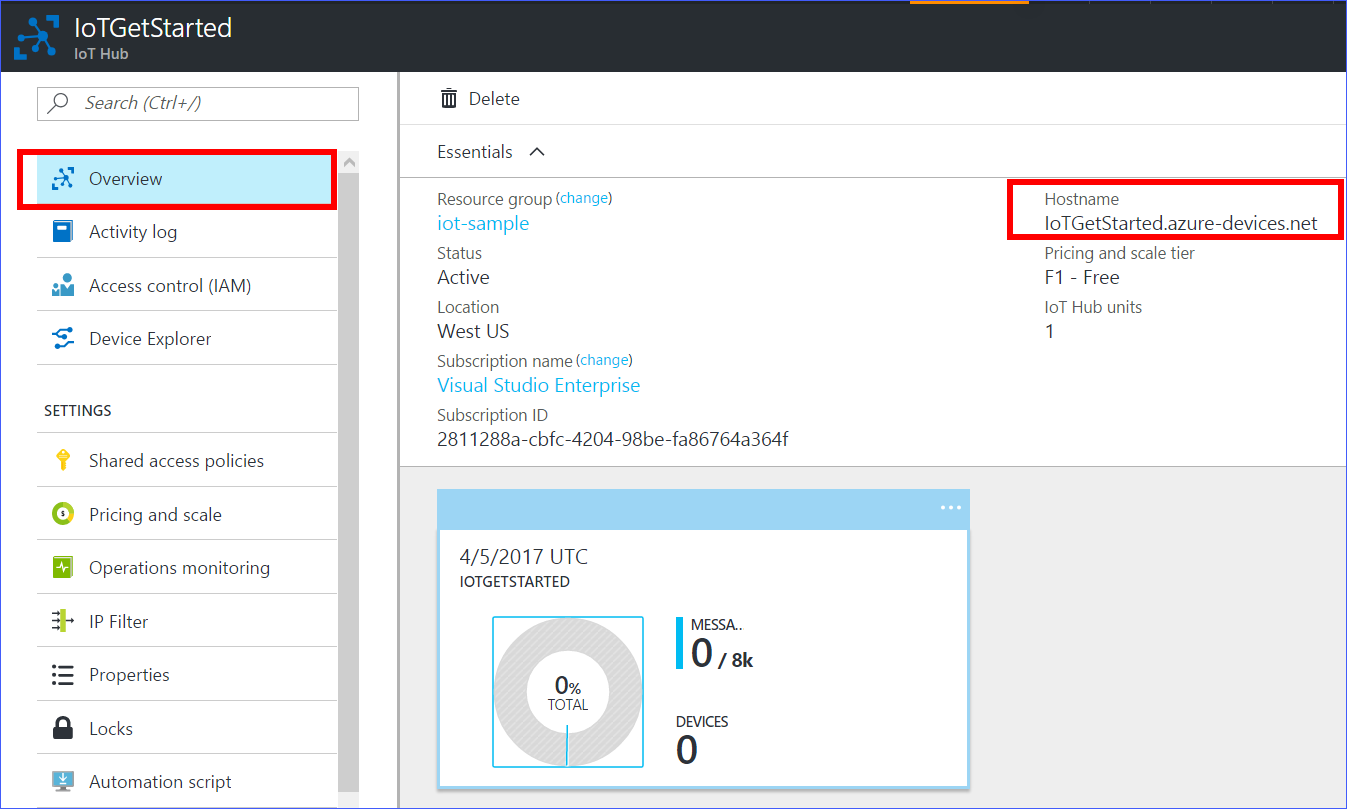
After your IoT hub is created, click it on the dashboard. Make a note of the Hostname, and then click Shared access policies.
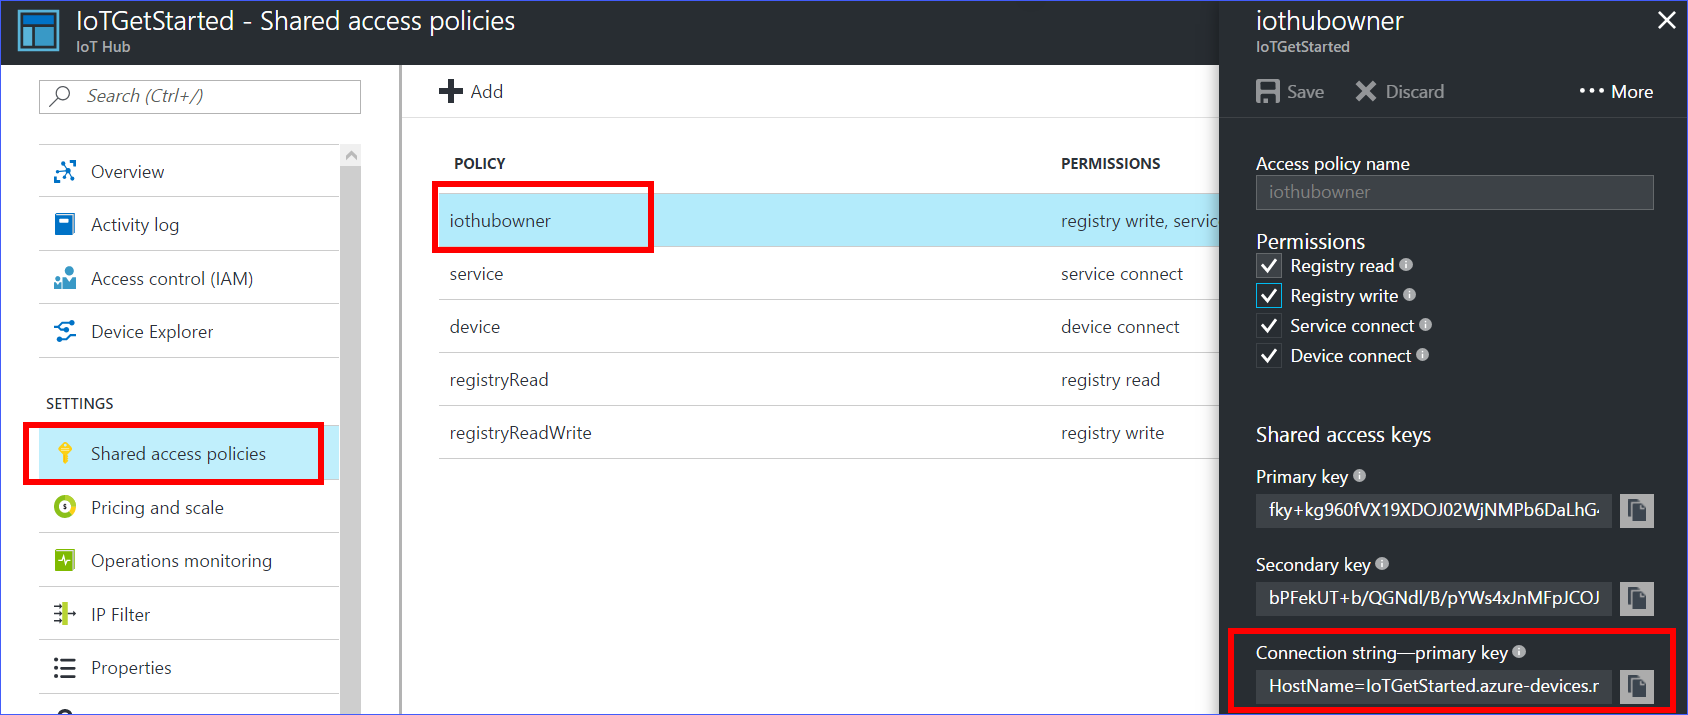
In the Shared access policies pane, click the iothubowner policy, and then copy and make a note of the Connection string of your IoT hub. For more information, see Control access to IoT Hub.
Note
You will not need this iothubowner connection string for this set-up tutorial. However, you may need it for some of the tutorials on different IoT scenarios after you complete this set-up.
Register a device in the IoT hub for your device
In the Azure portal, open your IoT hub.
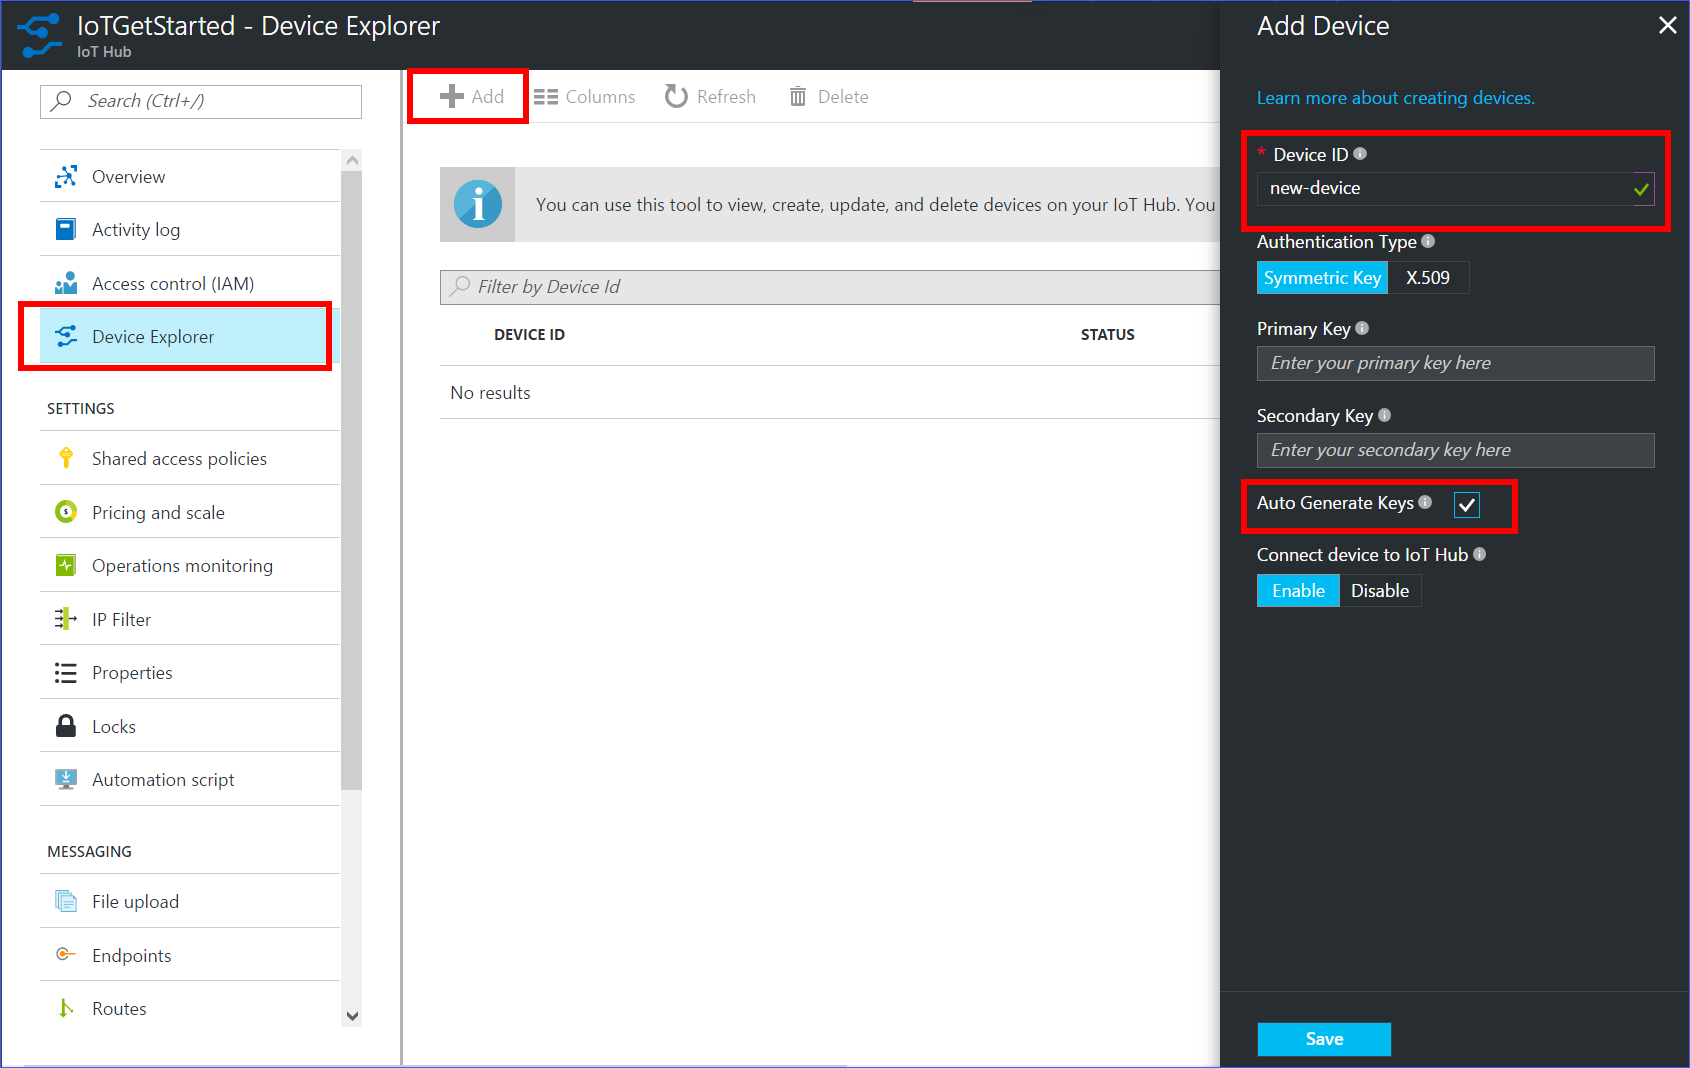
Click Device Explorer.
In the Device Explorer pane, click Add to add a device to your IoT hub. Then do the following:
Device ID: Enter the ID of the new device. Device IDs are case sensitive.
Authentication Type: Select Symmetric Key.
Auto Generate Keys: Select this check box.
Connect device to IoT Hub: Click Enable.
Important
The device ID may be visible in the logs collected for customer support and troubleshooting, so make sure to avoid any sensitive information while naming it.
Click Save.
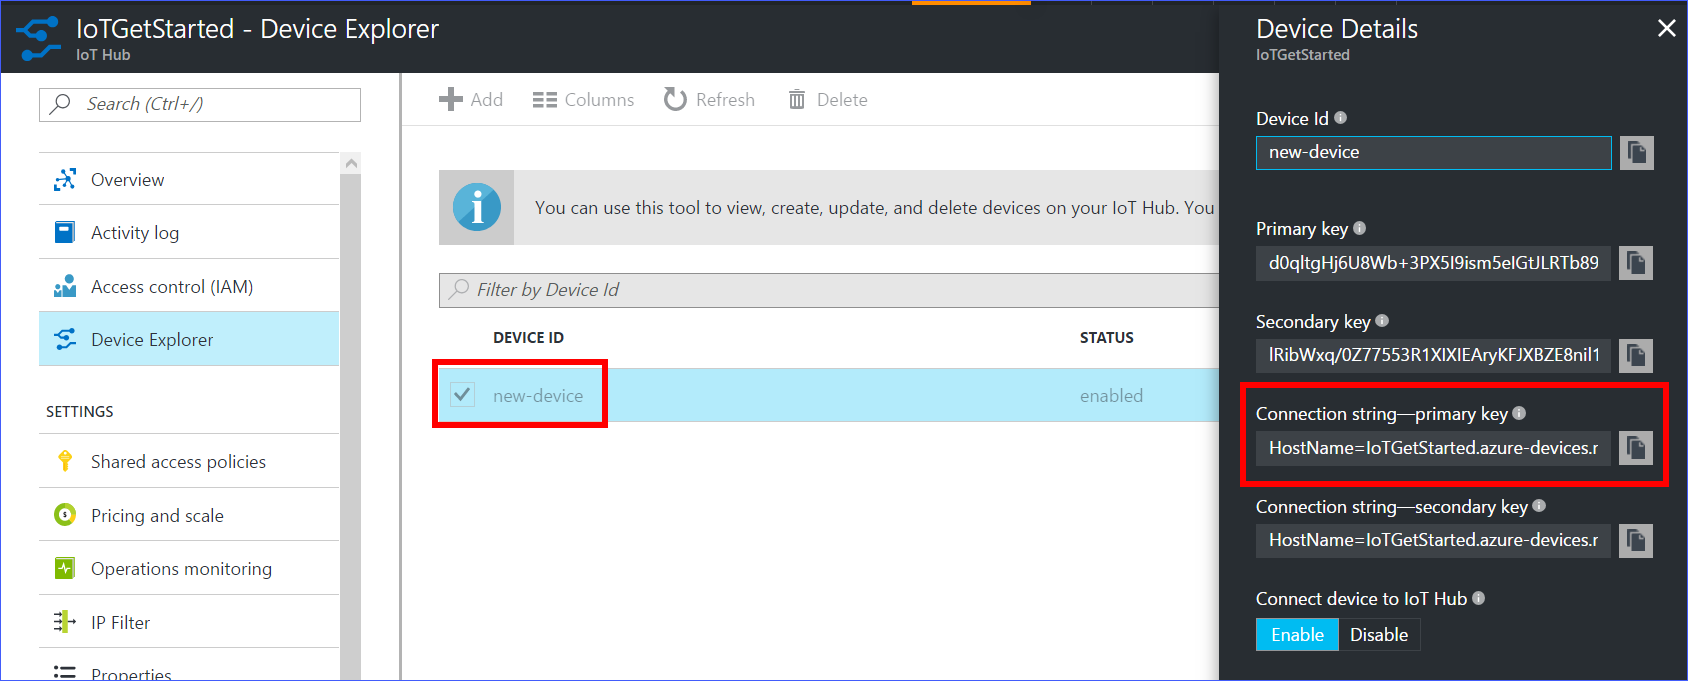
- After the device is created, open the device in the Device Explorer pane.
Make a note of the primary key of the connection string.
Run a sample application on Pi web simulator
In coding area, make sure you are working on the default sample application. Replace the placeholder in Line 15 with the Azure IoT hub device connection string.

Click Run or type
npm startto run the application.
You should see the following output that shows the sensor data and the messages that are sent to your IoT hub 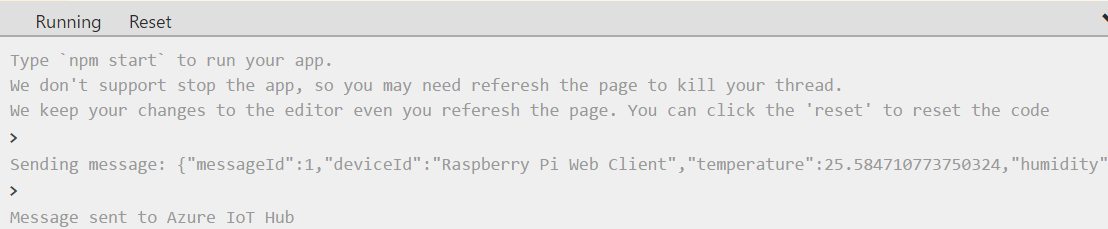
Next steps
You’ve run a sample application to collect sensor data and send it to your IoT hub.
To continue to get started with Azure IoT Hub and to explore other IoT scenarios, see the following:
- Manage cloud device messaging with iothub-explorer
- Save your Azure IoT hub messages to Azure data storage
- Use Power BI to visualize real-time sensor data from your IoT hub
- Use the Web Apps feature of Azure App Service to visualize real-time sensor data from your IoT hub
- Forecast weather by using the sensor data from your IoT hub in Azure Machine Learning
- Manage devices with iothub-explorer
- Use Logic Apps for remote monitoring and notifications
微软提供的 Web 版 Raspberry Pi 模拟器的更多相关文章
- VS Code 1.40 发布!可自行搭建 Web 版 VS Code!
今天(北京时间 2019 年 11 月 8 日),微软发布了 Visual Studio Code 1.40 版本.让我们来看看有哪些主要的更新. 自建 Web 版 VS Code 前不久,微软正式发 ...
- 用 Raspberry Pi 架设加密 DNS 客户端
Cloudflare 宣布使用 1.1.1.1 作为 DNS,并且强调隐私保护.由于 Cloudflare DNS 支持 DNS-over-TLS 和 DNS-over-HTTPS,这使得加密 DNS ...
- [树莓派(raspberry pi)] 02、PI3安装openCV开发环境做图像识别(详细版)
前言 上一篇我们讲了在linux环境下给树莓派安装系统及入门各种资料 ,今天我们更进一步,尝试在PI3上安装openCV开发环境. 博主在做的过程中主要参考一个国外小哥的文章(见最后链接1),不过其教 ...
- 重磅!微软发布 Visual Studio Online:Web 版 VS Code + 云开发环境
北京时间 2019 年 11 月 4 日,在 Microsoft Ignite 2019 大会上,微软正式发布了 Visual Studio Online (VS Online)公开预览版! 如今发布 ...
- 树莓派(raspberry pi)学习11: 将树莓派变成一个Web服务器(转)
将树莓派变成一个Web服务器,通过访问网页,就可以控制树莓派,比如:查看摄像头\开灯等等. 一想到Linux Web服务器,我们首先想到的是,Apache + MySql + Php. 树莓派可以安装 ...
- [IOT] - Raspberry Pi 3B + Windows 10 IOT Core + .Net Core Web 部署
硬件:Raspberry Pi 3B 系统:Windows 10 IOT Core 应用:.Net Core Web 部署流程 1. 系统安装 1.1 下载并安装 Windows 10 IoT Cor ...
- Raspberry Pi 4B Web服务器配置
目录 1. 安装nginx 2. 安装PHP 3. 修改nginx配置文件 4. 安装MariaDB数据库 参考资料1:树莓派4B安装PHP7.3 + Nginx + MySQL 教程 参考资料2:[ ...
- Raspberry Pi 电路图模拟器
Raspberry Pi 电路图模拟器 Circuit Diagram / Circuit Graph https://fritzing.org/learning/tutorials/building ...
- 如何在Raspberry Pi 3B中安装Windows 10 IoT Core
Windows 10 IoT Core简介 Windows 10 IoT是微软专门为物联网生态打造的操作系统,Windows 10 IoT Core则是Windows 10 IoT 操作系统的核心版本 ...
随机推荐
- SprimgMVC学习笔记(二)—— 整合Mybatis
一.整合思路 1.1 Dao层 SqlMapConfig.xml:空文件即可,但是需要文件头. applicationContext-dao.xml 数据库连接池 SqlSessionFactory对 ...
- [Android]Android开发艺术探索第1章笔记
1.1 Activity 的生命周期全面分析 1.1.1 典型情况下的生命周期分析 onPause: 正在停止,正常情况下紧接着 onStop 就会被调用,然后新的 Activity 执行 onRes ...
- 主席树的各类模板(区间第k大数【动,静】,区间不同数的个数,区间<=k的个数)
取板粗 好东西来的 1.(HDOJ2665)http://acm.hdu.edu.cn/showproblem.php?pid=2665 (POJ2104)http://poj.org/probl ...
- Go语言基础之14--Waitgroup和原子操作
一.Waitgroup介绍 1.1 背景 package main import ( "fmt" "time" ) func main() { ch := ma ...
- 测试转型之路--学习ing
http://www.importnew.com/27309.html 测试开发工程师 - 抖音方向 职位描述1.深度参与产品研发项目, 协同产品经理.业务研发.用户反馈团队优质交付产品:2.参与质量 ...
- python 和 C# DES加密
C# code: using System; using System.IO; using System.Security.Cryptography; using System.Text; names ...
- FCN用卷积层代替FC层原因(转)
分类任务 CNN对于常见的分类任务,基本是一个鲁棒且有效的方法.例如,做物体分类的话,入门级别的做法就是利用caffe提供的alexnet的模型,然后把输出的全连接层稍稍修改称为自己想要的类别数,然后 ...
- LBS开发
功能:用户发送自动的位置,返回周围的厕所信息 思路:根据用户的经纬度信息,调用百度地图的api,查询周围的厕所位置并且返回! 步骤:进入百度地图官网注册账号,选择web api接入 我们先看开发者文档 ...
- Yiic执行php脚本
用 Yii 写一个脚本,在 Linux 上运行这个脚本 1.编写好 XXXXCommand 继承 CConsoleCommand <?php namespace base\console; cl ...
- java——修改txt文件中某一行的内容
今天无意间看到java.io中有一个类:RandomAccessFile,可以在文件的任意位置进行读写操作,想到我之前写的一个小项目,想在txt中修改某一行的内容,都是从头遍历txt文件,修改这一行的 ...