
Ubuntu18.04+CUDA9.0+cuDNN7.1.3+openface安装总结
目录
luarocks—Lua 包管理器,提供一个命令行的方式来管理 Lua 包依赖、安装第三方 Lua 包等功能
前言
Ubuntu18.04+CUDA9.0+cuDNN7.1.3 详细安装教程请参照:https://blog.csdn.net/ctwy291314/article/details/80951148,本文介绍安装opeface相关安装。
编译工具CMake
sudo apt-get install cmakeC++标准库安装
sudo apt-get install libboost-dev

sudo apt-get install libboost-python-dev
下载OpenFace代码
git clone https://github.com/cmusatyalab/openface.gitOpenCV安装
sudo apt-get install libopencv-dev

sudo apt-get install python-opencv
luarocks—Lua 包管理器,提供一个命令行的方式来管理 Lua 包依赖、安装第三方 Lua 包等功能
sudo apt-get install luarocks安装 TORCH—科学计算框架,支持机器学习算法
git clone https://github.com/torch/distro.git ~/torch --recursive

cd torch

bash install-deps

./install.sh
安装过程中可能出现以下异常:
cuda 9.0 "error: more than one operator "==" matches these operands"
完整异常信息:
/home/hylink/torch/extra/cutorch/lib/THC/generic/THCTensorMath.cu(393): error: more than one operator "==" matches these operands:

            function "operator==(const __half &, const __half &)"

            function "operator==(half, half)"

            operand types are: half == half

/home/hylink/torch/extra/cutorch/lib/THC/generic/THCTensorMath.cu(414): error: more than one operator "==" matches these operands:

            function "operator==(const __half &, const __half &)"

            function "operator==(half, half)"

            operand types are: half == half

2 errors detected in the compilation of "/tmp/tmpxft_00006aee_00000000-6_THCTensorMath.cpp1.ii".

CMake Error at THC_generated_THCTensorMath.cu.o.cmake:267 (message):

  Error generating file

  /home/hylink/torch/extra/cutorch/build/lib/THC/CMakeFiles/THC.dir//./THC_generated_THCTensorMath.cu.o

lib/THC/CMakeFiles/THC.dir/build.make:2939: recipe for target 'lib/THC/CMakeFiles/THC.dir/THC_generated_THCTensorMath.cu.o' failed

make[2]: *** [lib/THC/CMakeFiles/THC.dir/THC_generated_THCTensorMath.cu.o] Error 1

CMakeFiles/Makefile2:172: recipe for target 'lib/THC/CMakeFiles/THC.dir/all' failed

make[1]: *** [lib/THC/CMakeFiles/THC.dir/all] Error 2

Makefile:129: recipe for target 'all' failed

make: *** [all] Error 2

Error: Build error: Failed building.
原因是cuda和torch的头文件都提供了相同的重载运算符,编译器不知道用哪一个。输入下面shell命令禁止使用cuda的头文件编译torch即可:
export TORCH_NVCC_FLAGS="-D__CUDA_NO_HALF_OPERATORS__"重新运行
./install.sh重新开始编译就OK了,安装过程中它会提示是否把torch加入bashrc中,有”….(yes|no)”提示,输入yes,即可。
编译成功过后,输入命令
source ~/.bashrc使torch立即生效
输入th进行验证是否安装成功
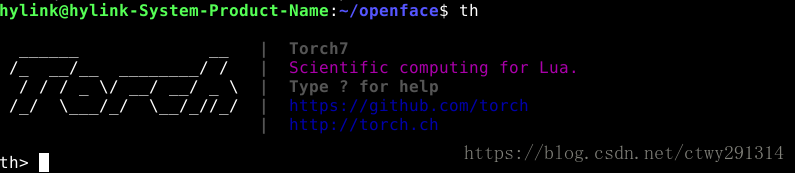
安装依赖的 LUA库
luarocks install dpnn注:cunn使用了cuda,如果不使用GPU来跑的话,不需要安装这个;fblualib和torchx都是用来训练DNN的,建议安装。
luarocks install dpnn

luarocks install nn

luarocks install optim

luarocks install csvigo

luarocks install cunn

luarocks install fblualib

luarocks install torchx
编译OpenFace代码
python setup.py build

sudo python setup.py install
下载预训练后的数据
sh models/get-models.sh调用Demo测试
cd openface

python demos/compare.py images/examples/{lennon-1.jpg,lennon-2.jpg}
官方文档:
http://cmusatyalab.github.io/openface/demo-1-web/
http://cmusatyalab.github.io/openface/setup/
Ubuntu18.04+CUDA9.0+cuDNN7.1.3+openface安装总结的更多相关文章
- Ubuntu18.04 + CUDA9.0 + cuDNN7.3 + Tensorflow-gpu-1.12 + Jupyter Notebook深度学习环境配置
目录 一.Ubuntu18.04 LTS系统的安装 1. 安装文件下载 2. 制作U盘安装镜像文件 3. 开始安装 二.设置软件源的国内镜像 1. 设置方法 2.关于ubuntu镜像的小知识 三.Nv ...
- Ubuntu18.04+CUDA9.0+cuDNN7.1.3+TensorFlow1.8 安装总结
Ubuntu18.04发行已经有一段时间了,正好最近Tensorflow也发布了1.8版本,于是决定两个一起装上,以下是安装总结,大致可 以分为5个步骤 确认当前软件和硬件环境.版本 更新显卡驱动,软 ...
- Ubuntu16.04 + cuda9.0 + cudnn7.1.4 + tensorflow安装
安装前的准备 UEFI 启动GPT分区 Win10和Ubuntu16.04双系统安装 ubuntu16.04 NVIDIA 驱动安装 ubuntu16.04 NVIDIA CUDA8.0 以及cuDN ...
- Ubuntu18.04 + cuda9.0+cudnn7.0
1 cannot find Toolkit in /usr/local/cuda-8.0 2017年05月27日 17:37:33 阅读数:2754 对于新版本ubuntukylin17.04安装C ...
- y7000笔记本 darknet-yolo安装与测试(Ubuntu18.04+Cuda9.0+Cudnn7.1)
环境配置看上一贴 https://www.cnblogs.com/clemente/p/10386479.html 1 安装darknet 1-1 克隆darknet repo git clone h ...
- ubuntu18.04+ cuda9.0+opencv3.1+caffe-ssd安装
详细Ubuntu18.04,CUDA9.0,OpenCV3.1,Tensorflow完全配置指南 问题1:使用Cmake编译opencv源码 CMake Error: The following va ...
- ubuntun16.04+cuda9.0+cudnn7+anaconda3+pytorch+anaconda3下py2安装pytorch
一.电脑配置 说明: 电脑配置: LEGION笔记本CPU Inter Core i7 8代GPU NVIDIA GeForce GTX1060Windows10 所需的环境: Anaconda3(6 ...
- Ubuntu16.04 + cuda9.0 +cudnn7.1(转载)
转载一个详细可用的ubuntu16.04+cuda9.0+cudnn7.1教程. 0 - 参考材料 https://blog.csdn.net/Umi_you/article/details/8026 ...
- Ubuntu16.04 + CUDA9.0 + cuDNN7.3 + Tensorflow-gpu-1.12 + Jupyter Notebook 深度学习环境配置
目录 一.Ubuntu16.04 LTS系统的安装 二.设置软件源的国内镜像 1. 设置方法 2.关于ubuntu镜像的小知识 三.Nvidia显卡驱动的安装 1. 首先查看显卡型号和推荐的显卡驱动 ...
随机推荐
- python常用函数 D
defaultdict(set_type) 可以定义字典多值映射,入参类型决定value类型. 例子: deque:(int) 保留最后N个元素 例子: Decimal(float) 直接对浮点数进行 ...
- find命令使用详解
一.主要内容 ====================================== 1. 用文件名查找文件 2.用文件名查找文件,忽略大小写 3. 使用mindepth和maxdepth限定搜 ...
- LeetCode(力扣)——Search in Rotated Sorted Array2 搜索旋转排序数组 python实现
题目描述: python实现 Search in Rotated Sorted Array2 搜索旋转排序数组 中文: 假设按照升序排序的数组在预先未知的某个点上进行了旋转. ( 例如,数组 [0 ...
- day20 python异常处理 try except
day20 python 一.异常处理 1.什么是异常, 常见异常有: 逻辑错误 ''' name Traceback (most recent call last): ...
- bzoj2669 [cqoi2012]局部极小值 状压DP+容斥
题目传送门 https://lydsy.com/JudgeOnline/problem.php?id=2669 题解 可以发现一个 \(4\times 7\) 的矩阵中,有局部最小值的点最多有 \(2 ...
- mysql中的key primary key 和unique key
mysql 中key就等同于index 所以 key:普通索引 unique key:唯一索引,就是这一列不能重复 primary key:主键索引,就是不能为空,且主键索引不是完全相同时,插入新数据 ...
- CentOS6.8 安装/升级Python2.7.x,并安装最新setuptools、pip、fabric程序总结
最终靠谱的可借鉴文档: 1.python官网 2.http://lovesoo.org/python-fabric-yuan-cheng-zi-dong-bu-shu-jian-jie.html 3. ...
- springMVC带参数请求重定向
SpirngMVC返回逻辑视图名 可以分下面几种情况: 1. servlet进行请求转发,返回到jsp页面,如 return "index.jsp" ; 2. servlet 返 ...
- php strnatcasecmp()函数 语法
php strnatcasecmp()函数 语法 作用:使用"自然"算法来比较两个字符串(不区分大小写):直线电机优势 语法:strnatcasecmp(string1,strin ...
- JS中字符串的常见属性及方法
1.属性 1.1.length var txt = "abc 123"; console.log(txt.length); 2.方法 2.1.返回字符位置(indexOf()) 该 ...