Nginx+tomcat+redis集群共享session实现负载均衡
1.nginx是一款轻量级兼备高性能的Http和反向代理服务器。所谓反向代理就是指用户发起访问请求,由代理服务器接受,然后将请求转发给正式服务器,并且将正式服务器处理完的数据返回给客户单,此时代理服务器就表现为一个服务器。

进入nginx的安装目录后,输入相关命令,一个窗口一闪而过,在任务管理器中可以找到它的进程。

浏览器输入localhost,可以看到nginx的欢迎页面!
修改nginx的配置文件,
worker_processes:工作进程个数,
worker_connections:单个进程最大连接数,
server:每一个server相当于一个代理服务器,
listern:监听端口,默认80,
server_name:当前服务的域名,可以有多个,用空格分割,
location:表示匹配的路径,配置/ 表示所有请求都被匹配到这里,
index:当没有指定主页时,默认会选择这个指定的文件,可多个,空格分割 ,
proxy_pass:请求转向自定义的服务器列表,
upstream name{} :服务器集群名称
- 然后再cmd中输入命令nginx -s reload重启nginx;
- 部署三个Tomcat,分别修改server.xml 和context.xml
server.xml依次修改 Server的port为8005,8006,8007 ,Connector的port为8081 8082 8083,8009 8010 8011


context.xml增加

并在webapps\ROOT下增加session.jsp ,加上标记tomcat 1 tomcat 2 tomcat 3
<%@ page language="java" contentType="text/html; charset=UTF-8" pageEncoding="UTF-8"%>
<!DOCTYPE html>
<html>
<head>
<meta http-equiv="Content-Type" content="text/html; charset=UTF-8">
<title>shared session</title>
</head>
<body>
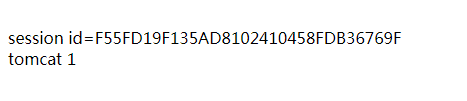
<br>session id=<%=session.getId()%>
<br>tomcat 1
</body>
</html>
将如下几个jar包复制到${TOMCAT_HOME}/lib下
tomcat-redis-session-manager-VERSION.jar

jedis-2.5.2.jar

commons-pool2-2.2.jar

3.修改Ngnix的配置文件增加负载均衡配置
#user  nobody;

#nginx进程数,建议设置为等于CPU总核心数

worker_processes  4;

error_log  logs/error.log;

#error_log  logs/error.log  notice;

#error_log  logs/error.log  info;

#进程pid文件

pid        logs/nginx.pid;

events {

    worker_connections  65535;

}

http {

    include       mime.types;

    default_type  application/octet-stream;

    #log_format  main  '$remote_addr - $remote_user [$time_local] "$request" '

    #                  '$status $body_bytes_sent "$http_referer" '

    #                  '"$http_user_agent" "$http_x_forwarded_for"';

    #access_log  logs/access.log  main;

    sendfile        on;

    #tcp_nopush     on;

    #keepalive_timeout  0;

    keepalive_timeout  65;

    #gzip  on;

	upstream mt.com {

		#upstream的负载均衡,weight是权重,可根据机器配置定义权重.weight参数表示权值,权值越高被分配的几率越大.

		server 127.0.0.1:8081 weight=1;

		server 127.0.0.1:8082 weight=2;

		server 127.0.0.1:8083 weight=3;

	}

    server {

        listen       80;

        server_name  localhost;

        #charset koi8-r;

        #access_log  logs/host.access.log  main;

        location / {

            #root   html;

            index  index.html index.htm;

			proxy_pass http://mt.com;

			proxy_set_header X-Real-IP $remote_addr;

			#允许客户端请求的最大单文件字节数

			client_max_body_size 100m;

        }

        #error_page  404              /404.html;

        # redirect server error pages to the static page /50x.html

        #

        error_page   500 502 503 504  /50x.html;

        location = /50x.html {

            root   html;

        }

        # proxy the PHP scripts to Apache listening on 127.0.0.1:80

        #

        #location ~ \.php$ {

        #    proxy_pass   http://127.0.0.1;

        #}

        # pass the PHP scripts to FastCGI server listening on 127.0.0.1:9000

        #

        #location ~ \.php$ {

        #    root           html;

        #    fastcgi_pass   127.0.0.1:9000;

        #    fastcgi_index  index.php;

        #    fastcgi_param  SCRIPT_FILENAME  /scripts$fastcgi_script_name;

        #    include        fastcgi_params;

        #}

        # deny access to .htaccess files, if Apache's document root

        # concurs with nginx's one

        #

        #location ~ /\.ht {

        #    deny  all;

        #}

    }

    # another virtual host using mix of IP-, name-, and port-based configuration

    #

    #server {

    #    listen       8000;

    #    listen       somename:8080;

    #    server_name  somename  alias  another.alias;

    #    location / {

    #        root   html;

    #        index  index.html index.htm;

    #    }

    #}

    # HTTPS server

    #

    #server {

    #    listen       443 ssl;

    #    server_name  localhost;

    #    ssl_certificate      cert.pem;

    #    ssl_certificate_key  cert.key;

    #    ssl_session_cache    shared:SSL:1m;

    #    ssl_session_timeout  5m;

    #    ssl_ciphers  HIGH:!aNULL:!MD5;

    #    ssl_prefer_server_ciphers  on;

    #    location / {

    #        root   html;

    #        index  index.html index.htm;

    #    }

    #}

}
4.启动redis,tomcat1,tomcat2,tomcat3 访问localhost/session.jsp且不断刷新


可以看到每次刷新都可能访问不同的tomcat,实现了负载均衡,而且session都是一致的,保证了session的一致性
原文参照: https://www.cnblogs.com/zhrxidian/p/5432886.html
https://www.cnblogs.com/linjiqin/p/5761281.html
http://blog.csdn.net/lipc_/article/details/52766884
https://www.cnblogs.com/machanghai/p/5956195.html
Nginx+tomcat+redis集群共享session实现负载均衡的更多相关文章
- Nginx+tomcat+redis 集群session共享
插件资源下载地址:https://github.com/ran-jit/tomcat-cluster-redis-session-manager/releases/tag/2.0.2 一.前置条件 J ...
- nginx+tomcat的集群和session复制
前端服务器采用nginx,后端应用服务器采用tomcat.nginx负责负载均衡,session复制在tomcat上处理. 1.nginx安装(略) 2.nginx配置负载均衡 http { incl ...
- keepalived+nginx+tomcat+redis集群环境部署
1.所需软件.jar包.配置文件下载:http://pan.baidu.com/s/1dFgntst 2.环境说明: centos6.5 64位 主节点:192.168.40.121 副节点:192 ...
- nginx+tomcat实现集群,redis实现session共享,软连接实现文件共享:http://blog.csdn.net/hua1586981/article/details/78132710
转载 2017年02月08日 16:52:41 730 相信很多人都听过nginx,这个小巧的东西慢慢地在吞食apache和IIS的份额.那究竟它有什么作用呢?可能很多人未必了解. 说到反向代理,可能 ...
- tomcat redis 集群 session共享
jcoleman/tomcat-redis-session-manager: Redis-backed non-sticky session store for Apache Tomcathttps: ...
- 图文解说:Nginx+tomcat配置集群负载均衡
图文解说:Nginx+tomcat配置集群负载均衡 博客分类: appserver nginxTomcatUbuntuLinux网络应用 作者:niumd Blog:http://ari.iteye ...
- Nginx+Tomcat+MemCached 集群配置手册
系统实施文档 Nginx+Tomcat+MemCached 集群配置手册 目 录 第1章 概述 1.1 目标 互联网的快速发展带来了互联网系统的高负载和高可用性, 这要求我们在设计系统架 ...
- Nginx + Tomcat搭建集群
一.Tomcat集群带来的好处 1.提高服务的性能,并发能力,以及高可用性 2.提供项目架构的横向扩展能力 二.Tomcat集群实现原理 通过Nginx负载均衡进行请求转发 三.Nginx + Tom ...
- LVS集群中的IP负载均衡技术
LVS集群中的IP负载均衡技术 章文嵩 (wensong@linux-vs.org) 转自LVS官方参考资料 2002 年 4 月 本文在分析服务器集群实现虚拟网络服务的相关技术上,详细描述了LVS集 ...
随机推荐
- Navicat for Mysql中错误提示索引过长1071-max key length is 767 byte
1.建用户信息表 tb_person_info create table tb_person_info( user_id int(10) auto_increment, `name` varchar( ...
- #leetcode刷题之路6- Z 字形变换
将一个给定字符串根据给定的行数,以从上往下.从左到右进行 Z 字形排列.比如输入字符串为 "LEETCODEISHIRING" 行数为 3 时,排列如下:L C I ...
- JDBC编程:获取数据库连接
JDBC(Java Database Connectivity),即Java数据库连接.通过JDBC编程,可以使Java应用程序和数据库进行交互. JDBC驱动的方式有很多种,我们常用的驱动方式为:本 ...
- DRF知识
- oracle中connect by语句的优化
很多应用中都会有类似组织机构的表,组织机构的表又通常是典型的层次结构(没有循环节点).于是通过组织控制数据权限的时候,许多人都喜欢通过connect by获得组织信息,然后再过滤目标数据. 在有些情况 ...
- Xcode升到7.1插件失效解决方法
Mac前段时间下载了新的OS系统与Xcode 7.1,然而在使用Xcode 7.1时,发现插件不能用了,瞬间木有爱了,正好交流群里有人问到了插件失效的问题,经过各路大神的神通最终用下面这种方法完美解决 ...
- 使用virtual安装Windows系列操作系统总结
最近在安装Windows操作系统的过程中,发现总是报错,无法安装成功,后来经过不断地摸索,发现根本的问题在于镜像,所以在以后的大文件传输下载后,一定要校验其MD5值是否与源文件一致,需要的朋友可以联系 ...
- Python基本数据类型(一)
我会持续更新.... 字符串类型 字符串定义: 字符串的格式:'字符串', "字符串", """字符串"""字符串一旦被 ...
- python中 列表常用的操作
列表可以装大量的数据,不限制数据类型,表示方式:[]:列表中的元素用逗号隔开. lst = [] #定义一个空列表 lst = ["Tanxu",18,"女", ...
- python系列7进程线程和协程
目录 进程 线程 协程 上下文切换 前言:线程和进程的关系图 由下图可知,在每个应用程序执行的过程中,都会去产生一个主进程和主线程来完成工作,当我们需要并发的执行的时候,就会通过主进程去生成一系列的 ...