【VMware vCenter】一次性说清楚 vCenter Server 的 CLI 部署方式。
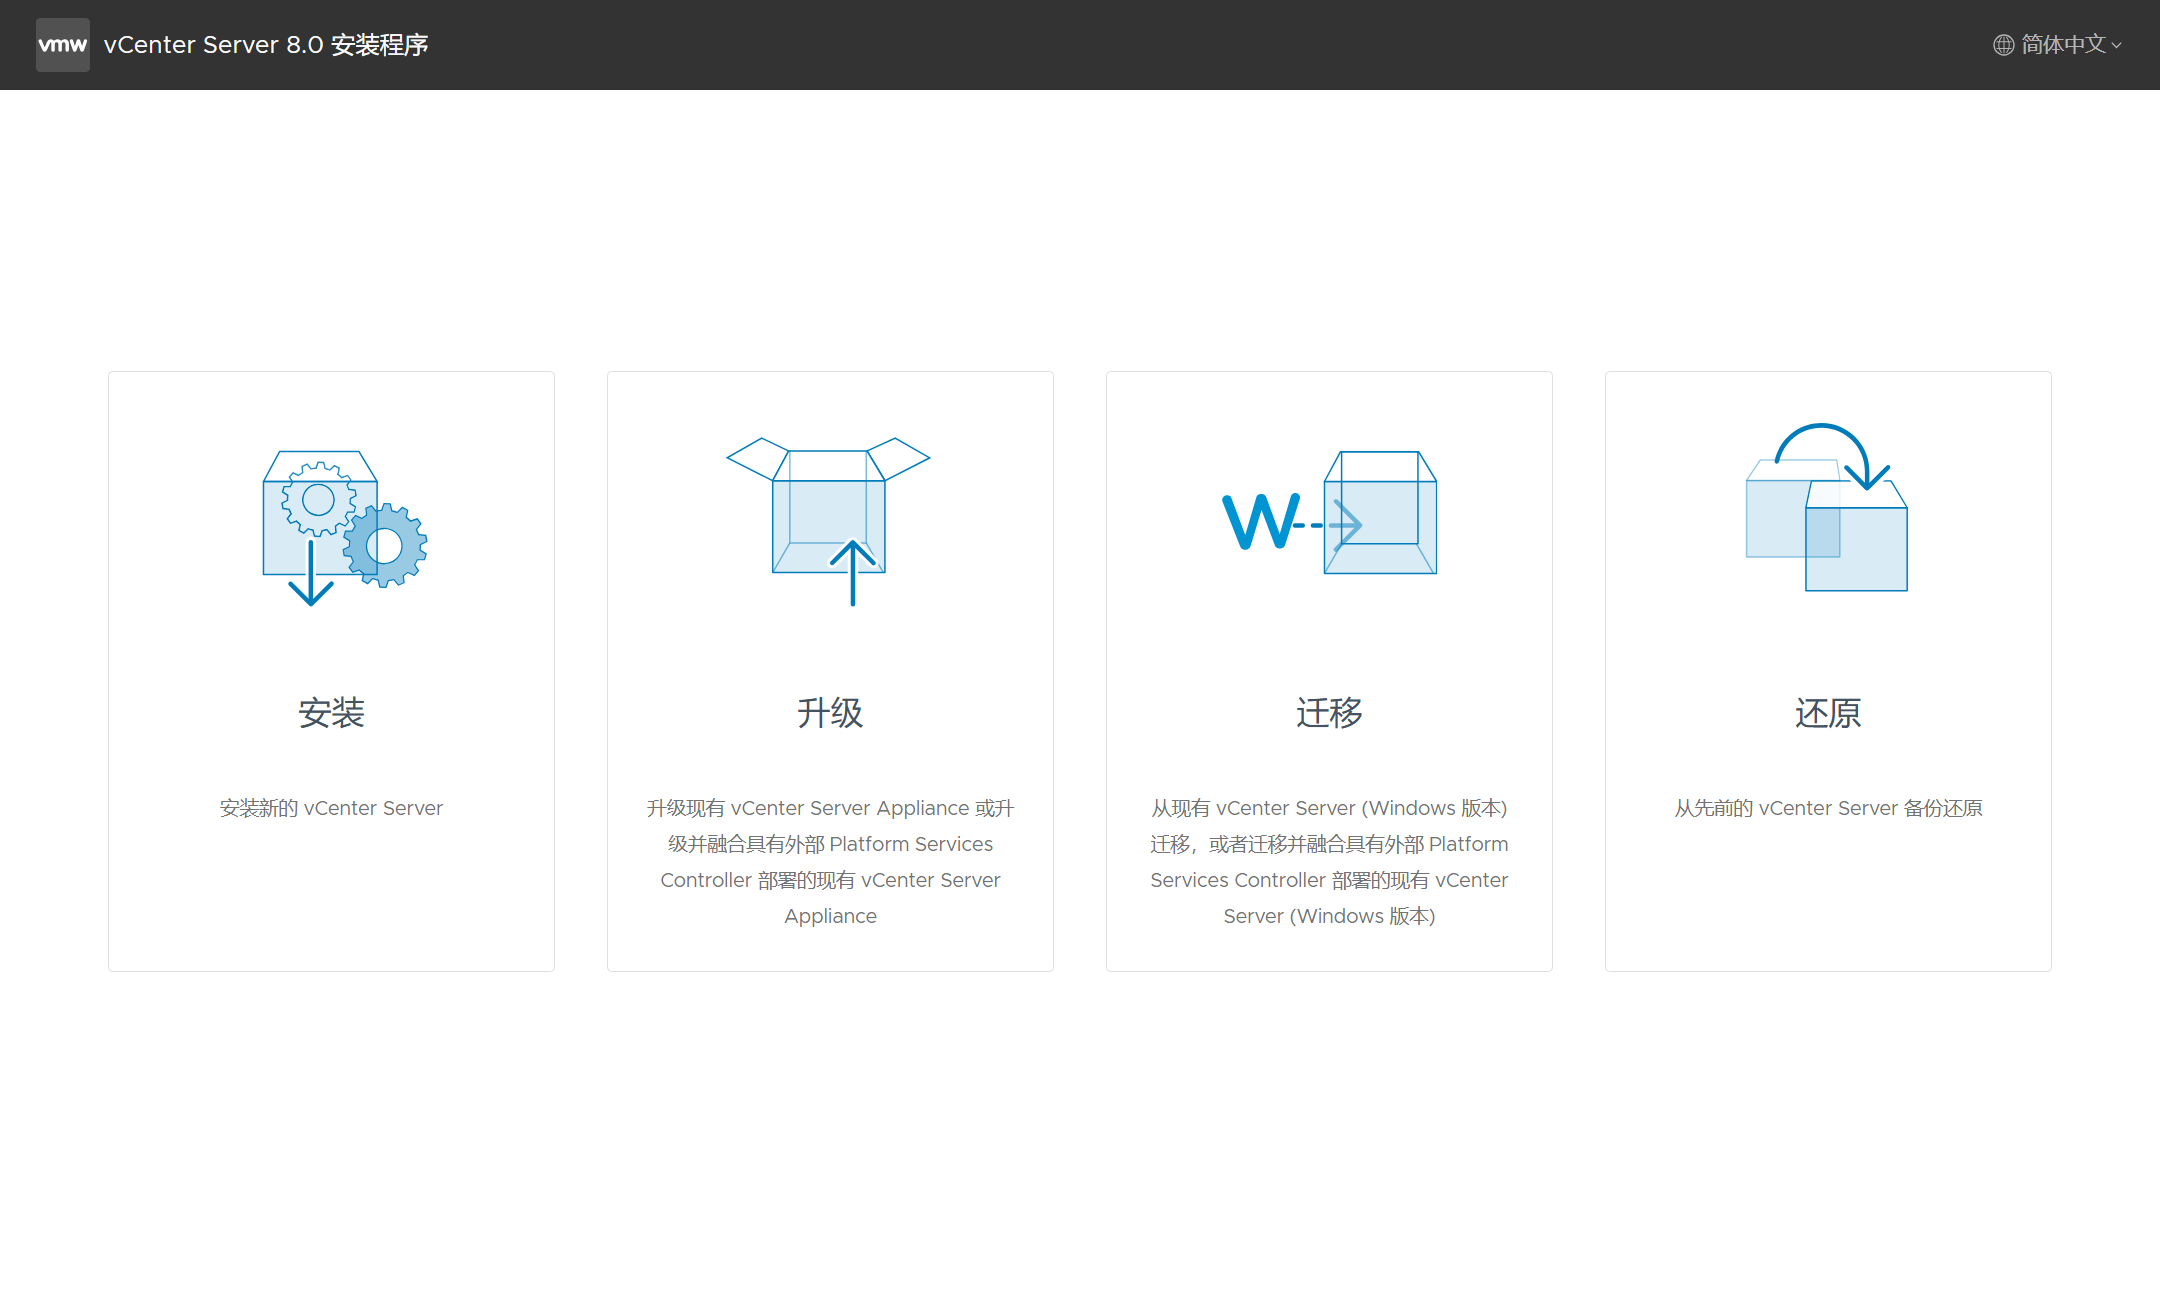
VMware vCenter Server 是 VMware vSphere 解决方案的核心组件,用于管理多个 ESXi 主机并实现更多高级功能特性(如 HA、DRS 以及 FT 等),相信大家已经非常熟悉了。对于 vCenter Server 的安装和部署,可能大部分人会选择使用 GUI 方式部署 vCenter Server,并使用 vCenter Server ISO 镜像文件中的 \vcsa-ui-installer\win32\installer.exe 部署程序,如下图所示。部署过程分为两个阶段,第一阶段配置并部署 vCenter Server 的 OVA 虚拟机文件;第二阶段设置并启动 vCenter Server 虚拟机的服务。
其实,对于 vCenter Server 的部署还支持 CLI 部署方式,像我这种在实验室中经常需要安装删除 vCenter Server 环境的来说,可能更喜欢 CLI 自动化部署方式,因为这样可以节约很多时间来做其他事情。如果你能了解 vCenter Server 的 GUI 部署过程,那对于使用 CLI 的部署方式应该也会非常简单。下面来看看如何使用 CLI 方式来部署我们所需要的 vCenter Server 环境,涵盖了 GUI 部署过程中的所有场景,更多内容和细节请查看 vCenter Server 产品文档。
将 vCenter Server ISO 镜像文件挂载到本地虚拟机光驱 F 盘符上,可以看到 vCenter Server 安装镜像文件中包含的所有文件,如下图所示。注,对于 vCenter Server 的 CLI 部署将使用 PowerShell 方式执行,ISO 镜像文件基于 vCenter Server 8.0 U2b,内部版本号 23319993。
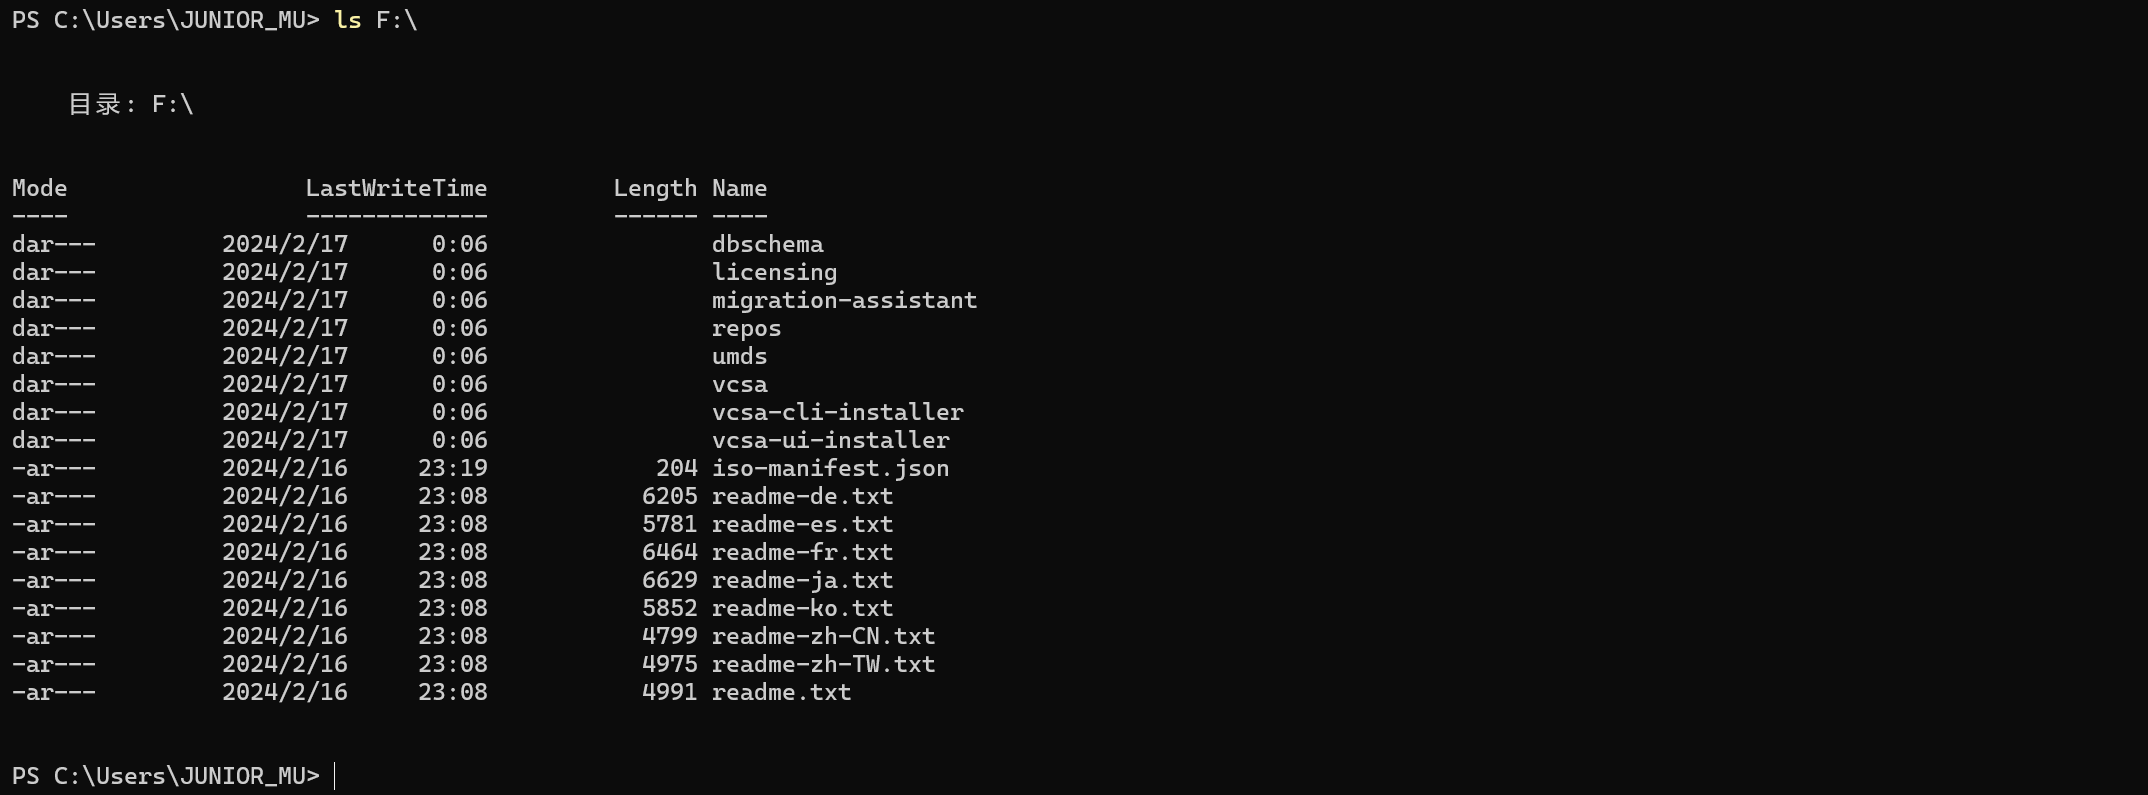
如你所见,要是使用 GUI 部署方式则选择 vcsa-ui-installer 文件夹下面所对应的部署程序,如果使用 CLI 部署方式则使用 \vcsa-cli-installer\win32\ 文件夹下面的 vcsa-deploy.exe 部署程序。

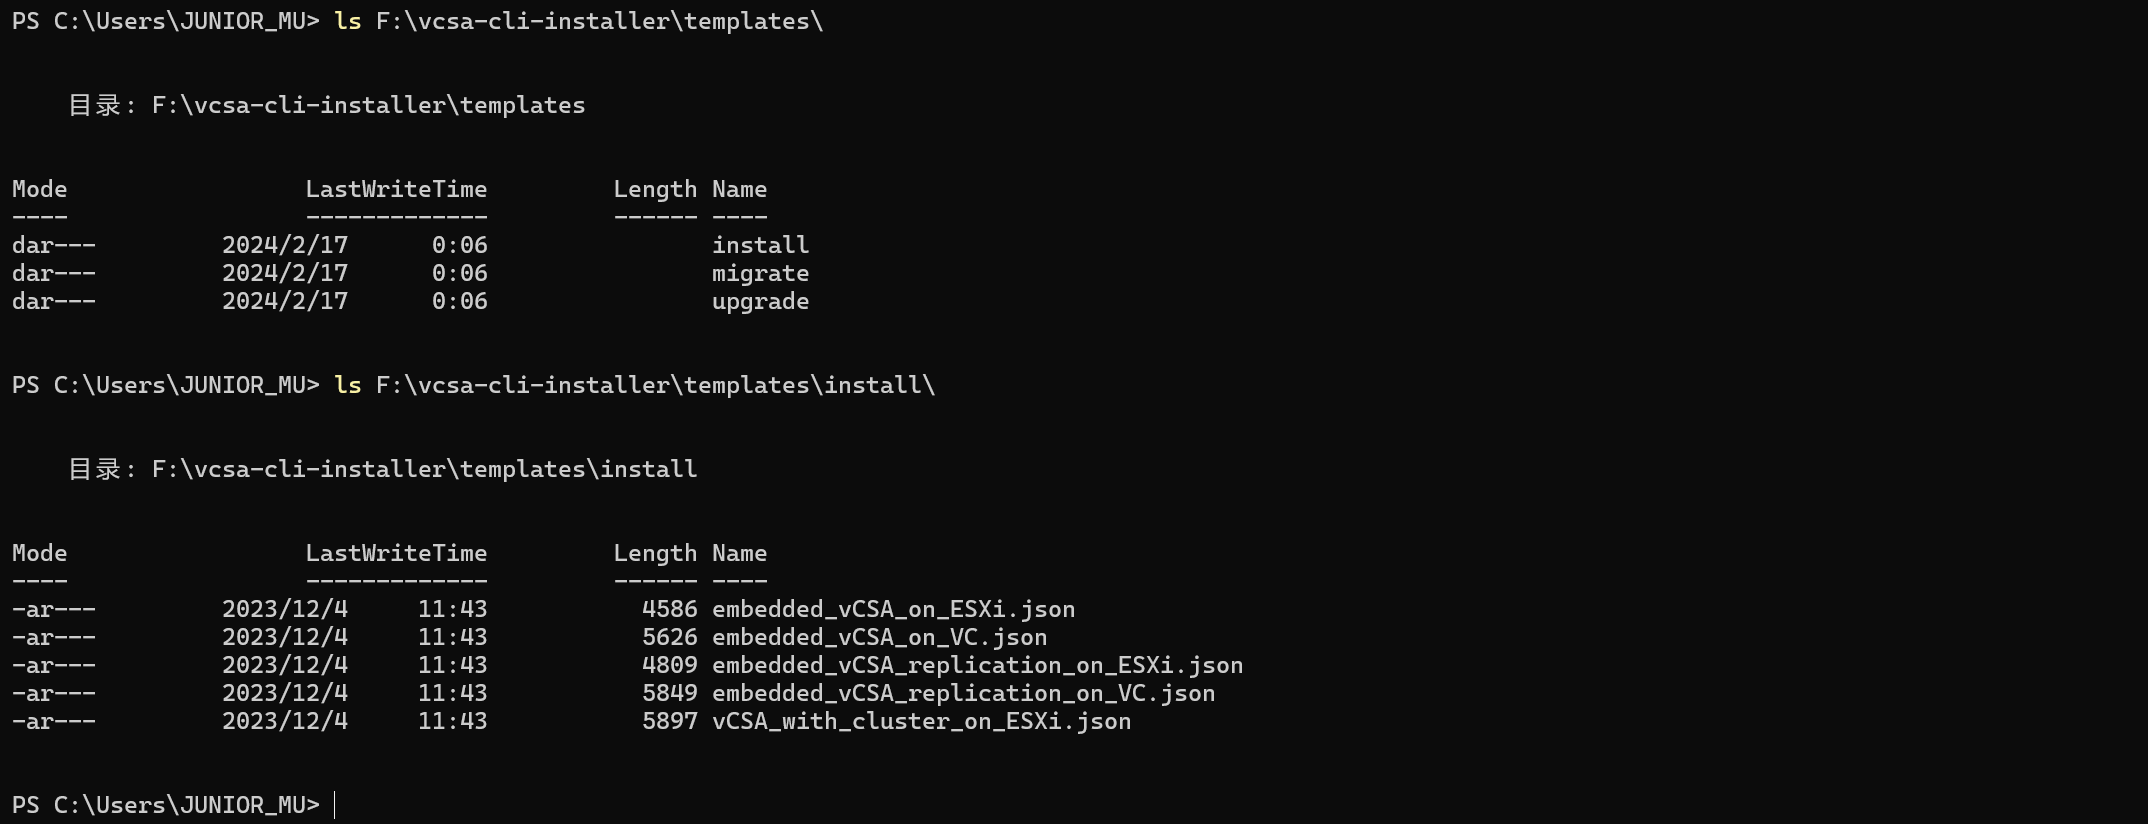
使用 CLI 部署方式除了要使用 vcsa-deploy.exe 部署程序以外,还需要用到 \vcsa-cli-installer\templates\install\ 文件夹下面的 JSON 配置文件,这些 JSON 配置文件中预定义了在部署 vCenter Server 过程中所需配置的信息,如部署位置 、FQDN 等。
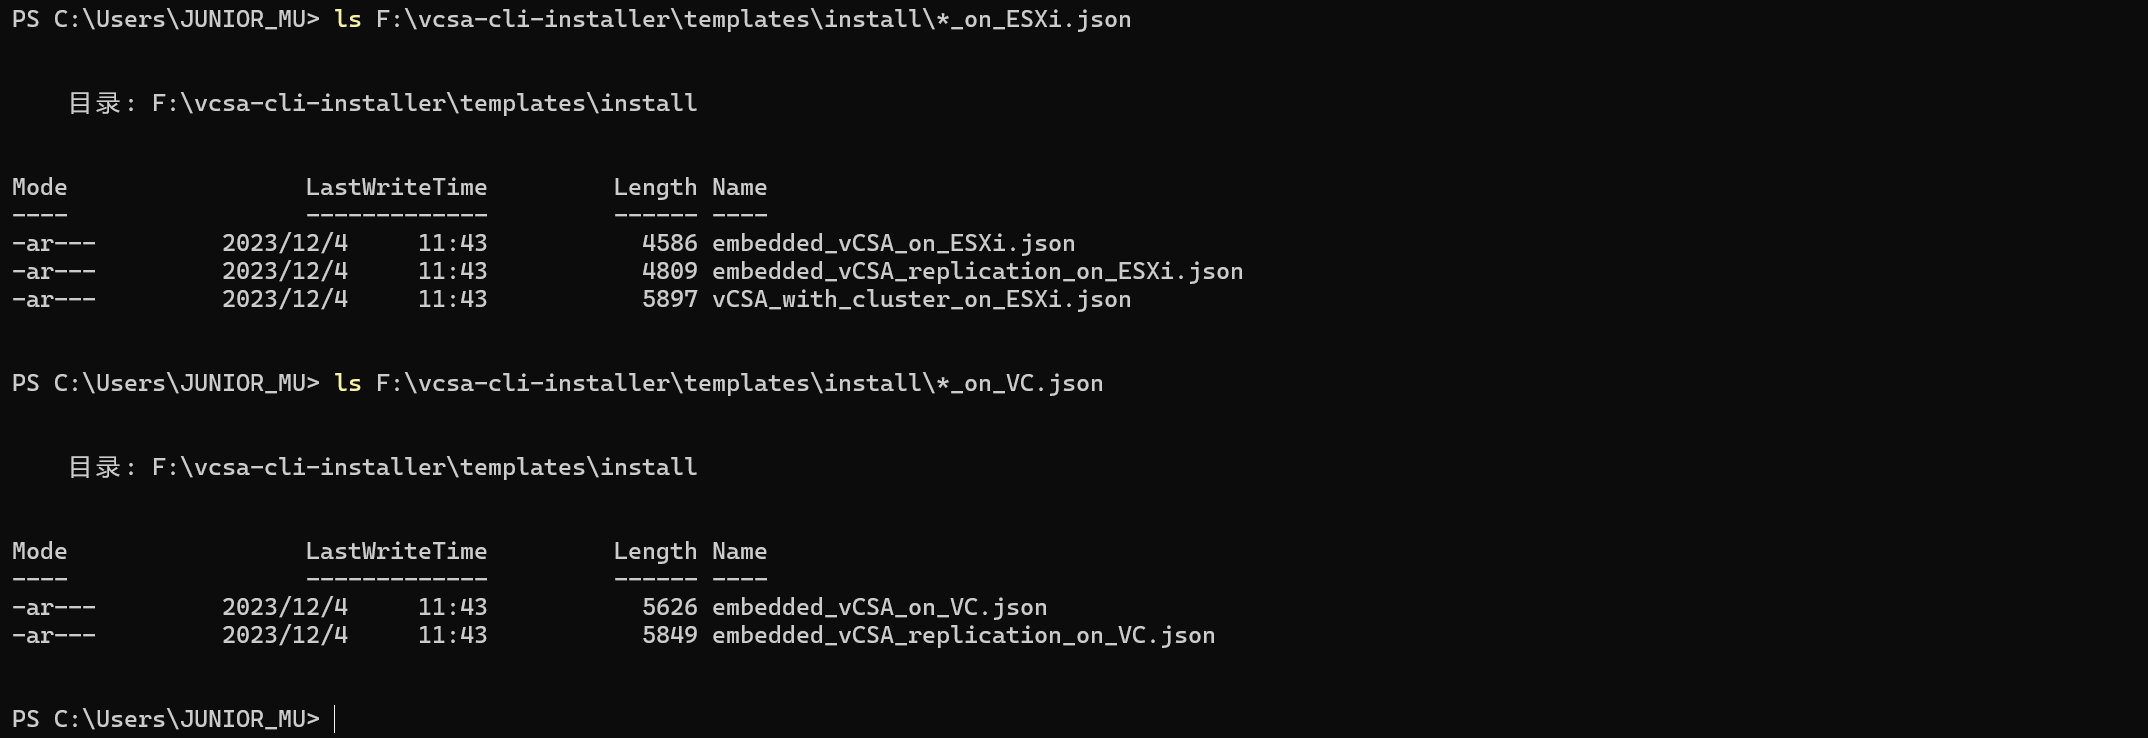
这些 JSON 配置文件一共分为两类,一类是 *_on_ESXi.json 文件,用于将 vCenter Server 虚拟机部署在 ESXi 主机上;另一类是 *_on_VC.json 文件,用于将 vCenter Server 虚拟机部署在现有 vCenter Server 上。第一类通常是用于初始部署,第二类是在已有 vSphere 环境的情况下进行部署,后面将分别介绍这几种 JSON 配置文件所代表的部署场景。
先看一下 vcsa-deploy.exe 部署程序的命令帮助,CLI 方式同样可以实现安装(install)、升级(upgrade)以及迁移(migrate)等功能。
F:\vcsa-cli-installer\win32\vcsa-deploy.exe --help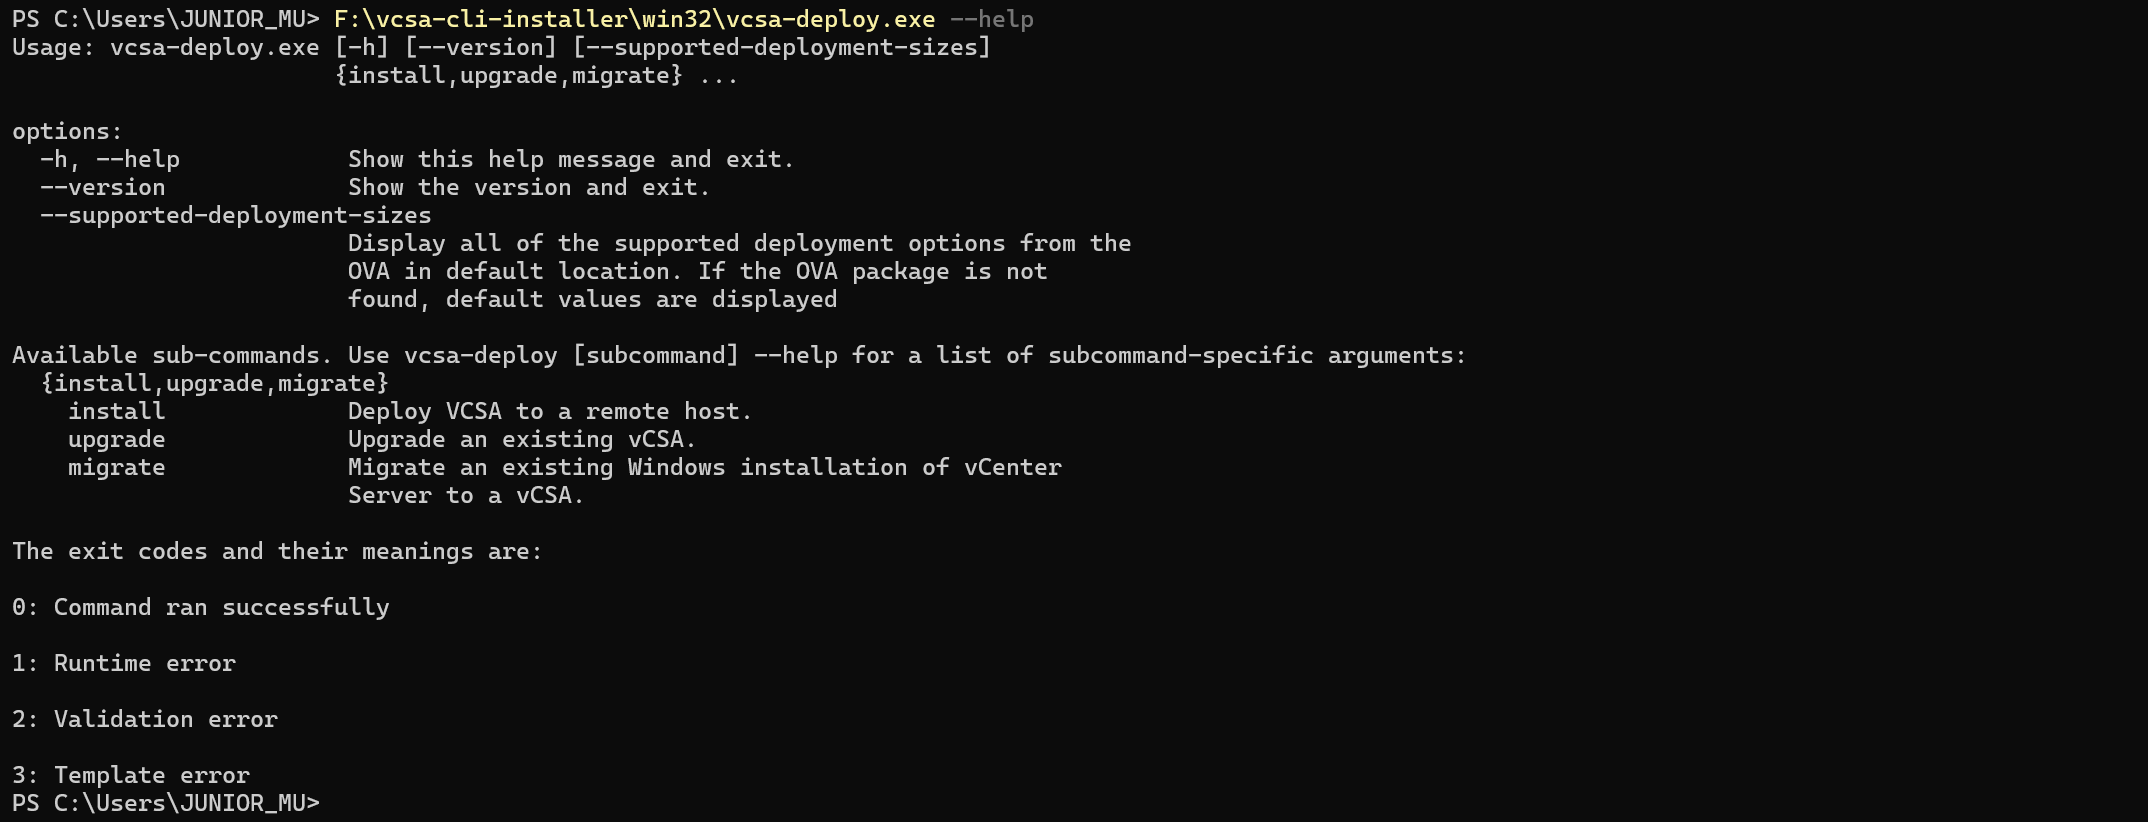
使用以下命令可以查看 vCenter Server 支持的部署大小以及对应的默认配置,可根据环境的情况自行选择哪种部署选项。
F:\vcsa-cli-installer\win32\vcsa-deploy.exe --supported-deployment-sizes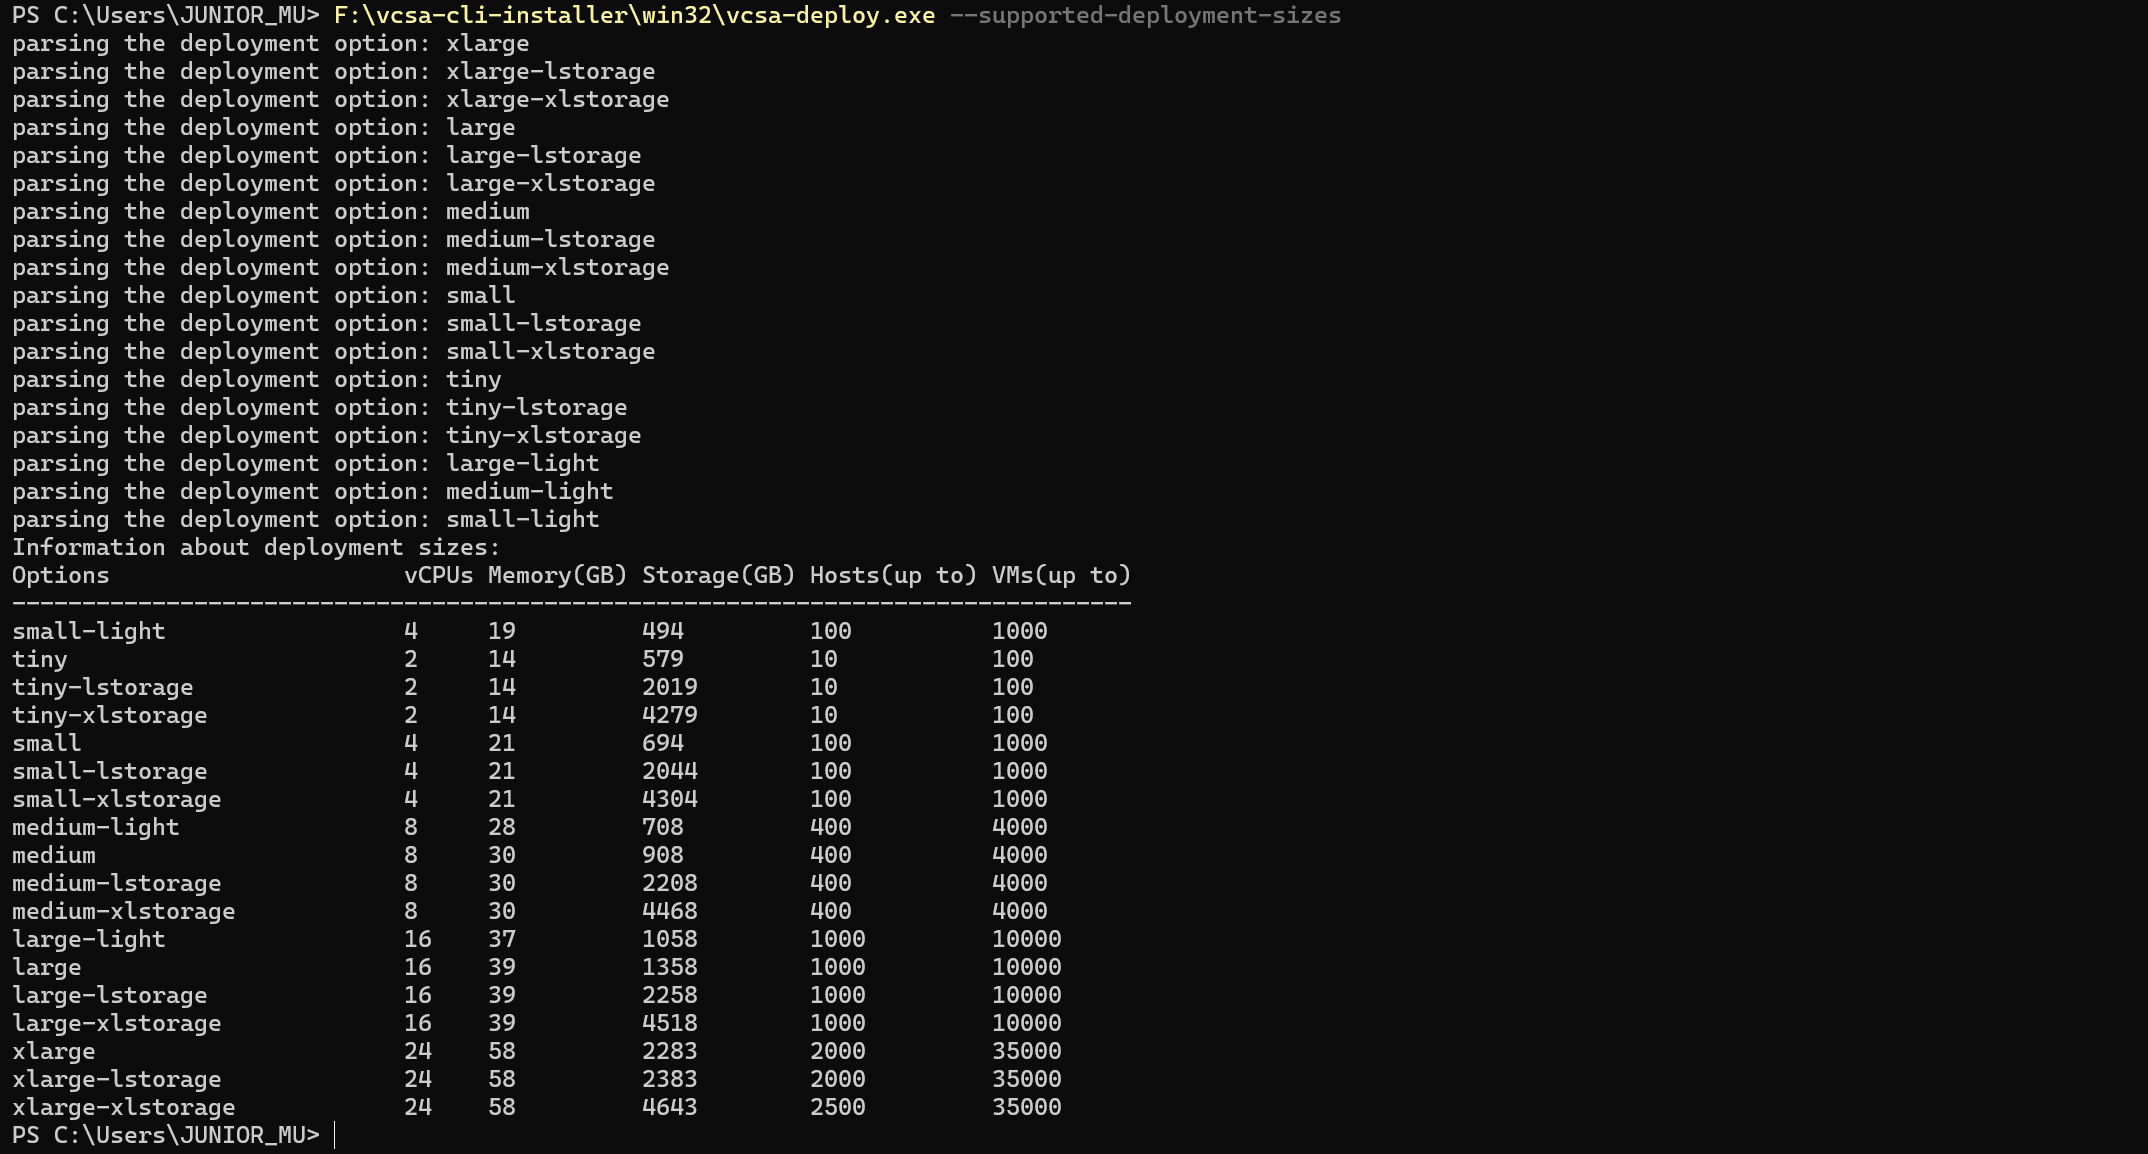
如果对 JSON 配置文件中的哪个配置选项有疑问,可以使用以下命令查看 JSON 配置文件中关于配置选项的说明。
F:\vcsa-cli-installer\win32\vcsa-deploy.exe install --template-help | more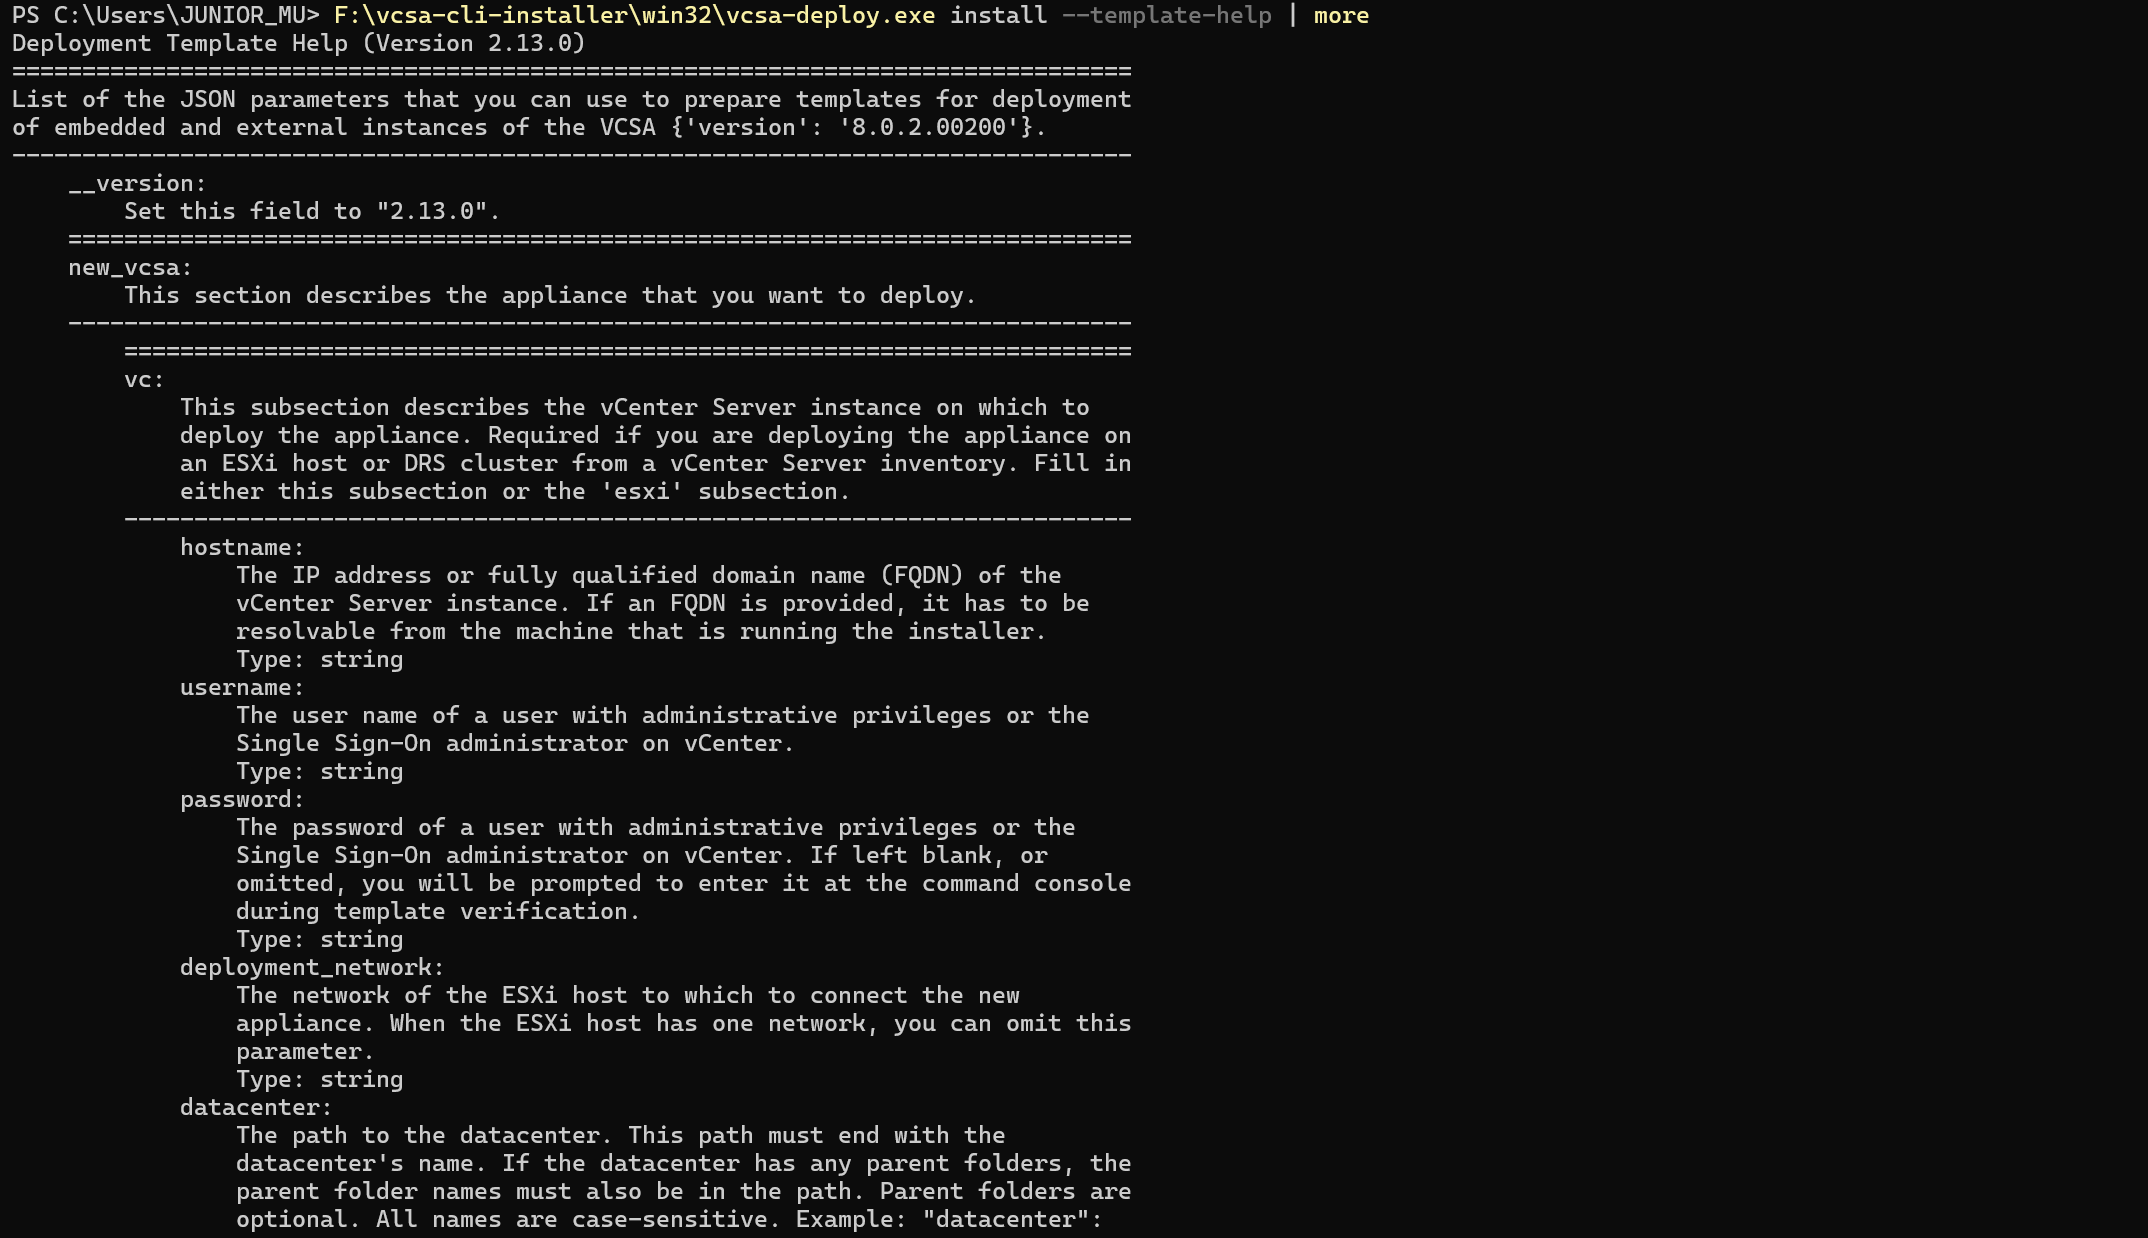
下面正式进入 CLI 部署的配置过程,涉及到 vCenter Server 的多种部署场景,不同的场景会使用到不同的 JSON 配置文件以及环境。
一、将 vCenter Server 虚拟机部署到 ESXi 主机上
将 vCenter Server 虚拟机部署到 ESXi 主机上,通常是 ESXi 主机上已经具有本地存储和网络端口组等环境信息,这种场景需要用到 vCenter Server 镜像文件中的 embedded_vCSA_on_ESXi.json 配置文件,根据这个配置文件修改为实际环境中的信息,示例如下:
{

    "__version": "2.13.0",

    "__comments": "将 vCenter Server 虚拟机部署到 ESXi 主机上",

    "new_vcsa": {

        "esxi": {

            "hostname": "192.168.32.51",

            "username": "root",

            "password": "vSphere8@password",

            "deployment_network": "VM Network",

            "datastore": "Datastore-01"

        },

        "appliance": {

            "__comments": [

                "vCenter Server 部署参数"

            ],

            "thin_disk_mode": true,

            "deployment_option": "tiny",

            "name": "vcenter01"

        },

        "network": {

            "ip_family": "ipv4",

            "mode": "static",

            "system_name": "vcenter01.mulab.local",

            "ip": "192.168.32.55",

            "prefix": "24",

            "gateway": "192.168.32.254",

            "dns_servers": [

                "192.168.32.3"

            ]

        },

        "os": {

            "password": "vSphere8@password",

            "ntp_servers": "192.168.32.3",

            "ssh_enable": true

        },

        "sso": {

            "password": "vSphere8@password",

            "domain_name": "vsphere.local"

        }

    },

    "ceip": {

        "description": {

            "__comments": [

                "++++VMware Customer Experience Improvement Program (CEIP)++++",

                "VMware's Customer Experience Improvement Program (CEIP) ",

                "provides VMware with information that enables VMware to ",

                "improve its products and services, to fix problems, ",

                "and to advise you on how best to deploy and use our ",

                "products. As part of CEIP, VMware collects technical ",

                "information about your organization's use of VMware ",

                "products and services on a regular basis in association ",

                "with your organization's VMware license key(s). This ",

                "information does not personally identify any individual. ",

                "",

                "Additional information regarding the data collected ",

                "through CEIP and the purposes for which it is used by ",

                "VMware is set forth in the Trust & Assurance Center at ",

                "http://www.vmware.com/trustvmware/ceip.html . If you ",

                "prefer not to participate in VMware's CEIP for this ",

                "product, you should disable CEIP by setting ",

                "'ceip_enabled': false. You may join or leave VMware's ",

                "CEIP for this product at any time. Please confirm your ",

                "acknowledgement by passing in the parameter ",

                "--acknowledge-ceip in the command line.",

                "++++++++++++++++++++++++++++++++++++++++++++++++++++++++++++++"

            ]

        },

        "settings": {

            "ceip_enabled": false

        }

    }

}
另存为 deploy-on-esxi.json 配置文件到 files 文件夹,使用以下命令执行部署前预检查。
F:\vcsa-cli-installer\win32\vcsa-deploy.exe install .\files\deploy-on-esxi.json --accept-eula --no-ssl-certificate-verification --precheck-only如果 JSON 配置文件与部署环境检查成功,则会输出类似下面的内容。
[SUCCEEDED] Successfully executed Task 'Precheck ovftool commandline parameters

to deploy a vCenter Server Appliance' in TaskFlow 'deploy-on-esxi' at 09:03:06

=================================== 09:03:07 ===================================

Result and Log File Information...

WorkFlow log directory:

C:\Users\JUNIOR~1\AppData\Local\Temp\vcsaCliInstaller-2024-08-06-09-02-x2dv8gw0\workflow_1722934960074
如果 JSON 配置文件与部署环境检查确定没问题,使用以下命令执行正式部署。
F:\vcsa-cli-installer\win32\vcsa-deploy.exe install .\files\deploy-on-esxi.json --accept-eula --no-ssl-certificate-verification如果 vCenter Server 部署成功,则会输出类似下面的内容。
Successfully completed VCSA deployment.  VCSA Deployment Start Time:

2024-08-06T09:11:48.264Z VCSA Deployment End Time: 2024-08-06T09:33:42.921Z

 [SUCCEEDED] Successfully executed Task 'MonitorDeploymentTask: Monitoring

Deployment' in TaskFlow 'deploy-on-esxi' at 09:33:55

Monitoring VCSA Deploy task completed

== [START] Start executing Task: Join active domain if necessary at 09:33:56 ==

Domain join task not applicable, skipping task

 [SUCCEEDED] Successfully executed Task 'Running deployment: Domain Join' in

TaskFlow 'deploy-on-esxi' at 09:33:56

 [START] Start executing Task: Provide the login information about new

appliance. at 09:33:56

    Appliance Name: vcenter01

    System Name: vcenter01.mulab.local

    System IP: 192.168.32.55

    Log in as: Administrator@vsphere.local

 [SUCCEEDED] Successfully executed Task 'ApplianceLoginSummaryTask: Provide

appliance login information.' in TaskFlow 'deploy-on-esxi' at 09:33:56

=================================== 09:33:57 ===================================

Result and Log File Information...

WorkFlow log directory:

C:\Users\JUNIOR~1\AppData\Local\Temp\vcsaCliInstaller-2024-08-06-09-03-4auw6_e4\workflow_1722935032748
登录 vCenter Server,查看部署情况。

二、将 vCenter Server 虚拟机部署到现有 vCenter Server 上
将 vCenter Server 虚拟机部署到现有 vCenter Server 上,通常是当前环境中已经具有 vSphere 环境并想在之上部署另外一套环境,这种场景需要用到 vCenter Server 镜像文件中的 embedded_vCSA_on_VC.json 配置文件,根据这个配置文件修改为实际环境中的信息,示例如下:
{

    "__version": "2.13.0",

    "__comments": "将 vCenter Server 虚拟机部署到现有 vCenter Server 上",

    "new_vcsa": {

        "vc": {

            "__comments": [

                "'datacenter' must end with a datacenter name, and only with a datacenter name.",

                "'target' must end with an ESXi hostname, a cluster name, or a resource pool name.",

                "The item 'Resources' must precede the resource pool name. ",

                "All names are case-sensitive. ",

                "For details and examples, refer to template help, i.e. vcsa-deploy {install|upgrade|migrate} --template-help"

            ],

            "hostname": "vcsa8-01.mulab.local",

            "username": "administrator@vsphere.local",

            "password": "vSphere8@password",

            "deployment_network": "VM Network",

            "datacenter": [

                "mulab"

            ],

            "datastore": "vsanDatastore",

            "target": [

			    "vsan8-hci-esa"

            ]

        },

        "appliance": {

            "__comments": [

                "vCenter Server 部署参数"

            ],

            "thin_disk_mode": true,

            "deployment_option": "tiny",

            "name": "vcenter02"

        },

        "network": {

            "ip_family": "ipv4",

            "mode": "static",

            "system_name": "vcenter02.mulab.local",

            "ip": "192.168.32.56",

            "prefix": "24",

            "gateway": "192.168.32.254",

            "dns_servers": [

                "192.168.32.3"

            ]

        },

        "os": {

            "password": "vSphere8@password",

            "ntp_servers": "192.168.32.3",

            "ssh_enable": true

        },

        "sso": {

            "password": "vSphere8@password",

            "domain_name": "vsphere.local"

        }

    },

    "ceip": {

        "description": {

            "__comments": [

                "++++VMware Customer Experience Improvement Program (CEIP)++++",

                "VMware's Customer Experience Improvement Program (CEIP) ",

                "provides VMware with information that enables VMware to ",

                "improve its products and services, to fix problems, ",

                "and to advise you on how best to deploy and use our ",

                "products. As part of CEIP, VMware collects technical ",

                "information about your organization's use of VMware ",

                "products and services on a regular basis in association ",

                "with your organization's VMware license key(s). This ",

                "information does not personally identify any individual. ",

                "",

                "Additional information regarding the data collected ",

                "through CEIP and the purposes for which it is used by ",

                "VMware is set forth in the Trust & Assurance Center at ",

                "http://www.vmware.com/trustvmware/ceip.html . If you ",

                "prefer not to participate in VMware's CEIP for this ",

                "product, you should disable CEIP by setting ",

                "'ceip_enabled': false. You may join or leave VMware's ",

                "CEIP for this product at any time. Please confirm your ",

                "acknowledgement by passing in the parameter ",

                "--acknowledge-ceip in the command line.",

                "++++++++++++++++++++++++++++++++++++++++++++++++++++++++++++++"

            ]

        },

        "settings": {

            "ceip_enabled": false

        }

    }

}
另存为 deploy-on-vcenter.json 配置文件到 files 文件夹,使用以下命令执行部署前预检查。
F:\vcsa-cli-installer\win32\vcsa-deploy.exe install .\files\deploy-on-vcenter.json --accept-eula --no-ssl-certificate-verification --precheck-only如果 JSON 配置文件与部署环境检查成功,则会输出类似下面的内容。
[SUCCEEDED] Successfully executed Task 'Precheck ovftool commandline parameters

to deploy a vCenter Server Appliance' in TaskFlow 'deploy-on-vcenter' at

09:05:55

=================================== 09:05:56 ===================================

Result and Log File Information...

WorkFlow log directory:

C:\Users\JUNIOR~1\AppData\Local\Temp\vcsaCliInstaller-2024-08-06-09-05-z39vgzmr\workflow_1722935126586
如果 JSON 配置文件与部署环境检查确定没问题,使用以下命令执行正式部署。
F:\vcsa-cli-installer\win32\vcsa-deploy.exe install .\files\deploy-on-vcenter.json --accept-eula --no-ssl-certificate-verification如果 vCenter Server 部署成功,则会输出类似下面的内容。
Successfully completed VCSA deployment. VCSA Deployment Start Time:
2024-08-06T09:18:57.371Z VCSA Deployment End Time: 2024-08-06T09:47:03.177Z
[SUCCEEDED] Successfully executed Task 'MonitorDeploymentTask: Monitoring
Deployment' in TaskFlow 'deploy-on-vcenter' at 09:47:27
Monitoring VCSA Deploy task completed
== [START] Start executing Task: Join active domain if necessary at 09:47:28 ==
Domain join task not applicable, skipping task
[SUCCEEDED] Successfully executed Task 'Running deployment: Domain Join' in
TaskFlow 'deploy-on-vcenter' at 09:47:28
[START] Start executing Task: Provide the login information about new
appliance. at 09:47:29
Appliance Name: vcenter02
System Name: vcenter02.mulab.local
System IP: 192.168.32.56
Log in as: Administrator@vsphere.local
[SUCCEEDED] Successfully executed Task 'ApplianceLoginSummaryTask: Provide
appliance login information.' in TaskFlow 'deploy-on-vcenter' at 09:47:29
=================================== 09:47:30 ===================================
Result and Log File Information...
WorkFlow log directory:
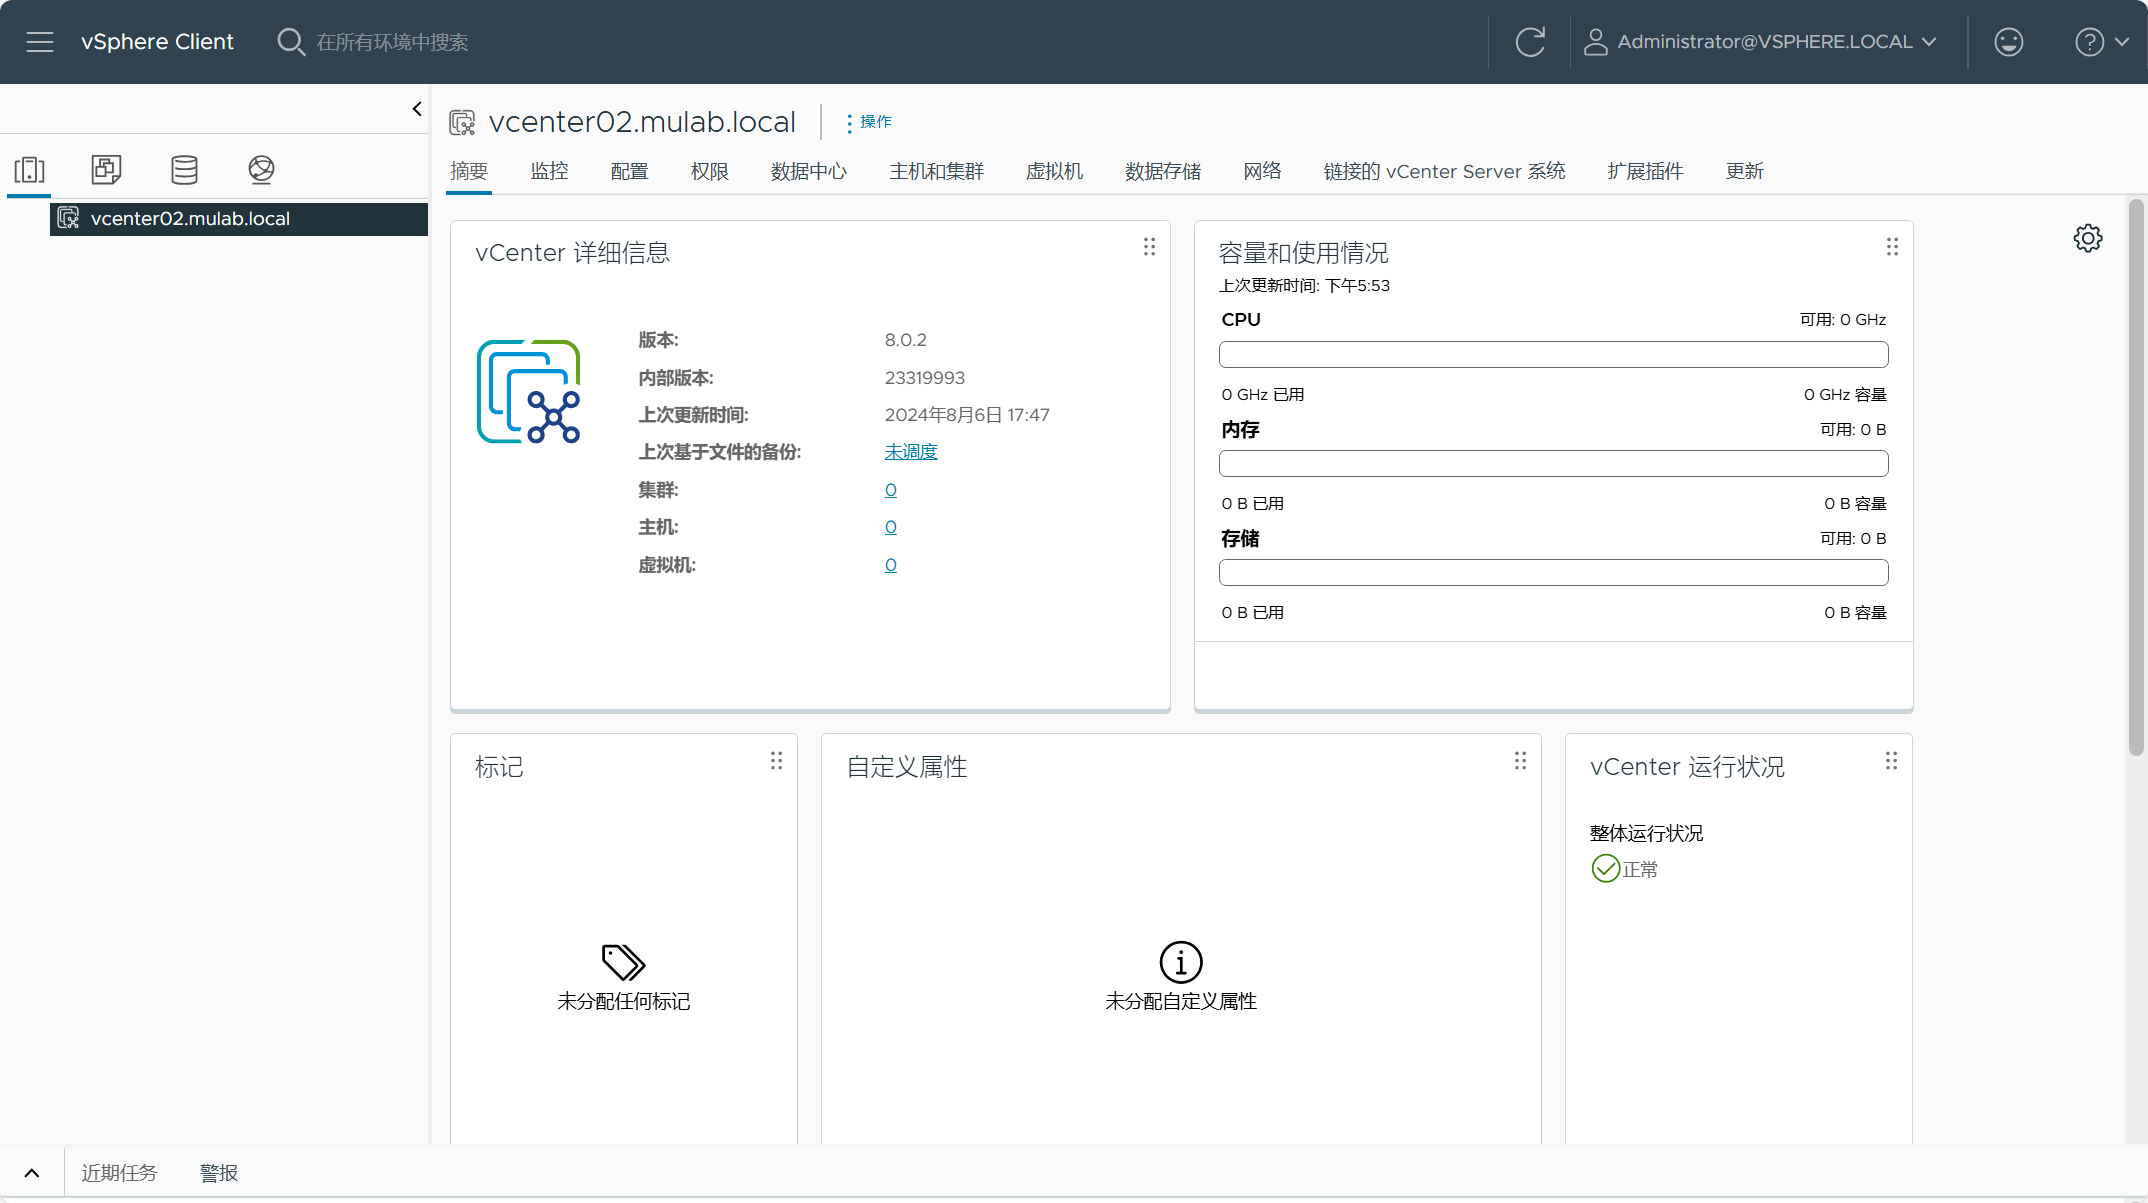
C:\Users\JUNIOR~1\AppData\Local\Temp\vcsaCliInstaller-2024-08-06-09-06-42t35ek9\workflow_1722935200962登录 vCenter Server,查看部署情况。
三、部署多个 vCenter Server
前面两种场景分别是将 vCenter Server 部署到 ESXi 主机或者现有 vCenter Server 上,针对前面两种情况,可能你有同时部署多个 vCenter Server 环境的需求,可以将 embedded_vCSA_on_ESXi.json 或者 embedded_vCSA_on_VC.json 配置文件复制为多个 vCenter Server 的部署配置文件,然后将这些文件放在同一个文件夹内(如 deploy-multiple-vcenter),部署的时候指定这个文件夹即可同时部署多个 vCenter Server 环境。

如果已经配置好了 JSON 配置文件并放在了同一文件夹(如 deploy-multiple-vcenter),使用以下命令执行部署前预检查。
F:\vcsa-cli-installer\win32\vcsa-deploy.exe install .\files\deploy-multiple-vcenter\ --accept-eula --no-ssl-certificate-verification --precheck-only如果文件夹中的 JSON 配置文件与部署环境检查确定没问题,使用以下命令执行正式部署。
F:\vcsa-cli-installer\win32\vcsa-deploy.exe install .\files\deploy-multiple-vcenter\ --accept-eula --no-ssl-certificate-verification四、部署具有增强型链接模式的 vCenter Server
增强型链接模式(ELM)就是将环境中的多个 vCenter Server 实例链接到一起并加入到同一个 SSO 域当中,当你通过 SSO 管理员登录到任意一个 vCenter Server 的时候,可以同时看到链接的其他 vCenter Server,这样就可以实现多个 vCenter Server 实例的统一管理。可以查看这篇(使用cmsso-util命令进行链接、删除、修改多个vCenter Server(VCSA)的SSO域。)文章了解更多关于增强型链接模式 vCenter Server 的相关配置。
部署具有增强型链接模式的 vCenter Server 虚拟机到 ESXi 主机上,需要用到 vCenter Server 镜像文件中的 embedded_vCSA_replication_on_ESXi.json 配置文件,根据这个配置文件修改为实际环境中的信息,示例如下:
{

    "__version": "2.13.0",

    "__comments": "将具有增强型链接模式的 vCenter Server 虚拟机部署到 ESXi 主机上",

    "new_vcsa": {

        "esxi": {

            "hostname": "192.168.32.51",

            "username": "root",

            "password": "vSphere8@password",

            "deployment_network": "VM Network",

            "datastore": "Datastore-01"

        },

        "appliance": {

            "__comments": [

                "vCenter Server 部署参数"

            ],

            "thin_disk_mode": true,

            "deployment_option": "tiny",

            "name": "vcenter03"

        },

        "network": {

            "ip_family": "ipv4",

            "mode": "static",

            "system_name": "vcenter03.mulab.local",

            "ip": "192.168.32.57",

            "prefix": "24",

            "gateway": "192.168.32.254",

            "dns_servers": [

                "192.168.32.3"

            ]

        },

        "os": {

            "password": "vSphere8@password",

            "ntp_servers": "192.168.32.3",

            "ssh_enable": true

        },

        "sso": {

            "password": "vSphere8@password",

            "domain_name": "vsphere.local",

            "first_instance": false,

            "replication_partner_hostname": "vcenter01.mulab.local",

            "sso_port": 443

        }

    },

    "ceip": {

        "description": {

            "__comments": [

                "++++VMware Customer Experience Improvement Program (CEIP)++++",

                "VMware's Customer Experience Improvement Program (CEIP) ",

                "provides VMware with information that enables VMware to ",

                "improve its products and services, to fix problems, ",

                "and to advise you on how best to deploy and use our ",

                "products. As part of CEIP, VMware collects technical ",

                "information about your organization's use of VMware ",

                "products and services on a regular basis in association ",

                "with your organization's VMware license key(s). This ",

                "information does not personally identify any individual. ",

                "",

                "Additional information regarding the data collected ",

                "through CEIP and the purposes for which it is used by ",

                "VMware is set forth in the Trust & Assurance Center at ",

                "http://www.vmware.com/trustvmware/ceip.html . If you ",

                "prefer not to participate in VMware's CEIP for this ",

                "product, you should disable CEIP by setting ",

                "'ceip_enabled': false. You may join or leave VMware's ",

                "CEIP for this product at any time. Please confirm your ",

                "acknowledgement by passing in the parameter ",

                "--acknowledge-ceip in the command line.",

                "++++++++++++++++++++++++++++++++++++++++++++++++++++++++++++++"

            ]

        },

        "settings": {

            "ceip_enabled": false

        }

    }

}
另存为 deploy-elm-on-esxi.json 配置文件到 files 文件夹,使用以下命令执行部署前预检查。
F:\vcsa-cli-installer\win32\vcsa-deploy.exe install .\files\deploy-elm-on-esxi.json --accept-eula --no-ssl-certificate-verification --precheck-only如果 JSON 配置文件与部署环境检查成功,则会输出类似下面的内容。
[SUCCEEDED] Successfully executed Task 'Precheck ovftool commandline parameters

to deploy a vCenter Server Appliance' in TaskFlow 'deploy-elm-on-esxi' at

09:42:46

=================================== 09:42:46 ===================================

Result and Log File Information...

WorkFlow log directory:

C:\Users\JUNIOR~1\AppData\Local\Temp\vcsaCliInstaller-2024-08-06-09-42-qzp_kn0v\workflow_1722937339642
如果 JSON 配置文件与部署环境检查确定没问题,使用以下命令执行正式部署。
F:\vcsa-cli-installer\win32\vcsa-deploy.exe install .\files\deploy-elm-on-esxi.json --accept-eula --no-ssl-certificate-verification如果 vCenter Server 部署成功,则会输出类似下面的内容。
Successfully completed VCSA deployment.  VCSA Deployment Start Time:

2024-08-06T09:52:23.624Z VCSA Deployment End Time: 2024-08-06T10:15:36.574Z

 [SUCCEEDED] Successfully executed Task 'MonitorDeploymentTask: Monitoring

Deployment' in TaskFlow 'deploy-elm-on-esxi' at 10:16:03

Monitoring VCSA Deploy task completed

== [START] Start executing Task: Join active domain if necessary at 10:16:04 ==

Domain join task not applicable, skipping task

 [SUCCEEDED] Successfully executed Task 'Running deployment: Domain Join' in

TaskFlow 'deploy-elm-on-esxi' at 10:16:04

 [START] Start executing Task: Provide the login information about new

appliance. at 10:16:05

    Appliance Name: vcenter03

    System Name: vcenter03.mulab.local

    System IP: 192.168.32.57

    Log in as: Administrator@vsphere.local

 [SUCCEEDED] Successfully executed Task 'ApplianceLoginSummaryTask: Provide

appliance login information.' in TaskFlow 'deploy-elm-on-esxi' at 10:16:05

=================================== 10:16:05 ===================================

Result and Log File Information...

WorkFlow log directory:

C:\Users\JUNIOR~1\AppData\Local\Temp\vcsaCliInstaller-2024-08-06-09-44-5l_hhkqk\workflow_1722937468472
登录 vCenter Server,查看部署情况。

部署具有增强型链接模式的 vCenter Server 虚拟机到现有 vCenter Server 上,需要用到 vCenter Server 镜像文件中的 embedded_vCSA_replication_on_VC.json 配置文件,根据这个配置文件修改为实际环境中的信息,示例如下:
{

    "__version": "2.13.0",

    "__comments": "将具有增强型链接模式的 vCenter Server 虚拟机部署到现有 vCenter Server 上",

    "new_vcsa": {

        "vc": {

            "__comments": [

                "'datacenter' must end with a datacenter name, and only with a datacenter name.",

                "'target' must end with an ESXi hostname, a cluster name, or a resource pool name.",

                "The item 'Resources' must precede the resource pool name. ",

                "All names are case-sensitive. ",

                "For details and examples, refer to template help, i.e. vcsa-deploy {install|upgrade|migrate} --template-help"

            ],

            "hostname": "vcsa8-01.mulab.local",

            "username": "administrator@vsphere.local",

            "password": "vSphere8@password",

            "deployment_network": "VM Network",

            "datacenter": [

                "mulab"

            ],

            "datastore": "vsanDatastore",

            "target": [

			    "vsan8-hci-esa"

            ]

        },

        "appliance": {

            "__comments": [

                "vCenter Server 部署参数"

            ],

            "thin_disk_mode": true,

            "deployment_option": "tiny",

            "name": "vcenter04"

        },

        "network": {

            "ip_family": "ipv4",

            "mode": "static",

            "system_name": "vcenter04.mulab.local",

            "ip": "192.168.32.58",

            "prefix": "24",

            "gateway": "192.168.32.254",

            "dns_servers": [

                "192.168.32.3"

            ]

        },

        "os": {

            "password": "vSphere8@password",

            "ntp_servers": "192.168.32.3",

            "ssh_enable": true

        },

        "sso": {

            "password": "vSphere8@password",

            "domain_name": "vsphere.local",

            "first_instance": false,

            "replication_partner_hostname": "vcenter02.mulab.local",

            "sso_port": 443

        }

    },

    "ceip": {

        "description": {

            "__comments": [

                "++++VMware Customer Experience Improvement Program (CEIP)++++",

                "VMware's Customer Experience Improvement Program (CEIP) ",

                "provides VMware with information that enables VMware to ",

                "improve its products and services, to fix problems, ",

                "and to advise you on how best to deploy and use our ",

                "products. As part of CEIP, VMware collects technical ",

                "information about your organization's use of VMware ",

                "products and services on a regular basis in association ",

                "with your organization's VMware license key(s). This ",

                "information does not personally identify any individual. ",

                "",

                "Additional information regarding the data collected ",

                "through CEIP and the purposes for which it is used by ",

                "VMware is set forth in the Trust & Assurance Center at ",

                "http://www.vmware.com/trustvmware/ceip.html . If you ",

                "prefer not to participate in VMware's CEIP for this ",

                "product, you should disable CEIP by setting ",

                "'ceip_enabled': false. You may join or leave VMware's ",

                "CEIP for this product at any time. Please confirm your ",

                "acknowledgement by passing in the parameter ",

                "--acknowledge-ceip in the command line.",

                "++++++++++++++++++++++++++++++++++++++++++++++++++++++++++++++"

            ]

        },

        "settings": {

            "ceip_enabled": false

        }

    }

}
另存为 deploy-elm-on-vcenter.json 配置文件到 files 文件夹,使用以下命令执行部署前预检查。
F:\vcsa-cli-installer\win32\vcsa-deploy.exe install .\files\deploy-elm-on-vcenter.json --accept-eula --no-ssl-certificate-verification --precheck-only如果 JSON 配置文件与部署环境检查成功,则会输出类似下面的内容。
[SUCCEEDED] Successfully executed Task 'Precheck ovftool commandline parameters

to deploy a vCenter Server Appliance' in TaskFlow 'deploy-elm-on-vcenter' at

09:55:12

=================================== 09:55:13 ===================================

Result and Log File Information...

WorkFlow log directory:

C:\Users\JUNIOR~1\AppData\Local\Temp\vcsaCliInstaller-2024-08-06-09-54-lps7j7v1\workflow_1722938084996
如果 JSON 配置文件与部署环境检查确定没问题,使用以下命令执行正式部署。
F:\vcsa-cli-installer\win32\vcsa-deploy.exe install .\files\deploy-elm-on-vcenter.json --accept-eula --no-ssl-certificate-verification如果 vCenter Server 部署成功,则会输出类似下面的内容。
[SUCCEEDED] Successfully executed Task 'MonitorDeploymentTask: Monitoring

Deployment' in TaskFlow 'deploy-elm-on-vcenter' at 10:35:50

Monitoring VCSA Deploy task completed

== [START] Start executing Task: Join active domain if necessary at 10:35:51 ==

Domain join task not applicable, skipping task

 [SUCCEEDED] Successfully executed Task 'Running deployment: Domain Join' in

TaskFlow 'deploy-elm-on-vcenter' at 10:35:51

 [START] Start executing Task: Provide the login information about new

appliance. at 10:35:52

    Appliance Name: vcenter04

    System Name: vcenter04.mulab.local

    System IP: 192.168.32.58

    Log in as: Administrator@vsphere.local

 [SUCCEEDED] Successfully executed Task 'ApplianceLoginSummaryTask: Provide

appliance login information.' in TaskFlow 'deploy-elm-on-vcenter' at 10:35:52

=================================== 10:35:52 ===================================

Result and Log File Information...

WorkFlow log directory:

C:\Users\JUNIOR~1\AppData\Local\Temp\vcsaCliInstaller-2024-08-06-09-56-8s9_eg18\workflow_1722938163017
登录 vCenter Server,查看部署情况。
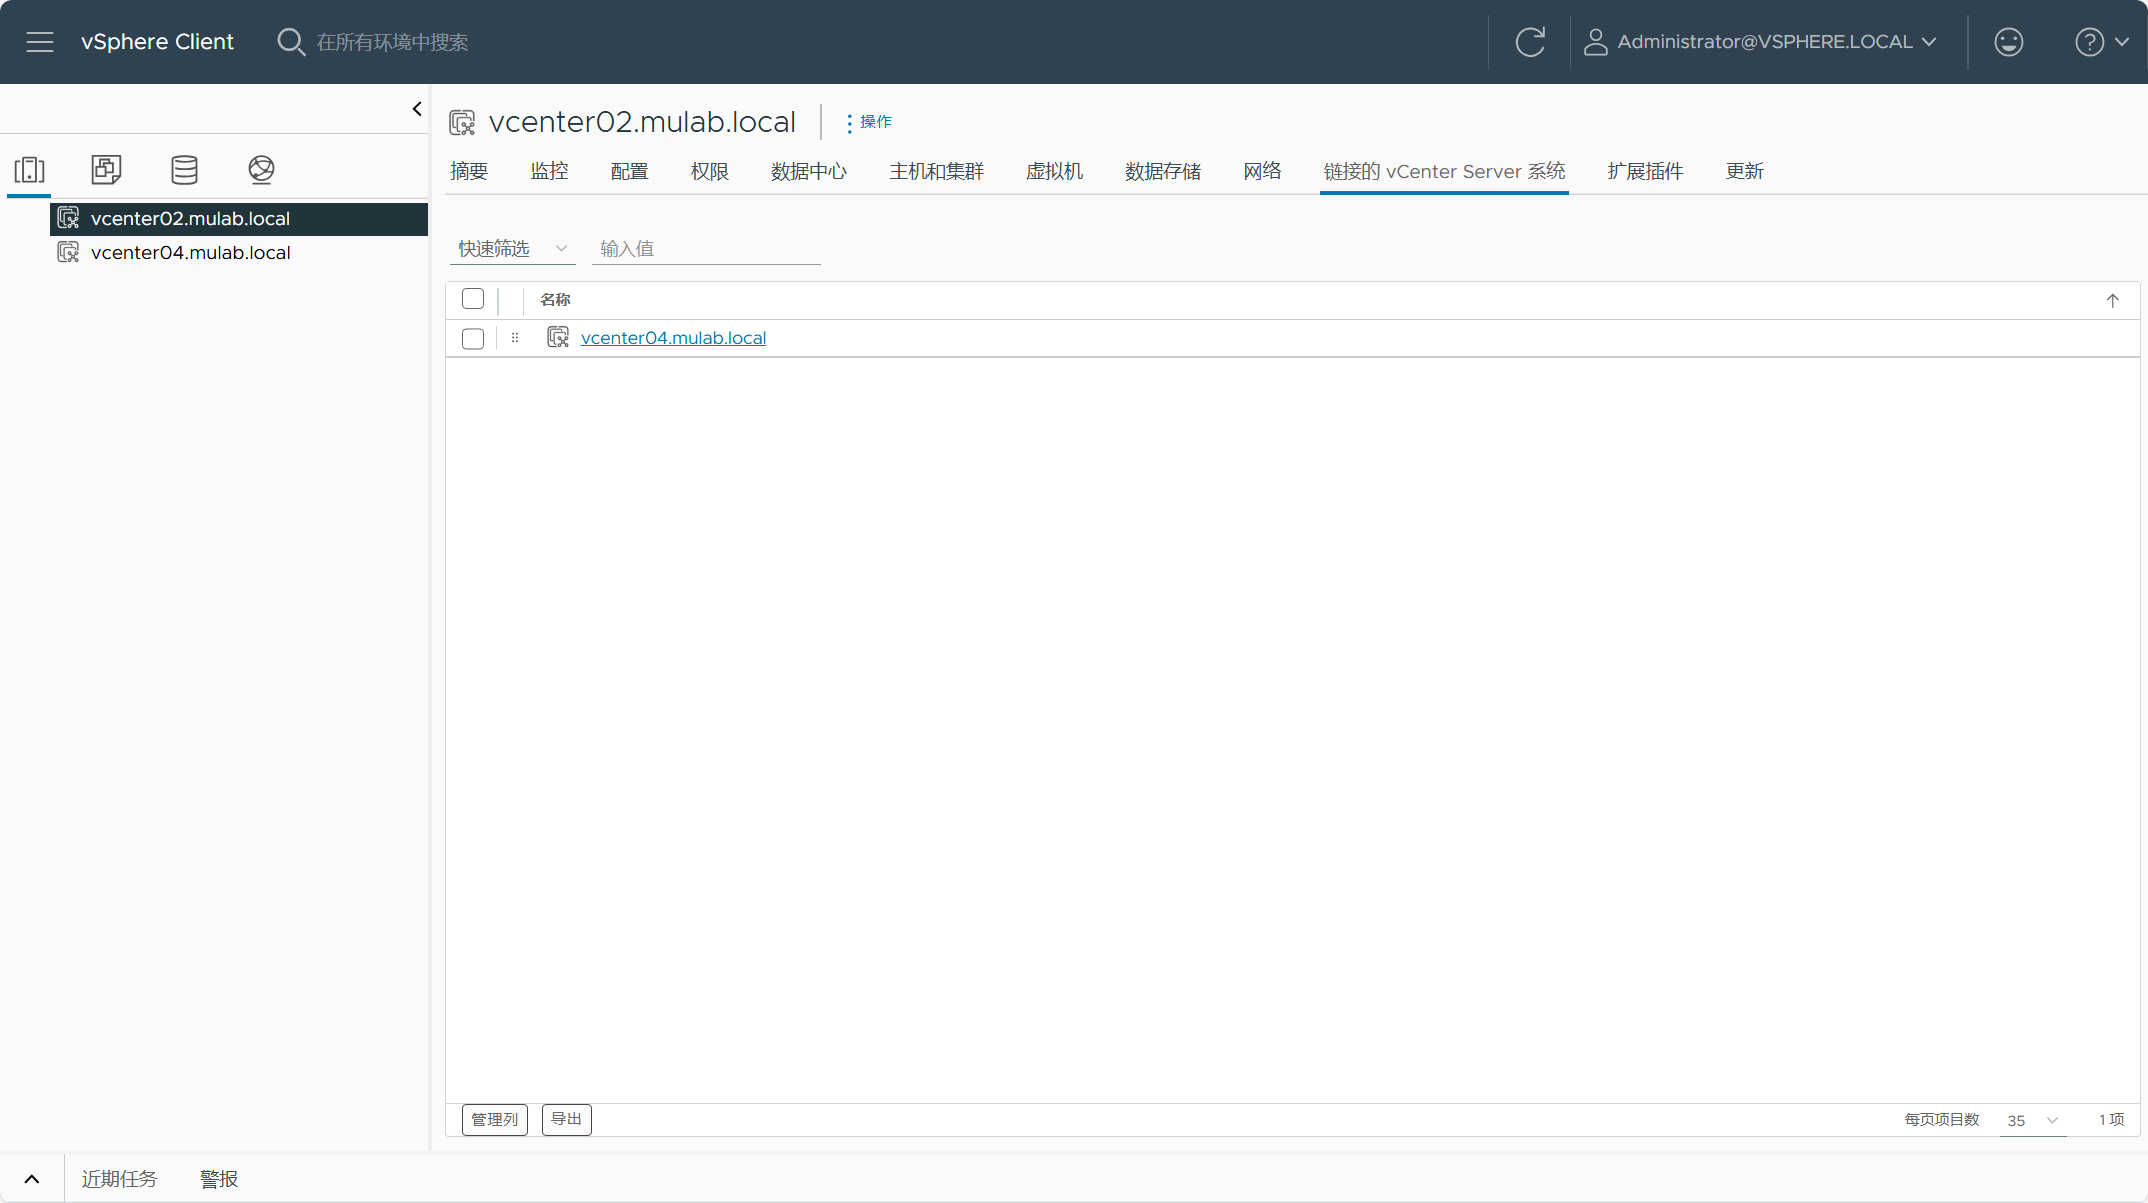
部署具有增强型链接模式 vCenter Server 的时候,可能大部分情况是环境中已经有第一个 vCenter Server 了,然后再使用上面所述的方式部署第二个 vCenter Server 并将其链接到第一个 vCenter Server 中。其实,如果环境中没有第一个 vCenter Server 的时候,也可以同时部署增强型链接模式的 vCenter Server,比如,deploy-vcenter01-on-esxi.json 配置文件用于部署第一个 vCenter Server,deploy-vcenter01-elm-on-esxi.json 配置文件用于部署具有增强型链接模式的第二个 vCenter Server,将这两个 JSON 配置文件放在同一文件夹中,在部署的时候指定这个文件夹,这样 CLI 部署完第一个 vCenter Server 后,然后当第二个 vCenter Server 部署的时候就会自动链接到第一个 vCenter Server 中去。

五、将 vCenter Server 虚拟机部署到 ESXi 主机上并配置单节点 vSAN ESA 集群
对于初始构建 vSphere 环境的用户来说,可能 ESXi 主机安装部署以后,想直接将 ESXi 主机应用于 vSAN 环境,同时又想将 vSAN 存储用于承载 vCenter Server。如果使用以上所述场景,部署 vCenter Server 的前提是环境中必须具有用于存放 vCenter Server 的本地/共享存储,但是,VMware 这里提供了一种方式,在部署 vCenter Server 之前,可以直接将初始安装的 ESXi 主机转换成 vSAN 集群的第一台主机,这样配置为单节点 vSAN 集群后,再将配置后的 vSAN 存储用于承载 vCenter Server 虚拟机所使用的存储。如果是这样,就不用单独先配置 ESXi 主机的本地/共享存储用于部署 vCenter Server 了,这也是 VMware 很多解决方案所使用的方式,比如 VMware Cloud Foundation。
将 vCenter Server 虚拟机部署到 ESXi 主机上并配置单节点 vSAN ESA 集群,需要用到 vCenter Server 镜像文件中的 vCSA_with_cluster_on_ESXi.json 配置文件,根据这个配置文件修改为实际环境中的信息,示例如下:
{
"__version": "2.13.0",
"__comments": "将 vCenter Server 虚拟机部署到 ESXi 主机上并配置单节点 vSAN ESA 集群",
"new_vcsa": {
"esxi": {
"hostname": "esxi.mulab.local",
"username": "root",
"password": "vSphere8@password",
"deployment_network": "VM Network",
"VCSA_cluster": {
"__comments": [
"Optional section. You must provide this option if you want to create the vSAN bootstrap cluster"
],
"datacenter": "datacenter",
"cluster": "vsan-esa",
"compression_only": false,
"deduplication_and_compression": false,
"enable_vlcm": true,
"enable_vsan_esa": true,
"storage_pool": {
"single_tier": [
"0654f79de904b1744a000c29669162b236",
"063ec1878a6b90d657000c296a1c16f648"
]
},
"vsan_hcl_database_path": "all.json"
}
},
"appliance": {
"__comments": [
"vCenter Server 部署参数"
],
"thin_disk_mode": true,
"deployment_option": "small",
"name": "vcenter"
},
"network": {
"ip_family": "ipv4",
"mode": "static",
"ip": "192.168.32.50",
"dns_servers": [
"192.168.32.3"
],
"prefix": "24",
"gateway": "192.168.32.254",
"system_name": "vcenter.mulab.local"
},
"os": {
"password": "vSphere8@password",
"ntp_servers": "192.168.32.3",
"ssh_enable": true
},
"sso": {
"password": "vSphere8@password",
"domain_name": "vsphere.local"
}
},
"ceip": {
"description": {
"__comments": [
"++++VMware Customer Experience Improvement Program (CEIP)++++",
"VMware's Customer Experience Improvement Program (CEIP) ",
"provides VMware with information that enables VMware to ",
"improve its products and services, to fix problems, ",
"and to advise you on how best to deploy and use our ",
"products. As part of CEIP, VMware collects technical ",
"information about your organization's use of VMware ",
"products and services on a regular basis in association ",
"with your organization's VMware license key(s). This ",
"information does not personally identify any individual. ",
"",
"Additional information regarding the data collected ",
"through CEIP and the purposes for which it is used by ",
"VMware is set forth in the Trust & Assurance Center at ",
"http://www.vmware.com/trustvmware/ceip.html . If you ",
"prefer not to participate in VMware's CEIP for this ",
"product, you should disable CEIP by setting ",
"'ceip_enabled': false. You may join or leave VMware's ",
"CEIP for this product at any time. Please confirm your ",
"acknowledgement by passing in the parameter ",
"--acknowledge-ceip in the command line.",
"++++++++++++++++++++++++++++++++++++++++++++++++++++++++++++++"
]
},
"settings": {
"ceip_enabled": false
}
}
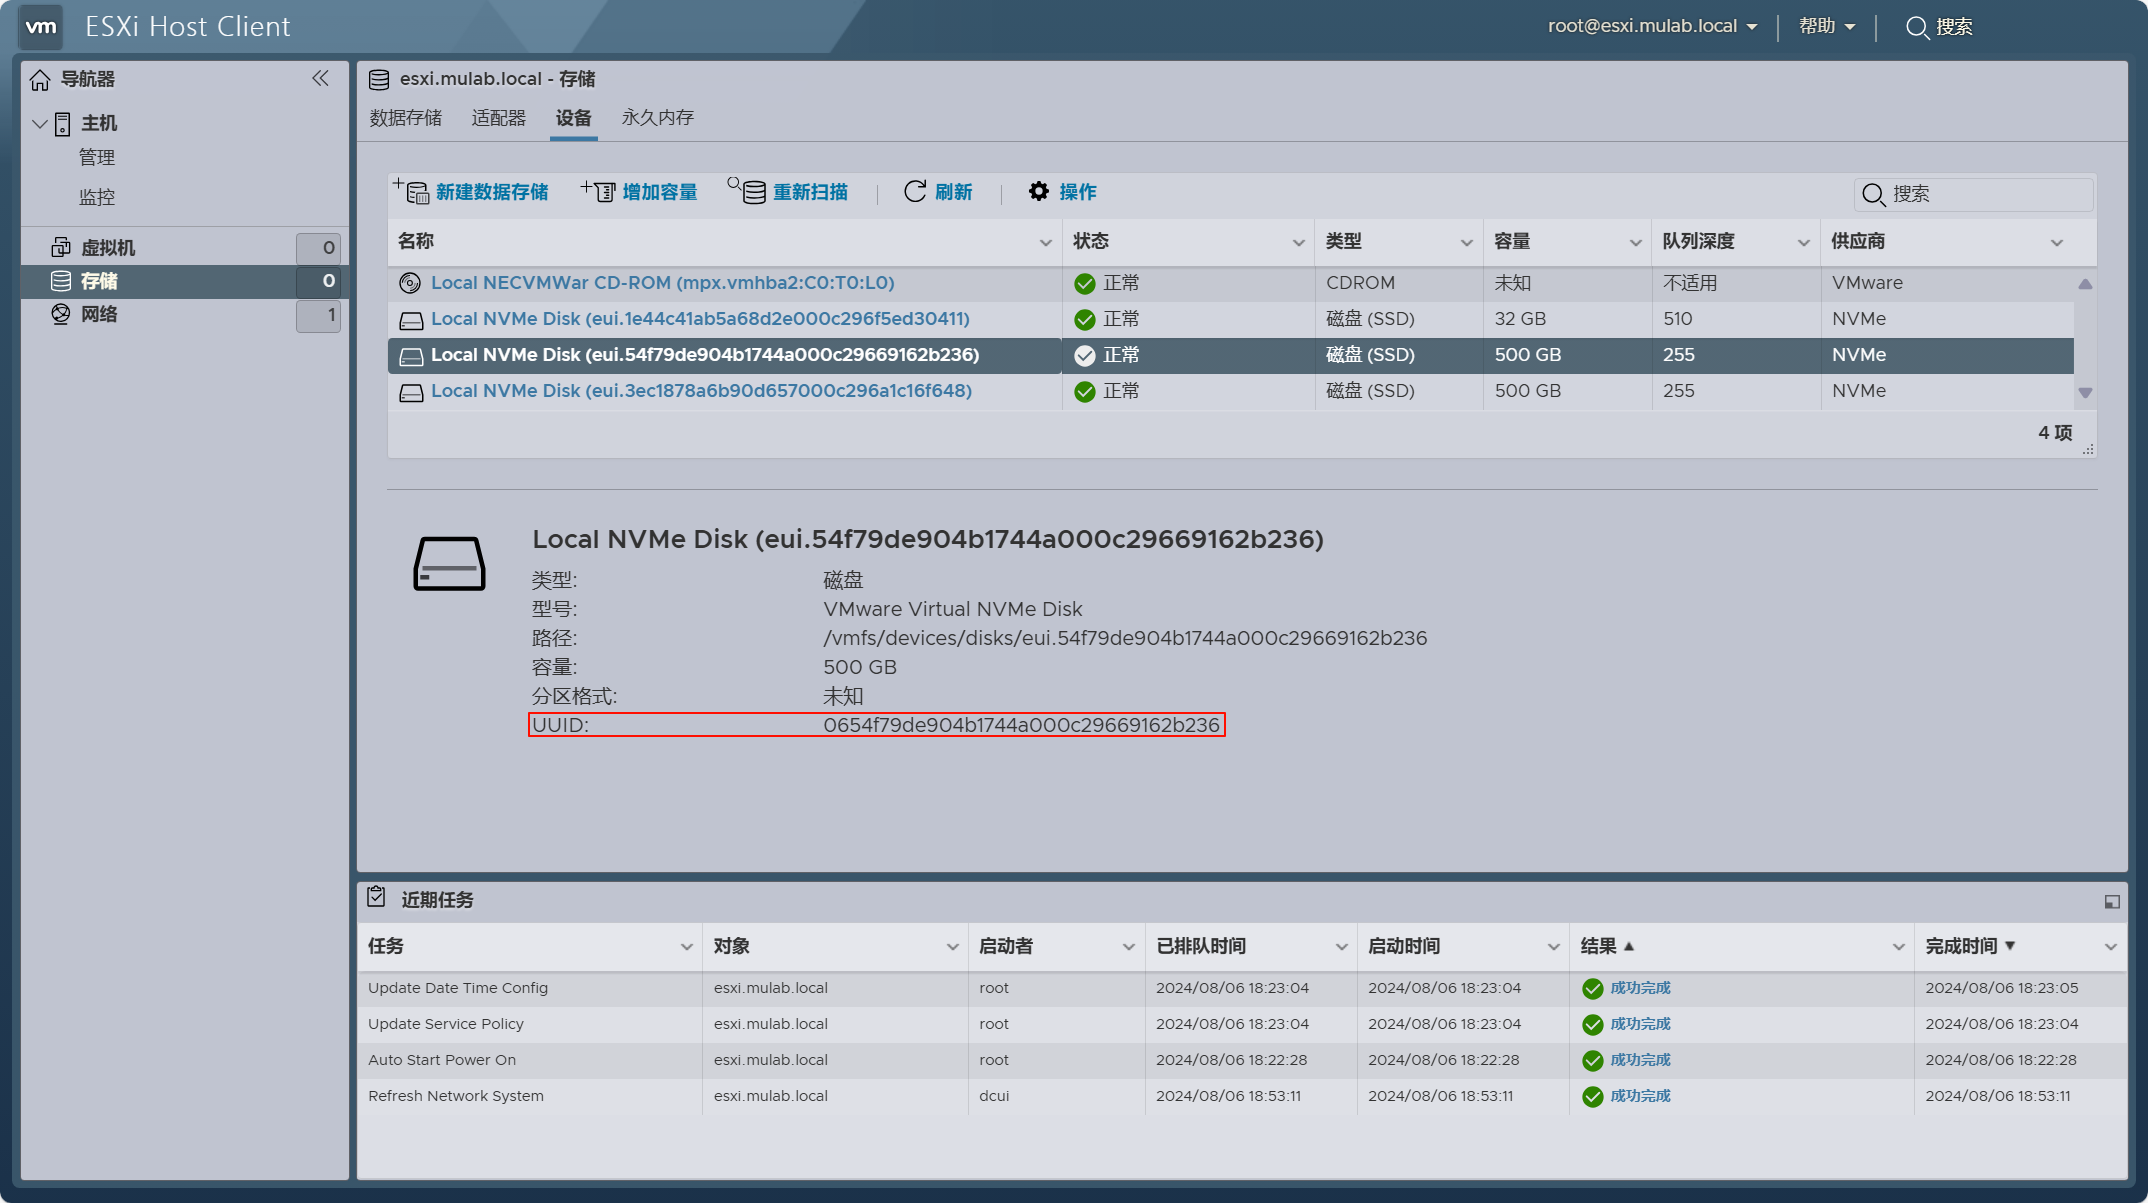
}JSON 配置文件中,关于 ESXi 主机用于 vSAN 存储池的硬盘信息可以在下图所示的地方获取。注意,由于是部署 vSAN ESA 环境,需要下载 vSAN HCL 文件到本地,并将文件的路径填入到对应的 JSON 配置文件当中,当前部署环境将 vSAN HCL 文件放在了运行 CLI 命令的当前目录(C:\Users\JUNIOR_MU\)。
另存为 deploy-on-esxi-with-vsan-esa.json 配置文件到 files 文件夹,使用以下命令执行部署前预检查。
F:\vcsa-cli-installer\win32\vcsa-deploy.exe install .\files\deploy-on-esxi-with-vsan-esa.json --accept-eula --no-ssl-certificate-verification --precheck-only如果 JSON 配置文件与部署环境检查成功,则会输出类似下面的内容。
[SUCCEEDED] Successfully executed Task 'Running Pre-check: vSAN Cluster Health

Checks.' in TaskFlow 'install' at 10:53:30

Running Pre-check: vSphere vLCM Cluster Enablement.

 [START] Start executing Task: Running Pre-check for vSphere vLCM Cluster

Enablement. at 10:53:30

 [SUCCEEDED] Successfully executed Task 'Running Pre-check: vSphere vLCM Cluster

Enablement.' in TaskFlow 'install' at 10:53:30

 [SUCCEEDED] Successfully executed Task 'PrecheckTask: Running prechecks.' in

TaskFlow 'deploy-on-esxi-with-vsan-esa' at 10:53:30

vcsa-deploy execution successfully completed, workflow log dir:

C:\Users\JUNIOR~1\AppData\Local\Temp\vcsaCliInstaller-2024-08-06-10-52-j1nef3kt\workflow_1722941536363

=================================== 10:53:31 ===================================

Result and Log File Information...

WorkFlow log directory:

C:\Users\JUNIOR~1\AppData\Local\Temp\vcsaCliInstaller-2024-08-06-10-52-j1nef3kt\workflow_1722941536363
如果 JSON 配置文件与部署环境检查确定没问题,使用以下命令执行正式部署。
F:\vcsa-cli-installer\win32\vcsa-deploy.exe install .\files\deploy-on-esxi-with-vsan-esa.json --accept-eula --no-ssl-certificate-verification如果 vCenter Server 部署成功,则会输出类似下面的内容。
Successfully completed VCSA deployment. VCSA Deployment Start Time:
2024-08-06T11:12:39.139Z VCSA Deployment End Time: 2024-08-06T11:31:05.857Z
[SUCCEEDED] Successfully executed Task 'MonitorDeploymentTask: Monitoring
Deployment' in TaskFlow 'deploy-on-esxi-with-vsan-esa' at 11:31:19
Monitoring VCSA Deploy task completed
== [START] Start executing Task: Join active domain if necessary at 11:31:20 ==
Domain join task not applicable, skipping task
[SUCCEEDED] Successfully executed Task 'Running deployment: Domain Join' in
TaskFlow 'deploy-on-esxi-with-vsan-esa' at 11:31:20
==== [START] Start executing Task: Creating the new datacenter. at 11:31:21 ====
The certificate of server 'vcenter.mulab.local' will not be verified because you
have provided either the '--no-ssl-certificate-verification' or
'--no-esx-ssl-verify' command parameter, which disables verification for all
certificates. Remove this parameter from the command line if you want server
certificates to be verified.
[SUCCEEDED] Successfully executed Task 'Running Datacenter Creation: Creating
the new datacenter for vSphere vLCM managed cluster.' in TaskFlow
'deploy-on-esxi-with-vsan-esa' at 11:31:23
[START] Start executing Task: Creating vSphere vLCM managed cluster. at
11:31:24
Enabling vLCM Cluster creation task on vcenter.mulab.local
Running ExecuteClusterHostSeedingWorkflow...
[SUCCEEDED] Successfully executed Task 'Running vSphere vLCM: Creating vSphere
vLCM managed cluster.' in TaskFlow 'deploy-on-esxi-with-vsan-esa' at 11:35:44
[START] Start executing Task: Provide the login information about new
appliance. at 11:35:45
Appliance Name: vcenter
System Name: vcenter.mulab.local
System IP: 192.168.32.50
Log in as: Administrator@vsphere.local
Your vCenter Server Appliance is deployed on a vSAN cluster. However this
one-host cluster must be further configured in order to provide the full
benefits of a vSAN cluster.
vSAN Configuration Instructions
1. Add additional hosts to the vSAN cluster (a minimum of two).
2. Complete the required configuration of the vSAN cluster.
3. Apply the correct VM Storage Policy to the vCenter Server Appliance.
[SUCCEEDED] Successfully executed Task 'ApplianceLoginSummaryTask: Provide
appliance login information.' in TaskFlow 'deploy-on-esxi-with-vsan-esa' at
11:35:45
=================================== 11:35:46 ===================================
Result and Log File Information...
WorkFlow log directory:
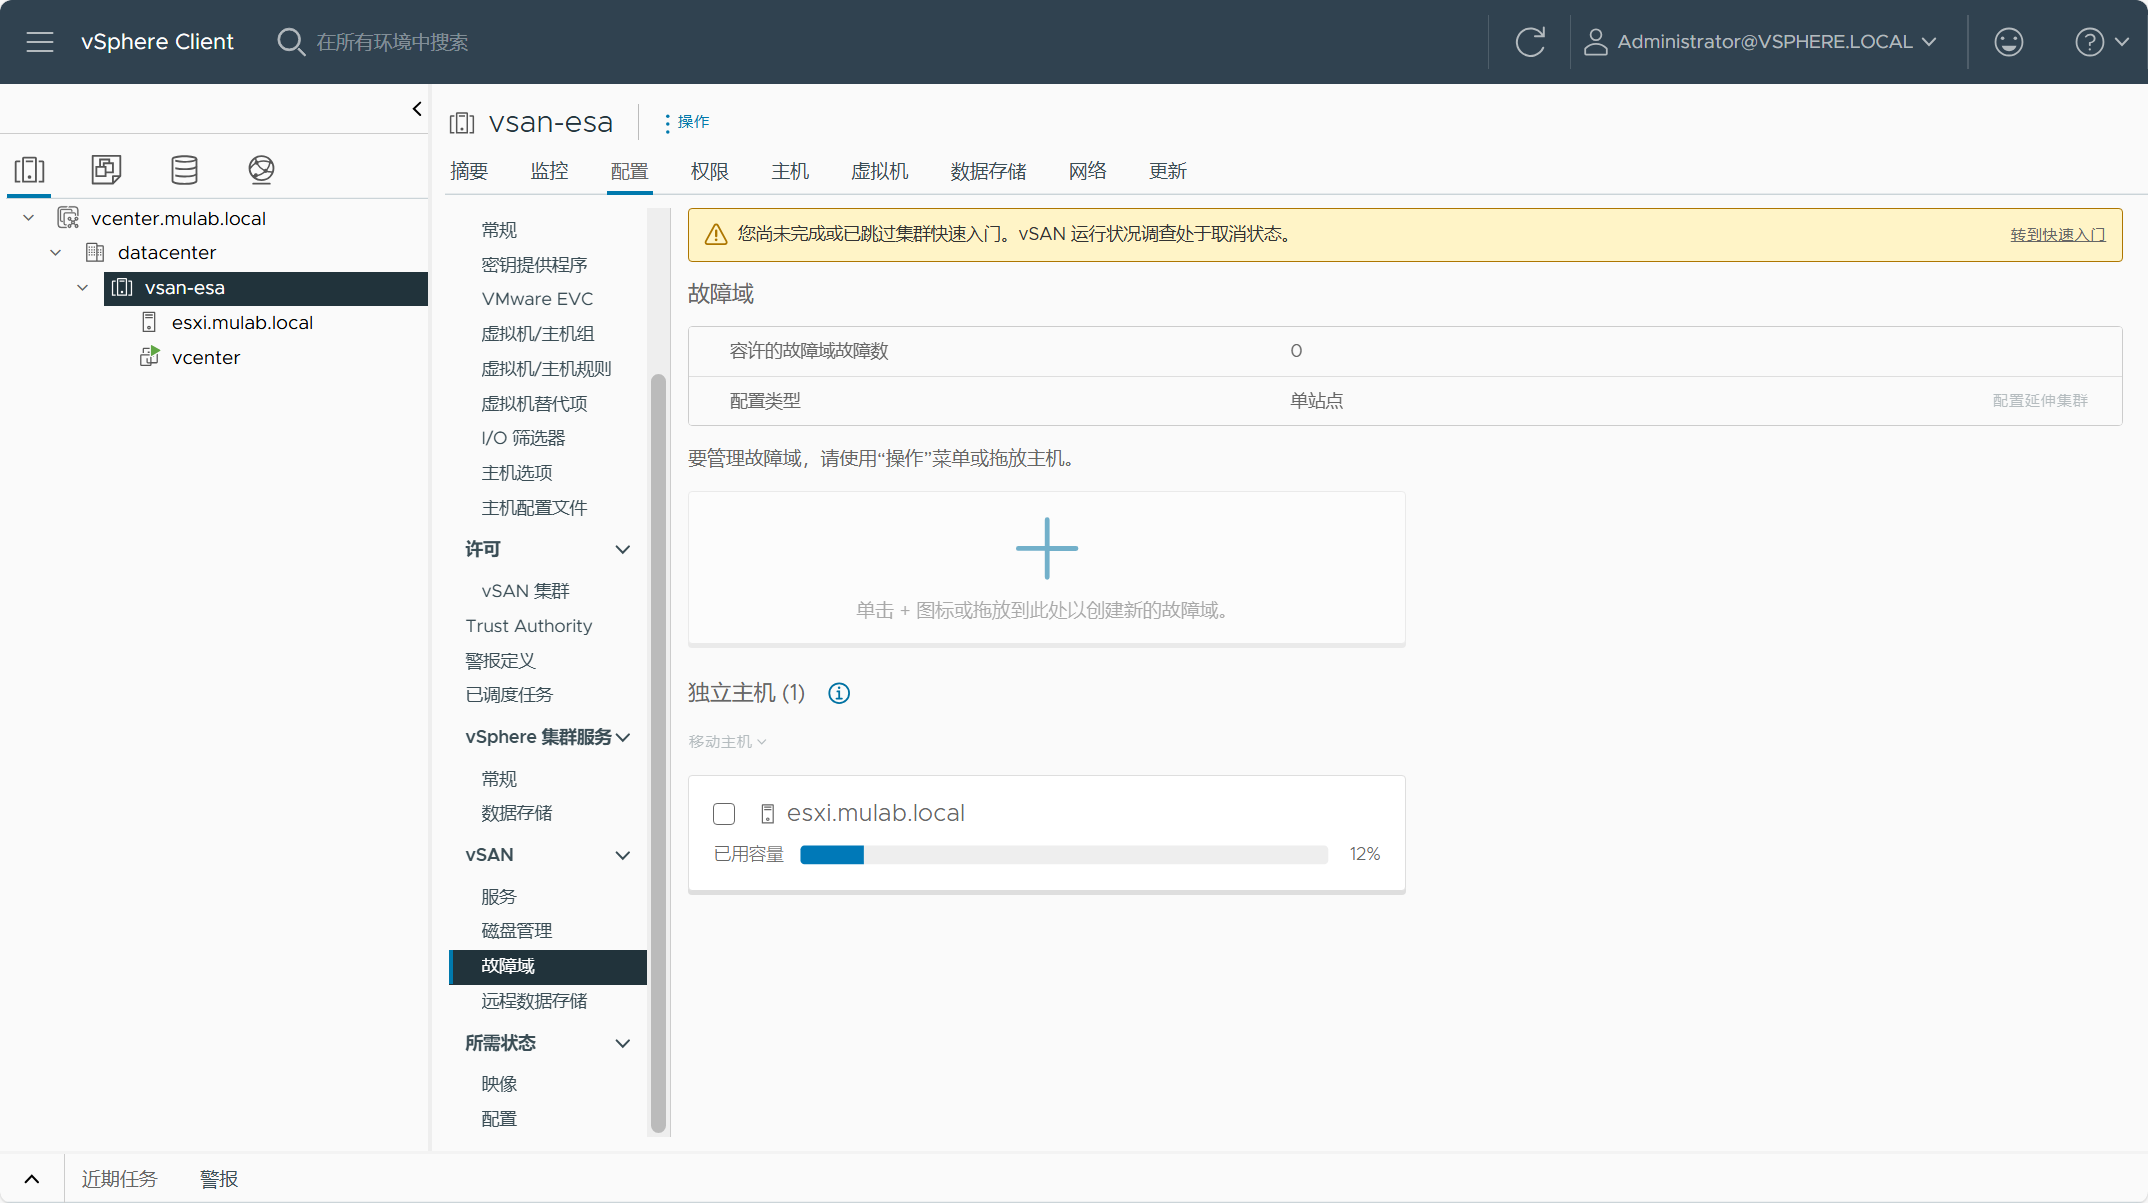
C:\Users\JUNIOR~1\AppData\Local\Temp\vcsaCliInstaller-2024-08-06-11-00-u9zayc8j\workflow_1722942009531登录 vCenter Server,查看部署情况。
当前是单节点 vSAN 集群,需要增加 ESXi 主机以满足 vSAN 集群最少主机要求(3台)。
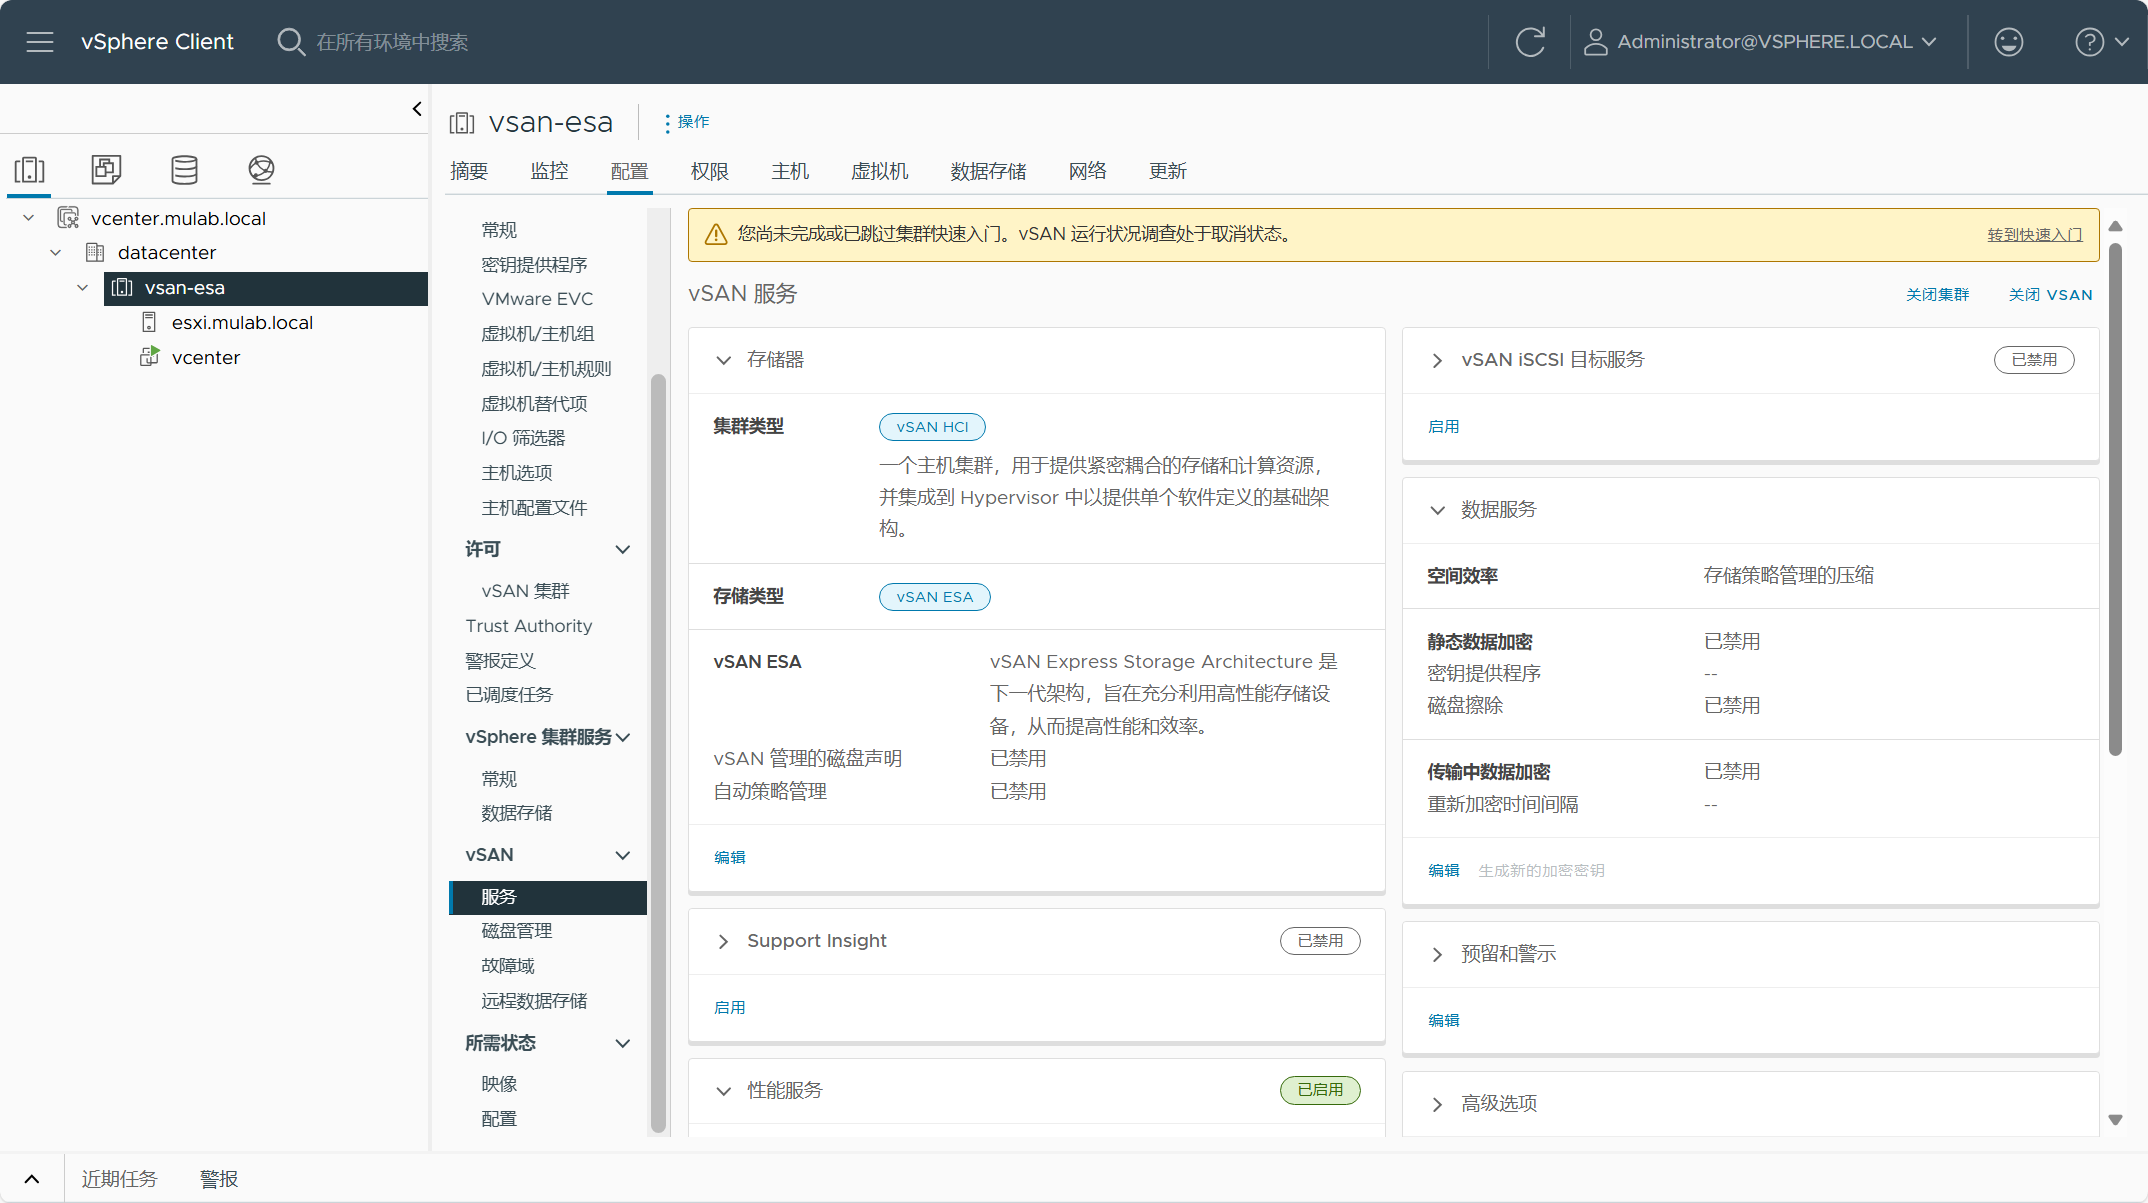
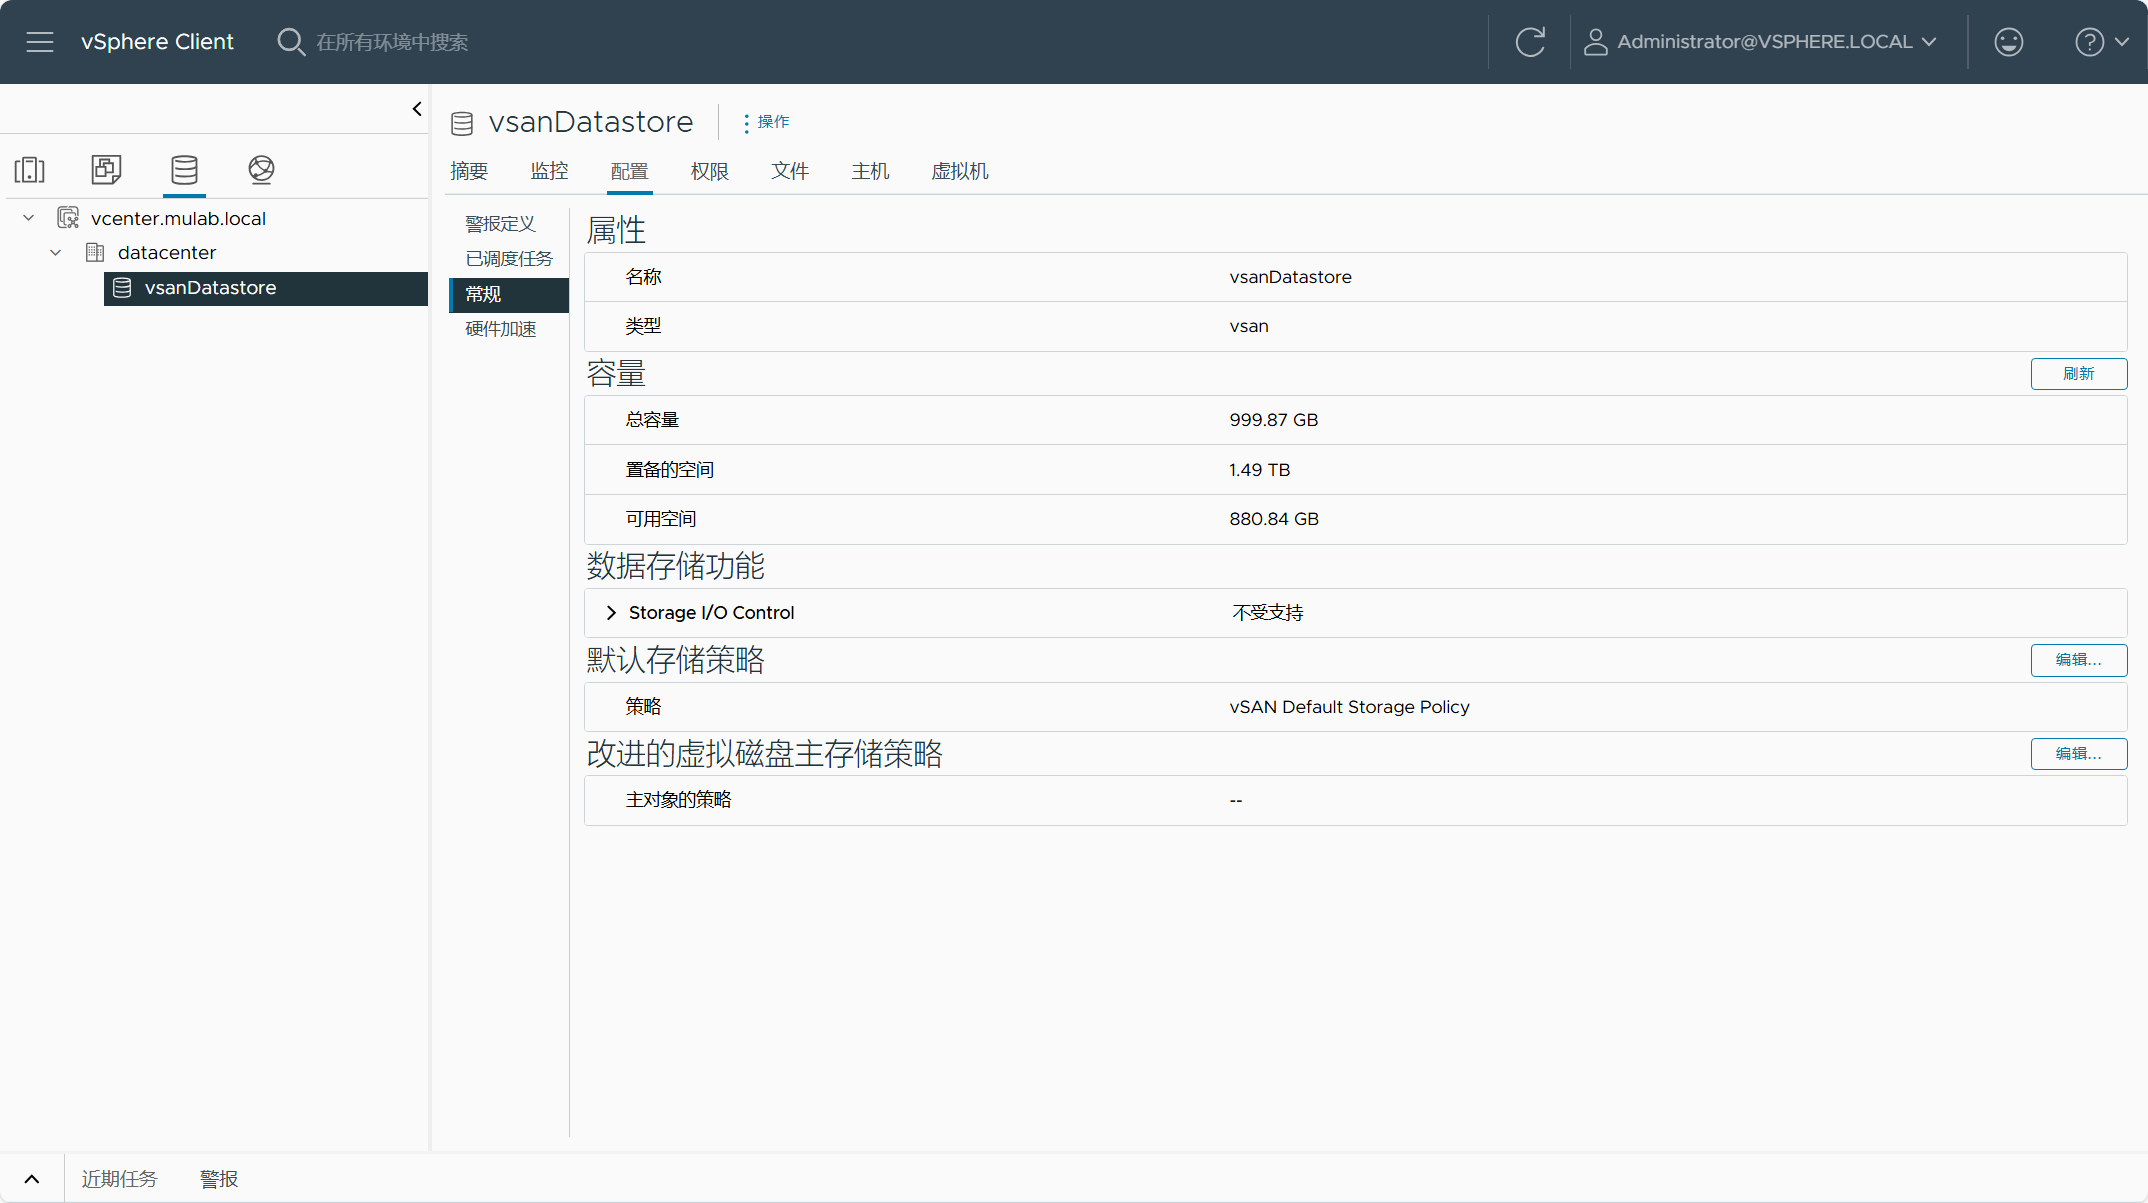
vSAN 存储容量以及当前默认存储策略配置。
vSAN ESA 集群 ESXi 主机磁盘配置。

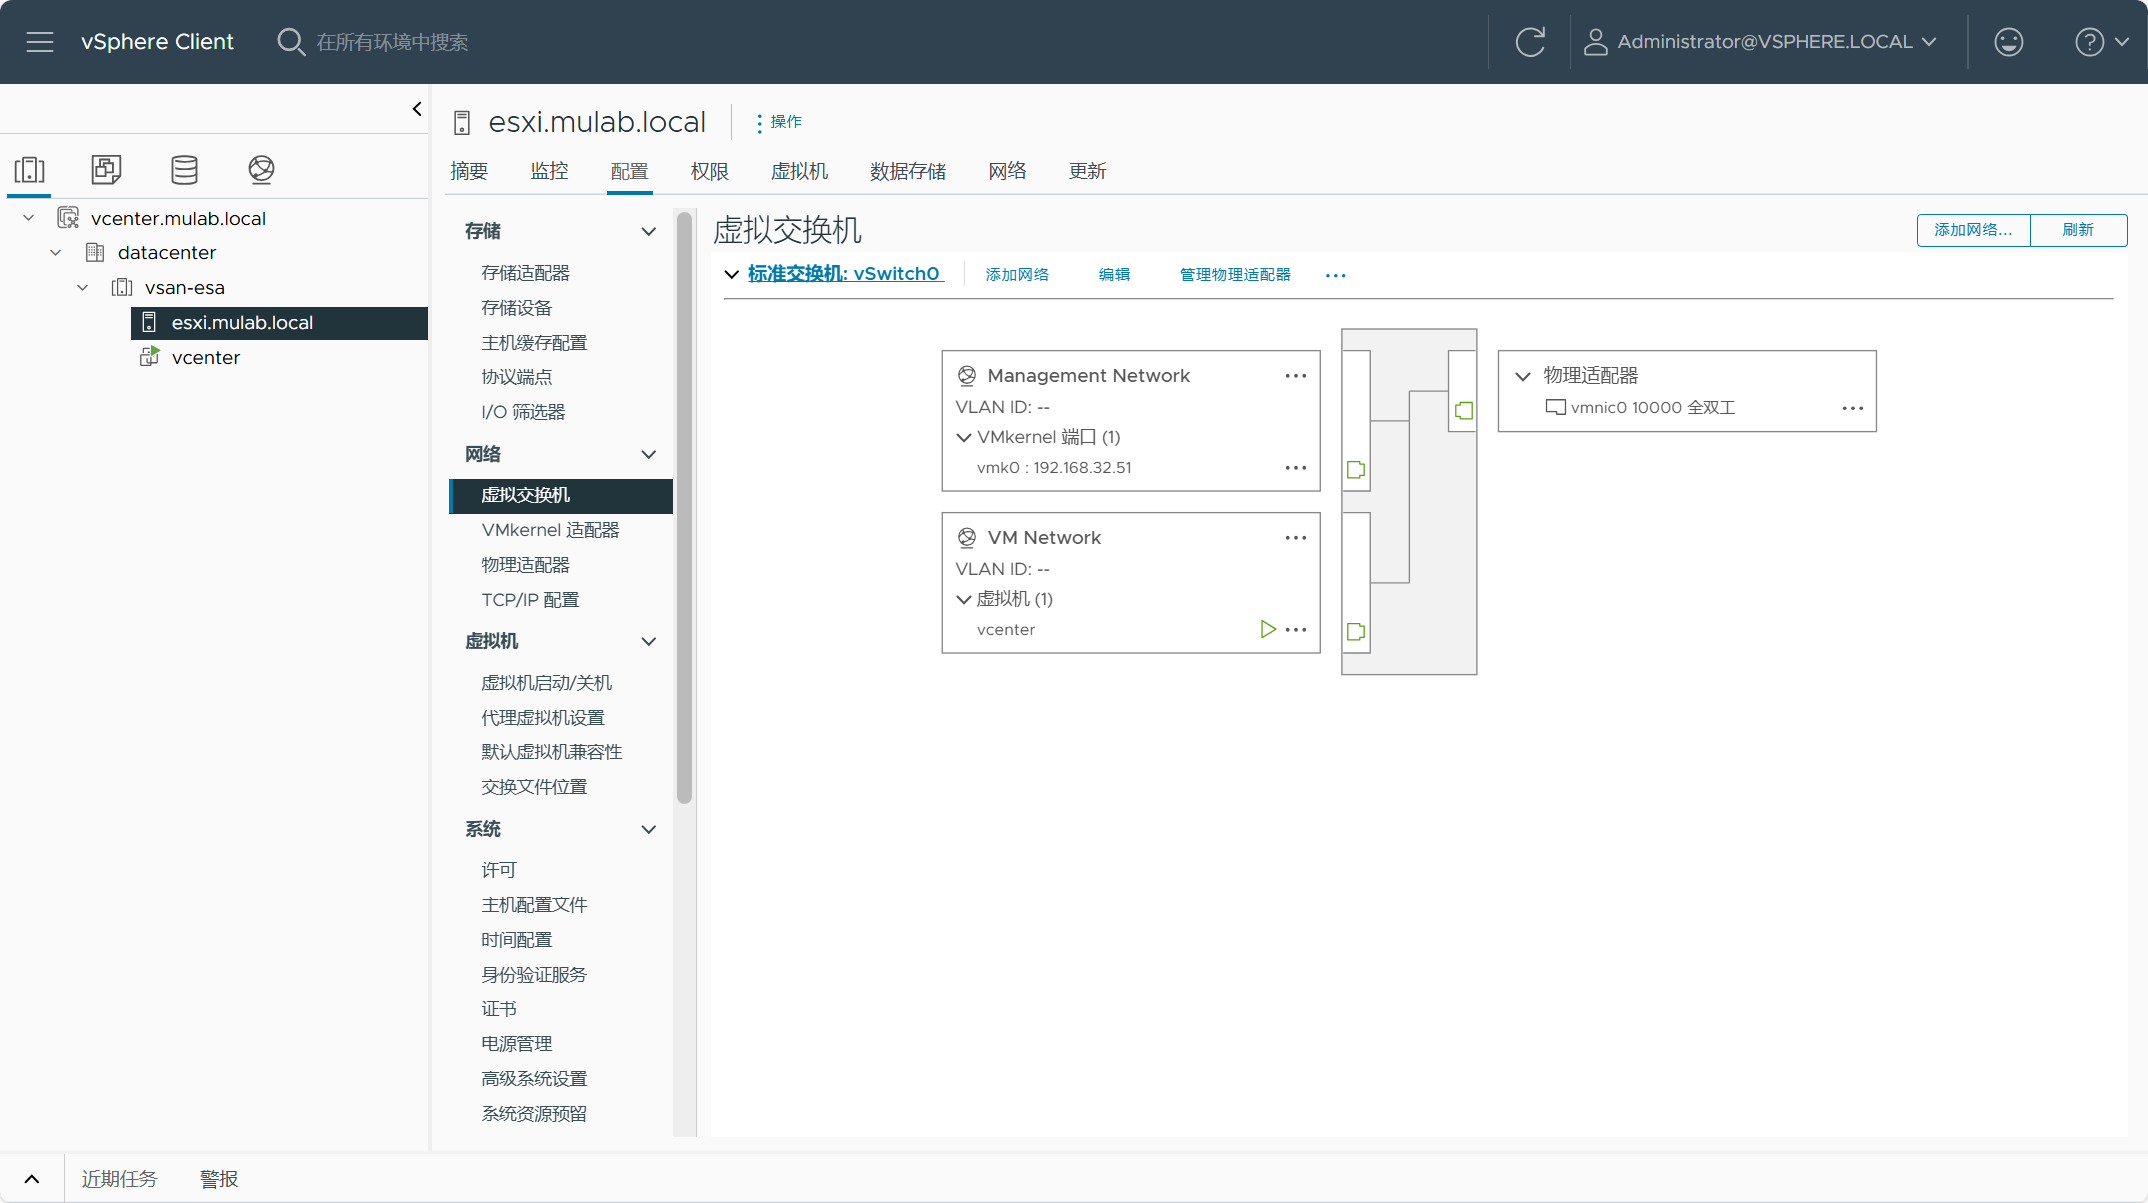
vSAN ESA 集群 ESXi 主机网络配置,需要添加配置用于 vSAN 流量的 vmkernel 网卡。
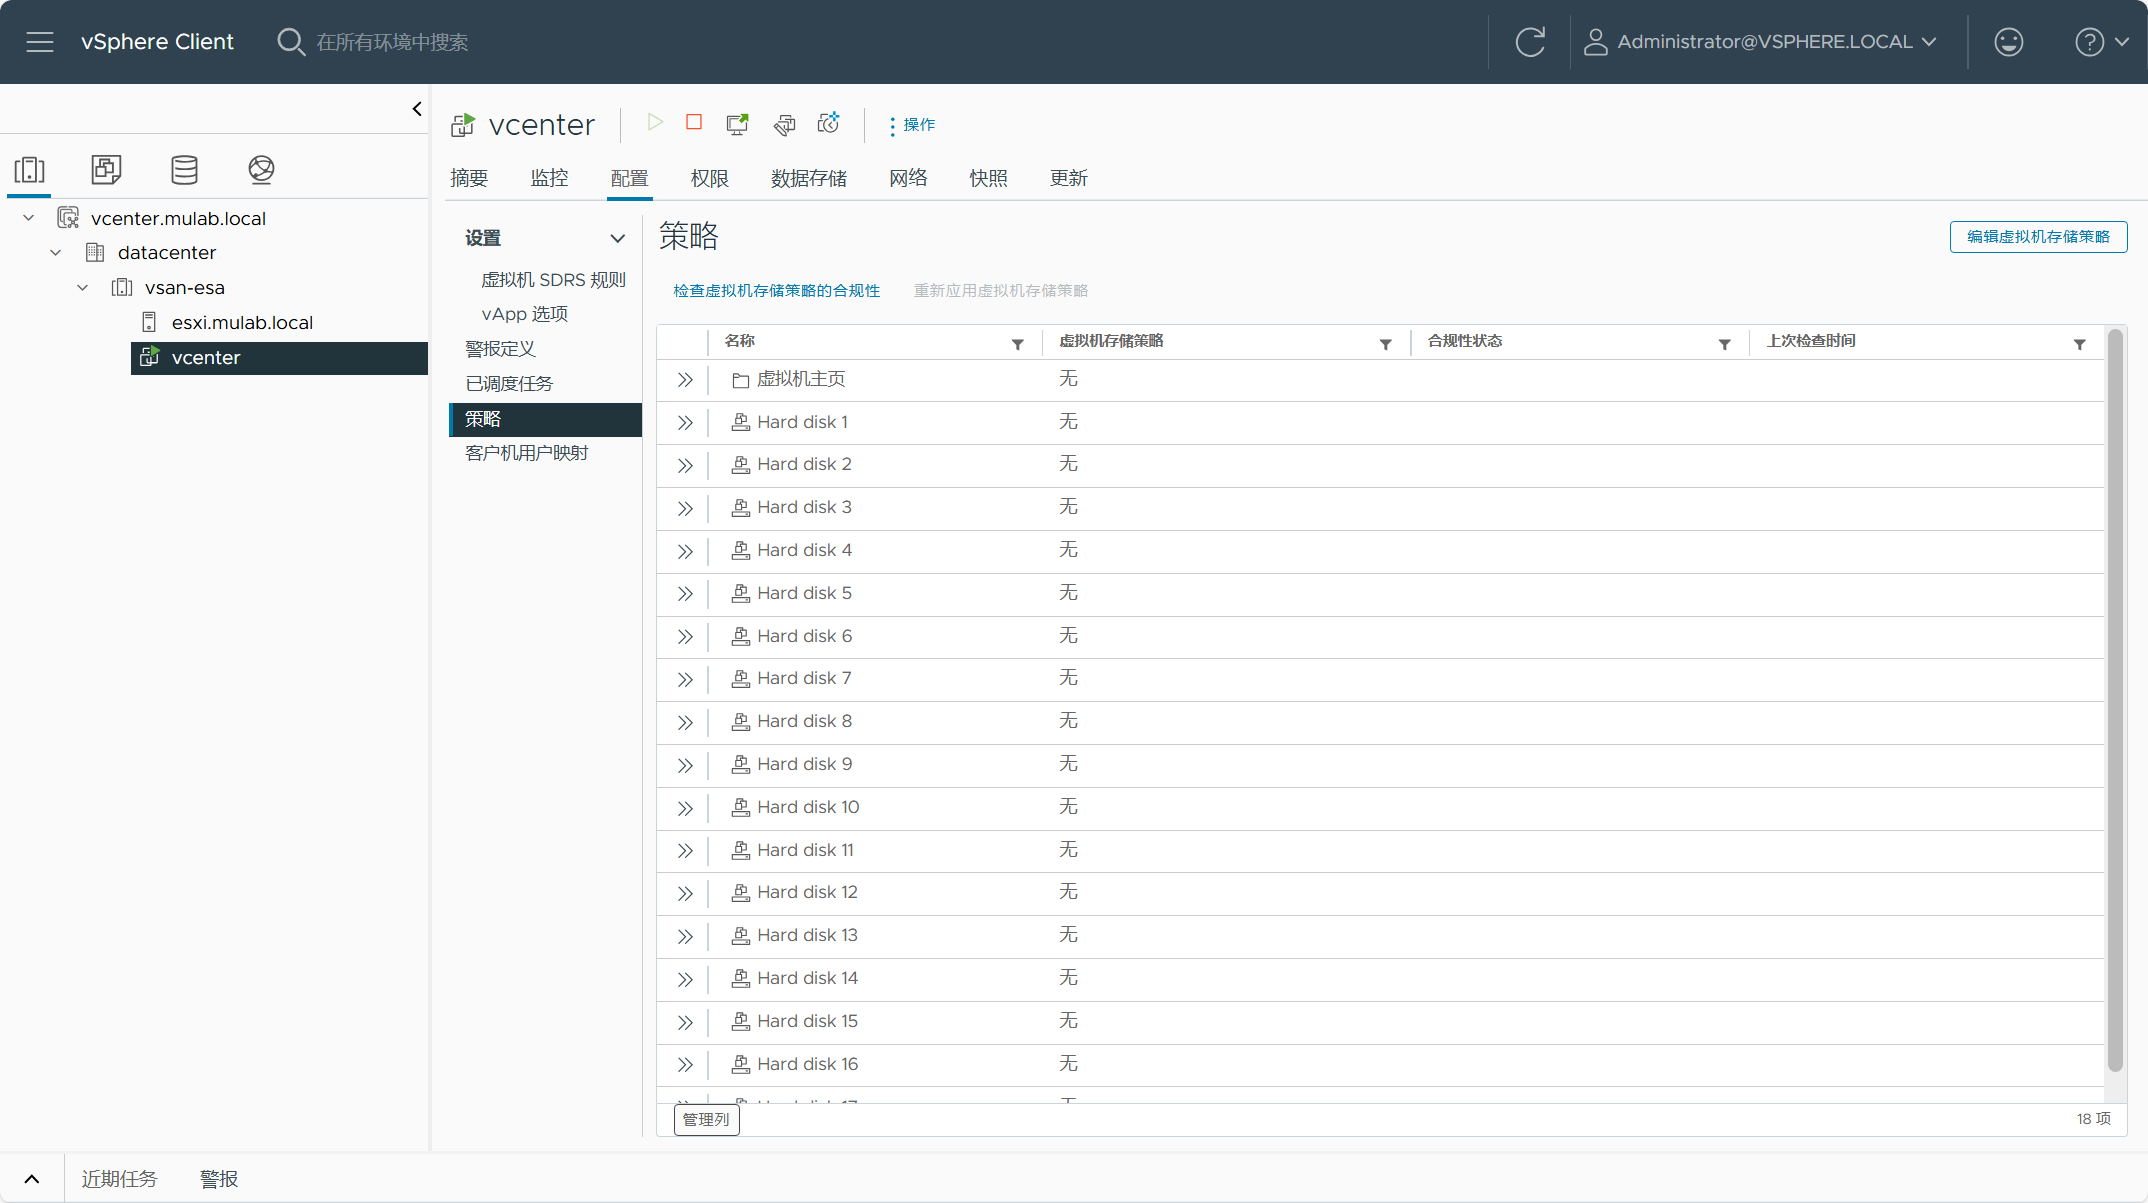
配置好完整的 vSAN 集群后,请将 vCenter Server 的策略调整为 vSAN 存储策略。
【VMware vCenter】一次性说清楚 vCenter Server 的 CLI 部署方式。的更多相关文章
- Tigase XMPP Server在CentOS部署和配置
Tigase XMPP Server在CentOS部署与配置 作者:chszs,转载需注明.博客主页:http://blog.csdn.net/chszs 以下讲述Tigase XMPP Server ...
- 阿里云服务器Windows Server 2008/2012部署Office Web Server 2013
以前成功将Office Web Server 2013部署在了本地服务器上,此次是将Office Web Server 2013部署在阿里云服务器Windows Server 2008和2012上,中 ...
- zabbix Server 4.0 部署及之内置item使用案例
zabbix Server 4.0 部署及之内置item使用案例 作者:尹正杰 版权声明:原创作品,谢绝转载!否则将追究法律责任. 一.zabbix组件架构概述(图片摘自网络) 1>.zabbi ...
- eclipse新建web项目,发布 run as 方式和 new server然后添加项目方式。 后者无法自动编译java 成class文件到classes包下。
eclipse新建web项目,发布 run as 方式和 new server然后添加项目方式. 后者无法自动编译java 成class文件到classes包下. 建议使用run as - run ...
- Windows Server 2012 R2部署--安装桌面体验
Windows Server 2012 R2部署(3)---安装桌面体验 1) 打开服务器管理器 2) 选择所有服务器 3)添加角色和功能 4)下一步 5)下一步 6)下一步 ...
- 单点登录(六)-----遇到问题-----cas server 源码部署导入gradle后有感叹号---错误信息A cycle was detected in the build path of pr
cas server 源码部署导入gradle后有感叹号---错误信息A cycle was detected in the build path of project 'cas-server-cor ...
- 单点登录(五)-----遇到问题-----cas server 源码部署tomcat运行报错BeanCreationException:Error creating bean with name 's
我们在上一篇文章已经解决了把下载好的cas server源码部署到tomcat缺少子项目编辑文件或者jar包导致找不到class报错的问题 单点登录(四)-----遇到问题-----cas serve ...
- 单点登录(四)-----遇到问题-----cas server 源码部署tomcat运行报错ClassNotFoundException: org.jasig.cas.CasEnvironmentCo
情况 cas单点登录 cas server 源码部署tomcat运行报错 把cas server的代码下载下来后使用gradle插件或者maven插件以及转化成eclipse·后导入发现部署到tomc ...
- 基于ArcGIS for Server的服务部署分析 分类: ArcGIS for server 云计算 2015-07-26 21:28 11人阅读 评论(0) 收藏
谨以此纪念去年在学海争锋上的演讲. ---------------------------------------------------- 基于ArcGIS for Server的服务部署分析 -- ...
- Windows Server 2012怎样部署Domain Controller
用过Windows Server2008 系统的运维师们,可能习惯于用dcpromo的方式部署Domain Controller,可是在WindowsServer2012操作系统已经把这样的部署方式取 ...
随机推荐
- LocalDateTime日期相互转换字符串
/** LocalDateTime日期相互转换字符串 * 默认的时间日期样式 */ public static final String YYYYMMDDHHMMSSS_PATTERN = " ...
- uni-app apple store 上传新版本审核被拒绝 Guideline 5.1.1
- Legal - Privacy - Data Collection and Storage We noticed that your app requests the user's consent ...
- Linux实时查看Java接口数据
1.Linux实时查看Java接口数据的方法 在Linux系统中实时查看Java接口数据通常涉及几个步骤: (1)编写Java应用程序:首先,我们需要有一个Java应用程序,它暴露了一个或多个HTTP ...
- 洛谷 P1226 快速幂
题目链接:快速幂 思路 简单快速幂模板.a ^ 17 = (a ^ 2) ^ 8 * a,此时pow()中的y就可以视为17 -> 8(y >>= 1),pow()中的x就是底数a ...
- Android程序获取鸿蒙手机设备信息(是否鸿蒙手机、版本号、小版本号等)
1.效果图 鸿蒙手机 --> 关于手机的截图: Android程序获取鸿蒙手机设备信息的截图: 2.实现 本案例DEMO的实现主要借鉴了网上现有的资料: https://blog.csdn.ne ...
- C++获取商店应用(msix应用)桌面快捷方式的安装目录
传统应用的快捷方式目标指向可执行文件的路径,但是对于商店应用(也叫msix打包应用),则指向一个奇怪的字符串,使用IShellLink::GetPath获取路径时,则得到的是空字符串,而我们的最终目的 ...
- .NET 个人博客-首页排版优化-2
个人博客-首页排版优化-2 原本这篇文章早就要出了的,结果之前买的服务器服务商跑路了,导致博客的数据缺失了部分.我是买了一年的服务器,然后用了3个月,国内跑路云太多了,然后也是花钱重新去别的服务商买了 ...
- Linux驱动中的异步函数(aio_read和aio_write)
Linux驱动中的异步函数(aio_read和aio_write) 我们可以在signal_handler使用了read和write函数处理设备文件的读写操作.然而这两个函数可以分别用aio_read ...
- QT自定义右键菜单
利用QMenu和QAction可以实现非常实用的右键菜单功能.具体实现思路如下: 1.在xxx.h文件中添加如下头文件 #include <QMenu> #include <QCon ...
- Java常见问题-多线程
现在有 T1.T2.T3 三个线程,你怎样保证 T2 在 T1 执行完后执行,T3 在 T2 执行完后执行? 这个多线程问题比较简单,可以用 join 方法实现. 在 Java 中 Lock 接口比 ...