SpringBoot 源码解析 (六)----- Spring Boot的核心能力 - 内置Servlet容器源码分析(Tomcat)
Spring Boot默认使用Tomcat作为嵌入式的Servlet容器,只要引入了spring-boot-start-web依赖,则默认是用Tomcat作为Servlet容器:
<dependency>

  <groupId>org.springframework.boot</groupId>

  <artifactId>spring-boot-starter-web</artifactId>

</dependency>
Servlet容器的使用
默认servlet容器
我们看看spring-boot-starter-web这个starter中有什么
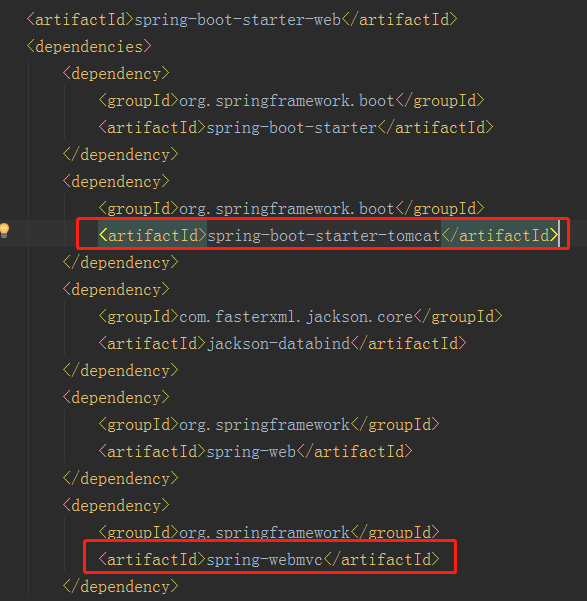
核心就是引入了tomcat和SpringMvc,我们先来看tomcat
Spring Boot默认支持Tomcat,Jetty,和Undertow作为底层容器。如图:
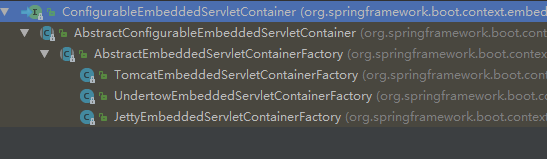
而Spring Boot默认使用Tomcat,一旦引入spring-boot-starter-web模块,就默认使用Tomcat容器。
切换servlet容器
那如果我么想切换其他Servlet容器呢,只需如下两步:
- 将tomcat依赖移除掉
- 引入其他Servlet容器依赖
引入jetty:
<dependency>

    <groupId>org.springframework.boot</groupId>

    <artifactId>spring-boot-starter-web</artifactId>

    <exclusions>

        <exclusion>

            <!--移除spring-boot-starter-web中的tomcat-->

            <artifactId>spring-boot-starter-tomcat</artifactId>

            <groupId>org.springframework.boot</groupId>

        </exclusion>

    </exclusions>

</dependency>

<dependency>

    <groupId>org.springframework.boot</groupId>

    <!--引入jetty-->

    <artifactId>spring-boot-starter-jetty</artifactId>

</dependency>
Servlet容器自动配置原理
EmbeddedServletContainerAutoConfiguration
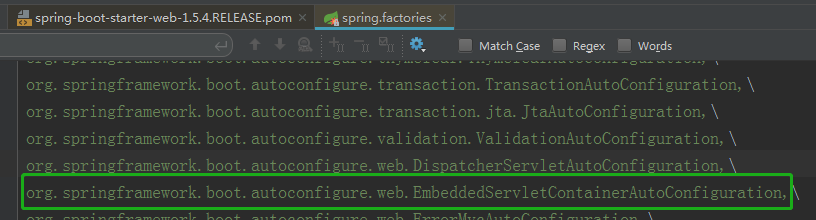
我们可以看到EmbeddedServletContainerAutoConfiguration被配置在spring.factories中,看过我前面文章的朋友应该知道SpringBoot自动配置的原理,这里将EmbeddedServletContainerAutoConfiguration配置类加入到IOC容器中,接着我们来具体看看这个配置类:
@AutoConfigureOrder(Ordered.HIGHEST_PRECEDENCE)

@Configuration

@ConditionalOnWebApplication// 在Web环境下才会起作用

@Import(BeanPostProcessorsRegistrar.class)// 会Import一个内部类BeanPostProcessorsRegistrar

public class EmbeddedServletContainerAutoConfiguration {

    @Configuration

    // Tomcat类和Servlet类必须在classloader中存在

    // 文章开头我们已经导入了web的starter,其中包含tomcat和SpringMvc

    // 那么classPath下会存在Tomcat.class和Servlet.class

    @ConditionalOnClass({ Servlet.class, Tomcat.class })

    // 当前Spring容器中不存在EmbeddedServletContainerFactory类型的实例

    @ConditionalOnMissingBean(value = EmbeddedServletContainerFactory.class, search = SearchStrategy.CURRENT)

    public static class EmbeddedTomcat {

        @Bean

        public TomcatEmbeddedServletContainerFactory tomcatEmbeddedServletContainerFactory() {

            // 上述条件注解成立的话就会构造TomcatEmbeddedServletContainerFactory这个EmbeddedServletContainerFactory

            return new TomcatEmbeddedServletContainerFactory();

        }

    }

    @Configuration

    @ConditionalOnClass({ Servlet.class, Server.class, Loader.class,

            WebAppContext.class })

    @ConditionalOnMissingBean(value = EmbeddedServletContainerFactory.class, search = SearchStrategy.CURRENT)

    public static class EmbeddedJetty {

        @Bean

        public JettyEmbeddedServletContainerFactory jettyEmbeddedServletContainerFactory() {

            return new JettyEmbeddedServletContainerFactory();

        }

    }

    @Configuration

    @ConditionalOnClass({ Servlet.class, Undertow.class, SslClientAuthMode.class })

    @ConditionalOnMissingBean(value = EmbeddedServletContainerFactory.class, search = SearchStrategy.CURRENT)

    public static class EmbeddedUndertow {

        @Bean

        public UndertowEmbeddedServletContainerFactory undertowEmbeddedServletContainerFactory() {

            return new UndertowEmbeddedServletContainerFactory();

        }

    }

    //other code...

}
在这个自动配置类中配置了三个容器工厂的Bean,分别是:
TomcatEmbeddedServletContainerFactory
JettyEmbeddedServletContainerFactory
UndertowEmbeddedServletContainerFactory
EmbeddedServletContainerFactory
- 嵌入式Servlet容器工厂
public interface EmbeddedServletContainerFactory {

    EmbeddedServletContainer getEmbeddedServletContainer( ServletContextInitializer... initializers);

}
内部只有一个方法,用于获取嵌入式的Servlet容器。
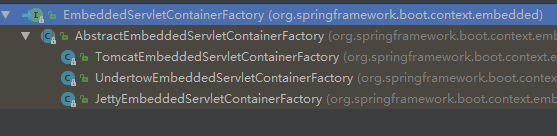
该工厂接口主要有三个实现类,分别对应三种嵌入式Servlet容器的工厂类,如图所示:
TomcatEmbeddedServletContainerFactory
以Tomcat容器工厂TomcatEmbeddedServletContainerFactory类为例:
public class TomcatEmbeddedServletContainerFactory extends AbstractEmbeddedServletContainerFactory implements ResourceLoaderAware {

    //other code...

    @Override

    public EmbeddedServletContainer getEmbeddedServletContainer( ServletContextInitializer... initializers) {

        //创建一个Tomcat

        Tomcat tomcat = new Tomcat();

       //配置Tomcat的基本环节

        File baseDir = (this.baseDirectory != null ? this.baseDirectory: createTempDir("tomcat"));

        tomcat.setBaseDir(baseDir.getAbsolutePath());

        Connector connector = new Connector(this.protocol);

        tomcat.getService().addConnector(connector);

        customizeConnector(connector);

        tomcat.setConnector(connector);

        tomcat.getHost().setAutoDeploy(false);

        configureEngine(tomcat.getEngine());

        for (Connector additionalConnector : this.additionalTomcatConnectors) {

            tomcat.getService().addConnector(additionalConnector);

        }

        prepareContext(tomcat.getHost(), initializers);

        //包装tomcat对象,返回一个嵌入式Tomcat容器,内部会启动该tomcat容器

        return getTomcatEmbeddedServletContainer(tomcat);

    }

}
首先会创建一个Tomcat的对象,并设置一些属性配置,最后调用getTomcatEmbeddedServletContainer(tomcat)方法,内部会启动tomcat,我们来看看:
protected TomcatEmbeddedServletContainer getTomcatEmbeddedServletContainer(

    Tomcat tomcat) {

    return new TomcatEmbeddedServletContainer(tomcat, getPort() >= 0);

}
该函数很简单,就是来创建Tomcat容器并返回。看看TomcatEmbeddedServletContainer类:
public class TomcatEmbeddedServletContainer implements EmbeddedServletContainer {

    public TomcatEmbeddedServletContainer(Tomcat tomcat, boolean autoStart) {

        Assert.notNull(tomcat, "Tomcat Server must not be null");

        this.tomcat = tomcat;

        this.autoStart = autoStart;

        //初始化嵌入式Tomcat容器,并启动Tomcat

        initialize();

    }

    private void initialize() throws EmbeddedServletContainerException {

        TomcatEmbeddedServletContainer.logger

                .info("Tomcat initialized with port(s): " + getPortsDescription(false));

        synchronized (this.monitor) {

            try {

                addInstanceIdToEngineName();

                try {

                    final Context context = findContext();

                    context.addLifecycleListener(new LifecycleListener() {

                        @Override

                        public void lifecycleEvent(LifecycleEvent event) {

                            if (context.equals(event.getSource())

                                    && Lifecycle.START_EVENT.equals(event.getType())) {

                                // Remove service connectors so that protocol

                                // binding doesn't happen when the service is

                                // started.

                                removeServiceConnectors();

                            }

                        }

                    });

                    // Start the server to trigger initialization listeners

                    //启动tomcat

                    this.tomcat.start();

                    // We can re-throw failure exception directly in the main thread

                    rethrowDeferredStartupExceptions();

                    try {

                        ContextBindings.bindClassLoader(context, getNamingToken(context),

                                getClass().getClassLoader());

                    }

                    catch (NamingException ex) {

                        // Naming is not enabled. Continue

                    }

                    // Unlike Jetty, all Tomcat threads are daemon threads. We create a

                    // blocking non-daemon to stop immediate shutdown

                    startDaemonAwaitThread();

                }

                catch (Exception ex) {

                    containerCounter.decrementAndGet();

                    throw ex;

                }

            }

            catch (Exception ex) {

                stopSilently();

                throw new EmbeddedServletContainerException(

                        "Unable to start embedded Tomcat", ex);

            }

        }

    }

}
到这里就启动了嵌入式的Servlet容器,其他容器类似。
Servlet容器启动原理
SpringBoot启动过程
我们回顾一下前面讲解的SpringBoot启动过程,也就是run方法:
public ConfigurableApplicationContext run(String... args) {

    // 计时工具

    StopWatch stopWatch = new StopWatch();

    stopWatch.start();

    ConfigurableApplicationContext context = null;

    Collection<SpringBootExceptionReporter> exceptionReporters = new ArrayList<>();

    configureHeadlessProperty();

    // 第一步:获取并启动监听器

    SpringApplicationRunListeners listeners = getRunListeners(args);

    listeners.starting();

    try {

        ApplicationArguments applicationArguments = new DefaultApplicationArguments(args);

        // 第二步:根据SpringApplicationRunListeners以及参数来准备环境

        ConfigurableEnvironment environment = prepareEnvironment(listeners,applicationArguments);

        configureIgnoreBeanInfo(environment);

        // 准备Banner打印器 - 就是启动Spring Boot的时候打印在console上的ASCII艺术字体

        Banner printedBanner = printBanner(environment);

        // 第三步:创建Spring容器

        context = createApplicationContext();

        exceptionReporters = getSpringFactoriesInstances(

                SpringBootExceptionReporter.class,

                new Class[] { ConfigurableApplicationContext.class }, context);

        // 第四步:Spring容器前置处理

        prepareContext(context, environment, listeners, applicationArguments,printedBanner);

        // 第五步:刷新容器

        refreshContext(context);

     // 第六步:Spring容器后置处理

        afterRefresh(context, applicationArguments);

      // 第七步:发出结束执行的事件

        listeners.started(context);

        // 第八步:执行Runners

        this.callRunners(context, applicationArguments);

        stopWatch.stop();

        // 返回容器

        return context;

    }

    catch (Throwable ex) {

        handleRunFailure(context, listeners, exceptionReporters, ex);

        throw new IllegalStateException(ex);

    }

}
我们回顾一下第三步:创建Spring容器
public static final String DEFAULT_CONTEXT_CLASS = "org.springframework.context."

            + "annotation.AnnotationConfigApplicationContext";

public static final String DEFAULT_WEB_CONTEXT_CLASS = "org.springframework."

            + "boot.context.embedded.AnnotationConfigEmbeddedWebApplicationContext";

protected ConfigurableApplicationContext createApplicationContext() {

    Class<?> contextClass = this.applicationContextClass;

    if (contextClass == null) {

        try {

            //根据应用环境,创建不同的IOC容器

            contextClass = Class.forName(this.webEnvironment

                                         ? DEFAULT_WEB_CONTEXT_CLASS : DEFAULT_CONTEXT_CLASS);

        }

    }

    return (ConfigurableApplicationContext) BeanUtils.instantiate(contextClass);

}
private void refreshContext(ConfigurableApplicationContext context) {

    refresh(context);

}

protected void refresh(ApplicationContext applicationContext) {

    Assert.isInstanceOf(AbstractApplicationContext.class, applicationContext);

    //调用容器的refresh()方法刷新容器

    ((AbstractApplicationContext) applicationContext).refresh();

}
容器刷新过程
调用抽象父类AbstractApplicationContext的refresh()方法;
AbstractApplicationContext
 public void refresh() throws BeansException, IllegalStateException {

     synchronized (this.startupShutdownMonitor) {

         /**

          * 刷新上下文环境

          */

         prepareRefresh();

         /**

          * 初始化BeanFactory,解析XML,相当于之前的XmlBeanFactory的操作,

          */

         ConfigurableListableBeanFactory beanFactory = obtainFreshBeanFactory();

         /**

          * 为上下文准备BeanFactory,即对BeanFactory的各种功能进行填充,如常用的注解@Autowired @Qualifier等

          * 添加ApplicationContextAwareProcessor处理器

          * 在依赖注入忽略实现*Aware的接口,如EnvironmentAware、ApplicationEventPublisherAware等

          * 注册依赖,如一个bean的属性中含有ApplicationEventPublisher(beanFactory),则会将beanFactory的实例注入进去

          */

         prepareBeanFactory(beanFactory);

         try {

             /**

              * 提供子类覆盖的额外处理,即子类处理自定义的BeanFactoryPostProcess

              */

             postProcessBeanFactory(beanFactory);

             /**

              * 激活各种BeanFactory处理器,包括BeanDefinitionRegistryBeanFactoryPostProcessor和普通的BeanFactoryPostProcessor

              * 执行对应的postProcessBeanDefinitionRegistry方法 和  postProcessBeanFactory方法

              */

             invokeBeanFactoryPostProcessors(beanFactory);

             /**

              * 注册拦截Bean创建的Bean处理器,即注册BeanPostProcessor,不是BeanFactoryPostProcessor,注意两者的区别

              * 注意,这里仅仅是注册,并不会执行对应的方法,将在bean的实例化时执行对应的方法

              */

             registerBeanPostProcessors(beanFactory);

             /**

              * 初始化上下文中的资源文件,如国际化文件的处理等

              */

             initMessageSource();

             /**

              * 初始化上下文事件广播器,并放入applicatioEventMulticaster,如ApplicationEventPublisher

              */

             initApplicationEventMulticaster();

             /**

              * 给子类扩展初始化其他Bean

              */

             onRefresh();


             /**

              * 在所有bean中查找listener bean,然后注册到广播器中

              */

             registerListeners();

             /**

              * 设置转换器

              * 注册一个默认的属性值解析器

              * 冻结所有的bean定义,说明注册的bean定义将不能被修改或进一步的处理

              * 初始化剩余的非惰性的bean,即初始化非延迟加载的bean

              */

             finishBeanFactoryInitialization(beanFactory);

             /**

              * 通过spring的事件发布机制发布ContextRefreshedEvent事件,以保证对应的监听器做进一步的处理

              * 即对那种在spring启动后需要处理的一些类,这些类实现了ApplicationListener<ContextRefreshedEvent>,

              * 这里就是要触发这些类的执行(执行onApplicationEvent方法)

              * spring的内置Event有ContextClosedEvent、ContextRefreshedEvent、ContextStartedEvent、ContextStoppedEvent、RequestHandleEvent

              * 完成初始化,通知生命周期处理器lifeCycleProcessor刷新过程,同时发出ContextRefreshEvent通知其他人

              */

             finishRefresh();

         }

         finally {

             resetCommonCaches();

         }

     }

 }
我们看第52行的方法:
protected void onRefresh() throws BeansException {

}
很明显抽象父类AbstractApplicationContext中的onRefresh是一个空方法,并且使用protected修饰,也就是其子类可以重写onRefresh方法,那我们看看其子类AnnotationConfigEmbeddedWebApplicationContext中的onRefresh方法是如何重写的,AnnotationConfigEmbeddedWebApplicationContext又继承EmbeddedWebApplicationContext,如下:
public class AnnotationConfigEmbeddedWebApplicationContext extends EmbeddedWebApplicationContext {
那我们看看其父类EmbeddedWebApplicationContext 是如何重写onRefresh方法的:
EmbeddedWebApplicationContext
@Override

protected void onRefresh() {

    super.onRefresh();

    try {

        //核心方法:会获取嵌入式的Servlet容器工厂,并通过工厂来获取Servlet容器

        createEmbeddedServletContainer();

    }

    catch (Throwable ex) {

        throw new ApplicationContextException("Unable to start embedded container", ex);

    }

}
在createEmbeddedServletContainer方法中会获取嵌入式的Servlet容器工厂,并通过工厂来获取Servlet容器:
 private void createEmbeddedServletContainer() {

     EmbeddedServletContainer localContainer = this.embeddedServletContainer;

     ServletContext localServletContext = getServletContext();

     if (localContainer == null && localServletContext == null) {

         //先获取嵌入式Servlet容器工厂

         EmbeddedServletContainerFactory containerFactory = getEmbeddedServletContainerFactory();

         //根据容器工厂来获取对应的嵌入式Servlet容器

         this.embeddedServletContainer = containerFactory.getEmbeddedServletContainer(getSelfInitializer());

     }

     else if (localServletContext != null) {

         try {

             getSelfInitializer().onStartup(localServletContext);

         }

         catch (ServletException ex) {

             throw new ApplicationContextException("Cannot initialize servlet context",ex);

         }

     }

     initPropertySources();

 }
关键代码在第6和第8行,先获取Servlet容器工厂,然后根据容器工厂来获取对应的嵌入式Servlet容器
获取Servlet容器工厂
protected EmbeddedServletContainerFactory getEmbeddedServletContainerFactory() {

    //从Spring的IOC容器中获取EmbeddedServletContainerFactory.class类型的Bean

    String[] beanNames = getBeanFactory().getBeanNamesForType(EmbeddedServletContainerFactory.class);

    //调用getBean实例化EmbeddedServletContainerFactory.class

    return getBeanFactory().getBean(beanNames[0], EmbeddedServletContainerFactory.class);

}
我们看到先从Spring的IOC容器中获取EmbeddedServletContainerFactory.class类型的Bean,然后调用getBean实例化EmbeddedServletContainerFactory.class,大家还记得我们第一节Servlet容器自动配置类EmbeddedServletContainerAutoConfiguration中注入Spring容器的对象是什么吗?当我们引入spring-boot-starter-web这个启动器后,会注入TomcatEmbeddedServletContainerFactory这个对象到Spring容器中,所以这里获取到的Servlet容器工厂是TomcatEmbeddedServletContainerFactory,然后调用
TomcatEmbeddedServletContainerFactory的getEmbeddedServletContainer方法获取Servlet容器,并且启动Tomcat,大家可以看看文章开头的getEmbeddedServletContainer方法。
大家看一下第8行代码获取Servlet容器方法的参数getSelfInitializer(),这是个啥?我们点进去看看
private ServletContextInitializer getSelfInitializer() {

    //创建一个ServletContextInitializer对象,并重写onStartup方法,很明显是一个回调方法

    return new ServletContextInitializer() {

        public void onStartup(ServletContext servletContext) throws ServletException {

            EmbeddedWebApplicationContext.this.selfInitialize(servletContext);

        }

    };

}
创建一个ServletContextInitializer对象,并重写onStartup方法,很明显是一个回调方法,这里给大家留一点疑问:
- ServletContextInitializer对象创建过程是怎样的?
- onStartup是何时调用的?
- onStartup方法的作用是什么?
ServletContextInitializer是 Servlet 容器初始化的时候,提供的初始化接口。这里涉及到Servlet、Filter实例的注册,我们留在下一篇具体讲
SpringBoot 源码解析 (六)----- Spring Boot的核心能力 - 内置Servlet容器源码分析(Tomcat)的更多相关文章
- Spring Boot → 09:使用外置Servlet容器_tomcat9.0
Spring Boot → 09:使用外置Servlet容器_tomcat9.0
- 170322、Spring Boot 性能优化之将Servlet容器变成Undertow
需求缘起:在研究Spring Boot加速启动的时候,发现我们在实际中,可能比较注重我们服务器的内存的情况,那么我们会想如果在启动的时候,所占用的内存越低是越好,基于这个想法,我们看看Spring B ...
- SpringBoot零XML配置的Spring Boot Application
Spring Boot 提供了一种统一的方式来管理应用的配置,允许开发人员使用属性properties文件.YAML 文件.环境变量和命令行参数来定义优先级不同的配置值.零XML配置的Spring B ...
- Spring Boot 启动源码解析结合Spring Bean生命周期分析
转载请注明出处: 1.SpringBoot 源码执行流程图 2. 创建SpringApplication 应用,在构造函数中推断启动应用类型,并进行spring boot自动装配 public sta ...
- Spring Boot启动命令参数详解及源码分析
使用过Spring Boot,我们都知道通过java -jar可以快速启动Spring Boot项目.同时,也可以通过在执行jar -jar时传递参数来进行配置.本文带大家系统的了解一下Spring ...
- Celery 源码解析六:Events 的实现
在 Celery 中,除了远程控制之外,还有一个元素可以让我们对分布式中的任务的状态有所掌控,而且从实际意义上来说,这个元素对 Celery 更为重要,这就是在本文中将要说到的 Event. 在 Ce ...
- Spring5源码解析-论Spring DispatcherServlet的生命周期
Spring Web框架架构的主要部分是DispatcherServlet.也就是本文中重点介绍的对象. 在本文的第一部分中,我们将看到基于Spring的DispatcherServlet的主要概念: ...
- springboot(十九):使用Spring Boot Actuator监控应用
微服务的特点决定了功能模块的部署是分布式的,大部分功能模块都是运行在不同的机器上,彼此通过服务调用进行交互,前后台的业务流会经过很多个微服务的处理和传递,出现了异常如何快速定位是哪个环节出现了问题? ...
- Spring Boot 2.0 教程 | 配置 Undertow 容器
欢迎关注个人微信公众号: 小哈学Java, 文末分享阿里 P8 资深架构师吐血总结的 <Java 核心知识整理&面试.pdf>资源链接!! 文章首发于个人网站 https://ww ...
随机推荐
- PHP 插入排序 -- 直接插入排序
1)直接插入序 -- Straight Insertion Sort 时间复杂度 :O(n^2) 适用条件: 适合记录数不多的情况 1 <?php 2 $a = [0 =>3,4,5,1, ...
- 移动端前端常见的触摸相关事件touch、tap、swipe
前端的很多事件在PC端和浏览器端可公用,但有些事件却只在移动端产生,如触摸相关的事件 本文整理了移动端常见的一些事件,包括原生支持的click.touch.tap.swipe事件,也有定义型的gest ...
- Flink 从 0 到 1 学习 —— 如何自定义 Data Source ?
前言 在 <从0到1学习Flink>-- Data Source 介绍 文章中,我给大家介绍了 Flink Data Source 以及简短的介绍了一下自定义 Data Source,这篇 ...
- Python编程系列---装饰器执行的底层原理及流程
代码中No.1 No.2 ...表示执行流程 """No.1 No.2 ...表示执行流程""" def set_func(func): ...
- vue element NavMenu 莫名出现蓝色边框
最近在开发一款官网,使用的是element,在头菜单NavMenu,的时候没有设置任何的边框属性,结果出现了如下图所示的边框线. 点击有二级菜单时出现 找了好多方法发现是有一个属性影响到了,:focu ...
- 百万年薪python之路 -- socket粘包问题解决
socket粘包问题解决 1. 高大上版解决粘包方式(自定制包头) 整体的流程解释 整个流程的大致解释: 我们可以把报头做成字典,字典里包含将要发送的真实数据的描述信息(大小啊之类的),然后json序 ...
- JVM 启动调优总结
启动命令 格式: java -jar 命令行参数 jar包路径 .示例如下 java -Dfile.encoding=utf-8 -jar -XX:MetaspaceSize=128m -XX:Max ...
- Python之路(第四十篇)进程池
一.进程池 进程池也是通过事先划分一块系统资源区域,这组资源区域在服务器启动时就已经创建和初始化,用户如果想创建新的进程,可以直接取得资源,从而避免了动态分配资源(这是很耗时的). 线程池内子进程的数 ...
- Spring Cloud 网关服务 zuul 三 动态路由
zuul动态路由 网关服务是流量的唯一入口.不能随便停服务.所以动态路由就显得尤为必要. 数据库动态路由基于事件刷新机制热修改zuul的路由属性. DiscoveryClientRouteLocato ...
- JUC - ReentrantLock 的基本用法 以及 lock()、tryLock()、lockInterruptibly()的区别
ReentrantLock 与 synchronized对比 最近有在阅读Java并发编程实战这本书,又看到了ReentrantLock和synchronized的对比,发现自己以前对于Renntra ...