
Ansible-Tower自动化运维管理环境 - 安装破解记录
公司中实现运维自动化的架构中主要用到ansible,ansible脚本在部署服务器指令行中显得不太直观。Ansible-Tower(之前叫做awx)是将ansible的指令界面化,简明直观,简单易用。Ansibke-tower其实就是一个图形化的任务调度,复杂服务部署,IT自动化的一个管理平台,属于发布配置管理系统,支持Api及界面操作,Django编写。Ansible-tower可以通过界面从github拉取最新playbook实施服务部署,提高生产效率。当然它也提供一个RESET API和命令行的CLI以供python脚本调用。下面是Ansible-Tower的搭建记录,在此分享下:
Ansible-Tower目前支持7.4+的版本,可以使用yum update -y命令更新;

1. 安装Ansible的epel源

[root@ansible ~]# cat /etc/redhat-release

CentOS Linux release 7.5.1804 (Core)

[root@ansible ~]# python -V

Python 2.7.5

关闭selinux

[root@ansible ansible-tower]# vim /etc/sysconfig/selinux

.........

SELINUX=disabled

[root@ansible ansible-tower]# setenforce 0

setenforce: SELinux is disabled

[root@ansible ansible-tower]# getenforce

Disabled

关闭防火墙

[root@ansible ansible-tower]# systemctl stop firewalld

[root@ansible ansible-tower]# systemctl disable firewalld

[root@ansible ansible-tower]# firewall-cmd --state

not running

========================================================================================================

需要注意:如果开启了防火墙,需要开放对应访问策略(这里是测试环境,就关闭了防火墙)

[root@ansible ansible-tower]# firewall-cmd --permanent --zone=public --add-port=80/tcp

[root@ansible ansible-tower]# systemctl restart firewalld.service

========================================================================================================

2. 安装Ansible

[root@ansible ~]# yum install -y ansible

[root@ansible ~]# ansible --version

ansible 2.8.2

  config file = /etc/ansible/ansible.cfg

  configured module search path = [u'/root/.ansible/plugins/modules', u'/usr/share/ansible/plugins/modules']

  ansible python module location = /usr/lib/python2.7/site-packages/ansible

  executable location = /usr/bin/ansible

  python version = 2.7.5 (default, Jun 20 2019, 20:27:34) [GCC 4.8.5 20150623 (Red Hat 4.8.5-36)]

3. 按照ansible-tower(官网下载地址: https://releases.ansible.com/ansible-tower/setup/)

下载地址:https://pan.baidu.com/s/1Uz-BFZXkjOr4FLg-lFF4fQ

提取密码:3e97

[root@ansible ~]# cd /usr/local/src/

[root@ansible src]# wget https://releases.ansible.com/ansible-tower/setup-bundle/ansible-tower-setup-bundle-3.2.6-1.el7.tar.gz

[root@ansible src]# tar -zvxf ansible-tower-setup-bundle-3.2.6-1.el7.tar.gz

[root@ansible src]# mv ansible-tower-setup-bundle-3.2.6-1.el7 /usr/local/ansible-tower

[root@ansible src]# cd /usr/local/ansible-tower

[root@ansible ansible-tower]# ls

backup.yml  bundle  group_vars  install.yml  inventory  licenses  README.md  restore.yml  roles  setup.sh

配置inventory文件 (注意:admin_password处填写的就是ansible-tower登陆密码,密码可以自行设定)

[root@ansible ansible-tower]# sed -i "s#password=''#password='tower@123'#g" inventory

[root@ansible ansible-tower]# sed -i "s#host=''#host='127.0.0.1'#g" inventory

[root@ansible ansible-tower]# sed -i "s#port=''#port='5432'#g" inventory

安装前先创建/var/log/tower的日志目录,不然会报错

[root@ansible ansible-tower]# mkdir -p /var/log/tower

接着执行ansible-tower的安装脚本,如果网络没有问题的话耐心等待安装完成即可.

[root@ansible ansible-tower]# ./setup.sh
安装完成没报错的话即可访问web页面,这里测试机地址为172.16.60.244,则访问ansible-tower地址就是https://172.16.60.244, 默认初始页面如下:

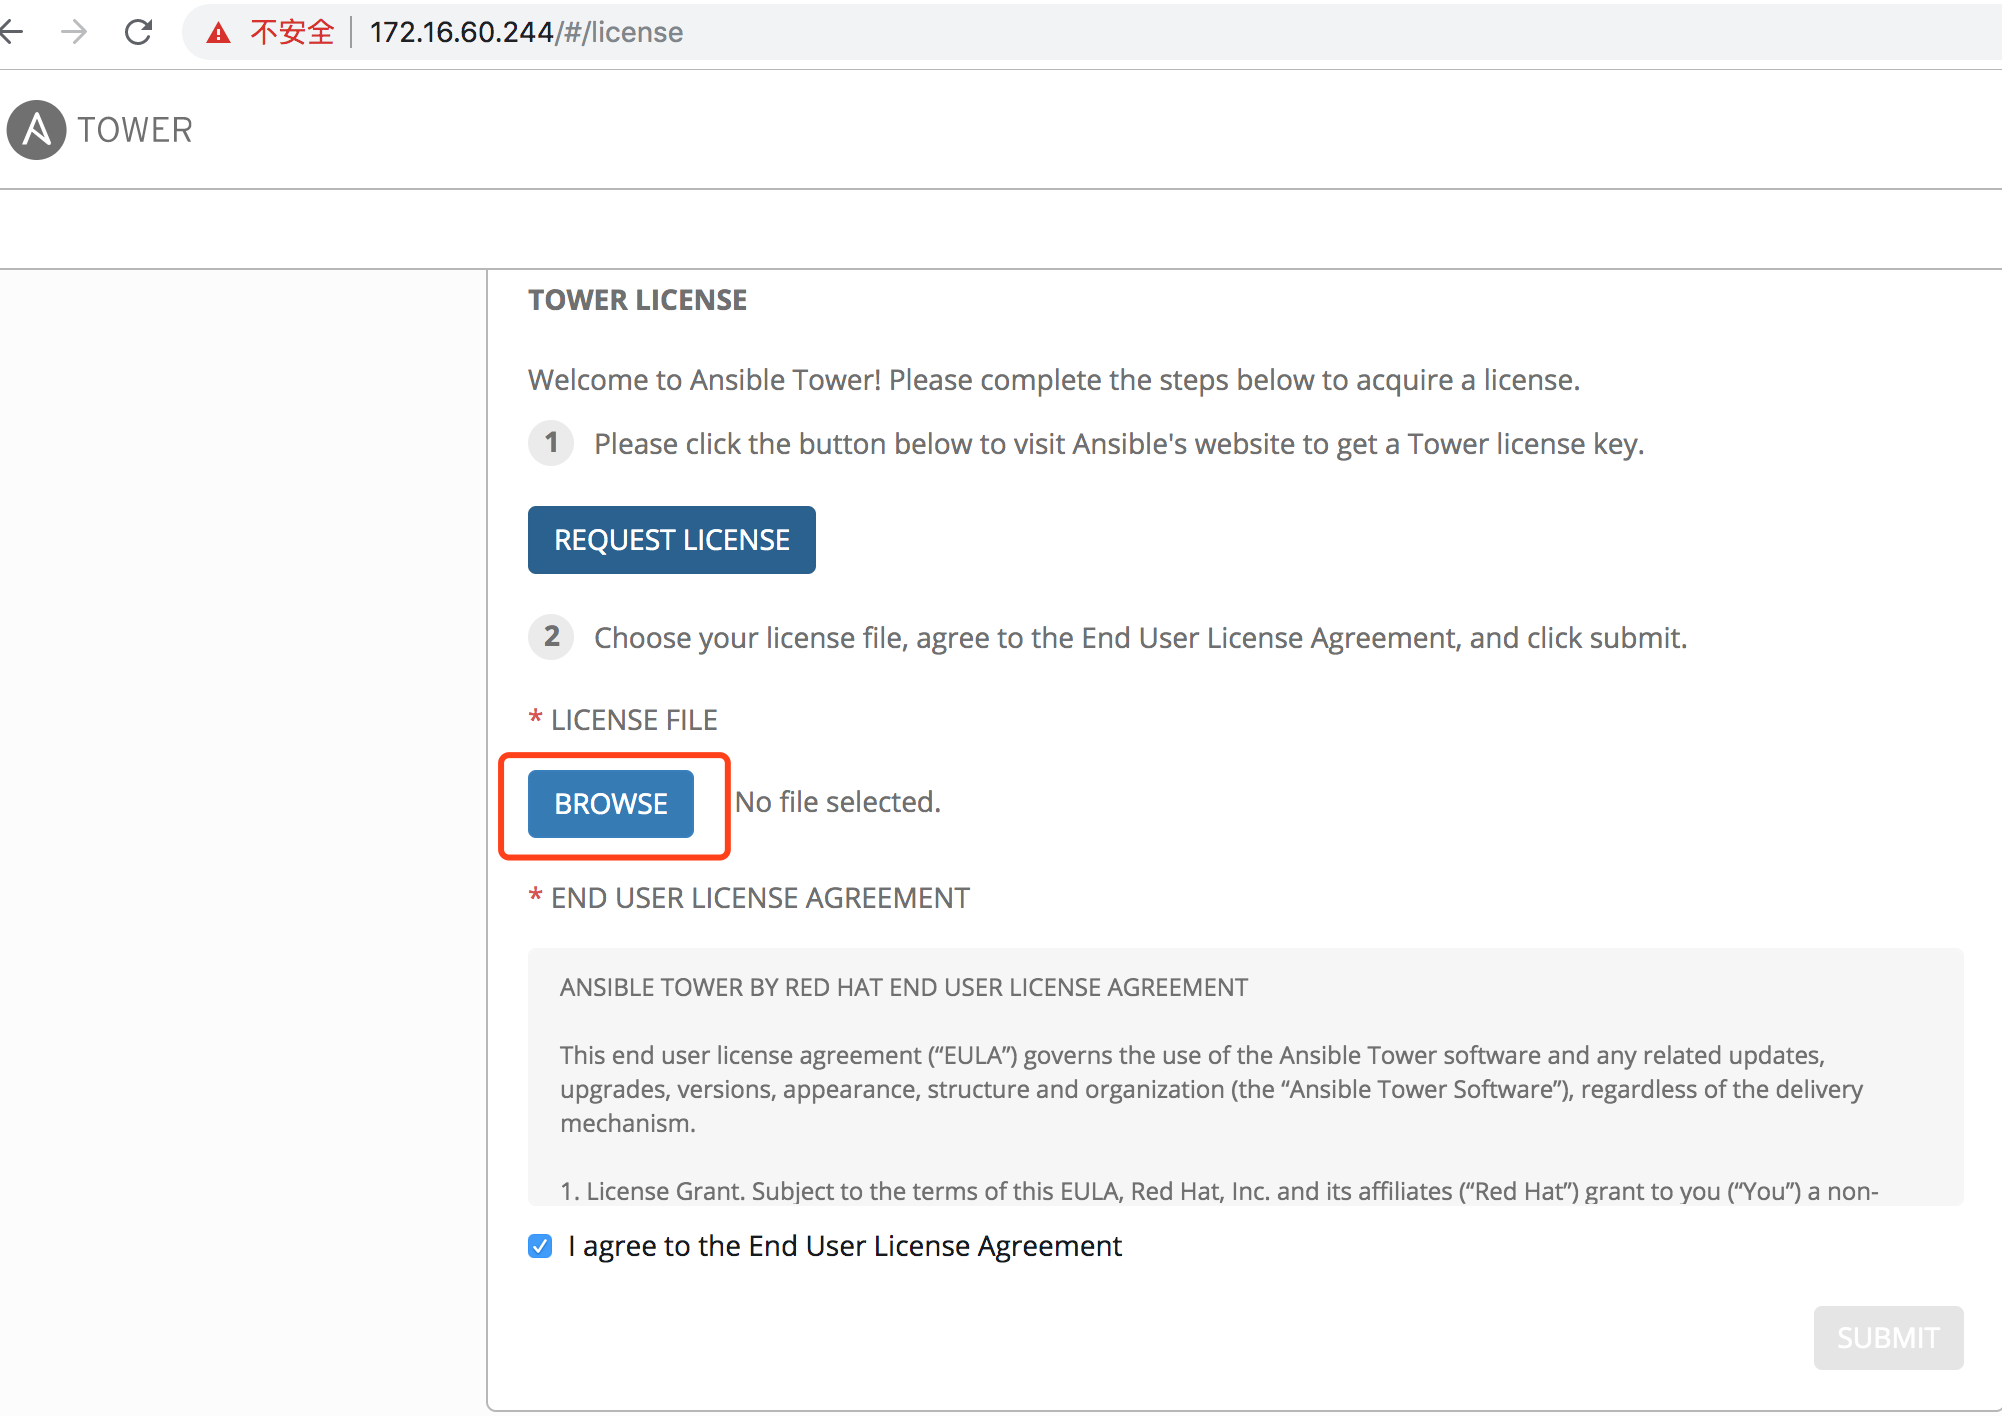
默认用户为admin,密码为inventory文件admin_password字段配置的密码(如上设置的密码为"tower@123")。接着会提示让选择license文件,导入license,没有的话,点击REQUEST LICENSE,去官方 (https://www.ansible.com/license) 申请免费试用,填写个人信息后 (邮箱要填写正确,其他信息可随便填写) 会把license发到填写的邮箱。这里分享一个已经申请下来的license文件 (提取密码为: krwe)。提交license并登录成功后默认初始页面如下:
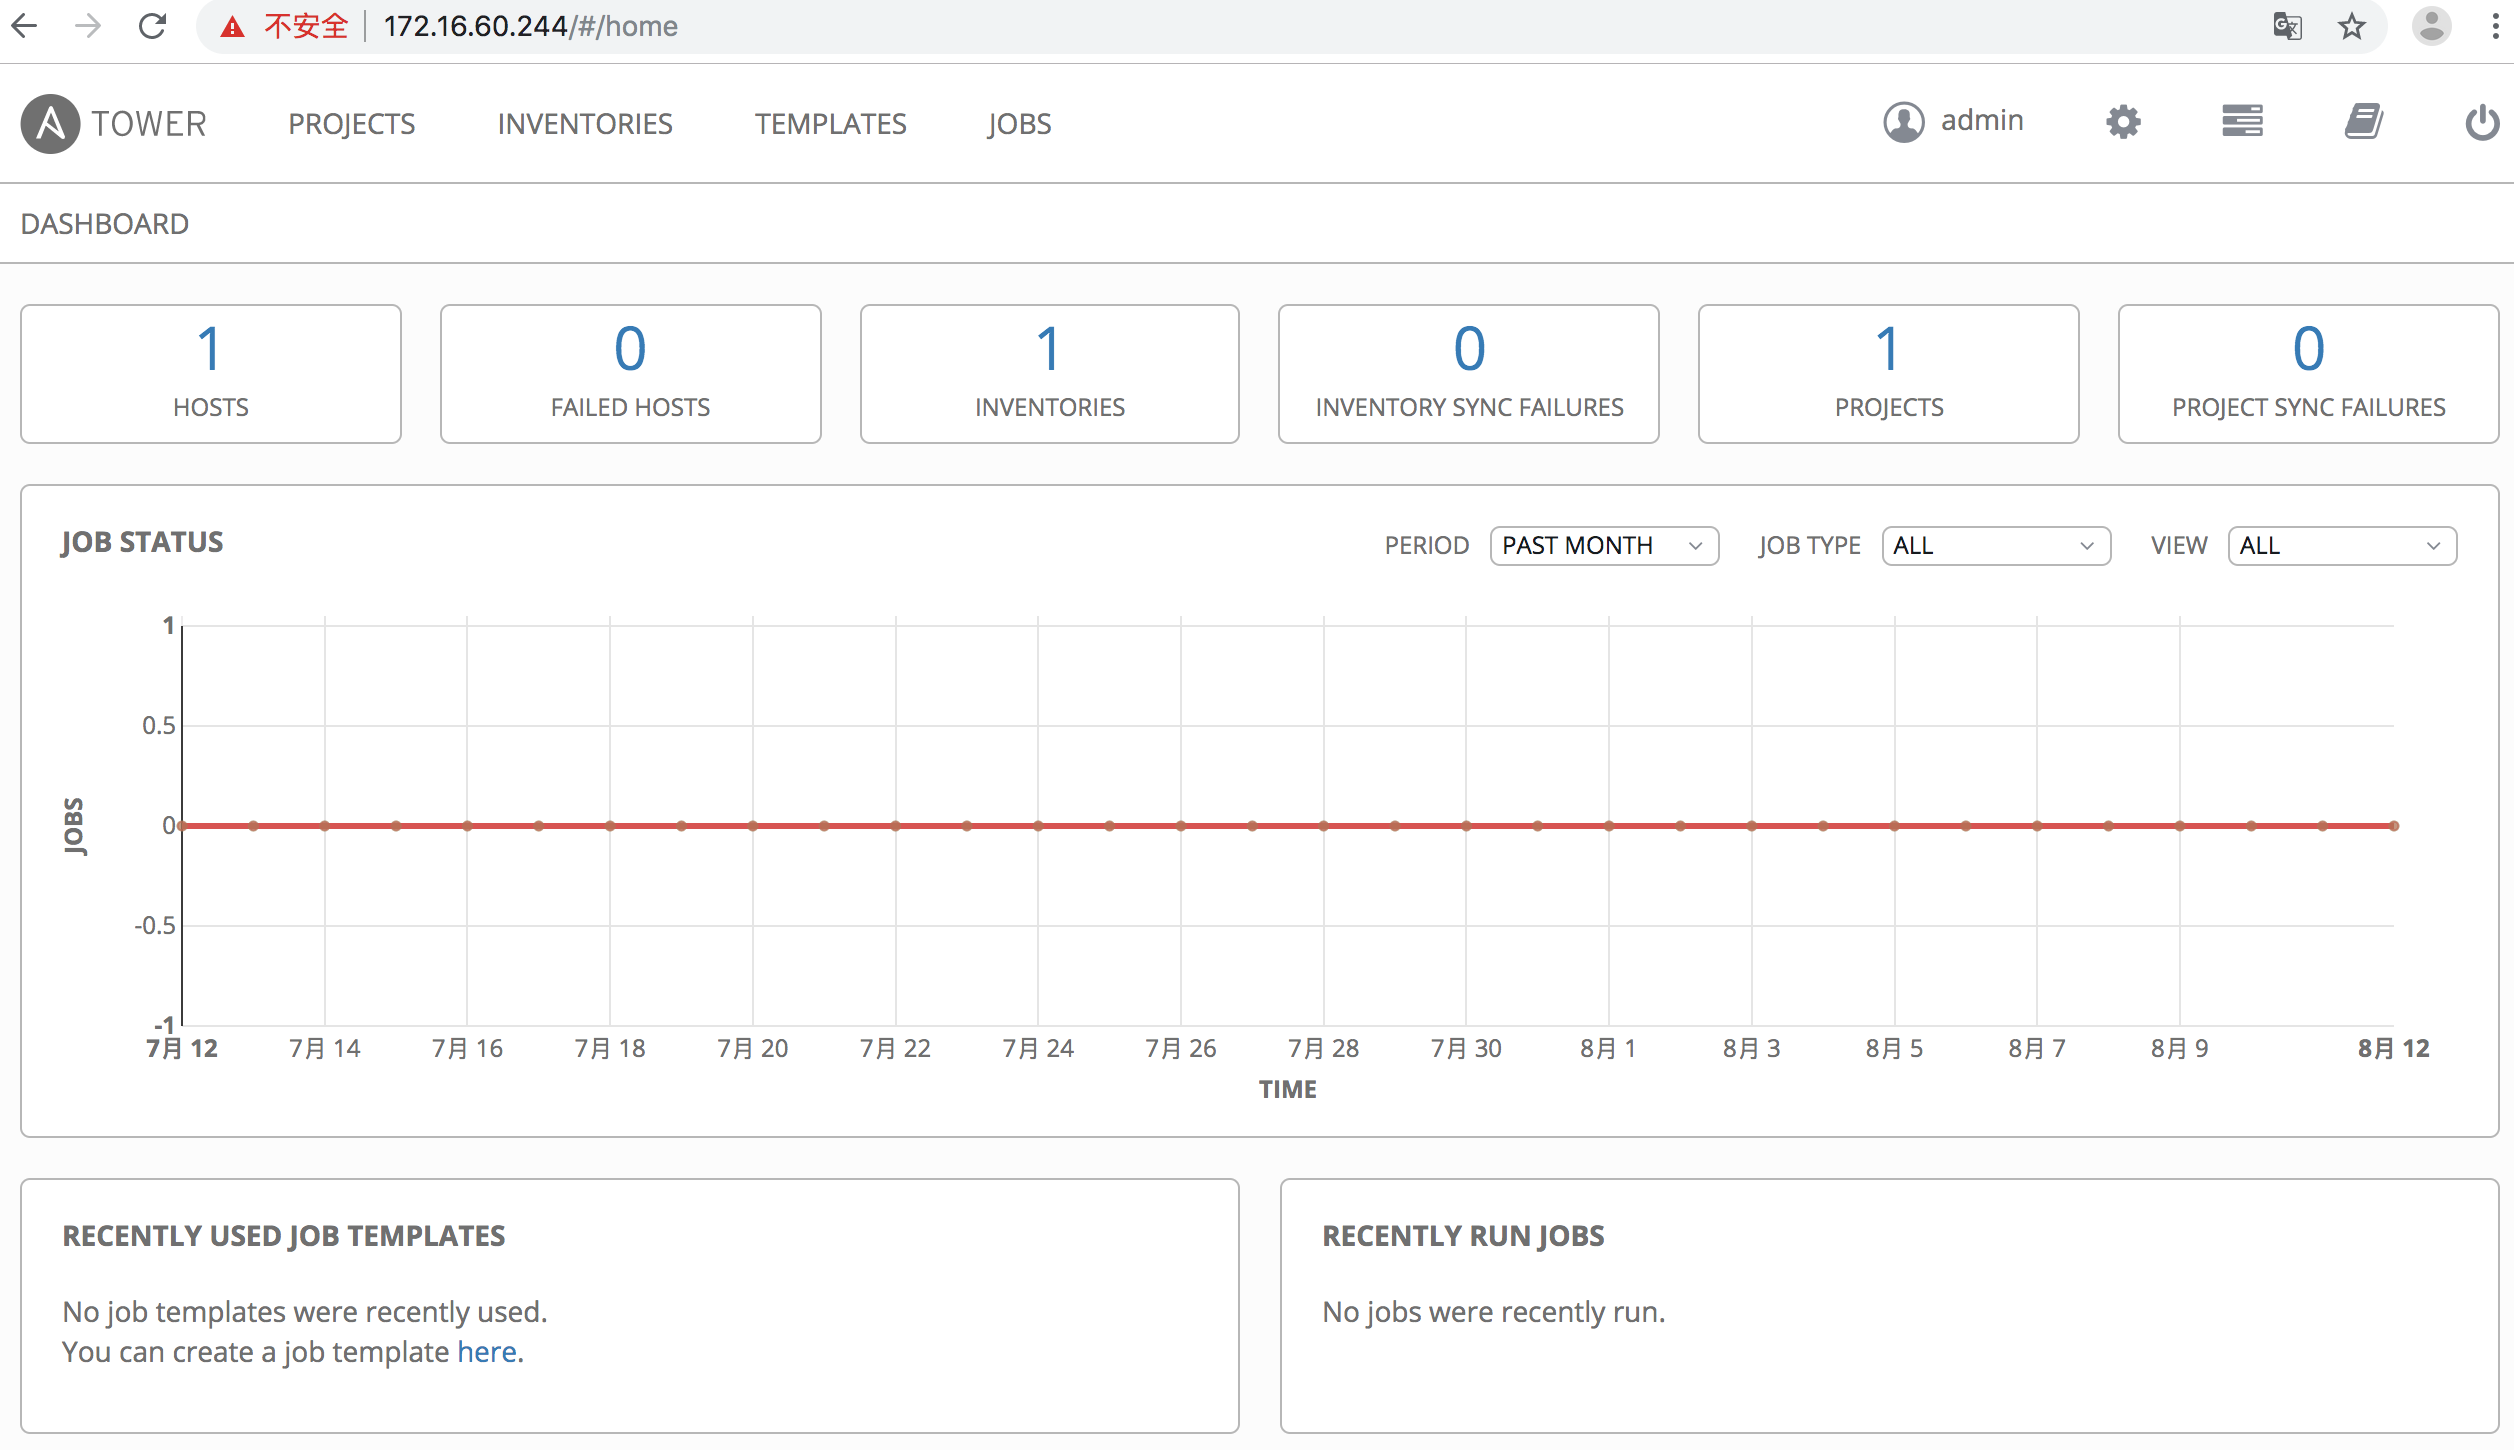
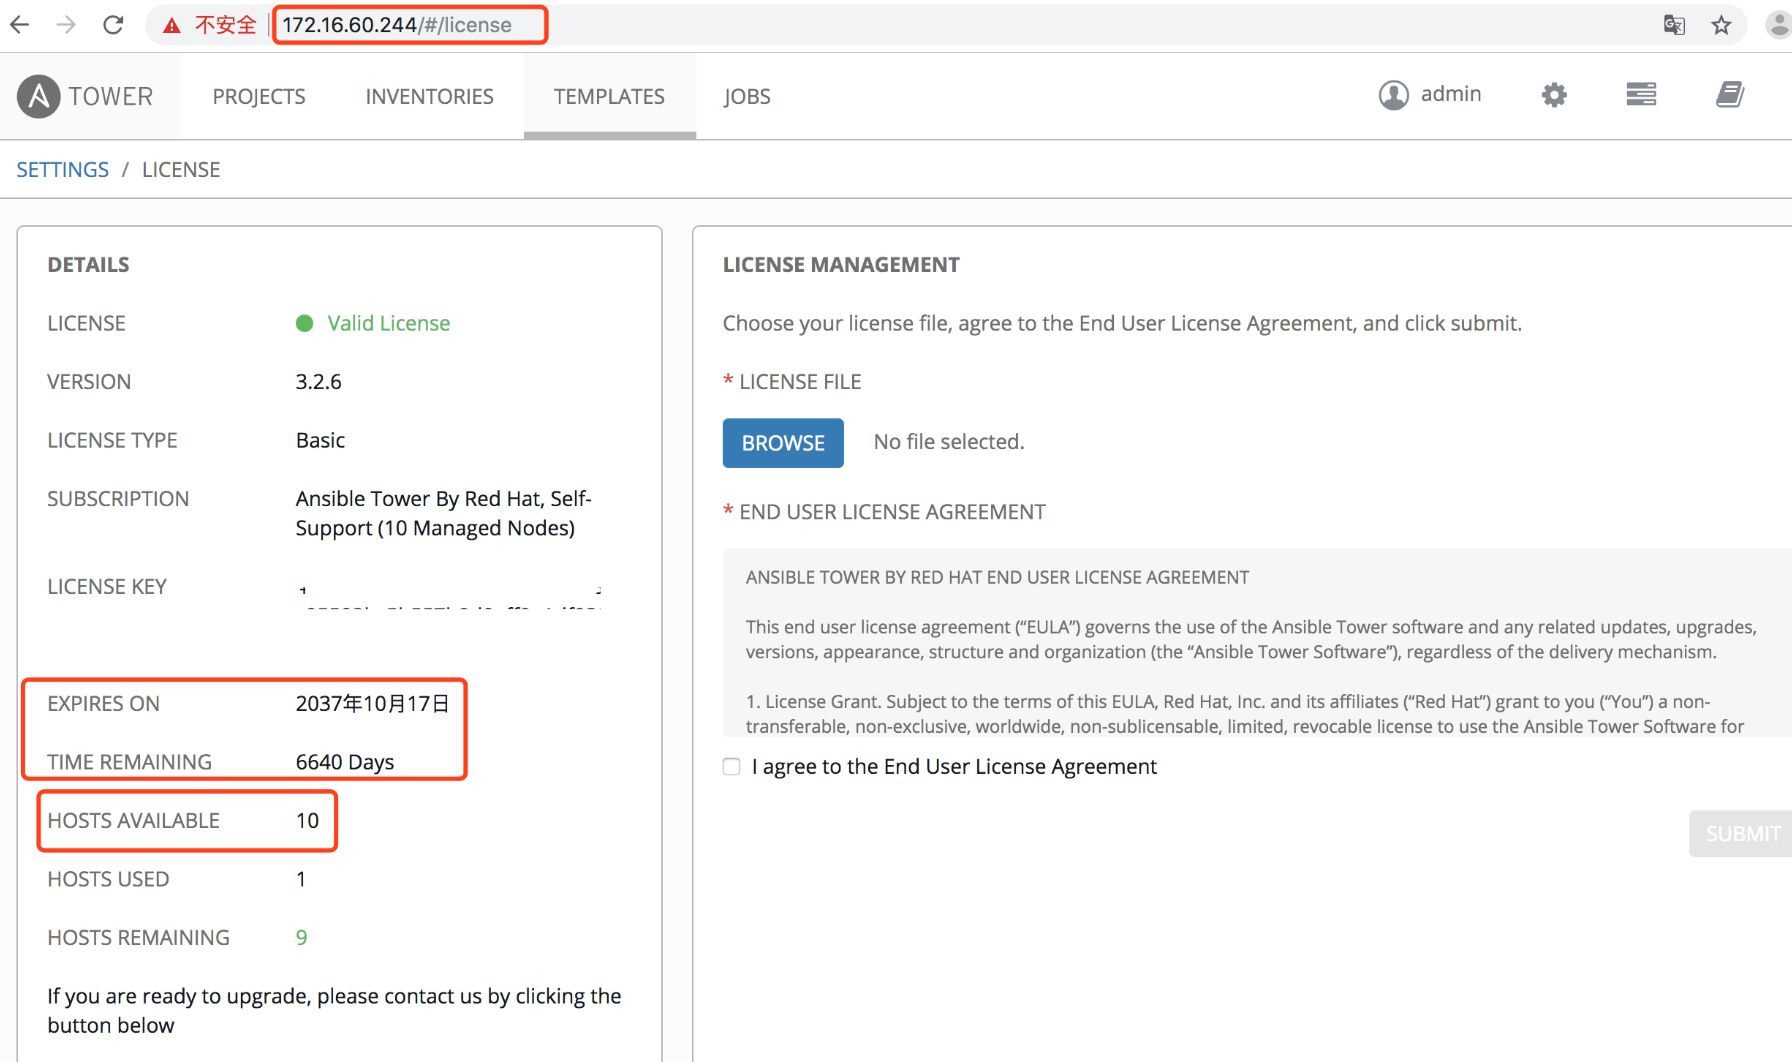
申请的免费版license最多只能添加10个主机, 且有时间限制。 下面记录下破解方法:
[root@k8s-node01 ansible-tower]# cd /var/lib/awx/venv/awx/lib/python2.7/site-packages/tower_license

[root@k8s-node01 tower_license]# ll

total 28

-rw-r--r-- 1 root root 10417 Aug 11  2018 __init__.py

-rw-r--r-- 1 root root  6352 Aug 11  2018 __init__.pyc

-rw-r--r-- 1 root root  6352 Aug 11  2018 __init__.pyo

修改__init__.py文件

将119行和120行修改为如下内容,特别需要注意格式.

也就是在原文119和120行之间添加了一行"return True"内容,格式对齐即可 (即加入的"return True" 跟 后面的if语句保持对齐,不然后面重新编译会报错)。

[root@k8s-node01 tower_license]# vim __init__.py

.........

119     def _check_cloudforms_subscription(self):

120         return True

121         if os.path.exists('/var/lib/awx/i18n.db'):

122             return True

123         if os.path.isdir("/opt/rh/cfme-appliance") and os.path.isdir("/opt/rh/cfme-gemset"):

124             try:

.........

修改完重新编译一下:

[root@k8s-node01 tower_license]# python -m py_compile __init__.py

[root@k8s-node01 tower_license]# python -O -m py_compile __init__.py

[root@k8s-node01 tower_license]#

重启服务:

[root@k8s-node01 tower_license]# ansible-tower-service restart

Restarting Tower

Redirecting to /bin/systemctl stop postgresql-9.6.service

Redirecting to /bin/systemctl stop rabbitmq-server.service

Redirecting to /bin/systemctl stop nginx.service

Redirecting to /bin/systemctl stop supervisord.service

Redirecting to /bin/systemctl start postgresql-9.6.service

Redirecting to /bin/systemctl start rabbitmq-server.service

Redirecting to /bin/systemctl start nginx.service

Redirecting to /bin/systemctl start supervisord.service

[root@k8s-node01 tower_license]#
重新打开ansible-tower界面的"settings"–>"VIEW YOUR LICENSE",发现"Hosts Available"变成了9999999台,说明破解成功,如下:

需要注意:发现最新版本或者高版本的ansible-tower没有__init__.py文件,需要对__init__.pyc进行反编译,然后进行HOSTS限制破解操作:
比如下载ansible-tower-setup-latest.tar.gz最新的包,按照上面的按照部署,将ansible-tower部署到/usr/local目录下

[root@ansible ~]# python --version

Python 2.7.5

[root@ansible ~]# cd /var/lib/awx/venv/awx/lib/python3.6/site-packages/tower_license

[root@ansible tower_license]# ll

total 8

-rw-r--r-- 1 root root 5055 Aug 12 21:13 __init__.pyc

drwxr-xr-x 2 root root   37 Aug 22 15:19 __pycache__

1)接下来进行反汇编init.pyc

[root@ansible tower_license]# yum install python-pip

[root@ansible tower_license]# pip -V

pip 8.1.2 from /usr/lib/python2.7/site-packages (python 2.7)

[root@ansible tower_license]# pip install uncompyle6

[root@ansible tower_license]# uncompyle6 --version

uncompyle6 3.3.5

[root@ansible tower_license]# uncompyle6 __init__.pyc >__init__.py

[root@ansible tower_license]# ll

total 16

-rw-r--r-- 1 root root 7301 Aug 22 15:42 __init__.py

-rw-r--r-- 1 root root 5055 Aug 12 21:13 __init__.pyc

drwxr-xr-x 2 root root   37 Aug 22 15:19 __pycache__

2)修改__init__.py文件

[root@ansible tower_license]# vim __init__.py

........

# _check_cloudforms_subscription方法修改如下内容,特别需要注意格式。

    def _check_cloudforms_subscription(self):

# 只需要添加下面一行直接返回 True即可。注意格式要跟if对对齐。

        return True

        if os.path.exists('/var/lib/awx/i18n.db'):

            return True

        else:

            if os.path.isdir('/opt/rh/cfme-appliance'):

                if os.path.isdir('/opt/rh/cfme-gemset'):

                    pass

            try:

........

#修改"license_date=253370764800L" 为 "license_date=253370764800"

........

    def _generate_cloudforms_subscription(self):

        self._attrs.update(dict(company_name='Red Hat CloudForms License', instance_count=9999999,

          license_date=253370764800,            # 只需要修改这一行

          license_key='xxxx',

          license_type='enterprise',

          subscription_name='Red Hat CloudForms License'))

........

3)修改完重新编译一下

[root@ansible tower_license]# python -m py_compile __init__.py

[root@ansible tower_license]# python -O -m py_compile __init__.py

[root@ansible tower_license]#

4)重启服务

[root@ansible tower_license]# ansible-tower-service restart

5)最后打开url (https://your_ip/#/license) ,发现"Hosts Available"变成了"9999999"台, 到期时间变成了"01/01/9999", 说明破解成功了。
Ansible-Tower自动化运维管理环境 - 安装破解记录的更多相关文章
- Ansible 自动化运维管理工具
Ansible 自动化运维管理工具 1.Ansible概述 2.Ansible部署 3.Ansible模块 1.Ansible概述: Ansible是一个基于Python开发的配置管理和应用部署工具, ...
- Linux运维之Ansible自动化运维管理工具
Ansible简介:Ansible是一个简单高效的自动化运维管理工具,用Python开发,能大批量管理N多台机器,可以并发的在多台机器上部署应用.安装软件.执行命令.配置和编排任务.后面会提到批量安装 ...
- ansible自动化运维管理工具
1.Ansible介绍 1)Ansible:Ansible的核心程序 2)Host Inventory:(默认路径:/etc/ansible/hosts)记录了每一个由Ansible管理的主机信息,信 ...
- opsmanage 自动化运维管理平台
关闭防火墙.selinux 更换阿里云 yum源 依赖环境 yum install -y epel-releaseyum install vim net-tools nmon htop rsync t ...
- django 实现linux运维管理平台
概述 使用django实现一个linux运维管理平台,可以实现注册登录,机器管理 ,服务器批量操作,服务器性能监控. 详细 代码下载:http://www.demodashi.com/demo/112 ...
- 国产安全自主可控IT智能运维管理解决方案
新一轮科技革命和产业变革席卷全球,大数据.云计算.物联网.人工智能.区块链等新技术不断涌现,数字经济正深刻地改变着人类的生产和生活方式,作为经济增长新动能的作用日益凸显.伴随增长的,还有网络中不断涌现 ...
- CentOS 7运维管理笔记(9)----Apache 安全控制与认证
Apache 提供了多种安全控制手段,包括设置Web访问控制.用户登陆密码认证及 .htaccess 文件等.通过这些技术手段,可以进一步提升Apache服务器的安全级别,减少服务器受攻击或数据被窃取 ...
- Python+Django+ansible playbook自动化运维项目实战☝☝☝
Python+Django+ansible playbook自动化运维项目实战☝☝☝ 一.入门引导 DevOPSDevOps(英文Development和Operations的组合)是一组过程.方法 ...
- 华为云和开源Istio运维管理对比样例应用部署
前言 在公有云方面,华为云已经率先将 Istio 作为产品投入到公有云中进行商业应用中,保持和开源istio高度兼容,做了商业化的运维管理界面,同时进行了性能优化.这里我们做一次验证测试. Booki ...
随机推荐
- SQL Server获取索引创建时间&重建时间&重组时间
之前写过一篇博客"SQL Server中是否可以准确获取最后一次索引重建的时间?",里面主要讲述了三个问题:我们能否找到索引的创建时间?最后一次索引重建(Index Rebuild ...
- bayaim_Centos7.6_mysql源码5.7-多my.cnf_20190424.txt
用户名/密码mysql/mysql 一.安装mysql: 位置位于 /data/mysql 如果遇到依赖,无法删除,使用 rpm -e --nodeps <包的名字> 不检查依赖,直接删除 ...
- unittest---unittest简单介绍
说起python的单元测试,第一反应肯定就会是unittest,unittest作为python的标准库,很优秀,也被广泛的用到各个项目,但是你们知道吗?python的单元测试并不只有这一个,还有个p ...
- @ImportResource
1. @ImportResource(locations = {"classpath:beantest.xml"})标注到启动类上,从类路径下加载xml文件,通过Applicati ...
- java之数据结构
数据结构有什么用? 现实世界的存储,我们使用的工具和建模.每种数据结构有自己的优点和缺点,想想如果Google的数据用的是数组的存储,我们还能方便地查询到所需要的数据吗?而算法,在这么多的数据中如何做 ...
- Xmind软件——xmind 8 pro下载激活推荐!!
亲测有效,在csdn上找到一个. 下载激活xmind 8 pro链接
- redis 事务(悲观锁和乐观锁)
MULTI 开启事务,后续的命令会被加入到同一个事务中 事务中的操作会发送给客服端,但是不会立即执行,而是将操作放到了该事务对应的一个队列中,服务端返回QUEQUD EXEC 执行EXEC后,事务中的 ...
- python - 操作excel表格
说明:由于公司oa暂缺,人事妹子在做考勤的时候,需要通过几个excel表格去交叉比对员工是否有旷工或迟到,工作量大而且容易出错. 这时候it屌丝的机会来啦,花了一天时间给妹子撸了一个自动化脚本. 1. ...
- Gerrit常见命令及最佳实践
概述 本文记录了笔者在使用Gerrit(一种免费.开放源代码的代码审查软件)过程中的一些微小的经验,在这里做个简单的分享. 克隆工程 git clone ssh://tusi@xx.xx.cn:294 ...
- Hive安装、配置和使用
Hive概述 Hive是基于Hadoop的一个数据仓库工具,可以将结构化的数据文件映射为一张表,并提供类SQL查询功能. Hive本质是:将HQL转化成MapReduce程序. Hive处理的数据存储 ...